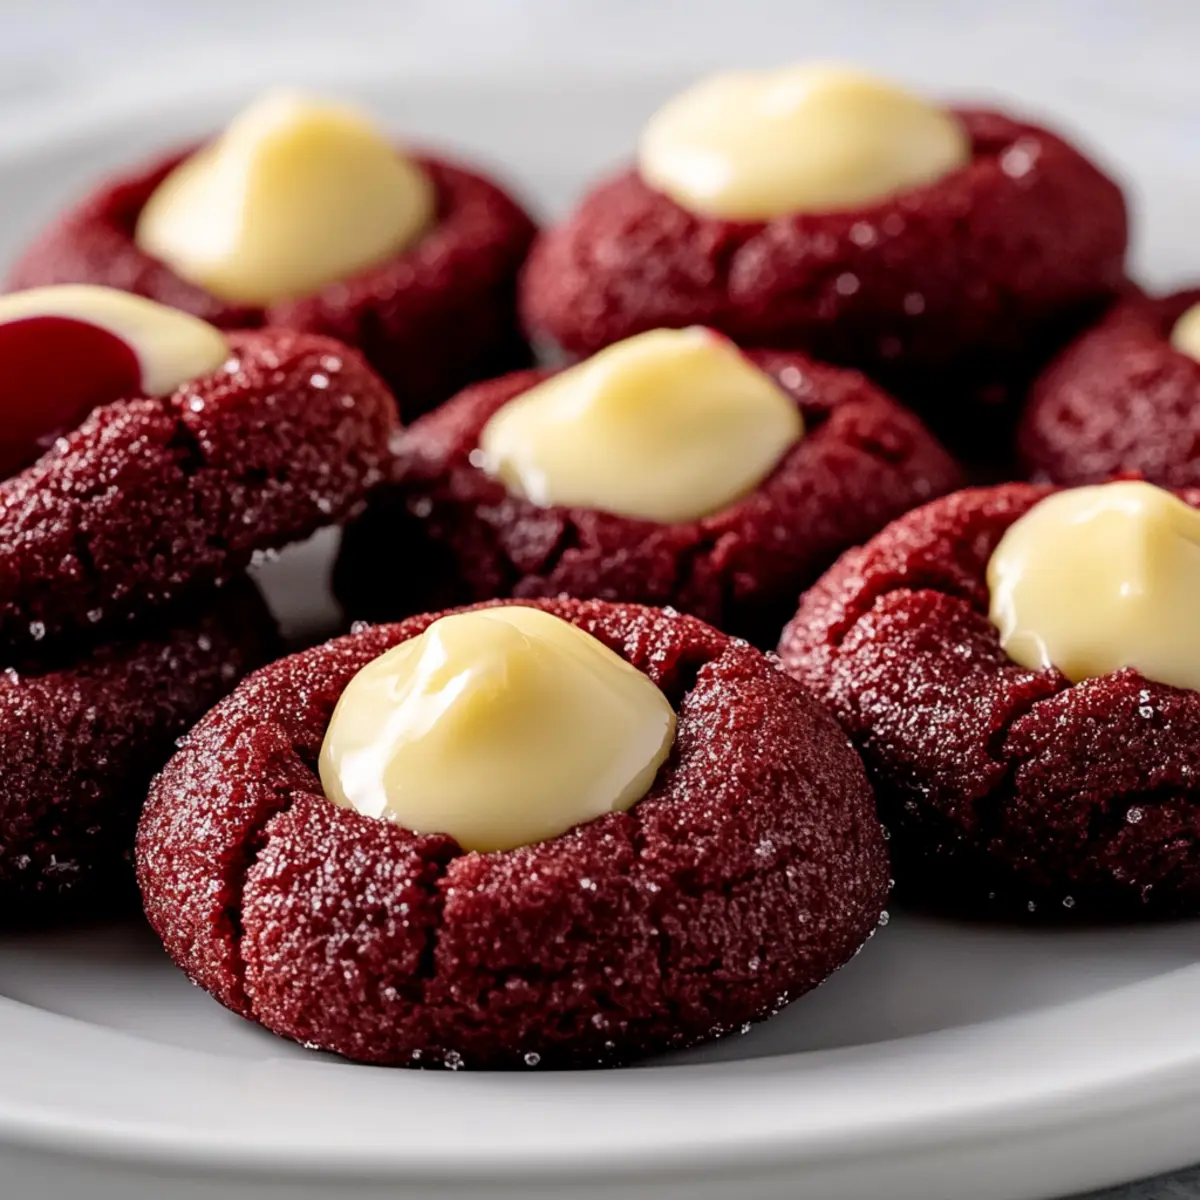
The subtle aroma of cocoa wafts through the air as I anticipate the joy of baking these delightful Red Velvet Cream Cheese Thumbprint Cookies. With their eye-catching crimson color and rich flavors, these festive treats are not just a feast for the eyes; they also deliver a perfect balance of sweetness and tangy creaminess that everyone will love. Ready in just a bit of time, these cookies are ideal for holiday gatherings and special occasions, making them the ultimate crowd-pleaser. Plus, their simple preparation means you can enjoy quality homemade fun without the stress of complicated baking techniques. Curious about how to impress your guests with a twist on a classic dessert? Let’s dive into this delicious adventure together!
Why Try Red Velvet Cream Cheese Cookies?
Colorful, Festive Appeal: These cookies’ vibrant red hue instantly brightens up any dessert table, making them a showstopper for your holiday gatherings.
Irresistibly Creamy: The luscious cream cheese filling adds a mouthwatering tang that beautifully complements the rich cocoa base.
Versatile Flavors: Customize your cookies with various fillings or festive toppings—think raspberry jam or edible glitter—for a personal touch!
Quick and Easy: With minimal prep time, baking these cookies can be a delightful, stress-free experience.
Perfect for Sharing: They make an excellent gift or treat for loved ones, ensuring everyone enjoys a taste of homemade goodness—similar to our popular Jalapeno Cream Cheese dip!
Enjoy the delicious power of nostalgia while treating yourself and your guests to these delectable bites!
Red Velvet Cream Cheese Ingredients
• Make your cookie magic happen with these essentials!
For the Cookie Dough
- All-Purpose Flour – Provides the structure for our delightful cookies; use gluten-free flour for a gluten-free alternative.
- Unsweetened Cocoa Powder – Infuses a rich chocolate flavor; Dutch-processed cocoa gives a deeper taste.
- Baking Soda – Acts as a leavening agent, helping cookies to rise perfectly; baking powder can work in a pinch.
- Salt – Brightens flavors and enhances sweetness; feel free to swap in sea salt or kosher salt.
- Unsalted Butter – Delivers richness to the dough; you can switch to plant-based butter for a dairy-free version.
- Granulated Sugar – Adds sweetness and texture; coconut sugar is a healthier substitute.
- Large Egg – Binds ingredients together, giving structure; use flaxseed meal for a vegan-friendly alternative.
- Vanilla Extract – Elevates flavor; almond extract can offer a unique twist.
- White Vinegar – Activates the cocoa for a richer taste; lemon juice can be used if desired.
- Buttermilk – Provides moisture and a tangy kick; mix milk with vinegar as a suitable substitute.
- Red Gel Food Coloring – Ensures those gorgeous crimson cookies; natural beet juice works for a healthy choice.
For the Cream Cheese Filling
- Cream Cheese – Offers a rich, creamy texture that pairs beautifully with the cookie; vegan cream cheese is a dairy-free option.
- Unsalted Butter – Adds an extra layer of creaminess; substitute with vegan butter if needed.
- Powdered Sugar – Contributes sweetness and a smooth texture; powdered monk fruit is a great low-sugar swap.
Optional Garnishes
- Powdered Sugar (for dusting) – Adds a lovely finish; cocoa powder can be a stylish alternative.
- Melted White Chocolate – A decorative touch to elevate your cookies; dark chocolate is a fabulous substitute for a different flavor.
Let’s gather these ingredients and create some delightful Red Velvet Cream Cheese Thumbprint Cookies that will spread cheer and flavor at your next celebration!
Step‑by‑Step Instructions for Red Velvet Cream Cheese Thumbprint Cookies
Step 1: Prepare for Baking
Preheat your oven to 375°F (190°C) and line two baking sheets with parchment paper to prevent sticking. This preparation will ensure your Red Velvet Cream Cheese Thumbprint Cookies bake evenly. Keeping your workspace tidy will help you feel organized and ready to tackle the next steps in your baking adventure.
Step 2: Mix Dry Ingredients
In a medium bowl, whisk together the all-purpose flour, unsweetened cocoa powder, baking soda, and salt until combined. This step is crucial as it evenly distributes the leavening agents throughout the mixture. Look for a uniform color in your dry ingredients, setting a solid foundation for your cookie dough.
Step 3: Cream Butter and Sugar
In a large mixing bowl, beat the softened unsalted butter and granulated sugar together using an electric mixer for about 3-5 minutes until the mixture is light and fluffy. This process incorporates air into the cookie base, creating a tender texture that’s essential for achieving the perfect Red Velvet Cream Cheese Thumbprint Cookies.
Step 4: Incorporate Wet Ingredients
Add in the large egg, vanilla extract, and white vinegar to the creamed butter and sugar mixture, mixing until just combined. This action blends the wet ingredients nicely without overworking them. You’re aiming for a smooth, cohesive mixture that hints at the delicious transformation to come.
Step 5: Add Color
Now, gently mix in the red gel food coloring until the dough reaches a vibrant crimson hue. You might want to adjust the amount of coloring depending on your preference for brightness. Enjoy watching the color come to life as it blends into your cookie mixture, setting the stage for those eye-catching thumbprint cookies.
Step 6: Combine Mixtures
Gradually add the dry ingredient mixture into the wet mixture, alternating with the buttermilk, mixing just until combined. Be careful not to overmix, as you want to maintain a tender crumb in your cookies. As the ingredients come together, you should see a beautifully colored dough emerge.
Step 7: Chill Dough
Wrap the cookie dough in plastic wrap and refrigerate for at least 30 minutes. Chilling the dough helps solidify the butter, making it easier to handle and preventing the cookies from spreading too much while baking. Use this time to tidy up or prepare your cream cheese filling.
Step 8: Prepare Cream Cheese Filling
In a mixing bowl, beat together the cream cheese and unsalted butter until smooth. Gradually add the powdered sugar, mixing until the filling is fluffy and light. This creamy filling will complement your cookies perfectly, so aim for a texture that’s easy to pipe into those lovely thumbprints.
Step 9: Flavor Filling
Once your cream cheese mixture is fluffy, add vanilla extract and a pinch of salt. Mix until well combined, ensuring a delightful balance of flavor that will elevate the overall taste of your Red Velvet Cream Cheese Thumbprint Cookies.
Step 10: Form Cookie Balls
Remove the chilled dough from the refrigerator and scoop out tablespoon-sized portions, rolling them into balls. Place the dough balls on the lined baking sheets, leaving enough space between each one to allow for spreading during baking. Visualize the festive treats taking shape as you prepare for the next step!
Step 11: Create Indentations
Using your thumb, gently press down in the center of each cookie ball to create an indentation, perfect for holding the cream cheese filling. The indents should be deep enough to hold a generous amount of filling, yet the edges of the cookies should stay intact to maintain their shape.
Step 12: Add Filling
Spoon or pipe the cream cheese filling into the thumbprint centers of each cookie. Take your time to fill each indentation for a satisfying burst of creamy flavor with every bite. Your Red Velvet Cream Cheese Thumbprint Cookies are starting to resemble their charming holiday form!
Step 13: Bake
Place the baking sheets in the preheated oven and bake the cookies for 10-12 minutes, or until the edges are set but the centers are still slightly soft. Keep an eye on them, as red velvet cookies can brown quickly! The delightful aroma that fills your kitchen will surely make the wait worthwhile.
Step 14: Cool Cookies
Once baked, allow the cookies to cool on the baking sheets for 5-7 minutes before gently transferring them to wire racks to cool completely. This step will help preserve their delicate texture while reinforcing their structure after the baking process.
Step 15: Garnish
If desired, dust the cooled cookies with powdered sugar or drizzle with melted white chocolate for an elegant finish. The added touch makes your festive Red Velvet Cream Cheese Thumbprint Cookies even more inviting and visually appealing, perfect for sharing with loved ones.
Step 16: Store
To keep the cookies fresh, store them in an airtight container in the refrigerator for 3-5 days, or freeze for 2-3 months. You can enjoy the joy of homemade goodness whenever the craving strikes, ready to impress at your next gathering or holiday celebration!
Red Velvet Cream Cheese Variations
Feel free to get creative with these delightful cookies and tailor them to suit your taste buds!
- Flavor Boost: Add orange zest to the cream cheese filling for a refreshing citrusy twist.
- Jam-Filled: Substitute the cream cheese filling with raspberry or strawberry jam for a fruity explosion.
- Nutty Option: Incorporate chopped pecans or walnuts in the dough to add delightful crunch and flavor.
- Spicy Kick: Mix in a dash of cayenne pepper into the cookies for a surprising hot-and-sweet contrast.
- Dairy-Free: Replace cream cheese and butter with vegan alternatives to create scrumptious dairy-free cookies.
- Holiday Spice: Stir in some cinnamon or ginger to the dough for a festive flavor reminiscent of holiday cookies.
- Chocolate Drizzle: Instead of powdered sugar, drizzle melted dark chocolate over the cooled cookies for an indulgent finish.
- Playful Colors: Try using different food colorings to surprise your guests with multi-colored thumbprints, making your cookies even more fun!
For a delicious twist on the classic dessert, don’t forget to check out our popular Cottage Cheese Chocolate recipe or whip up a savory Grilled Cheese Burrito for your next meal!
Make Ahead Options
These Red Velvet Cream Cheese Thumbprint Cookies are a fantastic choice for meal prep, allowing you to enjoy festive baking without the last-minute rush! You can prepare the cookie dough up to 24 hours in advance—just wrap it tightly in plastic wrap and refrigerate. Additionally, you can make the cream cheese filling ahead of time and store it in an airtight container in the fridge for up to 3 days. When you’re ready to bake, simply scoop and shape the chilled dough into balls, create thumbprint indentations, and pipe in the filling before baking. This way, you’ll have freshly baked cookies with just a bit of effort, ensuring they remain just as delicious as if made fresh!
What to Serve with Red Velvet Cream Cheese Thumbprint Cookies
Pair these delightful cookies with a variety of side dishes and drinks to create a festive experience! Your gatherings will be even more special with these complementary choices.
-
Creamy Hot Cocoa: Rich and velvety hot cocoa provides warmth and enhances the cookies’ sweetness, making a perfect pairing for chilly evenings.
-
Colombian Coffee: The bright acidity and roasted notes of a good cup of Colombian coffee elevate the cocoa flavors, creating a delightful taste contrast.
-
Vanilla Ice Cream: The smooth, refreshing essence of vanilla ice cream is a classic complement, particularly when served alongside warm cookies.
-
Chilled Sparkling Cider: A festive sparkling cider adds bubbly brightness and a tangy twist, which beautifully cuts through the cookie’s creaminess.
-
Chocolate Fondue: A rich chocolate fondue dip brings fun to the table. Guests can indulge by dipping their cookies, enhancing the chocolate experience.
-
Cranberry Sauce: A touch of tangy cranberry sauce adds a surprising twist that balances the sweetness while bringing holiday vibes to your dessert spread.
-
Peanut Butter Mousse: Light and airy peanut butter mousse offers a nutty richness that perfectly complements the cookies’ textures, creating a trio of indulgence.
-
Savory Cheese Platter: Add an assortment of cheeses, including tangy goat cheese and creamy brie, to balance out the cookie’s sweetness and provide diverse flavors.
-
Seasonal Fruit Salad: Fresh fruit like pomegranate, berries, and apples adds a bright crunch, bringing a refreshing contrast to the cookies’ rich, creamy filling.
Expert Tips for Red Velvet Cream Cheese Cookies
- Softened Butter: Ensure your unsalted butter is at room temperature, not melted, for perfect creaming and texture.
- Avoid Overmixing: Once the flour is added, mix just until combined to maintain that tender crumb in your Red Velvet Cream Cheese cookies.
- Chill is Key: Don’t skip the chilling step! It makes handling the cookie dough easier and helps prevent spreading during baking.
- Perfect Indentations: When creating thumbprints, press firmly but gently to avoid breaking the cookie while ensuring enough space for the creamy filling.
- Color Adjustment: Feel free to adjust the amount of red gel food coloring to achieve your desired shade of crimson.
How to Store and Freeze Red Velvet Cream Cheese Cookies
Fridge: Store your cookies in an airtight container for up to 3-5 days. This keeps them fresh and preserves their delightful texture.
Freezer: For longer storage, wrap the cookies in foil and place them in a freezer-safe bag, where they can last up to 2-3 months.
Reheating: To enjoy them warm, bake directly from frozen at 350°F (175°C) for about 5-7 minutes, restoring their tempting softness while reviving that cream cheese filling.
Make-Ahead: Prepare the dough and chill in the refrigerator; it can be stored for up to 2 days before baking. This is great for quick holiday prep!
Red Velvet Cream Cheese Thumbprint Cookies Recipe FAQs
How do I select ripe ingredients for my Red Velvet Cream Cheese Thumbprint Cookies?
Absolutely! For the best flavor and texture, ensure your butter is softened to room temperature. If you’re using eggs, they should also be at room temperature to incorporate more easily. The cream cheese filling works best with fresh cream cheese—check the expiration date to avoid any off flavors in your cookies!
What’s the best way to store my Red Velvet Cream Cheese Thumbprint Cookies?
To keep these delectable cookies fresh, store them in an airtight container in the refrigerator for up to 3-5 days. This will maintain their soft texture and preserve the rich flavor. I often layer parchment paper between cookies to prevent sticking, ensuring each bite remains delightful!
Can I freeze my Red Velvet Cream Cheese Thumbprint Cookies?
Very much! To freeze these cookies, first, let them cool completely. Then, wrap each cookie in foil and place them in a freezer-safe bag, where they can stay fresh for up to 2-3 months. When you’re ready to enjoy them, simply bake straight from frozen at 350°F (175°C) for 5-7 minutes, and they’ll return to their chewy glory!
What if my dough is too sticky to handle?
If you find your dough is sticky after chilling, fear not! Simply sprinkle a little all-purpose flour on your hands and the surface as you shape the cookie balls. Alternatively, a longer chill time—up to an hour—can really help with the dough’s firming, making it easier to work with as you create those adorable thumbprints.
Are there any dietary considerations I should keep in mind?
Absolutely! If you’re catering to gluten sensitivities, substitute the all-purpose flour with a certified gluten-free flour blend. For a dairy-free approach, consider using vegan cream cheese and butter in the filling. Always check product labels for allergens, and be mindful of guests’ dietary restrictions to ensure everyone can enjoy these festive treats!
How long can I prepare the cookie dough in advance?
You can prepare the dough ahead of time and chill it in the refrigerator for up to 2 days before baking. This makes it a breeze to whip up these festive Red Velvet Cream Cheese Thumbprint Cookies for any occasion, keeping the baking stress-free while still delivering homemade goodness!
Red Velvet Cream Cheese Cookies for Festive Flavor Bliss
Ingredients
Equipment
Method
- Preheat your oven to 375°F (190°C) and line two baking sheets with parchment paper.
- In a medium bowl, whisk together the all-purpose flour, cocoa powder, baking soda, and salt.
- In a large mixing bowl, beat the softened butter and sugar together for 3-5 minutes until light and fluffy.
- Add in the egg, vanilla extract, and white vinegar, mixing until just combined.
- Gently mix in the red gel food coloring.
- Gradually add the dry ingredients into the wet mixture, alternating with buttermilk.
- Wrap the cookie dough in plastic wrap and refrigerate for at least 30 minutes.
- In a mixing bowl, beat the cream cheese and butter until smooth, then add powdered sugar.
- Add vanilla extract and a pinch of salt to the cream cheese mixture, mixing until well combined.
- Remove chilled dough and scoop tablespoon-sized portions, rolling them into balls.
- Press down in the center of each cookie ball to create an indentation.
- Spoon or pipe the cream cheese filling into the thumbprint centers of each cookie.
- Bake for 10-12 minutes or until edges are set and centers are slightly soft.
- Allow cookies to cool on baking sheets for 5-7 minutes before transferring to wire racks.
- If desired, dust cooled cookies with powdered sugar or drizzle with melted white chocolate.
- Store in an airtight container in the refrigerator for 3-5 days or freeze for 2-3 months.
Leave a Reply