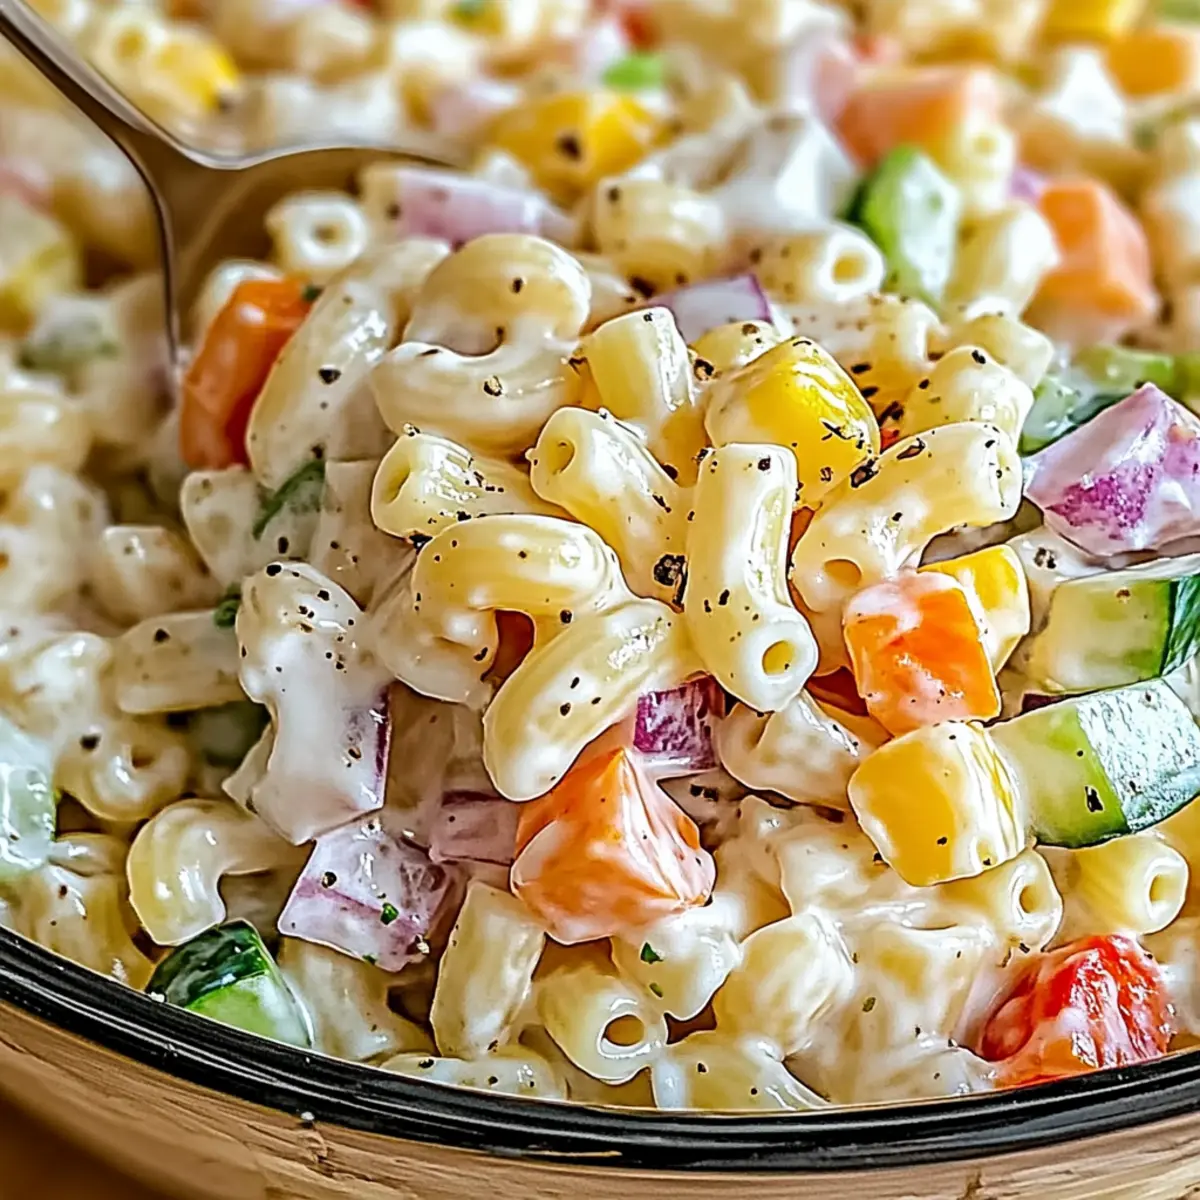
The sun winks through the kitchen window as I stir a vibrant bowl of Ditalini Pasta Salad, and I can almost taste summer. This versatile dish is not just a salad; it’s a colorful canvas where you can paint in your favorite vegetables and delightful dressings. Best of all, this quick and easy recipe is a meal prep champ, perfect for busy weekdays or spontaneous gatherings. Whether you prefer it creamy or zesty, vegan or gluten-free, it adapts to your every whim, making it a guaranteed crowd-pleaser. With each bite, the freshness of the crunchy vegetables mingles with the tender pasta, creating a symphony of textures and flavors. Are you ready to whip up a bowl and make it your own?
Why is Ditalini Pasta Salad So Versatile?
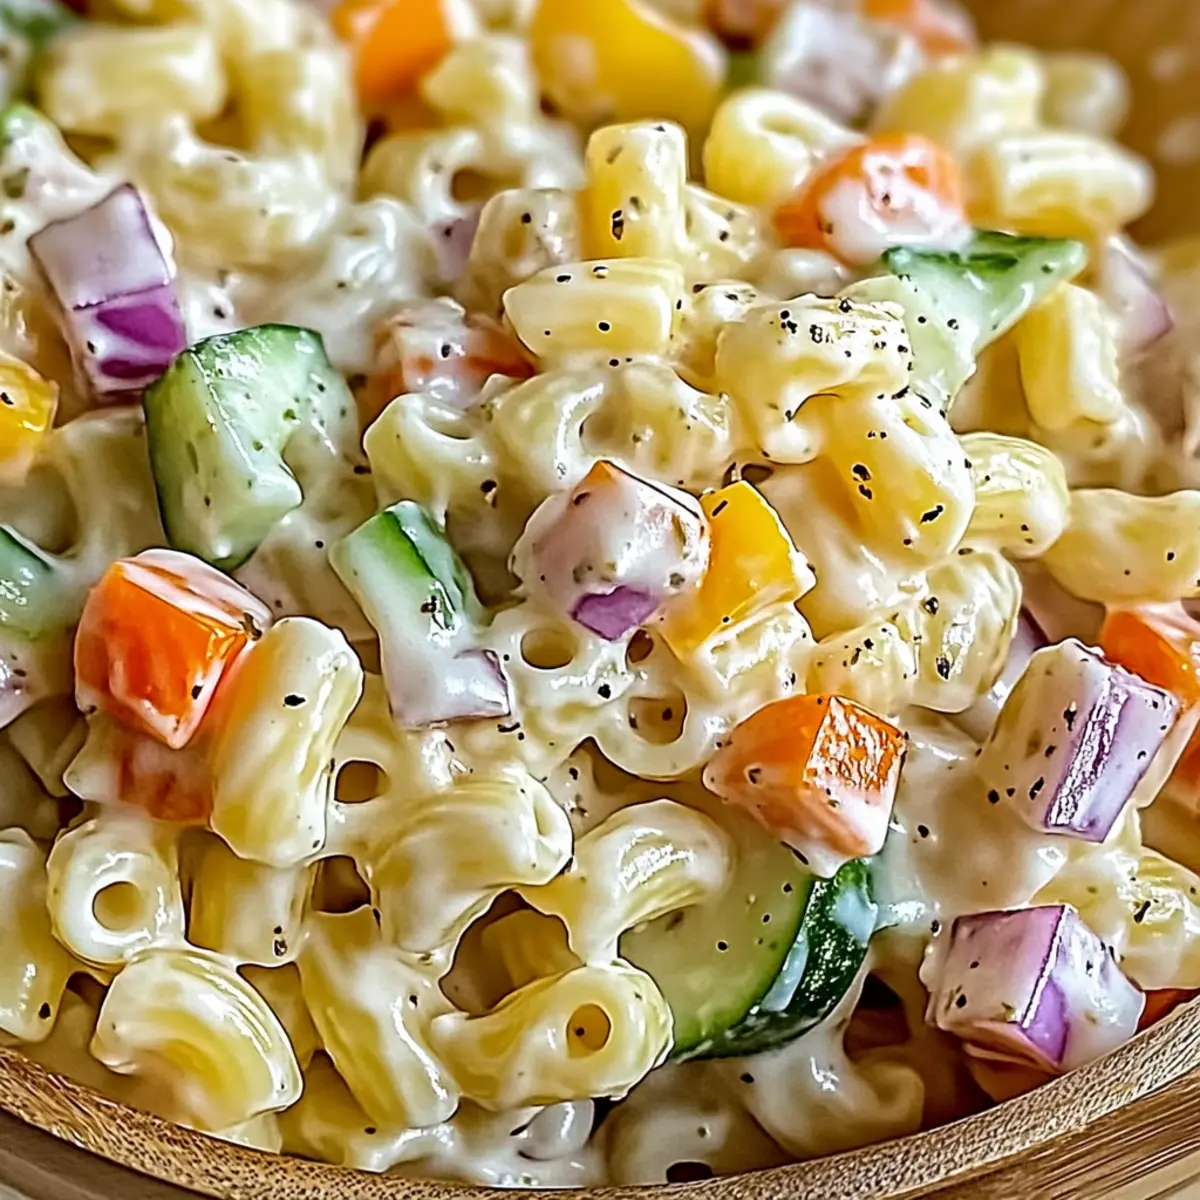
Versatility in Every Bite: This Ditalini Pasta Salad is a culinary chameleon! Quick and Easy to whip up, it fits seamlessly into any meal plan. Flavorful Customization options let you tailor it to vegan or gluten-free needs. Meal Prep Friendly, it keeps well for days, making it a convenient choice for busy lifestyles. Need ideas? Enjoy it alongside Grinder Tortellini Salad or pair with the refreshing Thanksgiving Salad Cranberry for a delightful spread. Colorful and Healthy, each serving bursts with crunchy vegetables, providing both nutrients and stunning presentation!
Ditalini Pasta Salad Ingredients
• Here’s what you need to create this crowd-pleasing Ditalini Pasta Salad.
For the Pasta
- Ditalini Pasta – A small, tube-shaped pasta that holds up well with vegetables and dressing.
For the Vegetables
- Celery – Adds a delightful crunch; you can substitute with fennel for an aromatic twist.
- Bell Peppers – Choose a mix of colors for visual appeal and sweetness; they brighten up the dish beautifully.
- Onion – Opt for sweet or red onions for milder flavor; they complement the salad perfectly.
- Cucumbers – Provides crispness; peeling them smooths the texture, but sliced radishes can also add a nice kick.
For the Dressing
- Mayonnaise – The creamy base for the dressing; swap with vegan mayo if you’re looking for a plant-based option.
- Apple Cider Vinegar – Offers a tangy note; lemon juice can be a bright substitute that works wonders.
- Sugar – Balances out the acidity; feel free to adjust according to your taste.
- Dijon Mustard – Adds depth and a touch of spice; yellow mustard can suffice in a pinch.
- Salt & Pepper – Essential for enhancing flavors; adjust to suit your personal preferences.
- Garlic Powder – A great way to deepen flavor; fresh garlic can be used for an added punch but be sure to mince finely.
- Paprika – Offers smokiness; try smoked paprika for an even richer taste.
Step‑by‑Step Instructions for Ditalini Pasta Salad
Step 1: Cook the Pasta
Bring a large pot of salted water to a rolling boil, then add the ditalini pasta. Cook for 8 to 10 minutes, stirring occasionally, until the pasta is al dente and firm to the bite. Once done, drain the pasta in a colander and set it aside to cool slightly while you prepare the other ingredients.
Step 2: Cool the Pasta
Immediately rinse the cooked ditalini pasta under cold water for about 30 seconds. This process stops further cooking and helps prevent the pasta from sticking together. Spread the pasta out on a baking sheet or large plate to allow it to cool completely and ensure it remains separate while you prepare the salad.
Step 3: Prepare the Dressing
In a medium mixing bowl, whisk together mayonnaise, apple cider vinegar, sugar, Dijon mustard, salt, black pepper, garlic powder, and paprika until you achieve a smooth and creamy consistency. Taste and adjust the seasoning according to your preference to balance the flavors perfectly for your Ditalini Pasta Salad.
Step 4: Chop the Vegetables
Take this time to wash and chop your vegetables into bite-sized pieces. Dice the celery, bell peppers, onions, and cucumbers, ensuring uniform sizes for even mixing. The colorful medley will not only add visual appeal to your salad but also enhance its flavor and texture with each refreshing bite.
Step 5: Combine Ingredients
In a large mixing bowl, gently combine the cooled ditalini pasta with the chopped vegetables. Use a spatula or large spoon to carefully fold the ingredients together until they are evenly distributed. This step sets the foundation for your Ditalini Pasta Salad, ensuring every bite is filled with pasta and veggies.
Step 6: Dress the Salad
Pour the creamy dressing over the pasta and vegetable mixture, using a spatula to toss and coat everything evenly. Be gentle to avoid breaking the pasta; you want it well-dressed but intact. The dressing will enhance the flavors and bring all the components of the Ditalini Pasta Salad together beautifully.
Step 7: Chill the Salad
Cover the bowl with plastic wrap or a lid and place it in the refrigerator for at least 1 hour before serving. This chilling time allows the flavors to meld and develop, resulting in a tastier Ditalini Pasta Salad. If made ahead, it can also be stored and enjoyed over several days!
What to Serve with Ditalini Pasta Salad
Elevate your mealtime experience by pairing this inviting pasta salad with complementary dishes that enhance its vibrant flavors.
-
Garlic Bread: The crisp, buttery flavor of garlic bread adds a delightful contrast, perfect for soaking up any extra dressing.
-
Grilled Chicken Skewers: Juicy and flavorful grilled chicken brings hearty protein to the table, making your meal satisfying and balanced.
-
Fresh Fruit Salad: A medley of seasonal fruits adds sweetness and a refreshing touch, wonderfully balancing the creaminess of the pasta.
-
Coleslaw: Crunchy, tangy coleslaw introduces a crisp texture that harmonizes beautifully with the creamy elements of your salad.
-
Veggie Platter with Hummus: Offer a platter of fresh vegetables and dipping hummus for a healthy, colorful addition to your spread.
-
Chilled White Wine: A glass of chilled white wine, like Sauvignon Blanc, enhances the flavors and makes for a perfect sip alongside your salad.
-
Roasted Vegetables: Warm roasted vegetables can elevate your plate, providing a hearty and savory counterpart to the cool salad.
-
Stuffed Peppers: Spice up your meal with stuffed bell peppers filled with grains and proteins, offering a colorful and nutritious complement.
-
Mini Quiches: These savory bites make a delightful finger food, providing an airy texture that pairs well with the salad’s creaminess.
Ditalini Pasta Salad Variations
Customize your Ditalini Pasta Salad to make it even more delightful and suited to your taste buds!
- Vegan Option: Swap mayonnaise for vegan mayo for a creamy plant-based dressing that everyone can enjoy.
- Gluten-Free: Use gluten-free ditalini pasta to ensure this dish is friendly for those with dietary restrictions.
- Protein-Packed: Stir in diced chicken, chickpeas, or tuna to transform this salad into a filling meal that satisfies hunger.
- Herb-Infused: Add a handful of freshly chopped herbs, like basil or dill, for a burst of flavor that brightens every bite. Enjoy the aroma as it mingles with the other ingredients!
- Nutty Crunch: Mix in toasted nuts or seeds, such as almonds or sunflower seeds, to create a delightful crunch that contrasts beautifully with the creamy dressing.
- Spicy Kick: For those who enjoy a bit of heat, incorporate chopped jalapeños or red pepper flakes. A little spice can elevate the flavor profile and add excitement!
- Sweet Surprise: Toss in diced apples or grapes to bring a sweet element that’ll play wonderfully against the savory flavors of the salad.
- Warm Option: Serve the salad warm by mixing in sautéed vegetables, which gives the dish a cozy twist perfect for cooler weather.
For tasty accompaniment ideas, consider pairing your salad with Garlic Bread or a refreshing side like Homemade Chicken Salad!
Expert Tips for Ditalini Pasta Salad
- Perfect Pasta: Cook ditalini pasta al dente; overcooked pasta can lead to a mushy salad that loses its charm.
- Chill Time: Let the salad rest in the fridge for at least an hour. This enhances flavor and ensures a refreshing taste!
- Veggie Variations: Feel free to swap vegetables based on preference—adaptability is key for your ideal Ditalini Pasta Salad!
- Dressing Consistency: If the dressing is too thick, add a splash of water or additional vinegar to achieve the desired consistency.
- Flavor Boost: Consider adding fresh herbs, such as basil or dill, for an aromatic twist that elevates your salad!
How to Store and Freeze Ditalini Pasta Salad
Fridge: Store your Ditalini Pasta Salad in an airtight container in the fridge for up to 3-5 days. It will taste even better as the flavors meld together!
Freezer: For long-term storage, freeze the salad without the dressing for up to 2 months. Thaw in the fridge before adding dressing and serving.
Reheating: If you prefer a warm version, you can gently reheat individual servings in the microwave. Add a splash of water to refresh the texture.
Meal Prep: For best results, prepare the pasta and vegetables in advance, storing them separately until you’re ready to mix for optimal freshness and crunch.
Make Ahead Options
Preparing Ditalini Pasta Salad ahead of time is a delightful way to save on busy weeknights! You can cook the ditalini pasta and chop all your vegetables up to 3 days in advance, storing them separately in the fridge. Make sure to drizzle a bit of olive oil over the pasta to keep it from sticking together. When you’re ready to serve, simply mix the pasta and veggies, whisk up the dressing, and toss everything for that fresh taste. Chilling the salad for at least 1 hour before serving will enhance the flavor meld, ensuring your Ditalini Pasta Salad is just as delicious as if freshly made!
Ditalini Pasta Salad Recipe FAQs
What type of pasta should I use for Ditalini Pasta Salad?
Absolutely! You should use high-quality durum wheat ditalini pasta. This small, tube-shaped pasta holds its shape beautifully and is perfect for mixing with the crunchy vegetables and creamy dressing.
How long can I store Ditalini Pasta Salad in the refrigerator?
You can store your Ditalini Pasta Salad in an airtight container in the fridge for up to 3-5 days. It makes for a convenient meal prep option, and delightfully, it often tastes even better the next day as the flavors meld together.
Can I freeze Ditalini Pasta Salad?
Yes, you can freeze it, but it’s best to do so without the dressing! To freeze, prepare the salad, then transfer it to an airtight container or freezer bag, ensuring to remove excess air. It can be frozen for up to 2 months. When you’re ready to enjoy, thaw it in the refrigerator overnight before adding the dressing.
What should I do if my Ditalini Pasta is overcooked?
Don’t worry! If your pasta turns mushy, consider turning your salad into a warm dish. Gently sauté the overcooked pasta with extra vegetables and a splash of broth for a creamy pasta dish instead. Future prevention tip: always keep an eye on the cooking time, aiming for that perfect al dente texture!
Can I customize Ditalini Pasta Salad for dietary needs?
Very! This salad is incredibly versatile. For a vegan option, simply swap out the mayonnaise for a plant-based alternative. If you need it gluten-free, use gluten-free pasta. You can also add proteins like chickpeas or diced chicken, and fresh herbs, or switch up the vegetables as you like!
Ditalini Pasta Salad: Your Go-To Recipe for Easy Summer Meals
Ingredients
Equipment
Method
- Bring a large pot of salted water to a rolling boil. Add ditalini pasta and cook for 8 to 10 minutes until al dente. Drain and set aside to cool.
- Rinse the cooked pasta under cold water for about 30 seconds to stop cooking and prevent sticking. Spread out on a baking sheet to cool completely.
- In a medium mixing bowl, whisk together mayonnaise, apple cider vinegar, sugar, Dijon mustard, salt, black pepper, garlic powder, and paprika until smooth.
- Wash and chop the celery, bell peppers, onions, and cucumbers into bite-sized pieces.
- In a large mixing bowl, combine the cooled ditalini pasta with the chopped vegetables, gently folding to mix evenly.
- Pour the dressing over the pasta and vegetables, tossing gently to coat everything evenly.
- Cover with plastic wrap or a lid and chill in the refrigerator for at least 1 hour before serving.
Leave a Reply