Stepping into my kitchen, I was reminded of the serenity that accompanies crafting something sweet. This No-Bake Chocolate Hazelnut Tart has become my go-to dessert, especially when I’m yearning for a quick yet impressive treat. With its creamy texture and balanced sweetness, this enchanting tart is sure to delight any chocolate and hazelnut lover in your life. It’s a breeze to whip up, making it perfect for both casual get-togethers and special celebrations. What’s more, there’s no baking involved—a true lifesaver for those who want to savor flavor without the fuss. Ready to indulge in the silky dream of this tart? Let’s dive into the recipe!
Why is this tart so irresistible?
Simplicity: This no-bake Chocolate Hazelnut Tart is ever-so-easy to assemble, making it perfect for even novice bakers.
Creamy Decadence: The luscious ganache filling combines rich chocolate and smooth hazelnut butter, creating a dessert that melts in your mouth.
Versatile Appeal: Whether you serve it at a party or as a family treat, this tart is sure to impress everyone.
Quick Delight: Whip it up in no time! With minimal cooking involved, it’s an excellent choice for spontaneous sweet cravings.
Crafted for Sharing: This dessert invites conversation and compliments, making it an ideal centerpiece for any gathering.
Feel free to explore delicious variations like Cottage Cheese Chocolate Mousse or add a hint of zest with some White Chocolate Orange accents!
Chocolate Hazelnut Tart Ingredients
• Get ready to delight your taste buds!
For the Crust
- Unsalted Butter – Creates richness and holds the crust together. Swap for vegan butter for a dairy-free option.
- Biscuit Crumb (Digestive/Graham Cracker) – Forms the base of the tart; crush nuts for a gluten-free alternative.
- Ground Hazelnuts – Offers delicious nutty flavor and texture; can be substituted with almond flour if not on hand.
For the Ganache Filling
- Heavy Cream (36% fat) – Essential for a smooth, luxurious filling; steer clear of low-fat varieties to maintain the right texture.
- Dark Chocolate (Callebaut) – The star ingredient; opt for chocolate with high cocoa content for the richest flavor.
- Hazelnut Butter – Enhances the tart with creaminess and a deep hazelnut taste; homemade versions are simple to whip up.
For Garnishing
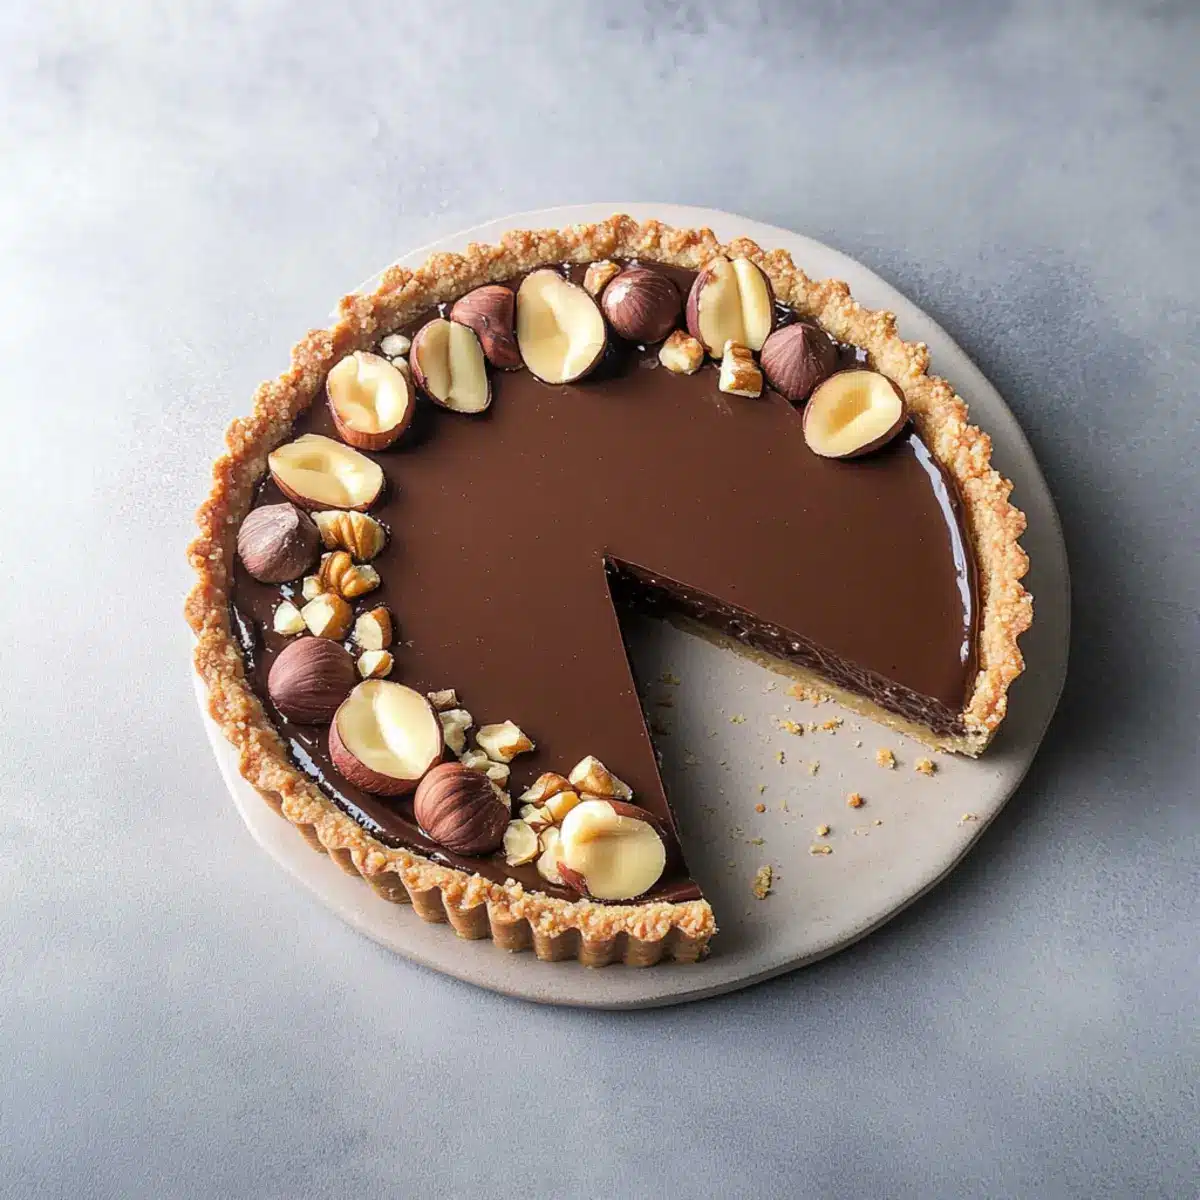
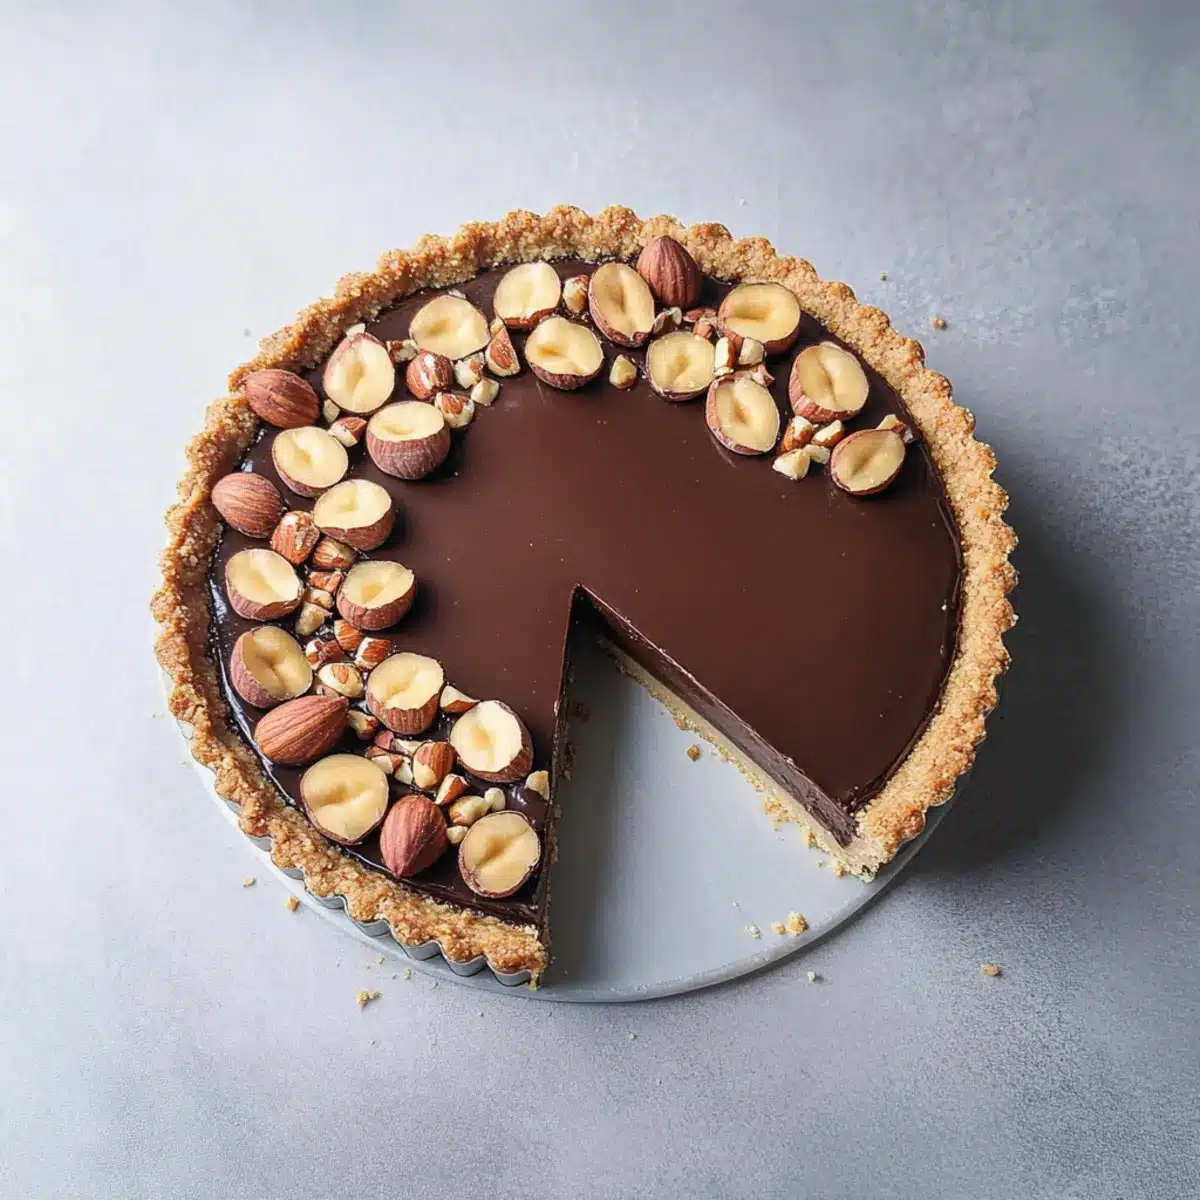
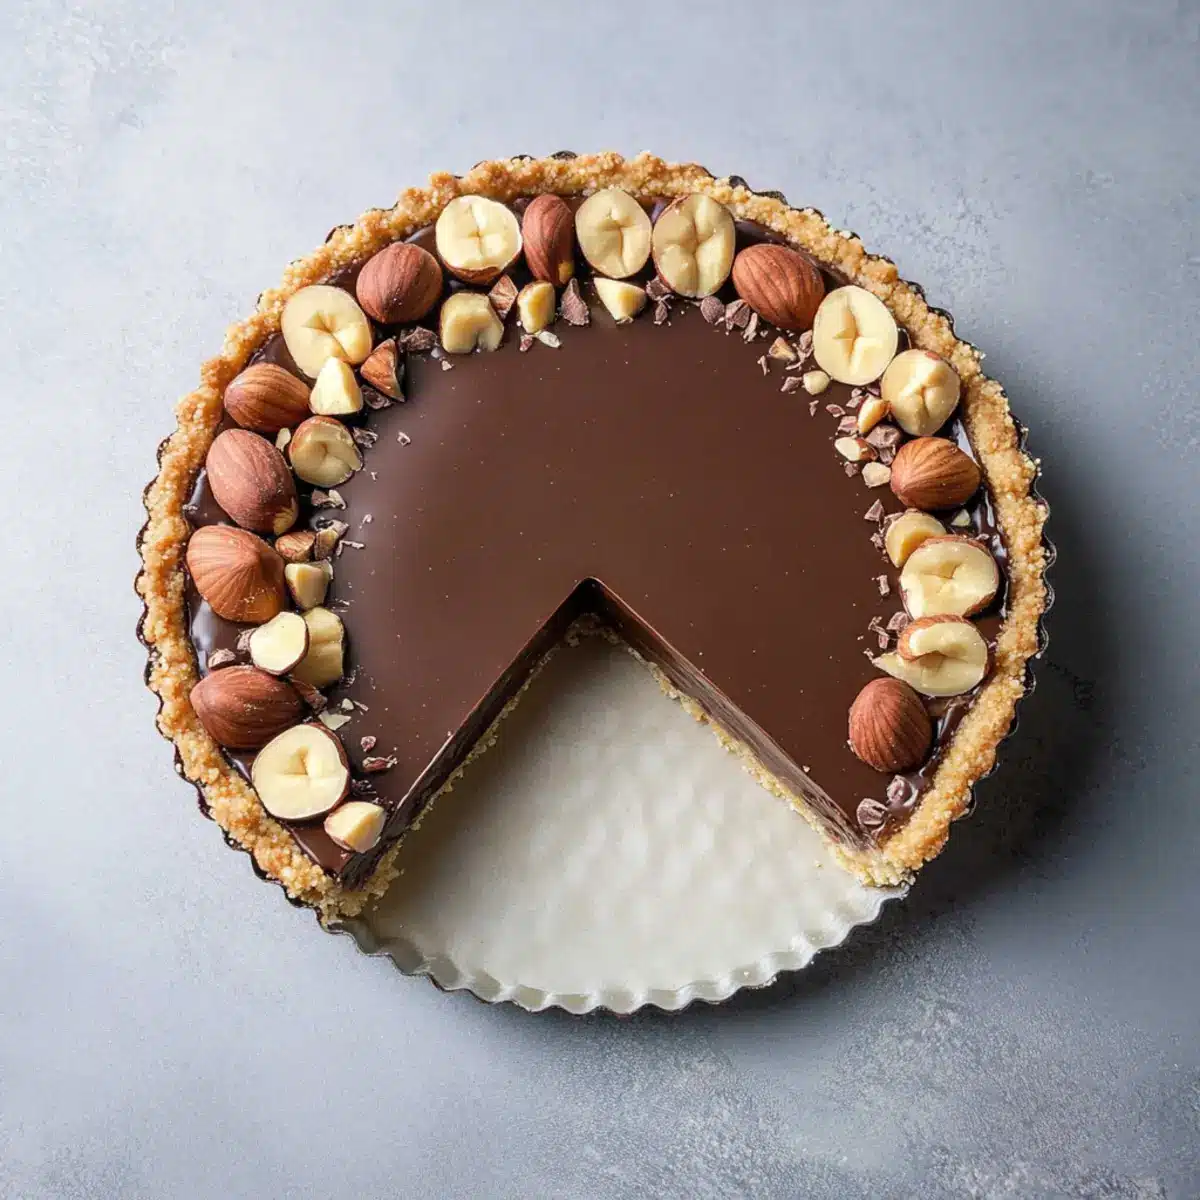
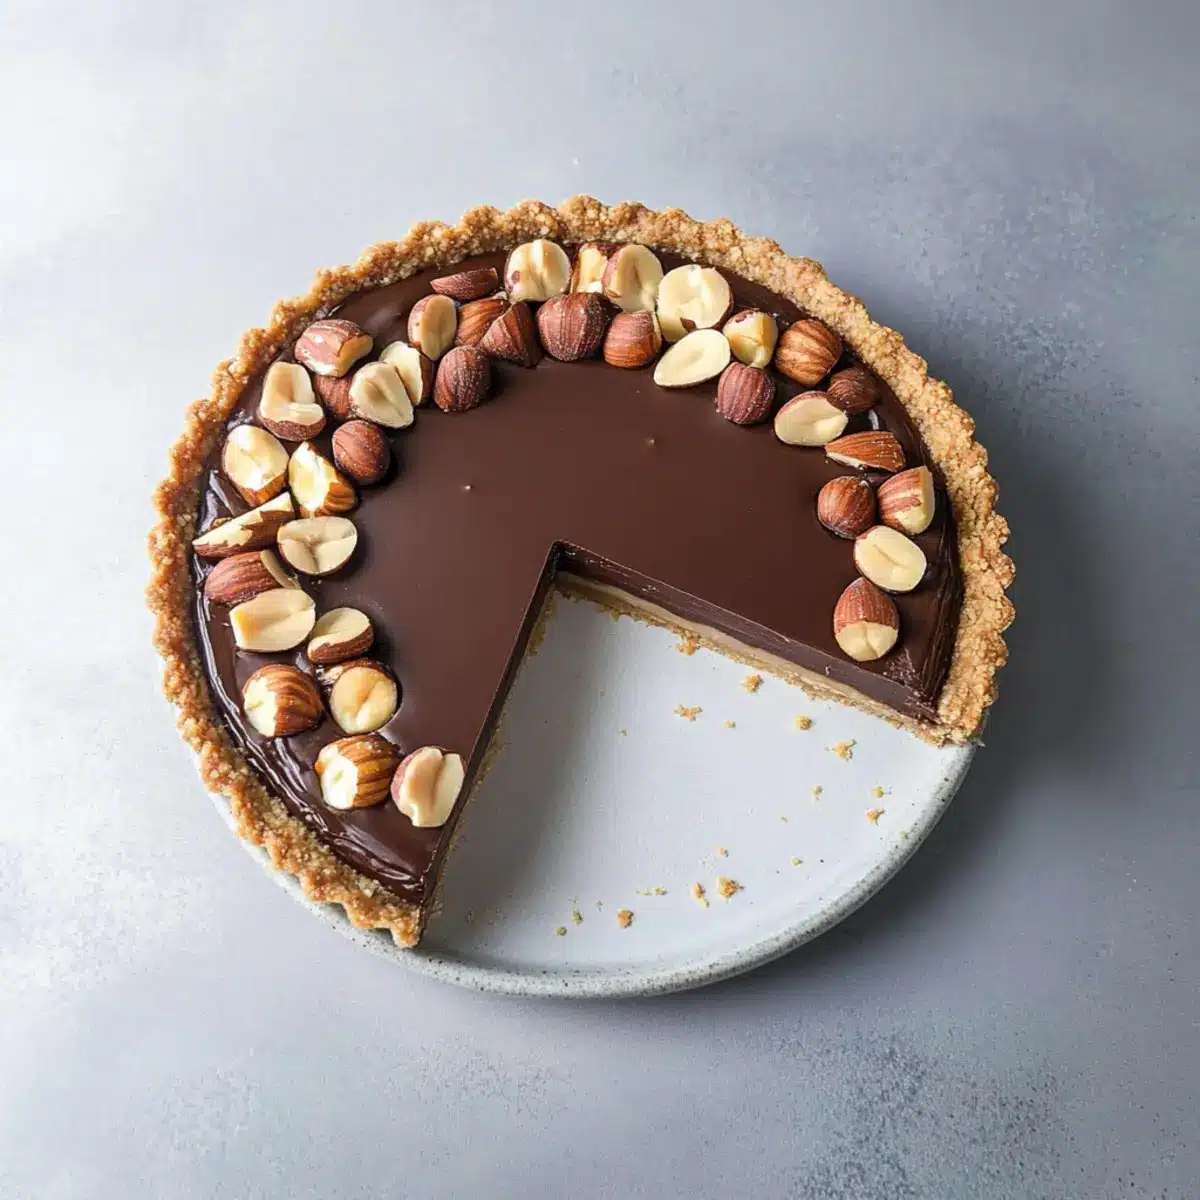
- Roasted Hazelnuts – Adds a delightful crunch on top; sprinkle them on just before serving for an attractive finish.
Step‑by‑Step Instructions for Chocolate Hazelnut Tart
Step 1: Melt the Butter
Start by melting ½ cup of unsalted butter in the microwave for about 30-45 seconds, until it’s fully liquefied. Allow it to cool slightly for about 5 minutes so it doesn’t cook other ingredients when mixed. You’ll use this rich butter to bind the crust, giving it a smooth and appealing texture.
Step 2: Prepare the Crust Mixture
In a food processor, combine 1 ½ cups of biscuit crumbs and ½ cup of ground hazelnuts. Pulse until they’re finely ground, creating a sandy texture. Pour in the melted butter along with a pinch of salt, and blend the mixture until it’s thoroughly combined and holds together when pressed. This will become the delightful base of your Chocolate Hazelnut Tart.
Step 3: Form the Tart Shell
Take your crust mixture and firmly press it into the bottom and up the sides of an 8-inch tart pan, ensuring an even layer. Use your fingers or a flat-bottomed glass to achieve a smooth surface. Once shaped, place the tart shell in the refrigerator for at least 30 minutes to set and firm up while you prepare the ganache filling.
Step 4: Heat the Heavy Cream
In a small saucepan, heat 1 cup of heavy cream over medium heat until it just starts to simmer, which should take about 5-7 minutes. Stir occasionally to prevent it from scorching on the bottom. Once it bubbles slightly around the edges, remove it from the heat—it’s ready to transform into a velvety ganache.
Step 5: Make the Ganache Filling
Chop 8 ounces of dark chocolate into small pieces and add it to a large mixing bowl along with ½ cup of hazelnut butter. Pour the hot heavy cream over the chopped chocolate and hazelnut butter. Let it sit for 2-3 minutes to soften, then stir gently until everything is blended together and glossy. This will become the decadent filling of your Chocolate Hazelnut Tart.
Step 6: Assemble the Tart
Carefully pour the smooth ganache filling into the chilled tart shell. Use an offset spatula to spread it evenly, ensuring a beautiful finish on top. Once filled, gently tap the tart pan on the counter to remove any air bubbles. Your Chocolate Hazelnut Tart is now ready for a relaxing chill in the refrigerator.
Step 7: Chill and Set
Cover the tart loosely with plastic wrap and refrigerate for at least 4 hours, or until the filling is firmly set. This time allows the flavors to meld beautifully, resulting in a creamy and luscious texture. Avoid the temptation to rush this step, as a well-set tart is essential for that perfect slice.
Step 8: Garnish and Serve
Once chilled and set, carefully remove the tart from the pan by gently pushing the bottom up if you’re using a pan with a removable base. To give your Chocolate Hazelnut Tart an extra touch, sprinkle some roasted hazelnuts on top just before serving. This adds a delightful crunch and visual appeal, making it irresistible for everyone.
Expert Tips for Chocolate Hazelnut Tart
-
Quality Ingredients: Always choose high-quality dark chocolate and heavy cream. This will elevate your Chocolate Hazelnut Tart and ensure a rich flavor profile.
-
Chill Time Matters: Patience is key! Allow the tart to chill for a full 4 hours, ensuring it sets properly for easy slicing and the best texture.
-
Avoid Wet Crust: Make sure your crust mixture is well combined and holds together without being too wet; if it crumbles, it won’t hold its shape.
-
Loosen the Tart Easily: Use a tart pan with a removable base to make serving effortless; this will help avoid any sticky situations when transferring to a plate.
-
Garnish with Love: Decorate with freshly roasted hazelnuts just before serving for an added crunch and visual appeal, enhancing the overall experience.
Chocolate Hazelnut Tart Variations
Feel free to get creative and make this delicious Chocolate Hazelnut Tart your own with these fun variations!
-
Nut-Free: Substitute ground hazelnuts in the crust with sunflower seed flour for a nut-free option. This twist keeps the texture while catering to allergies.
-
Flavored Chocolate: Experiment with flavored chocolate like mint or coffee for the ganache. This will elevate the tart’s flavor profile and amaze your taste buds.
-
Fruit Infusion: Add a layer of fresh raspberries or strawberries on top before pouring the ganache. This provides a refreshing contrast, balancing the tart’s sweetness beautifully.
-
Caramel Drizzle: Drizzle homemade caramel sauce on top before serving for an indulgent experience. The combination of sweet caramel and chocolate is simply divine!
-
Coconut Bliss: Use shredded coconut in the crust or as a garnish. This tropical addition enhances flavor and adds a unique texture that is exciting to bite into.
-
Berry Compote: Serve alongside a warm berry compote for an elevated presentation. It not only looks stunning but adds a burst of fruity flavor that complements the tart perfectly.
-
Heavenly Toppings: Top with whipped cream and chopped pecans for an added crunch and creamy texture. This will take your dessert to another level of deliciousness!
Don’t forget, if you’re intrigued by experimenting further with flavor, consider pairing this tart with Cottage Cheese Chocolate Mousse for an enjoyable contrast, or try adding a vibrant twist with the White Chocolate Orange infusion!
How to Store and Freeze Chocolate Hazelnut Tart
Fridge: Store your Chocolate Hazelnut Tart in an airtight container in the refrigerator for up to 3 days. This helps maintain the crust’s nice texture and keeps it fresh.
Freezer: If you want to enjoy it later, freeze the tart (well-wrapped) for up to 2 months. To serve, thaw overnight in the fridge before indulging.
Reheating: This tart is best served cold; there’s no need to reheat! Just slice it straight from the fridge for the ultimate creamy experience.
Presentation: When ready to serve, consider garnishing with extra roasted hazelnuts for a lovely touch and a delightful crunch.
Make Ahead Options
These Chocolate Hazelnut Tarts are perfect for meal prep, saving you time and effort for busy weeknights or gatherings! You can prepare the crust, mixing together the biscuit crumbs and ground hazelnuts, and pressing it into the tart pan up to 24 hours in advance. Simply refrigerate it tightly wrapped. The ganache filling can be made and stored separately in the fridge for up to 3 days; just reheat gently to smooth it out before pouring it into the crust. For the best quality, avoid pouring the ganache until you’re ready to serve, allowing the tart to set properly. With this prep, you’ll enjoy a delightful, no-bake dessert with minimal last-minute fuss!
What to Serve with No-Bake Chocolate Hazelnut Tart
Indulging in a slice of creamy Chocolate Hazelnut Tart is delightful on its own, but pairing it with the right sides transforms your dessert experience into something truly special.
-
Fresh Berries: The tartness of strawberries or raspberries balances the sweetness of the tart, adding a fresh, vibrant touch. A sprinkle of powdered sugar on the berries elevates the presentation too.
-
Vanilla Ice Cream: A scoop of velvety vanilla ice cream complements the rich flavors and adds a delightful temperature contrast. As it slowly melts over the warm slices, it creates a dreamy texture.
-
Whipped Cream: Fluffy, lightly sweetened whipped cream adds a cloud-like texture that beautifully complements the rich chocolate and hazelnut flavors. A dollop on each slice makes for a picturesque dessert.
-
Espresso or Coffee: A cup of hot, strong espresso enhances the chocolate notes, adding warmth and depth to your tasting experience. It’s a classic pairing that invites cozy conversation after dessert.
-
Chocolate Sauce Drizzle: A quick drizzle of chocolate sauce over the tart adds an extra layer of indulgence. It creates an eye-catching presentation and takes the already heavenly dessert to another level.
-
Hazelnut Praline: For those who crave that extra crunch, a sprinkle of homemade hazelnut praline not only adds flavor but also creates a delightful contrast in texture with the creamy tart.
Pair these sides and drinks with your Chocolate Hazelnut Tart, and watch as your dessert becomes the star of the gathering!
Chocolate Hazelnut Tart Recipe FAQs
How do I choose ripe hazelnuts?
Absolutely! When selecting hazelnuts, look for nuts that are firm and free of dark spots or blemishes. Ideally, they should also have a pleasant aroma. If they’re packaged, choose options that are sealed to ensure freshness. Fresh hazelnuts will provide the best flavor for your Chocolate Hazelnut Tart.
How should I store leftover Chocolate Hazelnut Tart?
Very simply! Store your Chocolate Hazelnut Tart in an airtight container in the refrigerator for up to 3 days. This will keep the crust fresh while maintaining the creamy ganache’s delightful texture. Avoid covering it directly with plastic wrap as it may affect the tart’s surface.
Can I freeze the Chocolate Hazelnut Tart?
Indeed! To freeze, allow the tart to fully chill in the fridge first. Then wrap it tightly in plastic wrap, followed by aluminum foil for extra protection. It can be stored in the freezer for up to 2 months. When you’re ready to enjoy it, let it thaw overnight in the refrigerator.
What if my ganache is too runny?
If you find your ganache is runny, it may be due to using low-fat cream or not allowing it enough time to chill. To remedy this, try putting it in the fridge for about 30 minutes to thicken. If it’s still too soft, you can reheat it gently and add a bit more chopped chocolate, stirring until melted and smooth.
Are there any allergy considerations I should be aware of?
Absolutely! The Chocolate Hazelnut Tart contains common allergens such as nuts (hazelnuts), dairy (cream and butter), and gluten (in biscuit crumbs). For a dairy-free version, substitute with vegan alternatives. If you’re making this for guests, always check if anyone has nut allergies or gluten sensitivities!
What’s the best way to slice the tart?
For a perfect slice, let your tart chill completely, then use a sharp knife warmed in hot water and wiped dry before each cut. This will help achieve those clean edges, letting the silky ganache of your Chocolate Hazelnut Tart shine through when served!
Easy Chocolate Hazelnut Tart – No-Bake Bliss Awaits
Ingredients
Equipment
Method
- Melt ½ cup of unsalted butter in the microwave for about 30-45 seconds, then let it cool slightly.
- In a food processor, combine 1 ½ cups of biscuit crumbs and ½ cup of ground hazelnuts. Blend with melted butter and a pinch of salt until it holds together.
- Press the crust mixture evenly into the bottom and sides of an 8-inch tart pan. Chill in the refrigerator for at least 30 minutes.
- Heat 1 cup of heavy cream in a small saucepan until it simmers. Remove from heat.
- Chop 8 ounces of dark chocolate and add it to a mixing bowl with ½ cup of hazelnut butter. Pour in the hot cream and stir until blended.
- Pour the ganache filling into the chilled tart shell and spread evenly with an offset spatula.
- Cover loosely with plastic wrap and refrigerate for at least 4 hours to set.
- Once set, remove from the pan and garnish with roasted hazelnuts before serving.
Leave a Reply