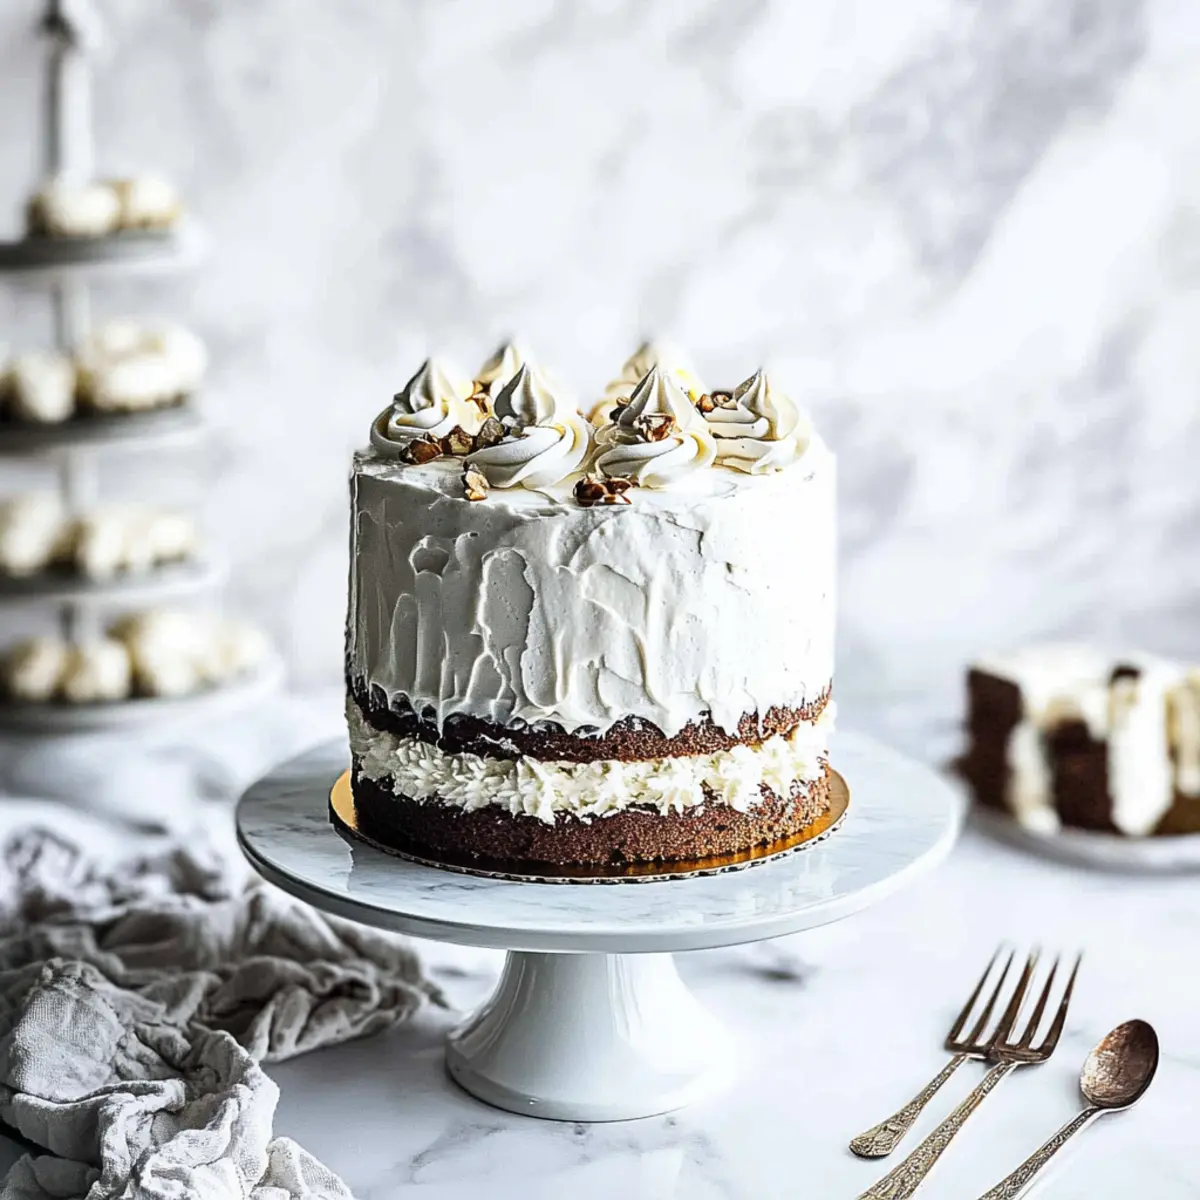
Stumbling upon a cozy winter gathering, the air rich with the sweet aroma of baking, I couldn’t help but smile at the sight of a stunning cake that looked like pure magic—welcome to the world of the Chocolate Hazelnut Winter Wonderland Cake! This four-layer beauty seamlessly combines velvety chocolate and delicate hazelnut cake, layered with a dreamy white chocolate hazelnut ganache and enveloped in creamy vanilla buttercream. Imagine serving this elegant centerpiece at your next celebration—it’s not only a showstopper but also surprisingly straightforward to make. Perfect for sharing with loved ones or enjoying as a well-deserved treat, it’s bound to spark joy and warmth. Ready to dive into a slice of festive indulgence? Let’s whip up this delightful creation together!
Why is this cake a must-make?
Indulgence at Its Finest: This Chocolate Hazelnut Winter Wonderland Cake brings a touch of magic to any gathering, perfect for impressing guests during festive celebrations.
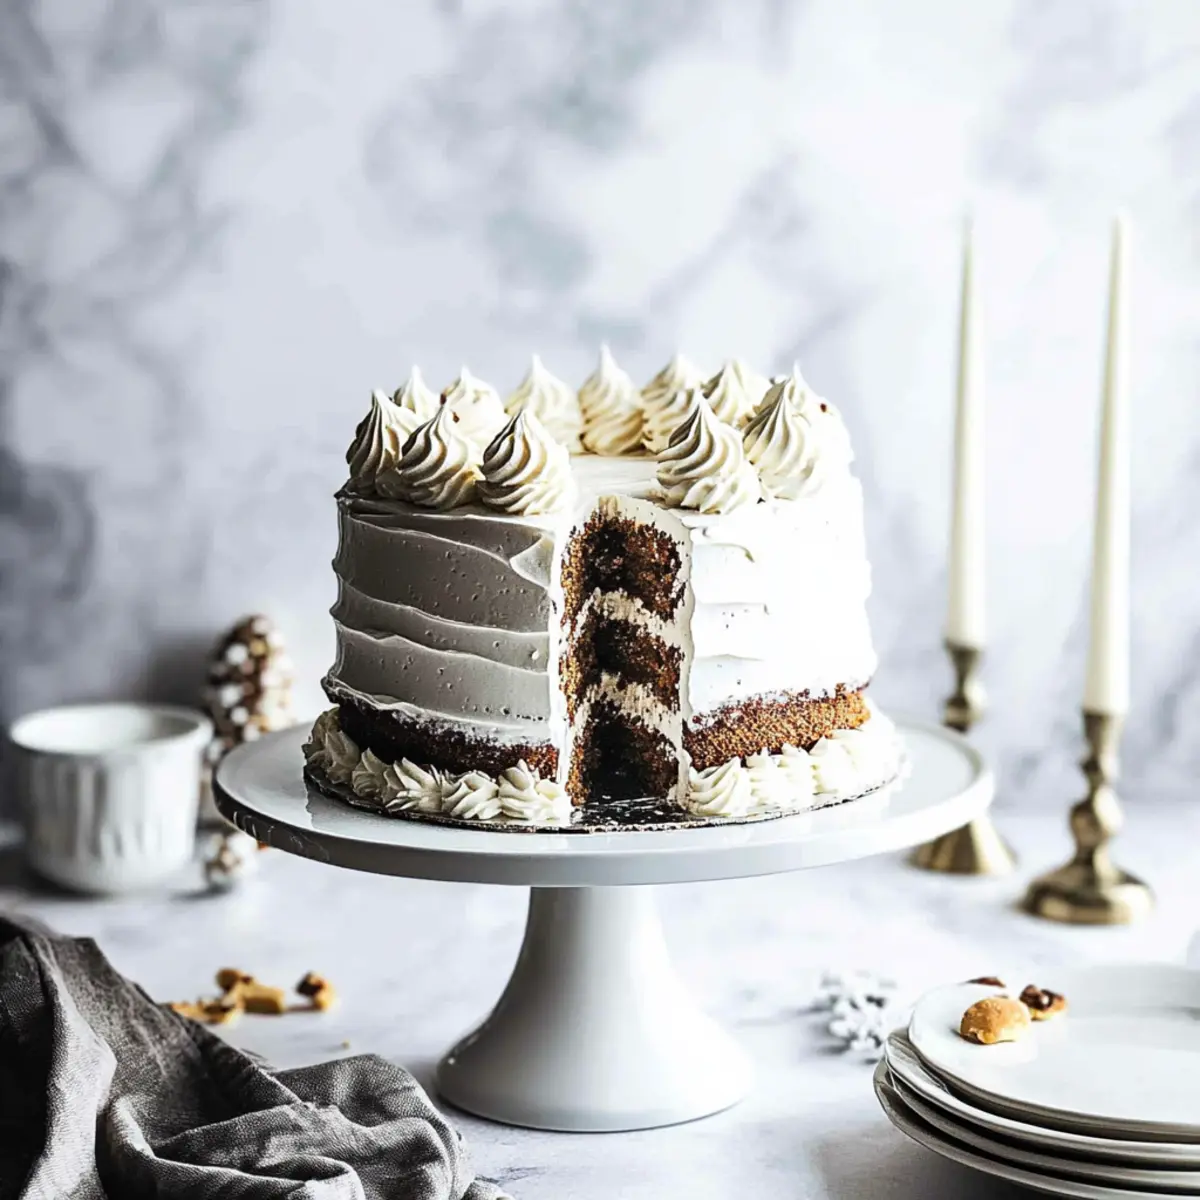
Layered Perfection: With its four delightful layers of chocolate and hazelnut, each slice promises a unique taste experience, much like our delightful Strawberry Custard Cake.
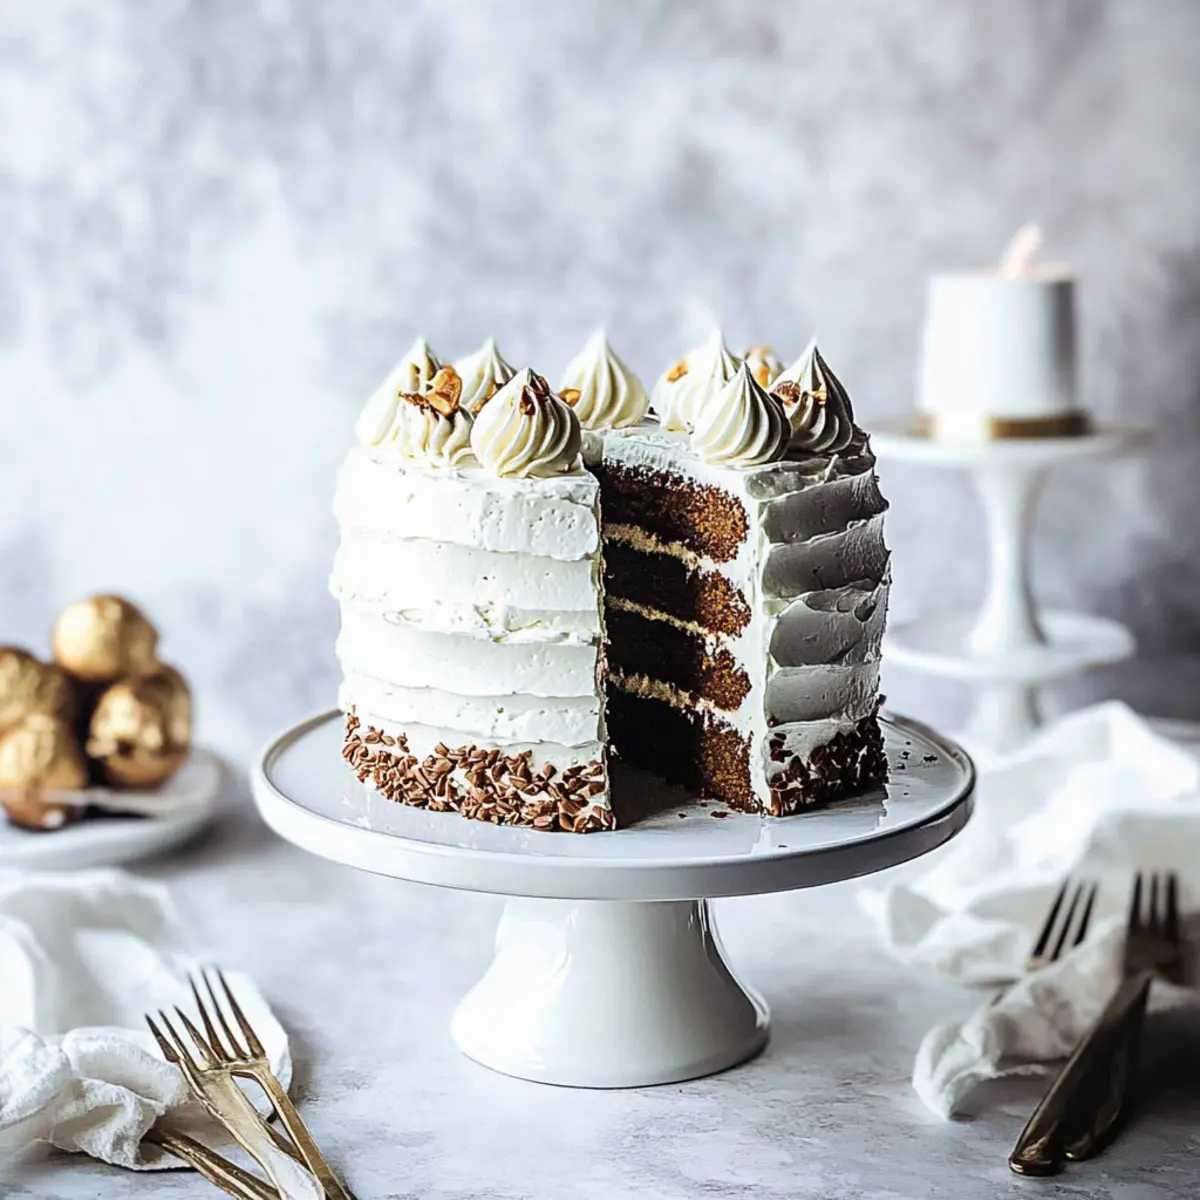
Elevated Flavor: The white chocolate hazelnut ganache elevates the already rich flavors, offering a creamy finish that you won’t forget.
Customized Touch: Feel free to customize the decoration—think meringue kisses or edible glitter—to match your winter festivity theme!
Quick Assembly: While it looks elaborate, the straightforward steps make this a hassle-free baking adventure that will leave your kitchen smelling heavenly.
Ultimate Crowd Pleaser: Whether you’re a seasoned chef or a baking novice, this cake is bound to be a showstopper that everyone adores!
Chocolate Hazelnut Winter Wonderland Cake Ingredients
For the Cake Layers
- Large Egg – Provides structure and moisture for the cake; substitute with a flax egg for a vegan option.
- Vegetable Oil (75g) – Adds moisture and richness; can be replaced with melted coconut oil for a different flavor profile.
- Full Fat Sour Cream (130g) – Contributes to moisture and tenderness; Greek yogurt is a suitable substitute.
- Vanilla Extract (½ teaspoon + 1 teaspoon) – Enhances the overall flavor; use almond extract for a different note.
- All-Purpose Flour (115g + 160g) – Forms the cake structure; can swap for gluten-free all-purpose flour to make it gluten-free.
- Dutch-Processed Cocoa Powder (50g) – Provides rich chocolate flavor; unsweetened cocoa can be used instead, though flavor may vary.
- Baking Powder (1½ teaspoon + 1½ teaspoon) – Leavens the cake; ensure it’s fresh for optimal rise.
- Salt (⅓ teaspoon + ¼ teaspoon) – Balances sweetness; no substitutions needed.
- White Granulated Sugar (150g + 60g) – Sweetens the cake; brown sugar can add more moisture and flavor complexity.
- Brown Cane Sugar (45g + 100g) – Adds depth and moisture to the cake; replace with light brown sugar if needed.
- Hot Water (75g) – Activates cocoa powder, enhancing flavor; no substitutions necessary.
For the Buttercream and Ganache
- Unsalted Butter (80g + 225g) – Adds richness and texture to both cake and buttercream; substitute with plant-based butter for a dairy-free option.
- Hazelnut Butter (70g + 100g) – Infuses the cake and filling with nutty flavor; can use store-bought or homemade hazelnut paste.
- Heavy Whipping Cream (200g + 100g) – Creates a smooth ganache; can be replaced with coconut cream for a non-dairy version.
This Chocolate Hazelnut Winter Wonderland Cake is a delightful way to celebrate the season, radiating warmth and joy with every bite!
Step‑by‑Step Instructions for Chocolate Hazelnut Winter Wonderland Cake
Step 1: Prepare Hazelnut Butter
Start by toasting skinned hazelnuts in a dry skillet over medium heat until fragrant, about 5-7 minutes. Transfer the toasted hazelnuts to a food processor and blend for about 5 minutes, stopping to scrape down the sides, until it turns into a smooth and creamy hazelnut butter. This nutty goodness will elevate the flavors in your Chocolate Hazelnut Winter Wonderland Cake.
Step 2: Make Chocolate Cake Layers
Preheat your oven to 160°C (325°F) and prepare two 8-inch round cake pans by greasing and lining them with parchment paper. In a large bowl, whisk together the all-purpose flour, cocoa powder, baking powder, and salt. In another bowl, whisk together the eggs, oil, sour cream, and vanilla extract until well combined. Gradually add the wet mixture to the dry ingredients, then mix in the boiling water. Divide the batter evenly between the prepared pans and bake for 23-25 minutes, or until a toothpick inserted comes out clean. Allow to cool completely.
Step 3: Make Hazelnut Cake Layers
Repeat the process for the hazelnut cake layers by prepping the oven at the same temperature of 160°C (325°F). In a medium bowl, combine the flour, baking powder, and salt. Then, in a large bowl, beat the hazelnut butter with sugar, eggs, oil, sour cream, and vanilla until smooth. Gradually incorporate the dry ingredients and alternate with hot water until well combined. Pour the batter into the pans and bake for 20-25 minutes until fully cooked. Once baked, let them cool in the pans for a few minutes before transferring them to a wire rack.
Step 4: Prepare Ganache Fillings
For the luscious ganache, heat 200g of heavy whipping cream in a small saucepan over medium heat until just bubbling. Pour the hot cream over both the chopped white chocolate and hazelnut butter in separate bowls. Allow them to sit for 5 minutes, then stir each mixture until smooth and glossy. Let the ganache sit at room temperature to thicken before assembling the cake.
Step 5: Make Vanilla Buttercream
In a saucepan over medium heat, combine 225g of butter, flour, sugar, salt, and milk, whisking constantly until thickened, about 5 minutes. Once thick, remove from heat and let cool to room temperature. In a mixing bowl, beat the cooled mixture with the remaining unsalted butter until fluffy. Add the vanilla extract and beat until creamy. This will form the smooth outer layer for our Chocolate Hazelnut Winter Wonderland Cake.
Step 6: Assemble Cake
Start assembling the cake by leveling the tops of the cooled cake layers with a serrated knife for even stacking. Place one chocolate layer on your serving plate and spread a generous layer of ganache on top. Follow with a hazelnut cake layer, adding more ganache, and repeat the process until all layers are stacked. Once assembled, apply a thin crumb coat of buttercream around the entire cake to help seal in the crumbs, then chill in the refrigerator for 30 minutes to set.
Step 7: Decorate
After chilling, remove the cake and frost it completely with the remaining vanilla buttercream, smoothing it out with a spatula. For a winter wonderland effect, you can create snowy textures or festive designs on the cake. Consider adding meringue kisses or edible glitter on top for a beautiful finish that will impress your guests and celebrate the season with this stunning Chocolate Hazelnut Winter Wonderland Cake!

Make Ahead Options
These Chocolate Hazelnut Winter Wonderland Cakes are perfect for busy cooks looking to save time without sacrificing flavor! You can prepare the cake layers up to 24 hours in advance; just let them cool completely before wrapping tightly in plastic wrap and refrigerating to maintain moisture. The ganache and vanilla buttercream can also be made and stored in the fridge for up to 3 days—just be sure to bring them back to room temperature and re-whip before using to restore their creamy texture. When you’re ready to serve, simply assemble the layers with the prepared fillings, frost the cake, and decorate for that winter wonderland magic!
Expert Tips for Chocolate Hazelnut Winter Wonderland Cake
-
Use Room Temperature Ingredients: Ensuring that all ingredients are at room temperature will lead to a smoother batter and better cake texture.
-
Monitor Baking Time: Begin checking the cakes at the 20-minute mark to prevent overbaking. A toothpick should come out clean but with a few moist crumbs for perfect layers.
-
Proper Cooling: Let the cake layers cool completely before frosting. This helps maintain the integrity of each layer and avoids melting your buttercream.
-
Store Ganache Wisely: If making ganache ahead of time, store it in the fridge. Bring to room temperature before using to ensure a smooth filling.
-
Scale for Precision: Invest in a kitchen scale for accurately measuring the chocolate and hazelnut ingredients, ensuring the success of your Chocolate Hazelnut Winter Wonderland Cake.
-
Customize Flavor Profiles: Feel free to swap dark chocolate for milk chocolate to adjust sweetness levels without compromising the cake’s deliciousness!
Chocolate Hazelnut Winter Wonderland Cake Variations
Feel free to unleash your culinary creativity and make this cake uniquely yours with these fun and tasty twists!
-
Milk Chocolate Ganache: Swap dark chocolate for milk chocolate for a sweeter, creamier ganache that kids will love. It’s like turning a classic into a family favorite!
-
Nut Butter Alternatives: Experiment with different nut butters like almond or peanut to give your cake an exciting twist. Each nut brings its special flavor profile, ensuring every bite is a delightful surprise.
-
Gluten-Free Option: Replace all-purpose flour with gluten-free all-purpose flour to make it suitable for gluten-sensitive guests. Everyone deserves to enjoy this festive cake, and gluten-free can be just as delicious!
-
Fruity Filling: Add layers of raspberry or cherry compote between the cake layers for a burst of tartness, brightening up the rich chocolate and hazelnut flavors. This contrast adds a delightful depth to every slice.
-
Spice it Up: Introduce a pinch of cinnamon or nutmeg to the batter for a warm, spiced flavor reminiscent of holiday baking. It’s that little touch that makes your cake feel cozy and festive!
-
Decorative Bliss: Top with edible gold glitter or crushed nuts for a beautiful finish that matches the winter wonderland theme. This not only looks stunning but also adds a delightful crunch!
-
Layered Goodness: Consider alternating between chocolate and vanilla buttercream for a visually appealing and flavorful multi-layer cake. The juxtaposition of flavors will leave your guests guessing!
-
Vegan Delight: For a vegan version, use flax eggs, coconut cream, and plant-based butter. You won’t sacrifice flavor or texture—seriously, it’s a win-win for everyone!
By exploring these variations, you’ll transform your Chocolate Hazelnut Winter Wonderland Cake into a personalized masterpiece, sure to impress at any gathering. Happy baking!
What to Serve with Chocolate Hazelnut Winter Wonderland Cake
Imagine the joy of indulging in decadent layers of cake while sipping on your favorite beverages or delighting in sumptuous sides that enhance every bite!
-
Rich Espresso: This bold coffee drinks beautifully complements the sweetness of the cake, elevating its flavors while providing a delightful contrast.
-
Fresh Berries: A mix of raspberries and strawberries adds a burst of freshness; their tartness balances the rich chocolate and hazelnut flavors.
-
Vanilla Ice Cream: A scoop of creamy vanilla ice cream creates a delicious contrast in temperatures and textures, melting into each slice for extra indulgence.
-
Whipped Cream: Light and airy, this fluffy topping adds a beautiful touch when dolloped on the side. Its neutrality enhances the cake’s nutty sweetness.
-
Chocolate Hazelnut Spread Dip: Perfect for those who can’t get enough chocolate, pair with fruit slices or pretzels for a fun and interactive dessert.
-
Sweet White Wine: A crisp, sweet wine sparkles alongside the rich dessert, enhancing the overall experience while offering a sophisticated touch.
-
Dark Chocolate Curls: Use these as a garnish to amplify the luxurious taste and visual appeal of your Chocolate Hazelnut Winter Wonderland Cake.
Elevate your celebration by combining these delicious accompaniments with your cake, and watch the magic unfold!
How to Store and Freeze Chocolate Hazelnut Winter Wonderland Cake
Room Temperature: Store in a cool, dry place wrapped in cling film for up to three days to maintain freshness.
Fridge: If you want to enjoy it longer, refrigerate slices in an airtight container for up to one week, allowing it to come to room temperature before serving for best flavor.
Freezer: Freeze cake layers wrapped tightly in plastic wrap, then foil, for up to three months. Thaw overnight in the fridge before frosting or serving.
Reheating: If you prefer a warm slice, gently reheat individual pieces in the microwave for about 10-15 seconds. Enjoy your delightful Chocolate Hazelnut Winter Wonderland Cake!
Chocolate Hazelnut Winter Wonderland Cake Recipe FAQs
What is the best way to select ripe hazelnuts?
Absolutely! When choosing hazelnuts, look for nuts that are plump, firm, and free from dark spots. Fresh hazelnuts should have a sweet, nutty fragrance. If possible, opt for those still in their shells for maximum freshness, as they tend to last longer.
How do I store leftover Chocolate Hazelnut Winter Wonderland Cake?
Very simply! Store any leftover cake in a cool, dry place wrapped in cling film for up to three days. If you want to keep it fresh for a longer time, you can refrigerate it in an airtight container for up to one week, but remember to bring it back to room temperature before serving to enjoy the flavors fully.
Can I freeze the Chocolate Hazelnut Winter Wonderland Cake?
Yes, you can! To freeze the cake layers, wrap them tightly in plastic wrap, then in foil, ensuring they’re well-protected from freezer burn. They will keep for up to three months in the freezer. When you’re ready to enjoy, simply thaw the layers overnight in the fridge before frosting or serving. This way, the cake will taste as fresh as the day it was baked!
What should I do if my cake layers are sinking in the middle?
If your cake layers are sinking, it may be due to underbaking or too much moisture in the batter. To troubleshoot, make sure you’re measuring your ingredients accurately and using room temperature items. Also, ensure your oven is correctly calibrated. A toothpick inserted should come out clean but with a few moist crumbs. If you suspect they weren’t baked long enough, add a few extra minutes to the baking time and keep an eye on them during the last five minutes.
Can any of the ingredients be substituted for dietary restrictions?
Absolutely! This recipe is quite versatile. If you need a vegan option, substitute the large egg with a flax egg (1 tablespoon flaxseed meal mixed with 3 tablespoons water, set to thicken) and use plant-based butter instead of unsalted butter. For lactose intolerance, swap the heavy cream with coconut cream and full-fat sour cream with a dairy-free yogurt. Adjust to fit your dietary needs while still ensuring a delicious result!
Indulge in Chocolate Hazelnut Winter Wonderland Cake Magic
Ingredients
Equipment
Method
- Toast hazelnuts in a dry skillet over medium heat until fragrant, about 5-7 minutes. Blend in a food processor until smooth to make hazelnut butter.
- Preheat oven to 160°C (325°F) and prepare two cake pans. Whisk dry ingredients together in a bowl. In another bowl, mix wet ingredients and combine with dry ingredients, adding hot water. Divide into pans and bake for 23-25 minutes.
- Repeat the above step for hazelnut cake layers.
- Heat 200g of heavy whipping cream until bubbling, then pour over chocolate and hazelnut butter in separate bowls. Stir until smooth and let cool.
- Combine 225g butter, flour, sugar, salt, and milk over medium heat, whisking until thick. Cool and beat with remaining butter and vanilla until fluffy.
- Level cooled cake layers, stack them with ganache in between, apply a crumb coat of buttercream, and chill for 30 minutes.
- Frost the chilled cake with remaining buttercream and decorate as desired.
Leave a Reply