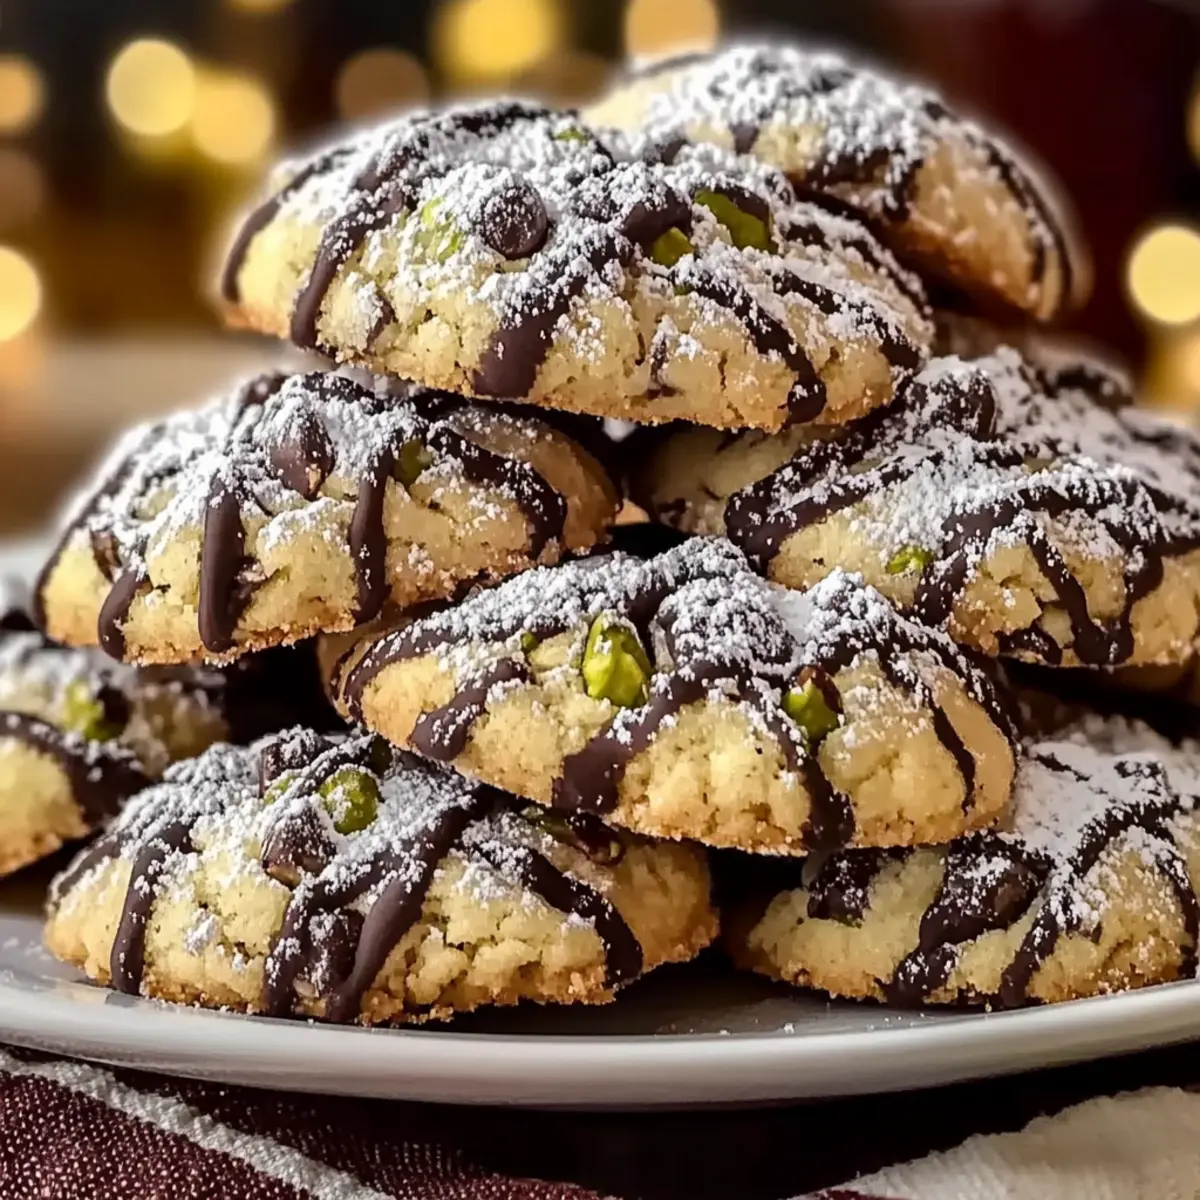
The aroma of freshly baked cookies wafts through the kitchen, immediately transporting me to a cozy Italian café. That’s exactly the experience I want to share with you through my delicious Cannoli Cookies! These delightful treats bring together the classic flavors of traditional Italian cannoli in an easy, bite-sized form that’s perfect for any occasion. With a soft, cake-like texture packed with creamy ricotta, sweet chocolate chips, and a hint of nutty pistachios, they make for a crowd-pleasing dessert. What’s more, these cookies are quick to whip up, making them a great choice for last-minute gatherings or cozy evenings at home. Ready to embark on this delightful baking adventure? Let’s make these Cannoli Cookies and sprinkle a little Italian magic into our lives!
Why Make Cannoli Cookies?
Irresistible Flavor: These Cannoli Cookies embody the rich, authentic taste of traditional Italian cannoli, combining creamy ricotta, sweet mini chocolate chips, and crunchy pistachios in every delightful bite.
Quick and Easy: The straightforward instructions mean you can whip up these treats in no time, making them ideal for unexpected guests or those cozy nights in.
Crowd Favorite: Whether it’s a holiday celebration or a simple afternoon snack, these cookies are sure to impress, delighting friends and family alike.
Versatile Options: Feel free to explore with different nut options or add in dried fruits for a fun twist! For more unique cookie ideas, consider trying these Almond Cherry Cookies.
Perfect for Sharing: Pack them up as gifts or serve alongside coffee; these cookies are truly perfect for any occasion!
Cannoli Cookies Ingredients
For the Cookie Batter
- Ricotta Cheese – Necessary for moisture and a tender texture; make sure it’s well-drained to prevent spreading.
- Butter – Creates a rich flavor and fluffy texture when creamed with sugar; opt for unsalted for better control.
- Sugar – Sweetens and provides structure; granulated sugar is ideal for the best texture.
- Eggs – Binds the ingredients; using room temperature eggs helps with better emulsion.
- Vanilla Extract – Enhances the overall flavor profile.
- Orange Zest – Adds a refreshing citrus note, complementing the other ingredients beautifully.
- Flour – Forms the cookie’s structure; accurate measurement is crucial for achieving the desired texture.
- Baking Powder – Acts as a leavening agent, ensuring the cookies rise and remain soft.
- Cinnamon & Nutmeg – Warm spices that elevate the traditional cannoli flavor without overpowering the mixture.
- Mini Chocolate Chips – Provide sweetness and richness; these smaller chips distribute perfectly throughout the cookies.
- Chopped Pistachios – Adds a delightful crunch and nutty flavor characteristic of traditional cannoli.
For the Finishing Touches
- Powdered Sugar (for dusting) – A lovely final touch for extra sweetness and visual appeal.
- Melted Chocolate (for drizzling) – While optional, it adds a charming decorative element to your Cannoli Cookies.
Create these Cannoli Cookies that blend the irresistible flavors of the traditional Italian dessert into a delightful treat!
Step‑by‑Step Instructions for Cannoli Cookies
Step 1: Prep Ricotta
Begin by draining the ricotta cheese to ensure your Cannoli Cookies have the ideal texture. Place the ricotta in a fine mesh strainer over a bowl and let it sit for 30 minutes. Gently press it with a spatula to help release any excess moisture. This crucial step prevents your cookies from spreading too much during baking.
Step 2: Mix Dry Ingredients
In a separate bowl, whisk together the flour, baking powder, salt, cinnamon, and nutmeg. This mixture is the foundation of your Cannoli Cookies, so make sure everything is evenly combined. Set this bowl aside, as you’ll blend it with the wet ingredients shortly. The aromatic spices will add warmth and enhance the cookie’s flavor.
Step 3: Cream Butter and Sugar
In a large mixing bowl, beat the softened butter and granulated sugar together using a stand mixer or hand mixer on medium speed for 3-4 minutes. You want the mixture to become light and fluffy, creating a lovely base for your Cannoli Cookies. Once it’s airy, you’re ready to introduce the wet ingredients.
Step 4: Add Eggs and Ricotta
Add the eggs one at a time to your butter and sugar mixture, ensuring they are fully incorporated before adding the next one. Then, mix in the drained ricotta, vanilla extract, and orange zest until just combined. This will create a moist and flavorful batter that captures the essence of traditional cannoli.
Step 5: Combine Mixtures
Gradually add the dry ingredient mixture in three parts to the wet ingredients, mixing on low speed. Continue until no flour streaks remain, but be careful not to overmix. The batter should be thick and cohesive, perfect for your Cannoli Cookies. This gentle blending ensures a tender crumb.
Step 6: Fold in Mix-ins
Gently fold in the mini chocolate chips and chopped pistachios, reserving a few for topping. Use a spatula to avoid overworking the dough, which will help maintain a soft texture in your Cannoli Cookies. The added mix-ins will provide delightful bursts of flavor and crunch in each cookie.
Step 7: Scoop and Bake
Using a cookie scoop or tablespoon, place the cookie dough onto parchment-lined baking sheets, spacing each mound about 2 inches apart to allow for spreading. Preheat your oven to 350°F and bake the cookies for 12-14 minutes, or until the edges are golden brown. The centers may appear soft, which is perfect.
Step 8: Cool and Decorate
After baking, allow the Cannoli Cookies to cool briefly on the baking sheet for about 5 minutes before transferring them to a wire rack. Once completely cool, drizzle with melted chocolate and dust with powdered sugar for a beautiful finish. This final touch not only enhances the flavor but also elevates the presentation of your baked treats.
Cannoli Cookies Variations & Substitutions
Explore delightful twists on these classic Cannoli Cookies that are sure to inspire your baking creativity!
- Nut-Free: Replace pistachios with sunflower seeds for a crunchy texture without allergens.
- Dairy-Free: Use coconut cream in place of ricotta and a dairy-free butter alternative for a delicious vegan treat.
- Extra Fruity: Add dried cranberries or chopped dried figs to the dough for a sweet, chewy surprise in each bite.
- Spiced Up: Infuse the batter with a pinch of cardamom or an extra dash of cinnamon for a warm, aromatic candy.
- Chocolate Lovers: Increase the amount of mini chocolate chips, or use dark chocolate chunks for a richer flavor experience.
- Citrus Burst: Incorporate a teaspoon of lemon zest along with the orange zest for a refreshing twist.
- Gluten-Free: Swap all-purpose flour with a gluten-free flour blend for a strain suitable for gluten-sensitive baking.
- Caramel Drizzle: Instead of a chocolate drizzle, top your cookies with a homemade caramel sauce for an indulgent finish.
As you play with these variations, let your taste buds guide you! For more scrumptious ideas, check out my recipe for Almond Cherry Cookies which could delight your palate as well!
Make Ahead Options
These Cannoli Cookies are perfect for busy home cooks looking to save time while still enjoying delicious homemade desserts! You can prepare the cookie dough up to 2 days in advance by following these steps: After mixing the dough, simply cover it tightly with plastic wrap and refrigerate to maintain its quality. To prevent the dough from losing moisture and flavors, ensure it’s well-sealed. When you’re ready to bake, drop the chilled dough onto parchment-lined baking sheets and bake as directed. The result? Just-as-delicious Cannoli Cookies that are ready in no time, making your meal planning a breeze!
How to Store and Freeze Cannoli Cookies
Room Temperature: Store your Cannoli Cookies in an airtight container at room temperature for up to 1 week. This keeps them soft and delicious for everyday snacking.
Fridge: For extended freshness, you can refrigerate the cookies in an airtight container for up to 2 weeks. However, be aware that this may slightly alter the texture.
Freezer: Freeze Cannoli Cookies in a single layer on a baking sheet until solid, then transfer to a freezer-safe bag or container for up to 3 months. Thaw at room temperature before enjoying!
Reheating: If desired, reheat cookies in the oven at 300°F for 5-7 minutes to restore their fresh-baked warmth without sacrificing texture.
What to Serve with Cannoli Cookies?
Indulging in Cannoli Cookies is a delightful experience, but pairing them with complementary dishes can elevate your dessert game even more.
- Rich Espresso: The boldness of espresso pairs perfectly with the sweetness of cannoli cookies, enhancing the flavors and creating a cozy atmosphere.
- Vanilla Ice Cream: A scoop of creamy vanilla ice cream adds a cold, velvety contrast to the soft, warm cookies. Perfect for a decadent treat!
- Fruit Salad: Fresh fruit adds a bright, refreshing note that balances the richness of the cookies, making for an uplifting combination.
- Chocolate Fondue: Dip cookie halves in warm chocolate fondue for an indulgent twist, turning each bite into a chocolate-covered delight!
- Sweet Wine: A glass of sweet dessert wine enhances the flavors while providing a rich, aromatic experience that’s simply irresistible.
- Cappuccino: Frothy cappuccino complements the flavors beautifully, making for a delightful pairing perfect for a brunch or afternoon treat.
With these pairings, your cannoli cookies will truly shine, offering a delightful array of flavors and textures that will keep everyone coming back for more!
Tips for the Best Cannoli Cookies
-
Drain Ricotta Well: Ensure ricotta is well-drained prior to baking; excess moisture can lead to flat cookies. A thick consistency is crucial for the best results.
-
Room Temperature Eggs: Use room temperature eggs for better emulsion in the batter. This helps create a smooth texture in your Cannoli Cookies.
-
Don’t Overmix: Mix only until combined to maintain a tender crumb. Overmixing can lead to dense cookies—remember, gentle is key!
-
Preheat Your Oven: Always preheat your oven to 350°F before baking. This ensures even baking and the perfect golden edges for your Cannoli Cookies.
-
Reserve Toppings: For an attractive finish, save some chocolate chips and pistachios to press into the tops before baking. This adds visual appeal and extra flavor.
-
Experiment with Spices: Feel free to customize the spices or add dried fruit for a unique twist—let your creativity shine with this versatile recipe!
Cannoli Cookies Recipe FAQs
How do I select the right ricotta cheese?
Absolutely! When choosing ricotta cheese, opt for a brand that is creamy and fresh. Look for well-drained ricotta to ensure your Cannoli Cookies maintain the perfect texture. If it looks watery, it may cause your cookies to spread too much during baking. Press it in a fine mesh strainer for at least 30 minutes to achieve the best results.
What’s the best way to store Cannoli Cookies?
I recommend storing your Cannoli Cookies in an airtight container at room temperature for up to 1 week. This keeps them soft and scrumptious for daily snacks. If you want them to last longer, you can refrigerate them for up to 2 weeks, but note that this may slightly alter the texture. To make them extra special, warm them up briefly in the oven before serving!
Can I freeze Cannoli Cookies?
Very! To freeze Cannoli Cookies, first, freeze them in a single layer on a baking sheet until solid—this usually takes about an hour. Once hardened, transfer them to a freezer-safe bag or container where they can last up to 3 months. When you’re ready to enjoy, simply thaw them at room temperature for a delightful treat.
What common issues should I watch for while baking?
If your Cannoli Cookies spread too much during baking, check that your ricotta was well-drained; excess moisture is often the culprit. Additionally, overmixing the dough can lead to dense cookies. Always mix until just combined and ensure your oven is preheated to 350°F! For a pillowy texture, don’t forget to respect the baking time as well, pulling them when the edges are golden but the centers look soft.
Are Cannoli Cookies safe for kids or people with allergies?
Yes! These Cannoli Cookies are generally safe for children, but if you’re serving them to someone with dietary restrictions, be cautious of their ingredients. They contain dairy (from ricotta and butter) and eggs, which can trigger allergies. If you’re looking for alternative options, consider using lactose-free ricotta or egg substitutes as an alternative for those with specific dietary needs.
How can I customize my Cannoli Cookies?
The more the merrier! For a fun twist, try substituting almonds for the pistachios or adding of dried fruits like raisins or cranberries. You can also experiment with different extracts, such as almond instead of vanilla, for a unique flavor profile. The key is to have fun and let your creativity shine through your cookies!

Cannoli Cookies: Decadent Italian Treats for Any Occasion
Ingredients
Equipment
Method
- Begin by draining the ricotta cheese to ensure your Cannoli Cookies have the ideal texture. Place the ricotta in a fine mesh strainer over a bowl and let it sit for 30 minutes.
- In a separate bowl, whisk together the flour, baking powder, salt, cinnamon, and nutmeg.
- In a large mixing bowl, beat the softened butter and granulated sugar together using a stand mixer or hand mixer on medium speed for 3-4 minutes.
- Add the eggs one at a time to your butter and sugar mixture, then mix in the drained ricotta, vanilla extract, and orange zest until just combined.
- Gradually add the dry ingredient mixture in three parts to the wet ingredients, mixing on low speed until no flour streaks remain.
- Gently fold in the mini chocolate chips and chopped pistachios, reserving a few for topping.
- Using a cookie scoop or tablespoon, place the cookie dough onto parchment-lined baking sheets, spacing each mound about 2 inches apart. Preheat your oven to 350°F and bake for 12-14 minutes.
- After baking, allow the Cannoli Cookies to cool briefly before transferring them to a wire rack. Once completely cool, drizzle with melted chocolate and dust with powdered sugar.
Leave a Reply