As summer sizzles and celebrations unfold, there’s nothing quite like a refreshing treat to keep the heat at bay. Enter the Vibrant Red, White and Blue Popsicles, a delightful nod to those sunny days filled with laughter and fun. These beauties are not only visually striking but also incredibly simple to whip up, making them a go-to choice for anyone eager to ditch fast food for something homemade. Crafted with creamy coconut milk and layered with fresh strawberries and blueberries, it’s the perfect blend of flavors that’s both vegan-friendly and gluten-free. Plus, you can easily customize them to suit your taste and make them a hit at any gathering. Ready to cool off and impress your friends with this delightful dessert? Let’s dive in!
Why Are These Popsicles So Special?
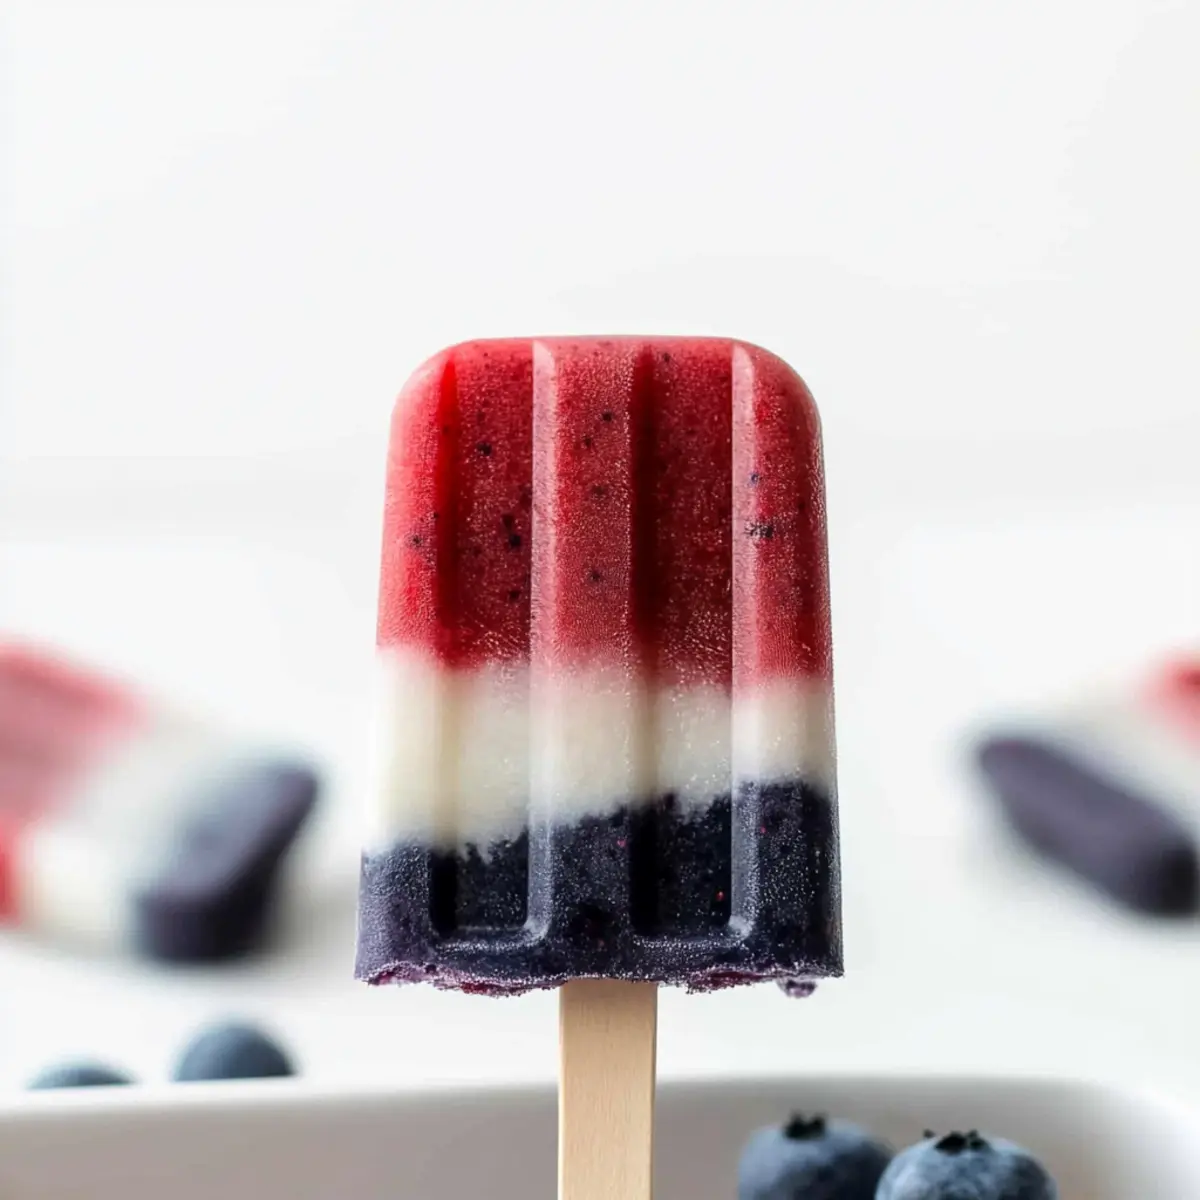
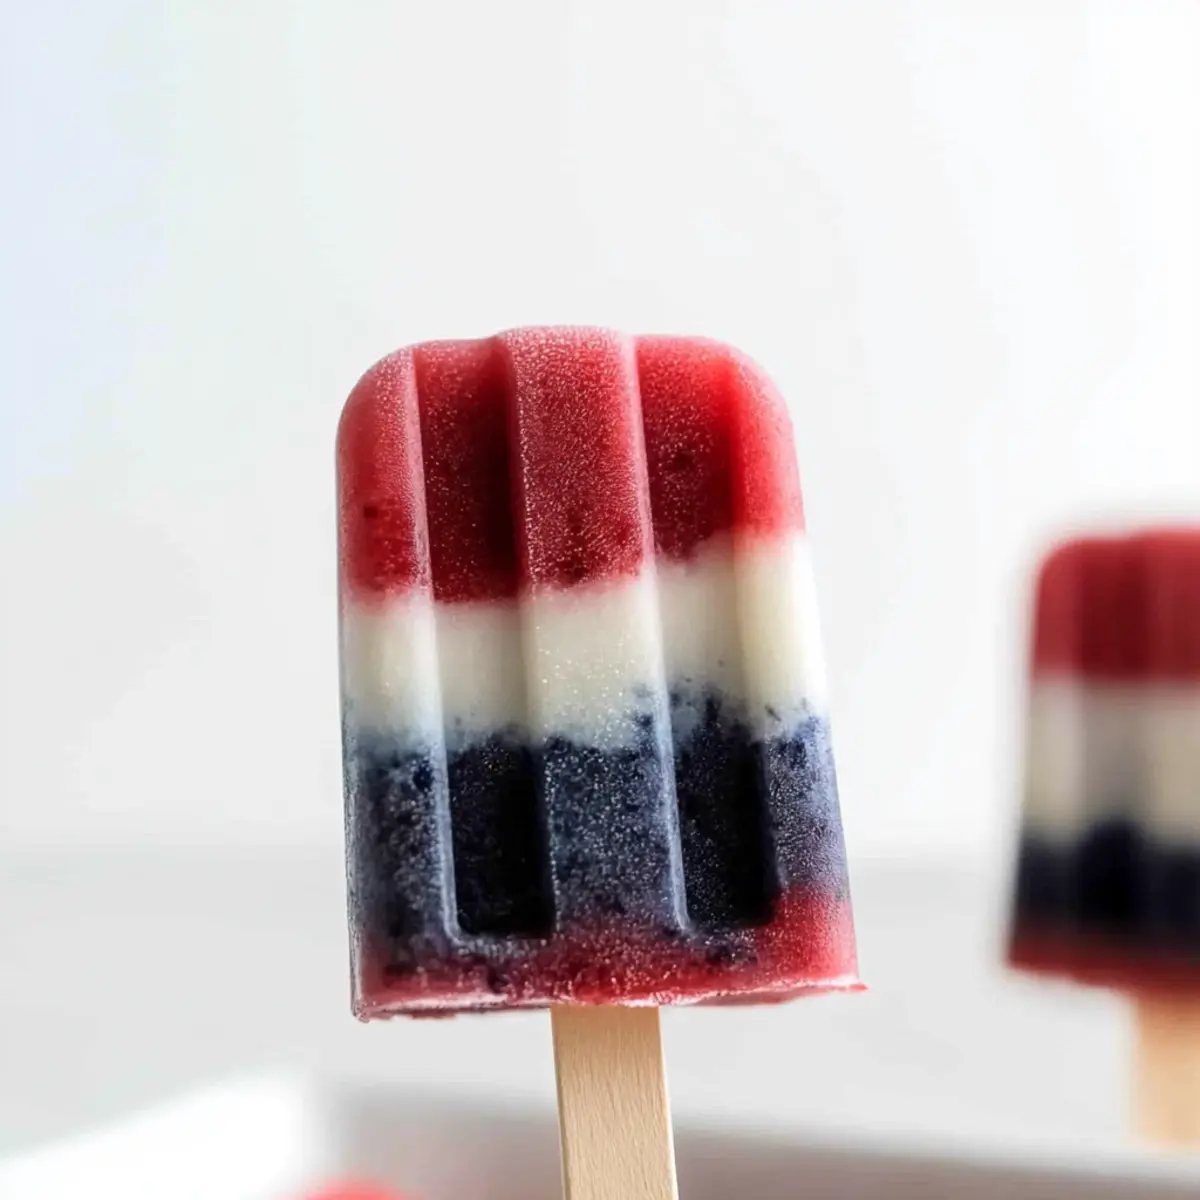
Vibrant Colors: Is there anything more festive than these stunning layers of red, white, and blue? They’re not just a treat for your taste buds but a feast for your eyes!
Customizable Flavors: Feel free to mix it up! Experimenting with fruits like raspberries or using almond milk gives you endless possibilities to delight your palate.
No-Bake Convenience: Forget about turning on the oven. These popsicles are perfect for those hot summer days when all you want is a cool and easy-to-make dessert.
Healthy Indulgence: Enjoy a low-calorie, vegan treat that’s packed with nutrients from fresh fruits. These popsicles are a far cry from heavy store-bought options!
Crowd-Pleasing Treat: Whether it’s a family barbecue or a party with friends, these popsicles will leave everyone raving—perfect for any celebration!
Red, White and Blue Popsicles Ingredients
For the Coconut Base
- Coconut Milk – A creamy base for the popsicle; full-fat coconut milk adds a richer flavor.
- Vanilla Extract – Enhances overall taste; opt for pure vanilla for the best results.
- Sweetener (Honey, Agave Nectar, Maple Syrup) – Sweetens the coconut layer; adjust based on your sweetness preference.
For the Red Layer
- Fresh Strawberries – Provides the red layer; hulled strawberries work best for a smooth blend.
- Red Food Coloring (optional) – Adds vibrant color; can be skipped for a natural appearance.
For the Blue Layer
- Fresh Blueberries – Creates the blue layer; fresh or frozen blueberries can be used interchangeably.
- Blue Food Coloring (optional) – Used for enhanced coloring; not necessary if you prefer a natural look.
With this easy list of ingredients, you’re all set to make those stunning Red, White and Blue Popsicles that are sure to impress your friends and family—all while keeping it healthy and homemade!
Step‑by‑Step Instructions for Red, White and Blue Popsicles
Step 1: Blend the Coconut Base
Start by pouring one can of coconut milk into a blender along with a splash of pure vanilla extract and your preferred sweetener, such as honey or agave nectar. Blend on high for about 30 seconds until the mixture is smooth and creamy. You’ll want a sweet, coconutty base that is well combined. Set aside one-third of this mixture in a bowl, covering it to keep it chilled for later use.
Step 2: Create the Red Layer
For the vibrant red layer in your Red, White and Blue Popsicles, add the hulled fresh strawberries to the remaining two-thirds of the coconut mixture in the blender. If desired, include a few drops of red food coloring for a bolder appearance. Blend until completely smooth, approximately 30 seconds. Once blended, transfer this mixture into a measuring cup for easy pouring, and chill it in the refrigerator while you prepare the next layers.
Step 3: Prepare the Blue Layer
After the red layer is chilling, rinse the blender and add the remaining coconut mixture to it. Toss in the fresh blueberries and blend on high until the mixture is silky, about 30 seconds. Here, you may also add blue food coloring if you want to intensify the blue appearance. Once well blended, pour this blueberry mixture into a separate measuring cup and set it aside for later use.
Step 4: Freeze the Red Layer
Now it’s time to assemble the popsicles! Pour the red strawberry mixture into your popsicle molds, filling each about one-third full. Place them in the freezer and freeze for 45 to 60 minutes, or until the layer is firm enough to support the next one. A good visual cue is when the mixture feels solid to the touch but not yet frozen solid.
Step 5: Add the Coconut Layer
Once the red layer is firm, carefully remove the molds from the freezer and gently pour in the coconut mixture to fill another third of the molds. To prevent the layers from mixing, pour slowly and avoid splashing. Return the molds to the freezer for another 45-60 minutes, ensuring that each layer freeze thoroughly before proceeding to avoid blending of colors.
Step 6: Freeze the Blue Layer
After the coconut layer is set, take the molds out and pour in the blueberry layer over the coconut. Insert popsicle sticks into the center of each pop, ensuring they’re straight. Finally, return the molds to the freezer for at least 4 hours or preferably overnight to allow the popsicles to freeze completely.
Step 7: Unmold the Popsicles
To release your beautiful Red, White and Blue Popsicles, run warm water over the outside of the molds for about 30 seconds. This will help loosen them. Gently pull on the sticks to remove the finished pops. Your stunning and refreshing popsicles are now ready to be enjoyed!
Make Ahead Options
These delightful Red, White and Blue Popsicles are perfect for busy home cooks looking to streamline their summer treat preparations! You can prepare the coconut base up to 24 hours in advance, storing it in the refrigerator to keep it fresh. Additionally, you can blend the red and blue layers and refrigerate them for up to 3 days before assembly, ensuring they are well-sealed in airtight containers to maintain their vibrant colors and flavors. When ready to serve, simply layer the popsicles as instructed and freeze completely for at least 4 hours. With a bit of prep ahead, you’ll enjoy refreshing homemade popsicles with minimal effort, perfect for any gathering!
Storage Tips for Red, White and Blue Popsicles
Freezer: Store any leftover popsicles in airtight containers or freezer bags for up to 2 weeks for the best flavor and texture.
Wrapping: If using molds, ensure that popsicles are completely frozen before transferring them to avoid breaking or losing shape.
Serving: To enjoy, run warm water over the outside of molds for 30 seconds before gently pulling the popsicles out for a delightful treat any time!
Refreezing: Avoid refreezing once they’ve been thawed to maintain the creamy consistency of your Red, White and Blue Popsicles.
What to Serve with Red, White and Blue Popsicles
As the sun shines bright and summer festivities abound, delight your guests with perfectly paired dishes and drinks that elevate these refreshing popsicles.
-
Grilled Pineapple Skewers: Sweet, caramelized pineapple adds a tropical flair that complements coconut flavors beautifully.
-
Crisp Green Salad: A light, refreshing salad with mixed greens and a citrus vinaigrette balances the sweetness of the popsicles, creating a vibrant plate.
-
Elderflower Lemonade: This sparkling drink offers floral notes that pair well with the fruity layers, making for a delightful summer sip.
-
Coconut Whipped Cream: A dollop of creamy, fluffy coconut whipped cream lends richness and contrasts with the icy pops, enhancing each bite.
-
Mango Salsa: The fruity, zesty flavors of mango salsa serve as a perfect accompaniment for dipping, enlivening the pops’ tropical vibe.
-
Chocolate-Dipped Pretzels: Crunchy pretzels drizzled in chocolate bring in a sweet-salty combination that can delight your taste buds after enjoying the popsicles.
-
Berry Smoothie Bowl: For a wholesome touch, serve a smoothie bowl loaded with fresh berries and granola alongside the popsicles—perfect for brunch gatherings.
-
Mint Iced Tea: A refreshing brewed tea infused with mint is a soothing drink option that beautifully complements the fruity and creamy elements of the popsicles.
Red, White and Blue Popsicles Variations
Customize your Red, White and Blue Popsicles to create something uniquely delightful. Let your imagination and taste buds run wild!
-
Berry Blast: Swap strawberries for equal parts raspberries and cherries for a tangy twist. The vibrant red will pop even more against the creamy layers, adding an extra hint of sweetness.
-
Nutty Base: Use almond or cashew milk instead of coconut milk for a nutty flavor profile. This offers a lovely twist that pairs wonderfully with the fruity layers.
-
Sweetener Swaps: Experiment by substituting honey with stevia or agave nectar. These swaps can help you dial in the perfect level of sweetness for any dietary preference.
-
Coconut Variation: For a tropical flair, incorporate a few tablespoons of shredded coconut into the base. This will give your pops a delightful texture and extra coconut flavor.
-
Tropical Fruits: Use mango or pineapple as a replacement for the red or blue layers. The sunny tropical notes will transport you to a beach vacation with every lick!
-
Chocolate Delight: For those who crave a little chocolate, drizzle some melted dark chocolate between the layers for an indulgent surprise. Just be sure to work quickly before it sets!
-
Zingy Citrus: Add a splash of fresh lime or orange juice to the coconut base for a zesty kick. This citrusy hint will brighten the overall flavor profile and make it incredibly refreshing.
-
Heat Things Up: If you like a bit of spice, try adding a pinch of cayenne pepper to the red layer for a surprising heat that complements the sweetness beautifully.
For more delightful twists, you might also want to check out these easy recipes: White Chocolate Orange for a creamy treat, or our refreshing Lemon Ginger Soup to cleanse your palate after enjoying these pops.
Tips for the Best Red, White and Blue Popsicles
-
Layer Freezing: Ensure each layer is completely frozen before adding the next; this keeps your popsicles visually stunning with distinct layers.
-
Measuring Cups: Use a large measuring cup for easy pouring into molds, and avoid messy spills that may lead to uneven layers in your Red, White and Blue Popsicles.
-
Chill Your Mixture: Let your fruit mixtures chill briefly before pouring; this will help maintain their vibrant colors and integrity as they freeze.
-
Kid-Friendly Fun: Involve children by allowing them to help layer the popsicles; this not only makes the process engaging but also creates cherished memories!
-
Food Coloring: If using food coloring, start with a small amount. You can always add more if needed, helping you create the most vibrantly colored popsicles without going overboard.
Red, White and Blue Popsicles Recipe FAQs
What type of coconut milk should I use for this recipe?
I recommend using full-fat coconut milk for a creamier texture and richer flavor in your popsicles. If you’re looking for a lighter version, light coconut milk can also work, though it will be less rich. It’s available in cans, and make sure to shake the can well before using to ensure a well-mixed product.
How should I store leftover popsicles?
To keep your Red, White and Blue Popsicles fresh, store them in airtight containers or freezer bags in the freezer. They’ll maintain their best flavor and texture for up to 2 weeks. Just make sure they’re completely frozen before transferring them to avoid breaking or losing their shape.
Can I freeze these popsicles for longer than 2 weeks?
While you can freeze them for longer, it’s best to consume them within 2 weeks for optimal taste and texture. If left in the freezer for an extended period, they may develop freezer burn, which can affect both flavor and consistency.
How do I unmold the popsicles without breaking them?
To easily unmold your popsicles, run warm water over the outside of the molds for about 30 seconds. This gentle heat will help loosen them without melting the popsicles too much. Then, gently pull on the sticks to remove your delicious creations.
Are there any allergy considerations I should be aware of?
Great question! This recipe is naturally vegan and gluten-free, making it suitable for a variety of dietary needs. However, if you or your guests have specific allergies, be cautious with the sweetener you choose, as honey isn’t vegan. Opt for agave nectar or maple syrup if you’re aiming for a fully plant-based sweetener. Always check labels for cross-contamination with allergens, especially if using pre-packaged ingredients.
Can I customize the fruit layers in these popsicles?
Absolutely! You can mix and match different fruits to create your own unique flavors. Swap strawberries for raspberries for a tangy twist or use mango and kiwi for a tropical vibe. Just remember to keep the base layers consistent for the best results!
Red, White and Blue Popsicles for a Refreshing Summer Treat
Ingredients
Equipment
Method
- Pour one can of coconut milk into a blender along with a splash of pure vanilla extract and your preferred sweetener. Blend on high for about 30 seconds until smooth and creamy.
- Set aside one-third of this mixture in a bowl, covering it to keep it chilled.
- Add hulled fresh strawberries to the remaining coconut mixture and blend until completely smooth, about 30 seconds.
- Transfer to a measuring cup and chill in the refrigerator.
- Rinse the blender, add the remaining coconut mixture and fresh blueberries, and blend until silky, about 30 seconds.
- Pour into a separate measuring cup and set aside.
- Pour the red strawberry mixture into popsicle molds, filling each about one-third full, and freeze for 45 to 60 minutes.
- Add the coconut mixture to fill another third of the molds and freeze for another 45-60 minutes.
- Pour in the blueberry layer, insert popsicle sticks, and freeze for at least 4 hours or overnight.
- Run warm water over the outside of molds for about 30 seconds to loosen them.
- Gently pull on the sticks to remove the popsicles.
Leave a Reply