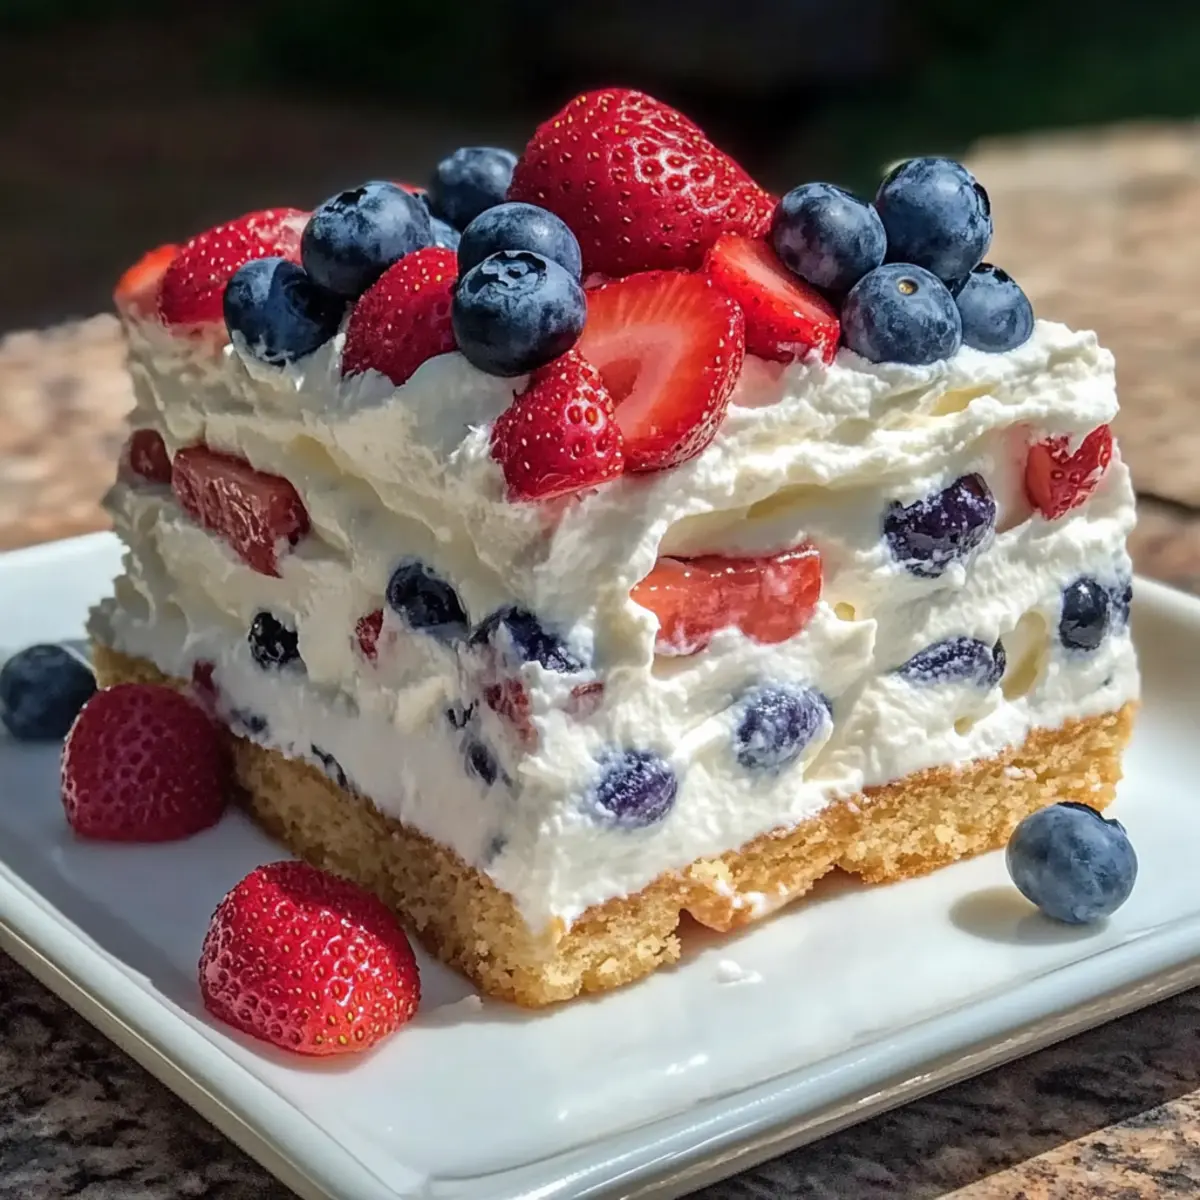
On a sweltering summer day, there’s nothing quite like the bliss of a dessert that requires zero baking—and let’s be honest, we could all use a break from those hot oven battles. Enter the No-Bake Red White and Blue Icebox Cake, a vibrant and patriotic treat that’s as easy as it gets. This cake layers fluffy whipped cream and fresh strawberries with crunchy vanilla wafer cookies, creating the perfect balance of creamy and crisp. Not only is it a spectacular centerpiece for your summer gatherings, but it also keeps your kitchen cool and stress-free. With options for gluten-free and dairy-free variations, this easy dessert is sure to please everyone at the table. Are you ready to whip up a slice of summer happiness?
Why choose this icebox cake recipe?
No-Bake Convenience: Enjoy dessert without heating up the kitchen, perfect for hot summer days.
Vibrant and Festive: The striking colors of fresh strawberries and blueberries create an eye-catching presentation for any gathering.
Customizable Delight: With suggestions for gluten-free and dairy-free options, it caters to a variety of dietary needs—try it with Gluten-Free Vanilla Wafers!
Crowd-Pleasing Flavor: Creamy whipped cream combined with the crunch of cookies and fresh fruit will leave your guests coming back for seconds.
Easier Than It Looks: Impress family and friends with minimal effort—this cake is put together with just a few easy steps!
You’ll find this No-Bake Red White and Blue Icebox Cake the ultimate summertime indulgence that’s both fun and simple to make.
No-Bake Red White and Blue Icebox Cake Ingredients
-
For the Whipped Cream
-
Heavy Cream – Essential for a rich, creamy texture; avoid overwhipping for best results.
-
Granulated Sugar – Sweetens the cream; adjust to taste as needed for your palate.
-
For the Layers
-
Fresh Strawberries – Provides a burst of sweetness and vibrant red color; always choose fresh, firm berries.
-
Fresh Blueberries – Adds tang and beautiful color; fresh berries will retain their shape better than frozen.
-
Vanilla Wafer Cookies – Acts as the structure of the cake; for gluten-free versions, swap with gluten-free cookies.
-
Optional Garnish
-
Extra Strawberries and Blueberries – Perfect for topping; makes the cake visually appealing and refreshing.
This No-Bake Red White and Blue Icebox Cake is not only delightful in flavor but also provides a refreshing finish to any summer gathering!
Step‑by‑Step Instructions for No-Bake Red White and Blue Icebox Cake
Step 1: Prep Whipped Cream
Begin by pouring 2 cups of heavy cream into a large mixing bowl. Using an electric mixer, whip the cream on medium speed until soft peaks form, which should take about 3-4 minutes. Gently fold in 3-4 tablespoons of granulated sugar to sweeten the cream, taking care not to overwhip to maintain a light and airy texture.
Step 2: Layer Ingredients
In a rectangular dish, start building your No-Bake Red White and Blue Icebox Cake by placing a single layer of vanilla wafer cookies at the bottom. Next, spread a generous layer of whipped cream over the cookies, followed by a vibrant layer of sliced fresh strawberries and blueberries. Repeat this process until you’ve used all your cookies, cream, and fruits, ensuring to finish with a final layer of whipped cream on top.
Step 3: Chill
After layering, cover the dish tightly with plastic wrap to keep the flavors sealed in. Place the icebox cake in the refrigerator and allow it to chill for at least 4 hours; overnight is even better! This cooling period is crucial for the cookies to soften and the flavors to meld beautifully, creating a creamy and refreshing dessert.
Step 4: Serve
Once chilled, take the No-Bake Red White and Blue Icebox Cake out of the refrigerator. Let it sit at room temperature for about 5 minutes to soften slightly, making it easier to slice. Use a serrated knife to cut through the layers smoothly, and serve immediately, garnishing with additional strawberries and blueberries if desired for an extra festive touch.

No-Bake Red White and Blue Icebox Cake Variations
Feel free to make this festive dessert your own with these delightful twists that will spark joy and flavor!
-
Mixed Berry Version: Use a combination of raspberries and blackberries together with blueberries for a vibrant blend of flavors. The colorful burst will tantalize your taste buds and make every slice a joy to behold.
-
Peach and Blueberry: Substitute strawberries for fresh peach slices, perfectly pairing the sweet, juicy peaches with tart blueberries. This summery twist will transport you straight to a sun-kissed picnic vibe.
-
Lightened-Up Version: Replace homemade whipped cream with whipped topping for a lighter dessert and reduce the sugar. You’ll enjoy a delicious dessert without the heaviness, making it perfect for warm days.
-
Gluten-Free: Use gluten-free vanilla wafers to create a wholesome version for those with dietary restrictions. Everyone can indulge in this tasty treat, maintaining that delightful crunch.
-
Dairy-Free: Opt for coconut whipped cream for a luscious dairy-free adaptation. The subtle coconut flavor melds wonderfully with the fresh fruits for a tropical refreshment.
-
Chocolate Drizzle: Add a chocolate drizzle on top for a decadent finish. A little melted dark chocolate drizzled over the whipped cream will elevate the cake to a whole new level of indulgence.
-
Nutty Crunch: Sprinkle chopped nuts like almonds or pecans between layers for added texture and flavor. This nutty twist adds a delightful crunch that perfectly complements the soft cream and juicy fruits.
-
Zesty Citrus: Add lemon or lime zest to the whipped cream for a zippy flavor boost. The citrus notes will brighten up the dessert and add a refreshing contrast to the sweetness of the fruits.
Whichever variation you choose, this No-Bake Red White and Blue Icebox Cake offers endless possibilities to indulge your summer cravings! Don’t forget, if you’re looking for more inspiring desserts, check out the delicious Italian Grandmas Cake or these delightful White Chocolate Orange Truffles.
Expert Tips for No-Bake Red White and Blue Icebox Cake
-
Chill Well: Give your cake at least 4 hours in the fridge; overnight is best for perfect flavor melding and texture.
-
Even Layers: Aim for thin, even layers when layering cookies, whipped cream, and fruits to ensure a beautiful slice and easy serving.
-
Fresh Fruits: Always choose firm, fresh strawberries and blueberries to avoid excess moisture which can lead to a soggy cake.
-
Serrated Knife: Use a serrated knife for slicing, and let the cake sit at room temperature briefly for neat, clean cuts.
-
Adjust Sweetness: Customize the sugar amount in the whipped cream to suit your taste; the key is balancing sweetness without overpowering the fresh fruit flavors.
What to Serve with No-Bake Red White and Blue Icebox Cake
Elevate your summer celebration with delightful side dishes and drinks that complement this refreshing, vibrant dessert.
-
Grilled Chicken Skewers: Juicy, marinated chicken skewers keep things savory and add a smoky flavor that balances the sweetness of dessert.
-
Corn on the Cob: Freshly grilled corn brushed with butter provides a delightful crunch and brings a taste of summer to your meal.
-
Mixed Green Salad: A light salad dressed with vinaigrette introduces a refreshing contrast, combining crisp greens and seasonal veggies for a healthy touch.
-
Watermelon Feta Salad: The natural sweetness of watermelon paired with tangy feta creates a festive, refreshing side—perfect for warm gatherings.
-
Sparkling Lemonade: Serve cold sparkling lemonade for a fizzy, citrusy drink that enhances the summer vibes and refreshes your palate.
-
Berry Sorbet: A light berry sorbet mirrors your icebox cake’s flavors while cleansing the palate, making for a perfect dessert pairing.
-
Chocolate-Dipped Strawberries: Indulge further with these simple-to-make treats that add elegance and a sweet touch to the dessert table.
These combinations ensure a balanced and joyful dining experience, leaving everyone asking for more!
Make Ahead Options
These No-Bake Red White and Blue Icebox Cakes are fantastic for busy home cooks looking to save time! You can prepare the layers—whipped cream, cookies, and fruits—up to 24 hours in advance, storing them separately in the refrigerator to keep everything fresh. When you’re ready to assemble, simply layer the whipped cream between the cookies and fruits, just as you normally would. To maintain quality, avoid over-whipping the cream and keep the ingredients sealed until assembly to prevent moisture accumulation. After assembling, place the cake in the fridge for at least 4 hours, or overnight for the best results, ensuring the flavors meld beautifully before serving. Enjoy a stress-free summer dessert!
How to Store and Freeze No-Bake Red White and Blue Icebox Cake
Fridge: Keep your No-Bake Red White and Blue Icebox Cake covered in the refrigerator for up to 3 days. Flavors enhance after the first day, making leftovers delightful!
Freezer: For longer storage, wrap the cake tightly with plastic wrap and foil, and freeze for up to 1 month. To serve, thaw the cake in the refrigerator overnight before enjoying.
Airtight Packaging: Always ensure the cake is well-covered to prevent it from absorbing any odors from the fridge.
Reheating: This cake is best served chilled. Simply slice and enjoy straight from the fridge. No need to heat!

No-Bake Red White and Blue Icebox Cake Recipe FAQs
What kind of strawberries should I use?
Absolutely! Choose fresh, firm strawberries that are bright red and free of dark spots or soft patches. Overripe berries can lead to a soggier cake, as they release excess moisture. For best results, buy them just before you plan to make your cake.
How should I store leftovers?
Very good question! After preparing, cover the No-Bake Red White and Blue Icebox Cake with plastic wrap or foil and store it in the refrigerator for up to 3 days. It’s interesting to note that the flavors actually improve as it rests—I find that it tastes even better the next day!
Can I freeze this cake?
Yes, indeed! If you want to freeze your icebox cake, wrap it tightly in plastic wrap and then in foil to protect it from freezer burn. It can last up to 1 month in the freezer. When you’re ready to enjoy it, simply thaw it in the refrigerator overnight before serving. This gentle thaw ensures the right texture!
What if my whipped cream is too runny?
Don’t worry; this happens! If your whipped cream isn’t holding its shape, you may have overwhipped it or not whipped it enough. If it’s too runny, try adding a tablespoon of cornstarch or instant pudding mix—it can help stabilize the cream. If it’s overwhipped, gently fold in a little more unwhipped cream to soften it.
Is this cake suitable for people with dietary restrictions?
Yes, the No-Bake Red White and Blue Icebox Cake is quite versatile! For a gluten-free version, simply use gluten-free vanilla wafers. If dairy is an issue, consider substituting the whipped cream with coconut whipped cream, which is equally delicious and provides that lovely creaminess without the dairy.
How do I ensure clean, neat slices when serving?
To get beautiful, even slices, let the cake sit at room temperature for about 5 minutes before cutting. Then, use a serrated knife—this helps maintain the lovely layered effect. Clean the knife blade with a damp towel after each cut, ensuring each slice looks as stunning as the last!

No-Bake Red White and Blue Icebox Cake for Festive Cool Treats
Ingredients
Equipment
Method
- Begin by pouring 2 cups of heavy cream into a large mixing bowl. Using an electric mixer, whip the cream on medium speed until soft peaks form, which should take about 3-4 minutes. Gently fold in 3-4 tablespoons of granulated sugar to sweeten the cream.
- In a rectangular dish, start building your No-Bake Red White and Blue Icebox Cake by placing a single layer of vanilla wafer cookies at the bottom. Spread a layer of whipped cream over the cookies, followed by a vibrant layer of sliced fresh strawberries and blueberries. Repeat until all ingredients are used, finishing with whipped cream on top.
- Cover the dish tightly with plastic wrap and place the icebox cake in the refrigerator to chill for at least 4 hours, preferably overnight.
- Once chilled, take the icebox cake out and let it sit at room temperature for about 5 minutes before slicing with a serrated knife. Serve immediately, garnishing with additional strawberries and blueberries if desired.
Leave a Reply