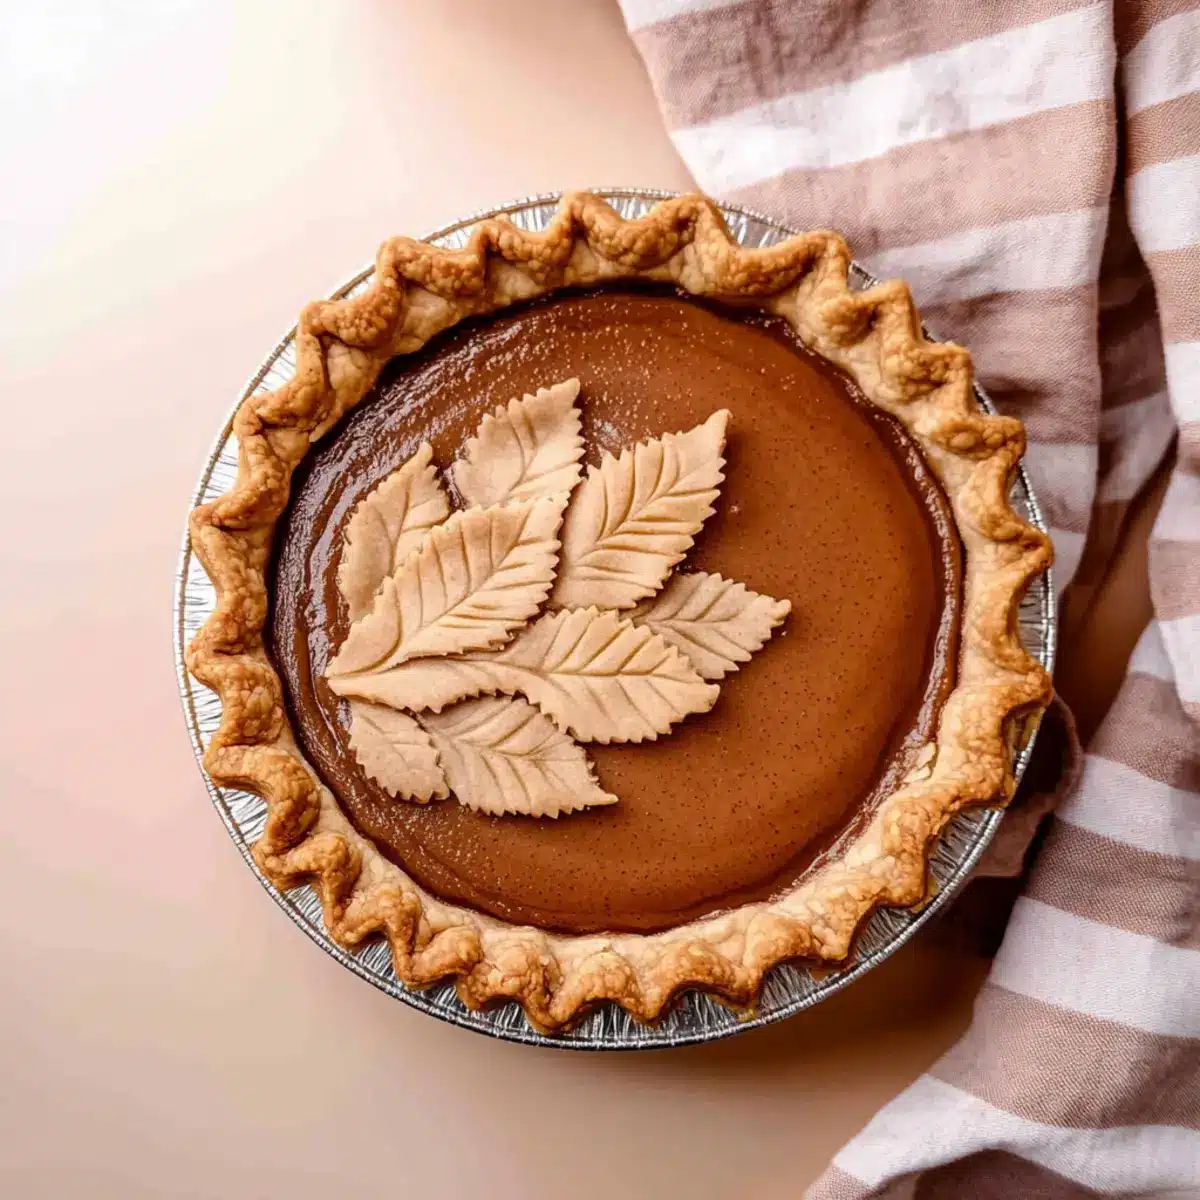
As I pulled the warm Apple Butter Pie from the oven, the delightful aroma of spiced apples flooded my kitchen, immediately transporting me to a cozy autumn afternoon. This silky dessert blends the beloved tastes of fall with an effortlessly easy-to-make approach that even novice bakers can tackle. Imagine presenting a classic custard pie that rivals pumpkin, yet offers its own bold character. With its rich, velvety filling and the wholesome crunch of a nutty spelt crust, this pie isn’t just a treat—it’s a heartfelt gathering staple for family dinners and cozy soirées. Plus, the best part? You can indulge in it guilt-free, knowing it’s vegetarian-friendly and freezer-friendly for those “just in case” moments. Are you ready to dive into a delicious slice of nostalgia? Let’s get baking!
Why is Apple Butter Pie a Must-Try?
Unforgettable Flavors: This pie is a delightful twist on traditional desserts, featuring rich apple butter that pops with flavor while keeping a smooth, custard-like texture.
Simplicity to Savor: It’s so easy to make, even novice bakers can shine in the kitchen. Just blend, pour, and bake!
Versatile Enjoyment: With options for different crusts, like a Pâte Sablée or even a graham cracker version, you can customize it to fit any taste.
Perfect for Gatherings: Whether it’s a holiday dinner or a cozy gathering, this pie steals the spotlight—and hearts!
Make-Ahead Convenience: Feel free to prepare this scrumptious dessert 1-2 days in advance, allowing flavors to develop while saving you time closer to serving.
Texture Heaven: Experience the perfect balance of a nutty crust and a creamy filling, making every bite utterly satisfying. Don’t forget to top it off with a dollop of maple whipped cream for that extra touch of indulgence!
Apple Butter Pie Ingredients
For the Filling
• Apple Butter – Core flavor base; substitute homemade for a fresher taste.
• Eggs – Provide structure and creaminess; use large eggs for best results.
• Cream – Adds richness to the filling; substitute half-and-half for a lighter version.
• Spices (Cinnamon, Nutmeg) – Enhance flavor depth; adjust spice levels based on personal preference.
• Sugar – Sweetens the pie; can use brown sugar for a deeper flavor.
For the Crust
• Spelt Flour – Base for a hearty pie crust; can substitute with regular all-purpose flour if desired.
• Salt – Balances sweetness; use Diamond Crystal coarse kosher or reduce if using fine salt.
With these carefully chosen ingredients, your Apple Butter Pie is bound to be a showstopper of a dessert!
Step‑by‑Step Instructions for Apple Butter Pie
Step 1: Prepare the Crust
Begin by preheating your oven to 375°F (190°C). In a mixing bowl, combine spelt flour and salt, then gradually incorporate chilled butter until the mixture resembles coarse crumbs. Press the dough into a greased pie dish, ensuring even thickness. Blind bake the crust for 15 minutes until lightly golden, then remove it from the oven and allow it to cool slightly while you prepare the filling.
Step 2: Mix the Filling
In a large bowl, whisk together the apple butter, eggs, cream, sugar, cinnamon, and nutmeg until thoroughly combined and smooth. This step is crucial for achieving the silky texture of your Apple Butter Pie. Make sure there are no lumps left behind. Once your filling is ready, set it aside as you prepare the crust for the delicious pouring action.
Step 3: Combine and Pour
Carefully pour the apple butter filling into the pre-baked spelt crust. Make sure to pour it in a steady stream, allowing the filling to settle naturally without creating bubbles. To ensure an even surface, gently tap the pie dish on your countertop. This will help remove any air pockets that may have formed during pouring.
Step 4: Bake the Pie
Reduce the oven temperature to 325°F (163°C) and place the filled pie back into the oven. Bake for 40-45 minutes, or until the edges are set but the center retains a gentle wobble, resembling a soufflé. Keep an eye on the pie’s surface for a slight golden hue and enjoy the warm autumn scents wafting through your kitchen.
Step 5: Cool and Chill
After baking, take the Apple Butter Pie out of the oven and allow it to cool at room temperature for about 30 minutes. Once it’s cooled slightly, transfer it to the refrigerator to chill for at least 6 hours. This ensures the pie sets beautifully, allowing the flavors to meld together perfectly for your delighted guests’ enjoyment.
Make Ahead Options
These Apple Butter Pie preparations are perfect for busy home cooks looking to save time without sacrificing flavor! You can prepare the spelt pie crust and refrigerate it up to 3 days in advance, keeping it covered to maintain its freshness. The filling can also be whisked together and stored in an airtight container in the refrigerator for up to 24 hours. When you’re ready to bake, pour the prepared filling into the chilled crust and continue with the baking instructions. This way, you’ll have a beautifully creamy Apple Butter Pie with minimal effort, making your gatherings stress-free while still impressing every guest!
Expert Tips for the Best Apple Butter Pie
Bake Carefully: Avoid over-baking; look for a softly wobbly center when done, which ensures a creamy texture.
Cool First: Allow the pie to cool completely before refrigerating to help it set properly and improve the flavor.
Smooth Filling: Whisk the filling until completely smooth; lumps can disrupt the creamy consistency of your Apple Butter Pie.
Air Bubbles: Pour the filling gently to prevent air bubbles; a steady pour allows for a more even pie surface.
Crust Variations: Experiment with different crusts like graham cracker or Pâte Sablée to enhance your pie’s flavor profile.
Apple Butter Pie Variations & Substitutions
Get ready to put your personal spin on this delightful Apple Butter Pie that invites creativity in every bite!
- Gluten-Free: Use a gluten-free all-purpose flour blend for the crust to make it accessible to everyone.
- Creamy Vegan Option: Swap heavy cream with coconut milk and use flax eggs for a plant-based delight.
- Sugar-Free Twist: Replace sugar with monk fruit sweetener or stevia for a guilt-free dessert without sacrificing flavor.
- Spiced Up Version: Add a pinch of ground ginger or cloves for an extra layer of warm, fall spices that sing in your pie.
- Garnishing Ideas: Top with a sprinkle of candied pecans or walnuts for a delightful crunch alongside the creamy filling.
Experimenting with your pie can make for lovely surprises. Perhaps serve it with a drizzle of your homemade Maple Whipped Cream that pairs wonderfully with the luscious texture of this pie!
- Flavor Infusion: Consider mixing in a splash of bourbon or brandy into the filling for an adult twist that elevates the taste.
- Nutty Crust: Combine half spelt flour with finely ground nuts, like almonds or pecans, to create a savory, nutty crust with added flavor.
No matter how you choose to customize your Apple Butter Pie, each variation brings a unique touch to this classic dessert, making it a cherished addition to your recipe repertoire!
What to Serve with Silky Apple Butter Pie?
As you prepare to delight your guests with this luscious dessert, consider these complementary dishes to create a memorable meal.
-
Creamy Mashed Potatoes: The buttery, smooth texture balances the velvety pie, making for a comforting side dish that everyone loves.
-
Savory Roasted Brussels Sprouts: Roasting brings out a natural sweetness that pairs beautifully with the apple flavors in the pie, adding a fresh and hearty contrast.
-
Maple-Glazed Carrots: A touch of sweetness ties these vibrant, tender carrots to your pie while providing a colorful, appealing addition to your table.
-
Spiced Apple Cider: This warm beverage mirrors the pie’s apple flavor and adds a festive touch, making each bite even more satisfying.
-
Whipped Maple Cream: A dollop on top of each slice of pie enhances the flavor and adds a silky richness that perfectly complements this treat.
-
Graham Cracker Crust Cheesecake: Offering a contrast in texture and another layer of flavor, this dessert can appeal to those looking for variety after enjoying the pie.
-
Herb-Infused Buttered Rolls: The warm, buttery rolls invite everyone to gather around the table—perfect for soaking up any extra pie filling!
-
Candied Pecans: Crunchy and sweet, these nuts provide a delightful textural contrast and a nutty flavor that enhances the nutty notes of the spelt crust.
How to Store and Freeze Apple Butter Pie
Fridge: Store your Apple Butter Pie in the refrigerator for up to 3 days. Wrap it in plastic wrap or cover it with a pie dish lid to prevent it from absorbing odors.
Freezer: For longer storage, freeze the pie for up to 2 months. Make sure it’s completely cooled, then wrap it tightly in plastic wrap and aluminum foil.
Thawing: When ready to enjoy, thaw the frozen pie in the fridge overnight. Reheat in a 325°F (163°C) oven for about 15-20 minutes for a warm, comforting slice.
Make-Ahead Tip: Prepare this delightful Apple Butter Pie 1-2 days in advance. Chilling not only saves time but also allows the flavors to deepen as it sets.
Apple Butter Pie Recipe FAQs
What type of apple butter should I use?
Absolutely! For the best flavor, I recommend using homemade apple butter if you can. It allows for fresher, richer tastes compared to store-bought options. If opting for store-bought, choose a brand with minimal ingredients for a more authentic flavor.
How should I store my Apple Butter Pie?
Store your Apple Butter Pie in the refrigerator for up to 3 days. I suggest wrapping it in plastic wrap or covering it with a pie lid to prevent it from absorbing any unwanted odors from the fridge.
Can I freeze my Apple Butter Pie?
Very! To freeze your pie, ensure it’s completely cooled after baking. Wrap it tightly in plastic wrap, then in aluminum foil to prevent freezer burn. This way, it can be safely stored for up to 2 months.
When you’re ready to enjoy, simply thaw it in the fridge overnight and reheat in a 325°F (163°C) oven for about 15-20 minutes. It will warm up beautifully!
What should I do if my pie cracks while baking?
No worries! If your pie cracks, it’s usually due to overbaking. To avoid this, keep an eye on it towards the end of the baking time. It should be set around the edges but slightly wobbly in the center for that perfect creamy texture. If cracks do appear, a dollop of whipped cream can creatively cover them up!
Is this pie safe for all dietary needs?
This Apple Butter Pie is vegetarian-friendly! However, if you have allergy concerns, always double-check your ingredients—like ensuring there are no allergens in the cream or pie crust when substituting. For a nut-free option, simply use all-purpose flour instead of spelt flour as your base for the crust.
Can I make this pie ahead of time?
Absolutely! I often prepare this pie 1-2 days in advance. It allows the flavors to deepen while saving you precious time closer to your gathering. Just be sure to let it cool completely before refrigerating to help it set properly!
Creamy Apple Butter Pie That Will Steal Your Heart
Ingredients
Equipment
Method
- Preheat your oven to 375°F (190°C). In a mixing bowl, combine spelt flour and salt, then gradually incorporate chilled butter until the mixture resembles coarse crumbs. Press the dough into a greased pie dish, ensuring even thickness. Blind bake the crust for 15 minutes until lightly golden, then remove it from the oven and allow it to cool slightly.
- In a large bowl, whisk together the apple butter, eggs, cream, sugar, cinnamon, and nutmeg until thoroughly combined and smooth. Set it aside as you prepare the crust.
- Carefully pour the apple butter filling into the pre-baked spelt crust, tapping the dish to remove any air pockets. Reduce the oven temperature to 325°F (163°C) and bake for 40-45 minutes.
- After baking, allow the Apple Butter Pie to cool at room temperature for about 30 minutes before refrigerating it for at least 6 hours.
Leave a Reply