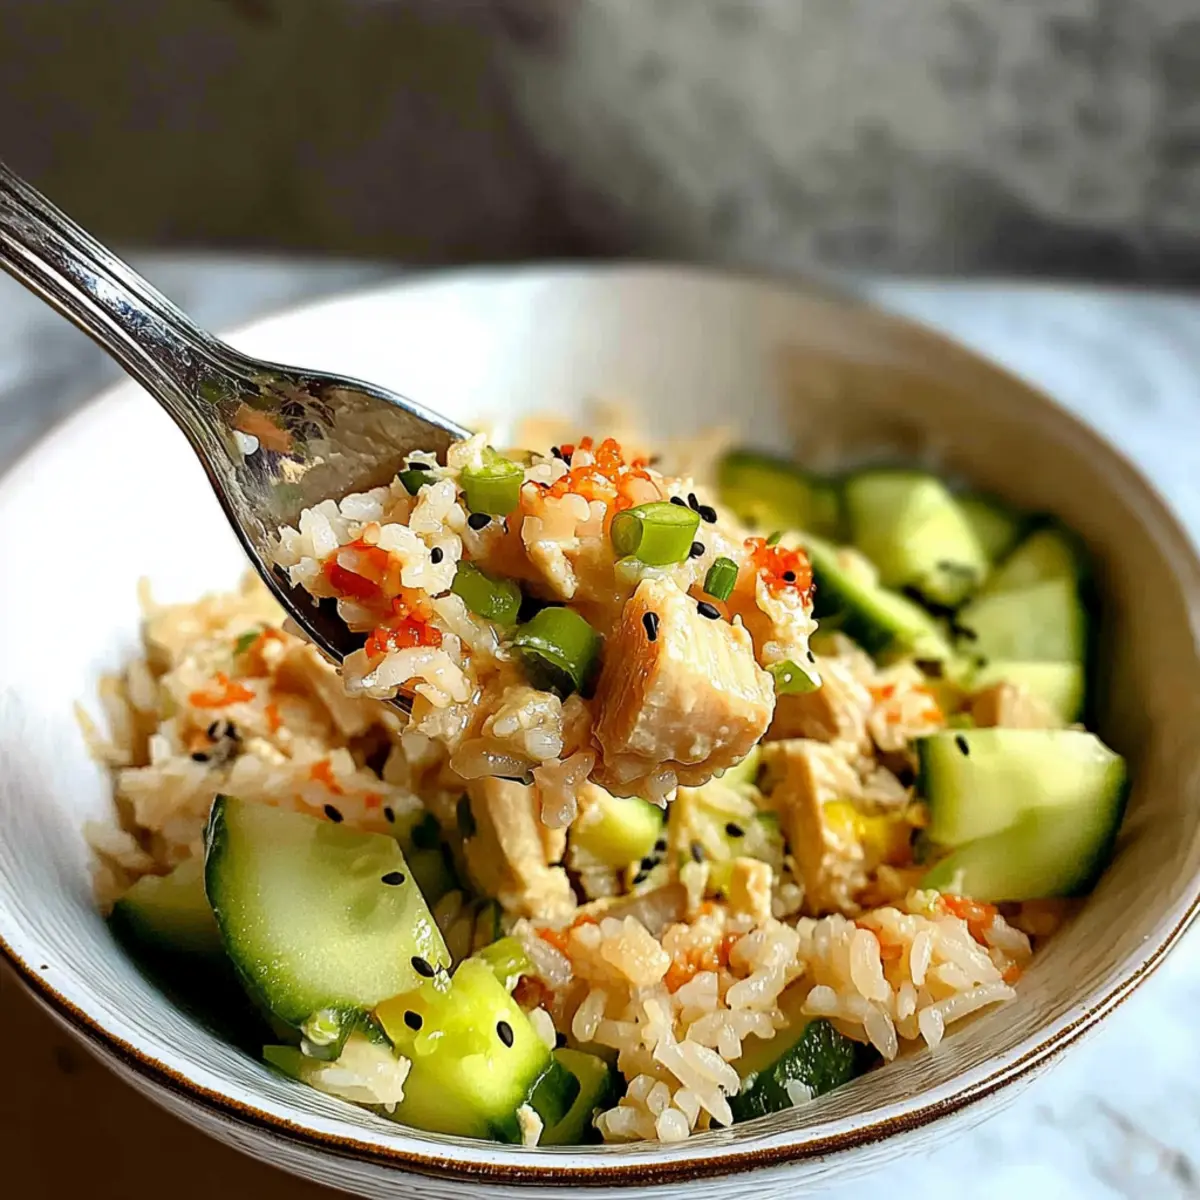
Rushing through a busy week, I often find myself longing for something quick yet satisfying. That’s when this Spicy Canned Tuna Rice Bowl comes to the rescue! With just 15 minutes to spare, I can whip up a nourishing meal that’s not only protein-rich but also incredibly customizable. The combination of tender sushi rice, creamy spicy tuna, and fresh veggies brings together a delightful mix of flavors and textures. Plus, it’s perfect for using whatever vegetables I have on hand, making it a versatile choice for any occasion. Whether you’re cooking for yourself or a group, this easy weeknight dinner will become a fast favorite. Curious about how to bring this tasty bowl to life? Let’s dive into the recipe!
Why choose a Canned Tuna Rice Bowl?
Versatility at Its Finest: Customize your bowl with whatever veggies you have—be it crunchy cucumbers or creamy avocado.
Quick and Easy: Ready in just 15 minutes, it’s the ideal meal for those hectic weeknights.
Protein-Packed: With canned tuna as the star, you’ll enjoy a rich source of protein without the fuss.
Satisfying Texture: The combination of sticky rice, creamy tuna, and fresh toppings creates a delightful mouthfeel that will keep you coming back for more.
Perfect for Meal Prep: Make the spicy tuna mix ahead of time, allowing for an effortless dinner that you can quickly assemble after a long day.
Transform your evenings with this delightful Canned Tuna Rice Bowl—quick, nutritious, and utterly satisfying!
Canned Tuna Rice Bowl Ingredients
For the Rice
- Cooked Sushi Rice – Provides a sticky, hearty base for the bowl; use short-grain rice for the best texture.
For the Spicy Tuna Mixture
- Canned Tuna – Acts as the main protein source; ensure to drain and squeeze out excess moisture for optimal texture.
- Kewpie Mayonnaise – Adds creaminess and flavor; substitute with regular mayonnaise if unavailable.
- Sriracha – Brings a spicy kick to the tuna; replace with additional mayo for a milder flavor.
- Fresh Lemon Juice – Enhances flavor balance; can be substituted with lime juice.
- Toasted Sesame Oil – Adds a nutty aroma; omit if unavailable or replace with regular sesame oil.
For the Toppings
- Sliced Avocado – Provides creaminess and healthy fats; can be swapped for any creamy vegetable like butternut squash.
- Diced Cucumbers – Offers a refreshing crunch; any crisp vegetable can be used as a substitute.
- Sliced Green Onions – Adds a mild onion flavor and visual appeal; other herbs like cilantro could be used for a different taste.
- Roasted Sesame Seeds – For garnishing, providing flavor and texture; omit if not available.
Elevate your dinner experience with this Canned Tuna Rice Bowl—easy to make and incredibly satisfying!
Step‑by‑Step Instructions for Canned Tuna Rice Bowl
Step 1: Prepare the Tuna
Begin by fully draining the canned tuna in a colander. Once drained, squeeze the tuna gently with your hands or a fork to remove any excess moisture, aiming for a drier consistency. This step is crucial to avoid soggy rice in your Canned Tuna Rice Bowl. Set the prepared tuna aside in a mixing bowl.
Step 2: Mix the Spicy Tuna
In the bowl with the drained tuna, add Kewpie mayonnaise, sriracha, fresh lemon juice, and toasted sesame oil. Mix everything together thoroughly using a fork until the tuna is evenly coated and creamy. Aim for a consistency that holds together well—about 2-3 minutes of mixing should do the trick. This flavorful mixture is what makes your Canned Tuna Rice Bowl so delightful.
Step 3: Combine Rice and Tuna
In a large bowl, place your cooked sushi rice, ensuring it is still warm to maintain a sticky texture. Gently fold in the spicy tuna mixture along with the diced cucumbers and sliced avocado. Mix just until everything is evenly distributed, which should take about 2-3 minutes. Be careful not to mash the avocado—this step is vital for creating a harmonious Canned Tuna Rice Bowl.
Step 4: Drizzle with Sauces
Once combined, take a moment to taste your rice bowl mixture. If desired, drizzle extra Kewpie mayonnaise and sriracha over the top for additional flavor. This step adds a creamy and spicy finish to your Canned Tuna Rice Bowl. Mix gently again if adding the sauces, ensuring that they are well integrated with the rest of the ingredients.
Step 5: Garnish and Serve
Transfer your completed Canned Tuna Rice Bowl into serving bowls. Top each bowl with sliced green onions and a sprinkle of roasted sesame seeds for added texture and visual appeal. To serve, pair with any extra sriracha on the side for those who enjoy a little extra heat. Enjoy your delicious, homemade creation!
Storage Tips for Canned Tuna Rice Bowl
-
Fridge: Store your assembled Canned Tuna Rice Bowl in an airtight container for up to 24 hours. The flavors will meld beautifully, but freshness is key.
-
Freezer: For best results, avoid freezing the assembled rice bowl. Instead, freeze the spicy tuna mixture in a separate container for up to 1 month.
-
Reheating: If refrigerated, gently reheat the rice in the microwave, adding a splash of water to maintain moisture. Combine with the chilled tuna mixture before serving.
-
Make-Ahead Tip: Pre-make the spicy tuna mix and store it separately. This way, you can quickly assemble the bowl when you’re ready to eat, ensuring optimal freshness.
Make Ahead Options
Preparing the Spicy Canned Tuna Rice Bowl in advance is a fantastic way to save time on busy weeknights! You can mix the spicy tuna mixture (canned tuna, Kewpie mayonnaise, sriracha, lemon juice, and sesame oil) and refrigerate it for up to 24 hours. This not only allows the flavors to meld beautifully but also ensures that you can quickly assemble dinner in minutes. Simply keep the cooked sushi rice separate and reheat it when you’re ready to serve. When it’s mealtime, combine the rice with your prepped tuna mixture, sliced cucumbers, and avocado, and top with green onions and sesame seeds. You’ll enjoy a delicious, homemade meal with minimal effort!
Expert Tips for Canned Tuna Rice Bowl
-
Drain Tuna Well: Ensure the canned tuna is thoroughly drained and squeezed to avoid a soggy rice bowl. Moisture can ruin the texture.
-
Warm Rice Is Key: Use warm sushi rice for the best consistency. Cold rice may not hold the spicy tuna mixture as effectively.
-
Customize with Confidence: Don’t hesitate to swap in any veggies you have on hand. This Canned Tuna Rice Bowl is all about personal touches!
-
Layer Flavors: For deeper flavor, mix in some additional spices or sauces of your choice to elevate the taste of the spicy tuna.
-
Chill Before Serving: If making ahead, chill your prepared ingredients before combining for a refreshing bowl. Just remember to add toppings just before serving!
What to Serve with Canned Tuna Rice Bowl?
Transform your delightful rice bowl into an extraordinary meal experience with these tasty pairings that enhance its flavors and textures.
-
Crispy Tempura Vegetables: Lightly battered and fried, these additions offer a satisfying crunch that perfectly complements the creamy tuna.
-
Miso Soup: A warm, umami-rich side that balances the freshness of the bowl, making for a comforting and nourishing meal.
-
Edamame: These tender, protein-packed beans provide a delightful pop of texture, enhancing the bowl’s nutritious content.
-
Seaweed Salad: A tangy and refreshing complement that adds depth of flavor while harmonizing with the Japanese-inspired theme.
-
Pickled Radishes: These bite-sized tangy treats bring a zesty contrast to the spicy tuna, refreshing your palate with each bite.
-
Sashimi-style Salmon: For a richer protein option, adding thinly sliced salmon can elevate the dish with a touch of luxurious flavor.
-
Chilled White Wine: A crisp, acidic wine pairs beautifully, cutting through the richness of the creamy tuna and enhancing your meal experience.
-
Fresh Fruit Salad: A light and refreshing dessert option that offers a sweet finish, perfectly complementing the savory aspects of the rice bowl.
Canned Tuna Rice Bowl Customizations
Feel free to get creative and tailor this dish to suit your taste and pantry!
-
Protein Swap: Substitute canned tuna with shredded chicken or tofu for a different protein source. Each brings its unique flavor, making the bowl just as satisfying.
-
Sauce Variation: Experiment with a spicy mayo or teriyaki sauce instead of sriracha for a flavor twist. This simple change can alter the entire profile of your bowl, making it a culinary adventure!
-
Creamy Alternatives: Use Greek yogurt or go for a vegan option like avocado cream in place of Kewpie mayonnaise for a lighter, tangy touch. These swaps add health benefits while keeping that creamy texture.
-
Extra Veggies: Add edamame or microwaved sweet potato cubes to boost fiber and color. Every additional topping introduces more depth and nutrition, making each bite delightful.
-
Leafy Greens: Introduce a layer of baby spinach or shredded lettuce for a refreshing crunch. These greens add texture and a fresh note, transforming your bowl into a vibrant meal.
-
Herb Boost: Sprinkle in cilantro or basil to elevate flavors and add aromatic freshness. Herbs can transform the dish and bring a sensational burst of taste.
-
Heat Levels: Adjust the sriracha amount based on your heat preference, or swap it for a milder option like sweet chili sauce. This way, you can cater to everyone’s tastes at the table.
Looking for more delicious ideas? Try pairing this bowl with a lovely Crispy Chilli Beef Rice for a complete meal experience!
Canned Tuna Rice Bowl Recipe FAQs
What type of tuna should I use for the Canned Tuna Rice Bowl?
You can use any canned tuna variety, but I recommend opting for chunk light tuna in water for a milder flavor and easier handling. Make sure to drain and squeeze it well to remove excess moisture, ensuring your rice bowl doesn’t become soggy!
How can I store leftovers of the Canned Tuna Rice Bowl?
Store the assembled Canned Tuna Rice Bowl in an airtight container in the fridge for up to 24 hours. If you have leftover spicy tuna, you can keep that in a separate container for a bit longer, about 1-2 days. Just remember to enjoy it fresh for the best flavor and texture!
Can I freeze the Canned Tuna Rice Bowl?
Absolutely! However, it’s best to freeze only the spicy tuna mixture and not the entire rice bowl. Transfer the tuna mix into a freezer-safe container and keep it frozen for up to 1 month. When you’re ready to enjoy it, thaw in the fridge overnight and reheat the rice separately before assembling your bowl.
What should I do if my rice seems too sticky or gummy?
If your sushi rice ends up being too sticky, it may be due to overcooking or excess moisture. Next time, make sure to rinse the rice before cooking until the water runs clear, which removes excess starch. If you’ve already cooked the rice, try gently fluffing it with a fork to separate the grains, then add a dash of sesame oil for improved flavor.
Can I make this recipe gluten-free?
Yes! To ensure your Canned Tuna Rice Bowl is gluten-free, replace Kewpie mayonnaise with a gluten-free mayonnaise brand and check that both your soy sauce (if using) and sesame oil are labeled gluten-free. This way, everyone can enjoy this delicious and protein-rich meal without worry.
Canned Tuna Rice Bowl: A Quick and Tasty Weeknight Delight
Ingredients
Equipment
Method
- Begin by fully draining the canned tuna in a colander. Once drained, squeeze the tuna gently with your hands or a fork to remove any excess moisture. Set aside in a mixing bowl.
- In the bowl with the drained tuna, add Kewpie mayonnaise, sriracha, fresh lemon juice, and toasted sesame oil. Mix thoroughly using a fork until the tuna is evenly coated and creamy.
- In a large bowl, place your cooked sushi rice, ensuring it is still warm. Gently fold in the spicy tuna mixture along with the diced cucumbers and sliced avocado.
- Taste your rice bowl mixture. If desired, drizzle extra Kewpie mayonnaise and sriracha over the top for additional flavor.
- Transfer the completed Canned Tuna Rice Bowl into serving bowls. Top each with sliced green onions and a sprinkle of roasted sesame seeds.
Leave a Reply