As I stood in my kitchen, the sweet smell of vanilla and baked sugar cookies danced around me, transporting me back to childhood days filled with memories of homemade treats. Today, I’m excited to share my delightful Strawberry Kiss Cookies, a whimsical twist on classic sugar cookies that are not only vegetarian but incredibly easy to make. With just a few simple ingredients like Funfetti mix paired with Hershey’s Strawberry Ice Cream Cone Kisses, these cookies come together in a flash, making them perfect for Valentine’s Day or any sweet celebration. They’re also a great way to impress your loved ones or bring a smile to anyone’s face. Ready to bake these heartwarming cookies that bring joy with every bite? Let’s dive in!

Why Are Strawberry Kiss Cookies So Special?
Irresistible flavor bursts from Hershey’s Strawberry Ice Cream Cone Kisses create a delightful treat that everyone will love. Simplicity reigns supreme with only a few ingredients and straightforward baking steps, making it perfect for novice bakers. Festive for celebrations like Valentine’s Day, these cookies are bright and inviting, instantly lifting anyone’s spirits. Customizable options abound—experiment with different Kiss flavors or fun sanding sugars to match any occasion. Plus, they store well, ensuring your delicious creations can be savored over several days or shared among friends, making them an ideal choice for gifting or gatherings! Looking for more sweet ideas? Try these Almond Cherry Cookies or a lovely slice of Strawberry Custard Cake.
Strawberry Kiss Cookies Ingredients
• Perfect for your baking adventure!
For the Cookie Base
- Funfetti Sugar Cookie Mix – This forms the delightful base; substitute regular sugar cookie mix or strawberry cake mix if unavailable.
- Cream Cheese (4 oz, softened) – Adds richness and moisture to keep cookies irresistibly soft; ensure it’s at room temperature for easy mixing.
- Large Egg (1) – Binds the ingredients and helps the cookie maintain its structure.
For the Coating
- Pink or White Sanding Sugar (½ cup) – Coats the cookies for added sweetness and crunch; can be replaced with colored sprinkles or crushed freeze-dried strawberries for an exciting twist.
For the Sweet Surprise
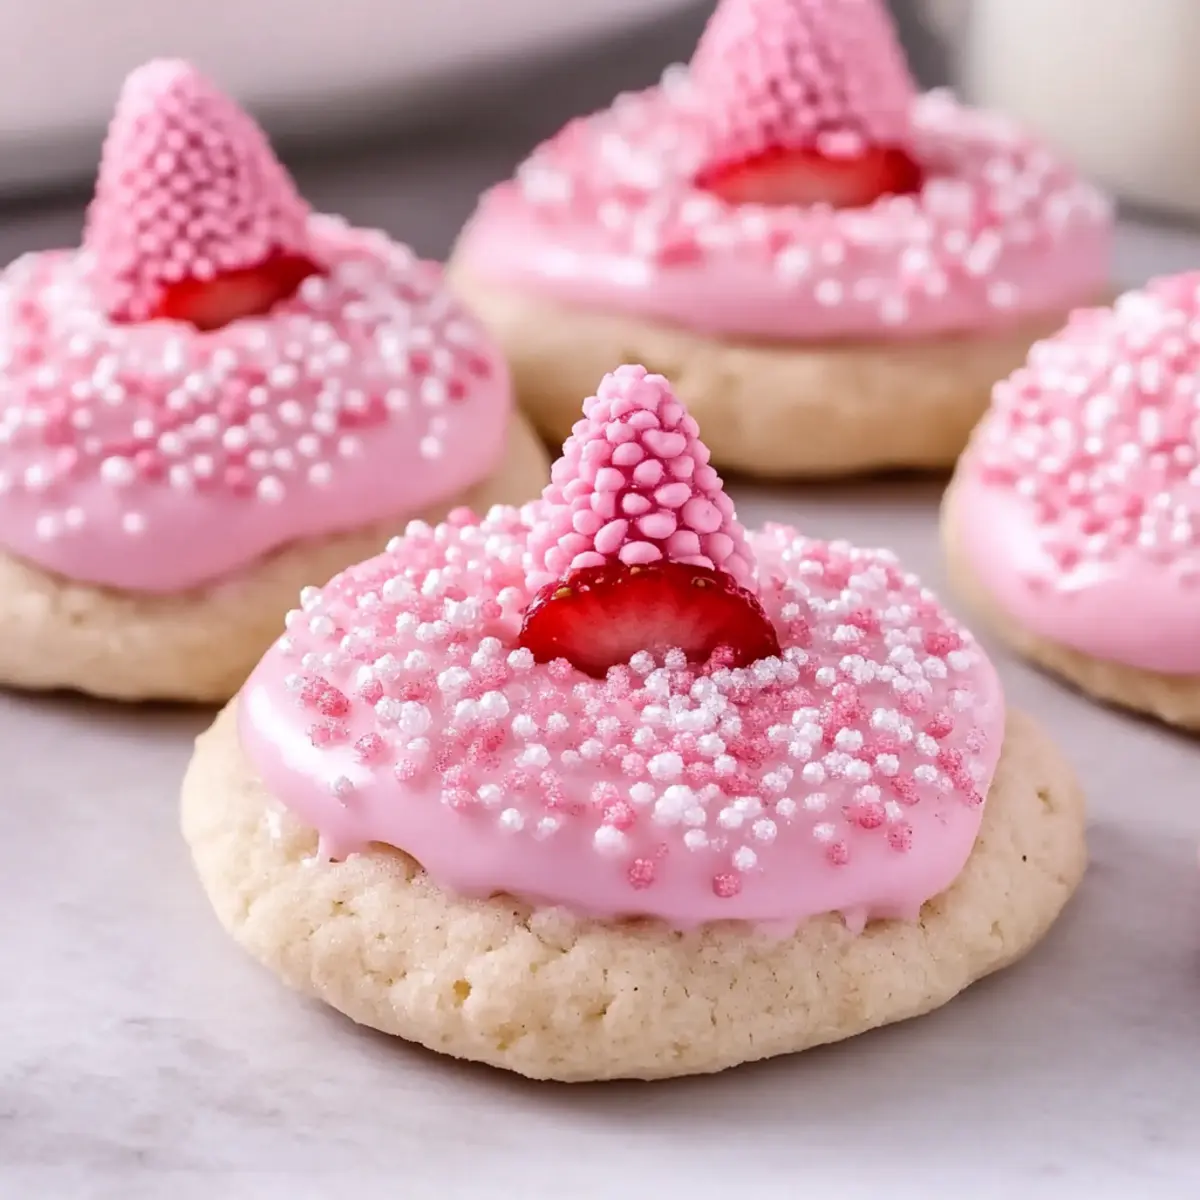
- Hershey’s Strawberry Ice Cream Cone Kisses (18) – These delightful kisses provide the fruity center and serve as decoration; feel free to swap in any Kiss flavor for variety!
With these ingredients, you’re all set to create mouthwatering Strawberry Kiss Cookies that are sure to please!
Step‑by‑Step Instructions for Strawberry Kiss Cookies
Step 1: Preheat and Prepare
Begin by preheating your oven to 375°F (190°C). Line a baking sheet with parchment paper to prevent the cookies from sticking. This will ensure an easy cleanup later. A light sheen of oil on the parchment can add to the cookies’ crispiness if desired.
Step 2: Mix the Dough
In a large mixing bowl, combine the Funfetti sugar cookie mix, softened cream cheese, and the large egg. Use a sturdy spatula or a hand mixer on low speed to blend until you achieve a soft, cohesive dough, which may take about 2–3 minutes. Scrape down the sides of the bowl to ensure all ingredients are well incorporated.
Step 3: Chill the Dough (if needed)
If your dough appears too sticky to handle, cover the bowl with plastic wrap and refrigerate for 30–60 minutes. Chilling will firm up the dough, making it easier to shape into balls. This step is optional but recommended for cleaner cookie shapes and a better texture.
Step 4: Prepare the Coating
While the dough chills, pour the pink or white sanding sugar into a shallow bowl. This will serve as a sweet coating for the cookies, adding crunch and a festive flair. Choose bright colors for extra pizzazz if you’d like to match your Valentine’s Day theme or other celebrations.
Step 5: Portion and Shape
Once the dough is ready, use a cookie scoop (about 1½ tablespoons size) to portion out the dough. Roll each portion into a smooth ball in your hands, then gently roll it in the sanding sugar until well-coated. This step adds a delightful sweetness to the outside of your Strawberry Kiss Cookies.
Step 6: Arrange on Baking Sheet
Place the coated cookie balls on the prepared baking sheet, ensuring they are spaced about 1½ inches apart. This will allow for even baking and prevent them from merging together during the baking process. You should see a beautiful sparkle on the surface from the sanding sugar.
Step 7: Bake the Cookies
Bake the Strawberry Kiss Cookies in your preheated oven for 8–12 minutes. Keep an eye on them; the edges should be set while the centers remain slightly soft. This visual cue is key to achieving the perfect chewy texture that makes these cookies so irresistible.
Step 8: Add the Sweet Center
Once the cookies are out of the oven, allow them to cool for 3–5 minutes on the baking sheet. While they’re still warm, gently press a Hershey’s Strawberry Ice Cream Cone Kiss into the center of each cookie. The warmth will slightly melt the chocolate, creating a deliciously gooey center.
Step 9: Cool and Serve
Finally, let the cookies cool completely on the baking sheet for another 5-10 minutes before transferring them to a wire rack. This will ensure they set perfectly. Once cooled, your Strawberry Kiss Cookies are ready to be enjoyed, or serve them warm for a delightful melty treat.

How to Store and Freeze Strawberry Kiss Cookies
Room Temperature: Store your cookies in an airtight container at room temperature for up to 4 days to maintain their soft texture.
Fridge: If you prefer, keep the cookies in the fridge for about a week. Just remember to seal them tightly to prevent drying out.
Freezer: To freeze, stack the cookies in layers separated by parchment paper in a freezer-safe container. They will stay fresh for up to 3 months.
Thawing: Thaw the Strawberry Kiss Cookies at room temperature before serving, allowing them to regain their delightful softness and flavor.
Expert Tips for Strawberry Kiss Cookies
• Room Temperature Ingredients: Ensure the cream cheese is at room temperature for smooth incorporation into your dough. This helps avoid lumps that can affect texture.
• Avoid Sticky Dough: If your dough is too sticky to handle, chilling it for 30–60 minutes will make shaping the cookie balls much easier and yield a better final product.
• Perfect Cookie Texture: Bake until the edges are set but the centers remain slightly soft. This is key for that delightful chewy texture in your Strawberry Kiss Cookies.
• Kiss Placement: For a gooey center, press the Hershey’s Kisses into warm cookies; for a firmer result, wait until they cool.
• Coating Alternatives: Feel free to experiment with colored sprinkles or crushed freeze-dried strawberries instead of sanding sugar for extra flavor and visual appeal.
Make Ahead Options
These delightful Strawberry Kiss Cookies can easily be prepped ahead of time, making your baking weekend a breeze! You can prepare the cookie dough up to 24 hours in advance by mixing all your ingredients and then refrigerating the formed dough balls. For added convenience, coat the cookie balls in sanding sugar right before baking; this ensures that they remain crisp and sweet. When you’re ready to bake, simply place the chilled cookie dough on a baking sheet, and bake them fresh for 8-12 minutes. This way, you’ll enjoy warm cookies with just the right amount of chewy texture, all while saving time for those busy weeknights!
Strawberry Kiss Cookies Variations
Feel free to get creative with your Strawberry Kiss Cookies—each twist enhances the experience and tantalizes your taste buds!
-
Different Kisses: Swap Hershey’s Strawberry Ice Cream Cone Kisses for other flavors like milk chocolate or cookies and cream for a new spin. Each Kiss brings its own unique sweetness!
-
Gluten-Free Option: Use a gluten-free sugar cookie mix instead of Funfetti. You won’t miss out on that delightful chewiness!
-
Dairy-Free Variation: Substitute cream cheese with a plant-based cream cheese alternative. You still get that rich texture without the dairy, perfect for vegan friends.
-
Fruity Flair: Add white chocolate chips or chopped freeze-dried strawberries to the dough for an extra burst of flavor and texture in every bite. What a delightful surprise!
-
Nutty Delight: Incorporate chopped nuts like pecans or walnuts into the dough for a crunchy contrast to the chewy cookies. They add a delightful richness!
-
Bold Heat: For a zesty twist, add a pinch of cayenne or chili powder into the dough for a spicy surprise. The sweetness of the cookies beautifully balances that kick!
-
Holiday Spirit: Use seasonal or themed sanding sugars—like red and green for Christmas or pastel colors for Easter—for added charm and festivity. The right colors can make any occasion special!
-
Toppings Galore: Top your warm cookies with a drizzle of melted chocolate or caramel sauce just before serving. It creates an indulgently lush finish.
For more cookie inspiration, check out these delightful Almond Cherry Cookies or treat yourself to a slice of Strawberry Custard Cake!
What to Serve with Strawberry Kiss Cookies
Indulging in these delightful cookies is just the beginning—pair them with refreshing treats to create a memorable experience.
-
Creamy Hot Cocoa: The rich, velvety texture of hot cocoa pairs perfectly with the chewy sweetness of the cookies, making it feel like a cozy hug on a chilly day.
-
Strawberry Lemonade: Adding a refreshing zing, strawberry lemonade perfectly complements the fruity notes of the cookies, brightening up any gathering.
-
Vanilla Ice Cream: A scoop of creamy vanilla ice cream provides a delightful contrast, balancing the flavors of the cookies with cool creaminess.
-
Chocolate Dipped Pretzels: The crunchy, salty pretzels dipped in chocolate introduce an exciting texture that enhances the sweetness of the cookies, perfect for snacking.
-
Fruit Platter: A colorful array of fresh berries adds a refreshing touch and enhances the fruity elements within Strawberry Kiss Cookies, making for a vibrant dessert table.
-
Coffee or Tea: Accompany your cookies with a warm cup of coffee or herbal tea for a sophisticated pairing. The warmth will melt the chocolate slightly, unlocking more flavor.
These suggestions will transform your cookie moment into an extraordinary celebration of flavor and joy!
Strawberry Kiss Cookies Recipe FAQs
How do I choose the right ripeness of ingredients, especially for the cream cheese?
Absolutely! For the best results, ensure your cream cheese is at room temperature. This allows it to mix smoothly into the dough, providing a rich and creamy texture in your cookies. You can leave it out for about 30 minutes before using, just enough time for it to soften. If it’s too cold, you risk lumps that can impact the final result.
What’s the best way to store leftover Strawberry Kiss Cookies?
Very! Store your Strawberry Kiss Cookies in an airtight container at room temperature for up to 4 days. If you’d like them to last longer, you can refrigerate them, where they’ll stay fresh for about a week. Just be sure to seal them tightly to maintain their delicious, soft texture!
Can I freeze Strawberry Kiss Cookies for later enjoyment?
Absolutely! To freeze your cookies, stack them in a freezer-safe container, separating each layer with parchment paper to prevent sticking. They will stay fresh for up to 3 months. When you’re ready to enjoy them, simply thaw at room temperature for about 30 minutes before serving to restore their delightful softness.
What should I do if my cookie dough is too sticky?
No worries! If you find your dough too sticky to work with, cover the bowl with plastic wrap and refrigerate it for 30 to 60 minutes. Chilling will firm up the dough, making it easier to shape into cookies. I often use this trick to achieve cleaner cookie shapes that bake evenly!
Are Strawberry Kiss Cookies safe for people with allergies?
It depends! While these cookies are vegetarian, they do contain gluten from the sugar cookie mix and dairy from the cream cheese. If you need allergy-friendly options, consider using gluten-free cookie mixes and dairy alternatives like vegan cream cheese. Be sure to check the ingredients on your Kiss chocolates for potential allergens, too!

Strawberry Kiss Cookies: Sweet Treats for Every Celebration
Ingredients
Equipment
Method
- Preheat your oven to 375°F (190°C). Line a baking sheet with parchment paper.
- In a large mixing bowl, combine the Funfetti sugar cookie mix, softened cream cheese, and the large egg. Mix until a soft dough forms.
- If the dough is too sticky, refrigerate for 30–60 minutes to make shaping easier.
- Pour the sanding sugar into a shallow bowl for coating.
- Use a cookie scoop to portion the dough and roll into balls, then coat in sanding sugar.
- Place the cookie balls on the baking sheet, spaced 1½ inches apart.
- Bake for 8–12 minutes, until the edges are set but centers remain soft.
- Cool for 3–5 minutes, then gently press a Hershey's Kiss into the center of each cookie.
- Allow cookies to cool completely on a wire rack before serving.
Leave a Reply