Standing in my kitchen, the comforting aroma of ripe bananas takes me back to lazy Sunday afternoons filled with laughter and homemade treats. This Mother’s Day, I’m excited to whip up these No Bake Banana Pudding Dream Bars, a dessert that will delight banana lovers and create cherished memories in any home. With a crunchy Oreo crust anchoring layers of fresh bananas and a dreamy cream cheese filling, this approachable recipe is perfect for anyone looking to elevate their dessert game. Plus, the no-bake aspect means you can save time and easily share these bars with your loved ones. As the days grow warmer, isn’t it wonderful to have a refreshing dessert at the ready? Let’s dive into this indulgent treat that combines simplicity and nostalgia—who wouldn’t want a slice?
Why are these Banana Pudding Dream Bars irresistible?
Nostalgic Flavors: Each bite brings back fond memories of family gatherings and sunny days, making them the perfect tribute for Mother’s Day.
No-Bake Convenience: Save valuable time while impressing everyone with this dessert that requires no oven, ideal for busy occasions.
Elevated Texture: Experience the delightful contrast of the crunchy Oreo crust paired with a creamy, fluffy filling—it’s pure bliss!
Crowd-Pleasing Appeal: Whether you’re celebrating or just satisfying a sweet tooth, these bars are sure to please everyone, just like my favorite Condensed Milk Pudding.
Easily Customizable: Add a tropical twist with crushed pineapple or switch to chocolate pudding for a fun variation—there’s a version for every palate!
Chilling Perfection: With just a few hours in the fridge, you can serve a delicious dessert that’s perfect for warm days.
Mother’s Day Banana Pudding Dream Bars Ingredients
• Dive into making these scrumptious Banana Pudding Dream Bars that celebrate the essence of homemade love!
For the Crust
- Golden Oreos – The base layer provides sweetness and crunch; feel free to use regular Oreos for a chocolate twist.
- Unsalted Butter – Binds the crust together; you can substitute with salted butter if desired, just adjust any added salt in the recipe.
For the Filling
- Bananas – Adds natural sweetness and is essential for flavor; use ripe bananas for optimal taste.
- Cream Cheese – Introduces creaminess and richness to the cheesecake layer; make sure it’s at room temperature for easy mixing.
- Confectioners’ Sugar – Sweetens the cream cheese layer for a smooth texture; can replace with granulated sugar if mixed thoroughly.
- Pure Vanilla Extract – Enhances overall flavor; always opt for real vanilla for the best results, or you can use vanilla bean paste.
- Cool Whip – Topping for added lightness; you can swap it for homemade stabilized whipped cream if you prefer.
For the Pudding Layer
- Instant Banana Pudding – Creates the pudding that delivers that banana flavor; mix with less milk than usual for best thickness (only 1½ cups).
- Milk – Activates the pudding and brings out the desired creamy consistency; choose whole or low-fat milk, or experiment with non-dairy options that may alter the flavor slightly.
Enjoy crafting these delightful Mother’s Day Banana Pudding Dream Bars that bring both taste and nostalgic joy to your celebration!
Step‑by‑Step Instructions for Mother’s Day Banana Pudding Dream Bars
Step 1: Prepare the Crust
Begin by crushing 20 Golden Oreos in a blender until they resemble fine crumbs. In a mixing bowl, combine the crushed Oreos with melted unsalted butter, ensuring it’s well mixed. Press this mixture firmly into the bottom of an ungreased 8×8-inch baking dish to create an even layer. Place the crust in the freezer for about 30 minutes to set until firm.
Step 2: Make the Banana Pudding
In a separate bowl, whisk together the instant banana pudding mix with 1½ cups of milk. Mix vigorously for approximately 2 minutes until the pudding thickens significantly. This will create the luscious pudding layer that will be a star in your Mother’s Day Banana Pudding Dream Bars. Set the prepared pudding aside while you move on to the next step.
Step 3: Prepare the Cream Cheese Layer
In another mixing bowl, mash one ripe banana using a fork until smooth. Add softened cream cheese, confectioners’ sugar, and pure vanilla extract to the mashed banana. Beat the mixture with a hand mixer on medium speed until it’s creamy and free of lumps. Finally, gently fold in 1 cup of Cool Whip to lighten the filling and create that fluffy texture.
Step 4: Layer the Ingredients
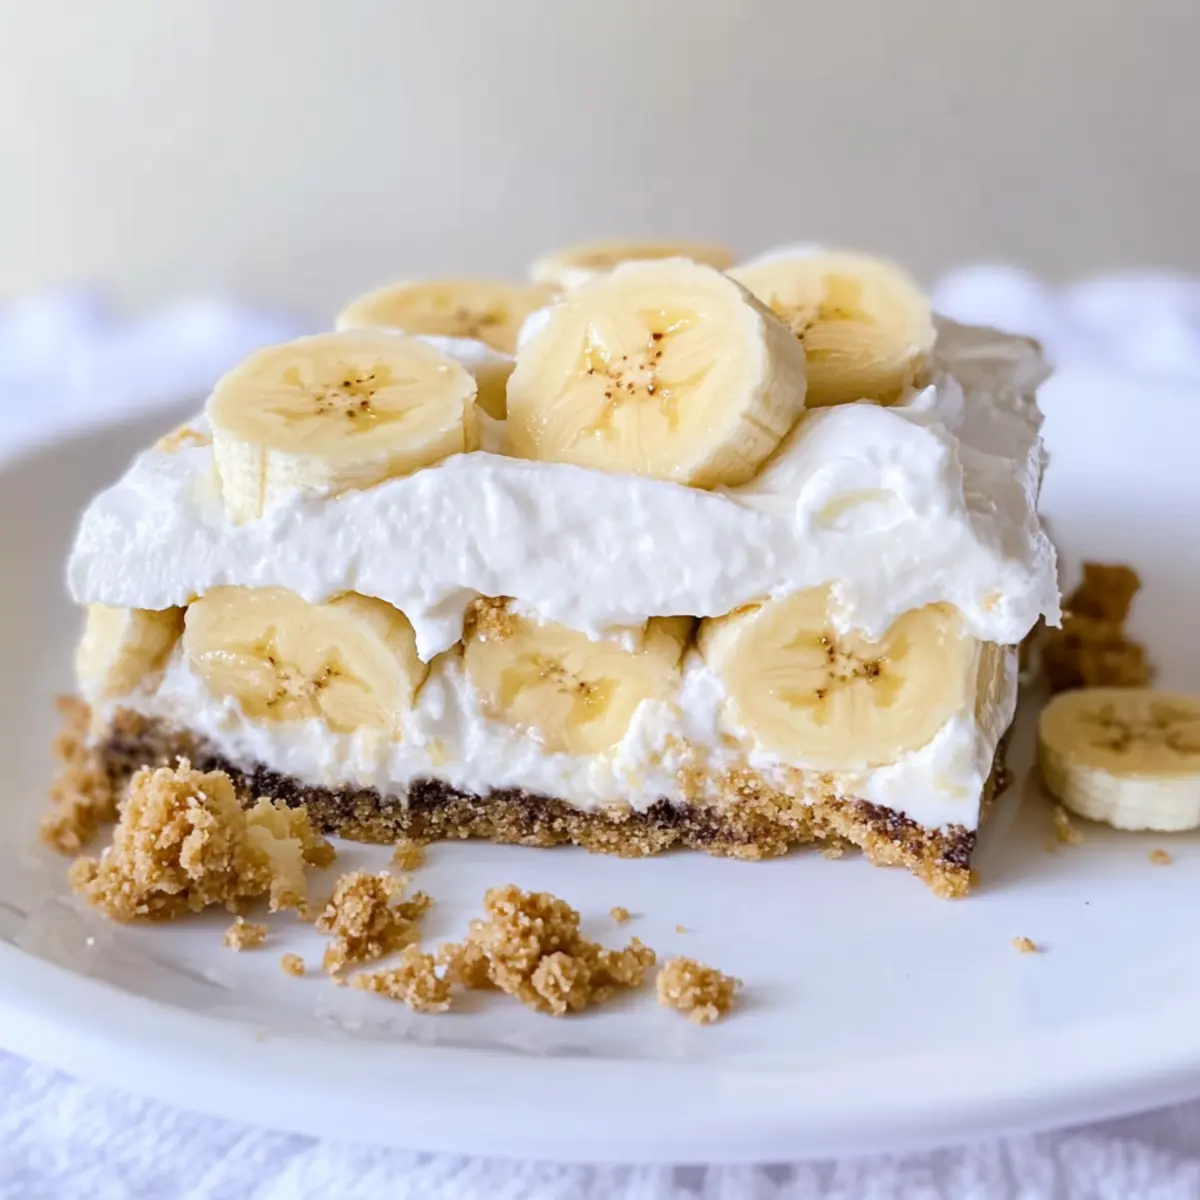
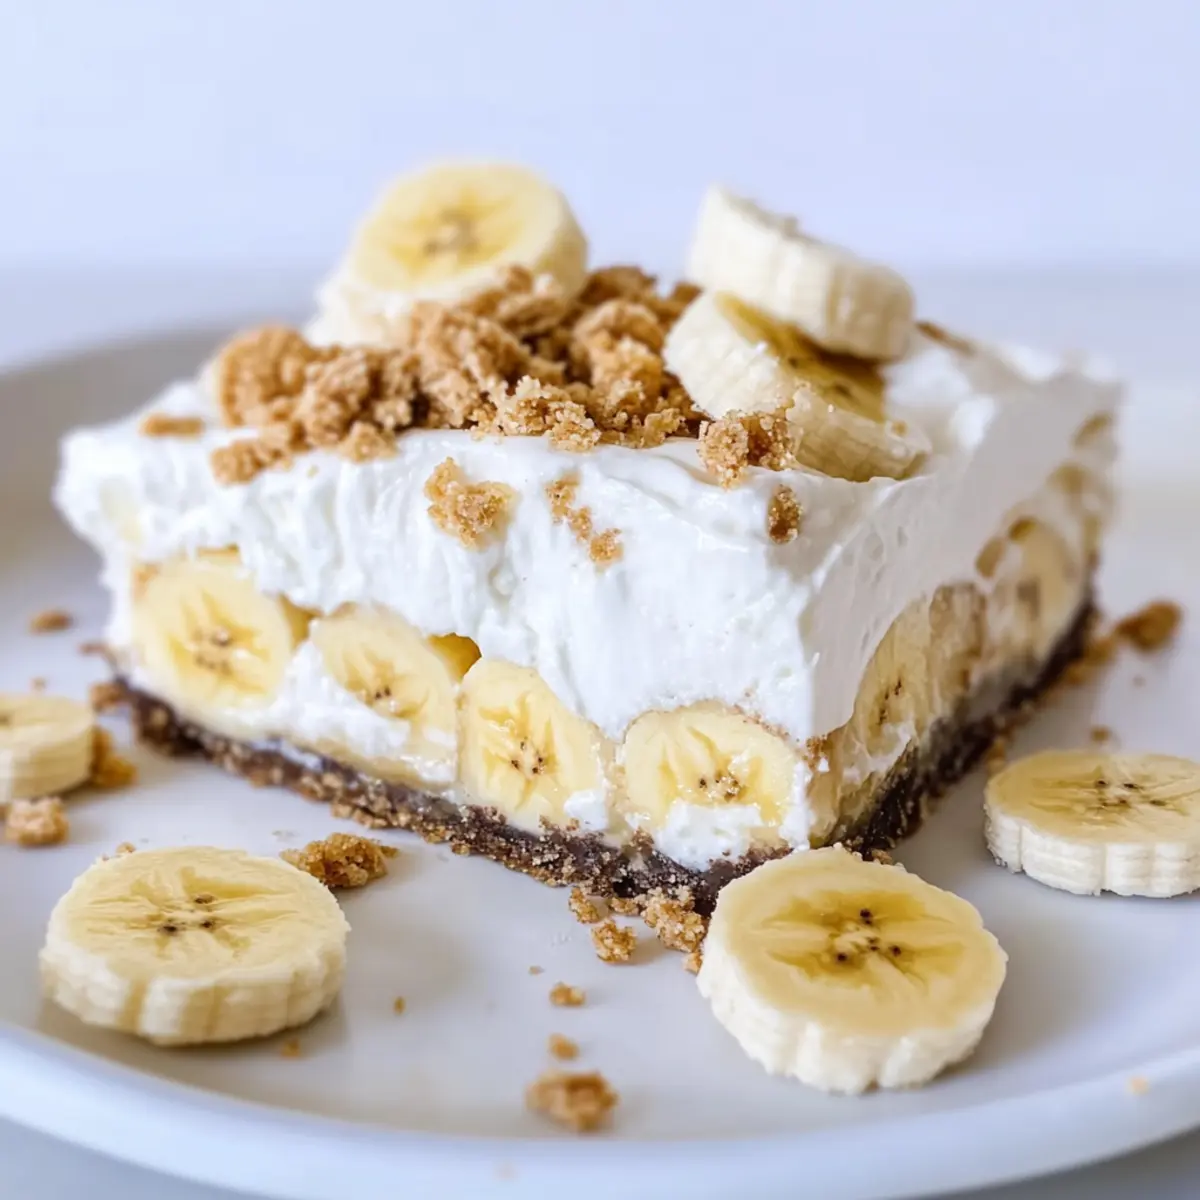
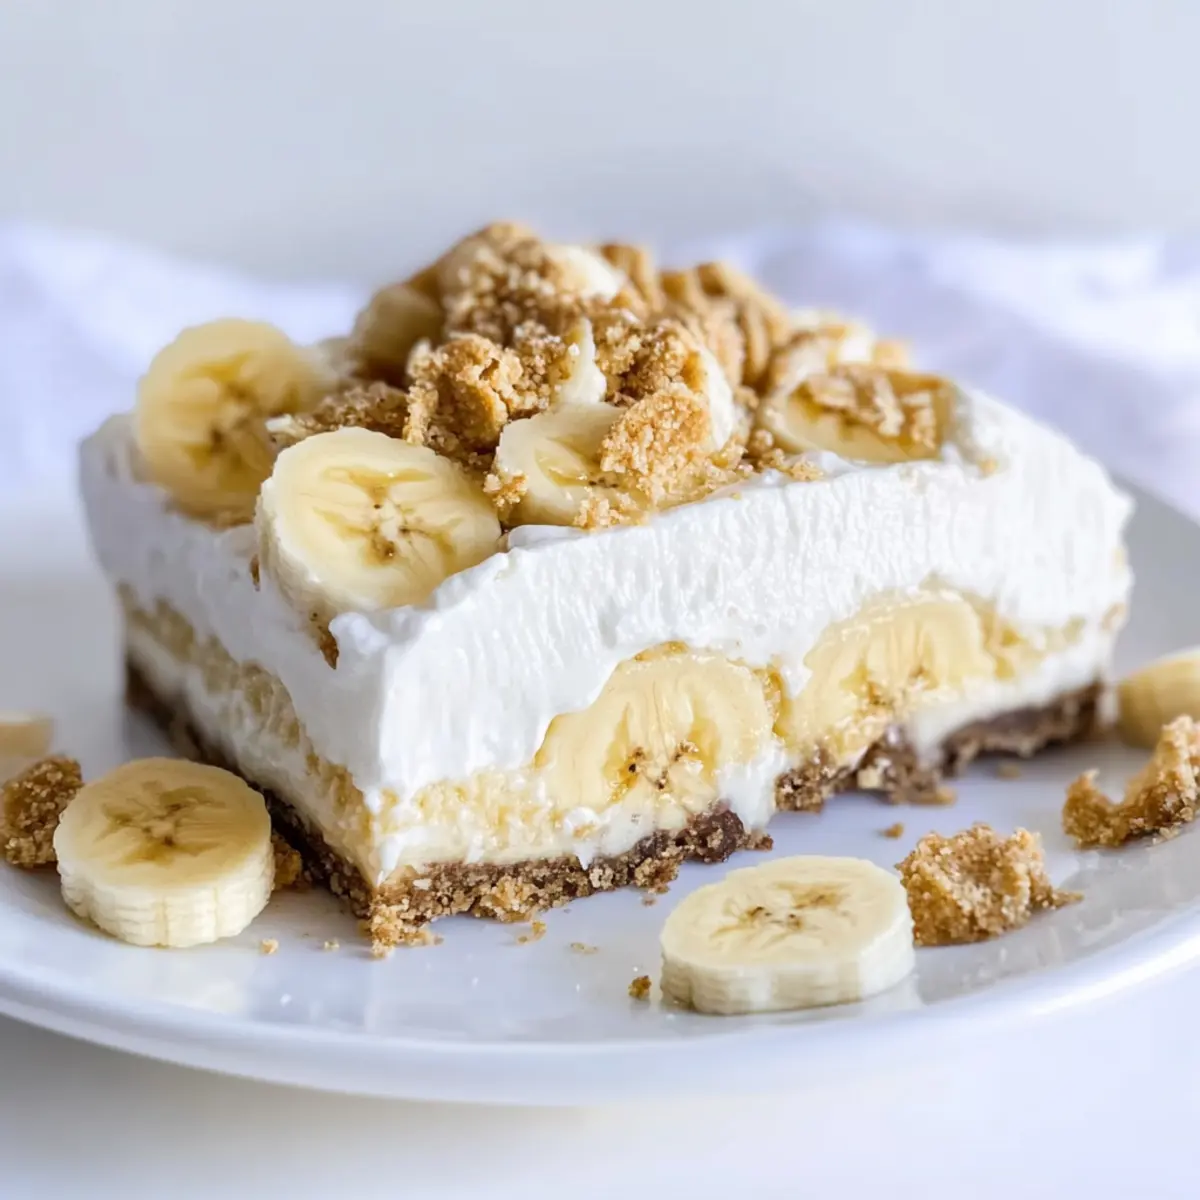
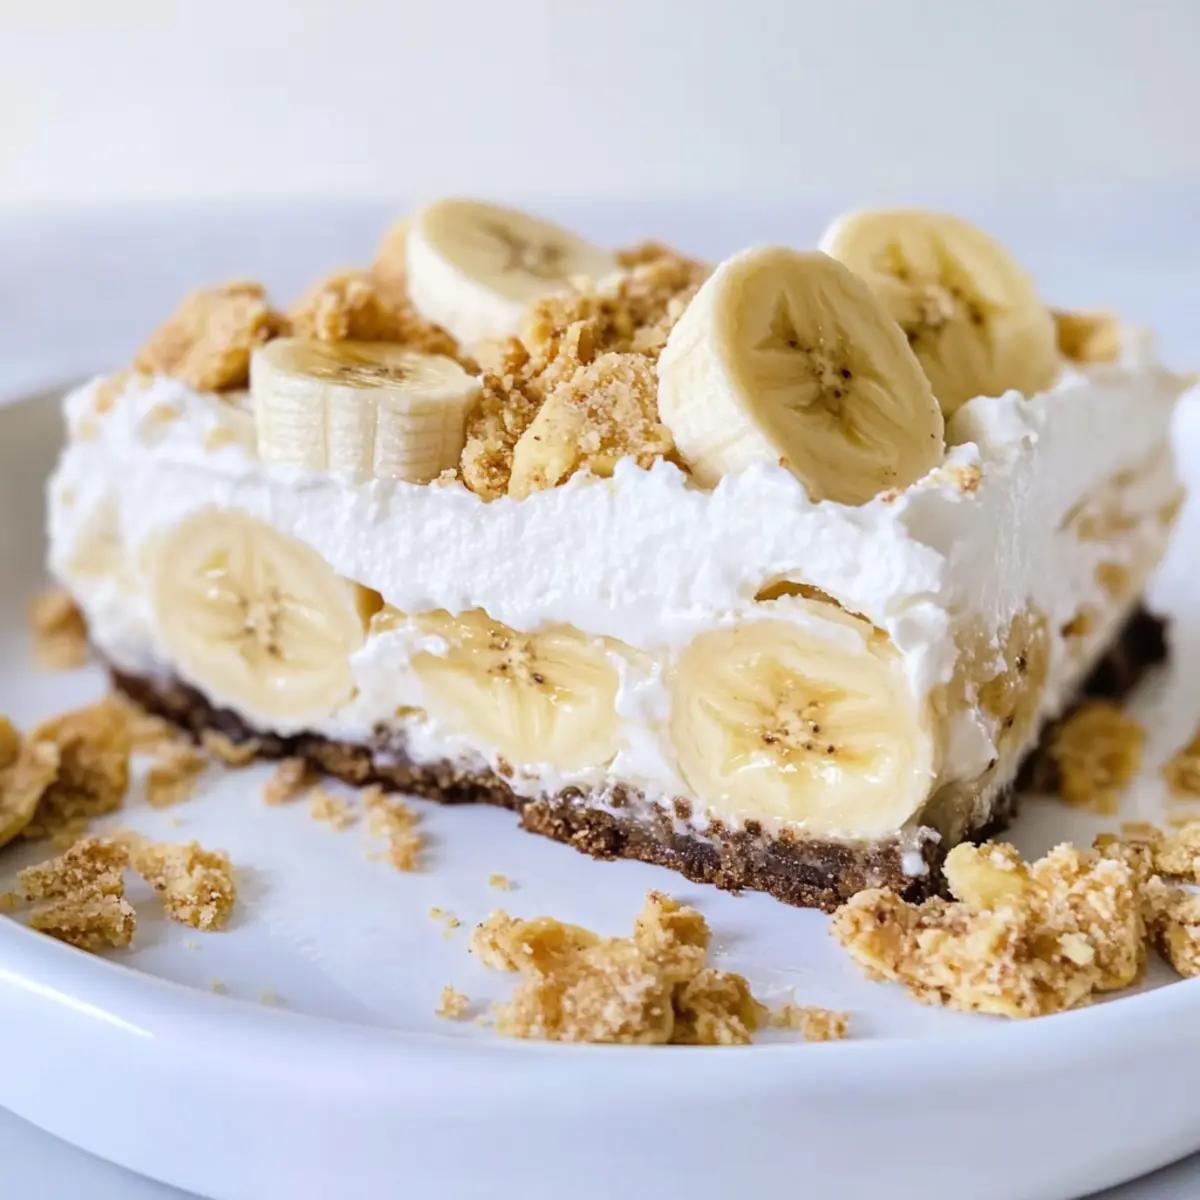
Carefully remove the chilled crust from the freezer and layer banana slices evenly over it, ensuring each slice is in contact with the crust. Next, spread the creamy cream cheese mixture over the banana layer, using a spatula to achieve an even distribution. Finally, pour the thickened banana pudding layer on top, smoothing it out gently with a spatula.
Step 5: Final Touches
Once all layers are in place, use the remaining Cool Whip to spread a light topping over the pudding layer, creating a fluffy finish. For added texture and crunch, sprinkle crushed Oreos over the Cool Whip. Cover the baking dish with plastic wrap and refrigerate for at least 2 hours, allowing the flavors to meld and the bars to set properly.
Step 6: Serve Your Dream Bars
After chilling, carefully cut the Mother’s Day Banana Pudding Dream Bars into squares while they are still refrigerated. For cleaner slices, run a knife under warm water before cutting. Serve the bars chilled, and if desired, garnish each piece with fresh banana slices or a dollop of whipped cream for a delightful presentation.
What to Serve with No Bake Banana Pudding Dream Bars
Indulging in these creamy bars opens up a world of delightful pairings that make dessert even more special!
-
Fresh Whipped Cream: A dollop on top adds a light, airy touch that perfectly complements the rich flavors of the bars.
-
Sliced Strawberries: Sweet and juicy, strawberries brighten the plate and their tartness balances the sweetness of the bars.
-
Chocolate Drizzle: A drizzle of melted chocolate introduces a rich, decadent layer, elevating the dessert into a truly indulgent treat.
-
Nutty Granola: Crunchy granola sprinkled on top not only adds texture but brings a delightful nutty flavor that enhances each bite.
-
Iced Coffee: The cool, robust flavors of iced coffee pair beautifully, providing a refreshing contrast to the creamy dessert.
-
Banana Slices: Extra slices of banana on the side serve as a familiar touch, enhancing the banana flavor and adding a healthy element.
-
Lemon Sorbet: The refreshing tartness of lemon sorbet cleanses the palate and rounds off the sweetness beautifully.
-
Mint Leaves: A sprinkle of fresh mint adds a pop of color and a refreshing herbal note that brightens the entire dessert.
-
Raspberry Sauce: A drizzle of tangy raspberry sauce adds a pop of color and flavor that dramatically enhances the presentation.
-
Sparkling Water: A glass of fizzy sparkling water offers a refreshing lift alongside the bars, keeping the dessert experience light and dazzling.
Make Ahead Options
These Mother’s Day Banana Pudding Dream Bars are perfect for meal prep, allowing you to enjoy more time with family! You can prepare the crust and the creamy layers up to 24 hours in advance, simply refrigerate the filling components separately to maintain their texture. To prep ahead, crush the Golden Oreos and mix them with melted butter for the crust, then store in the freezer. For the filling, mix the cream cheese, mashed bananas, and sugar, and keep it in an airtight container. When you’re ready to assemble, layer the crust, filling, and pudding as directed, then refrigerate for at least 2 hours before serving. This way, your dessert will be just as delicious and ready to impress!
How to Store and Freeze Mother’s Day Banana Pudding Dream Bars
Fridge: Store the bars covered in the refrigerator for up to 3-4 days. Keep them in an airtight container to maintain freshness and prevent absorbing odors.
Freezer: For longer storage, freeze the uncut bars wrapped tightly in plastic wrap and then aluminum foil for up to 2 months. Thaw in the fridge overnight before serving.
Serving: Once thawed, enjoy your Mother’s Day Banana Pudding Dream Bars chilled. For the best texture, consume within a few days of thawing.
Expert Tips for Mother’s Day Banana Pudding Dream Bars
-
Perfect Pudding: Use only 1½ cups of milk instead of the usual 2 cups for the pudding. This ensures the perfect creamy consistency in your Mother’s Day Banana Pudding Dream Bars.
-
Chilling Time: Allow at least 2 hours in the refrigerator before serving. This chilling time is crucial for the bars to firm up and slice neatly.
-
Knife for Slicing: For clean, even slices, run a knife under warm water before cutting. This helps glide through the layers seamlessly.
-
Use Ripe Bananas: Opt for ripe bananas for the best flavor. Overripe bananas can lend intense sweetness and enhance the dessert’s overall profile.
-
Adjust Sugar Levels: If you prefer a less sweet dessert, reduce the quantity of confectioners’ sugar in the cream cheese layer and adjust to your taste.
Variations & Substitutions for Mother’s Day Banana Pudding Dream Bars
Feel free to let your creativity shine and customize these delightful bars to suit your taste!
-
Dairy-Free: Replace cream cheese with dairy-free cream cheese and use coconut whipped cream as a substitute for Cool Whip. This keeps the creaminess intact without dairy.
When making these bars for vegan loved ones, don’t worry—you can still delight in the classic flavor! -
Chocolate Twist: Use chocolate pudding instead of banana pudding for a rich, indulgent option. This little switch creates a whole new flavor experience!
Chocolate lovers will rejoice as they bite into a luxurious blend reminiscent of banana cream pie but with a chocolatey surprise. -
Nutty Crunch: Sprinkle chopped walnuts or pecans over the banana layer for an added crunch. This swap introduces a delightful texture contrast alongside the creamy filling.
Each bite becomes a delightful mix of smooth and crunchy, elevating the entire dessert experience! -
Tropical Flavor: Mix in crushed pineapple along with the bananas for a tropical twist that brightens the bars. This brings a fresh burst of flavor to each slice.
Imagine serving these at a sunny gathering—it’s like a mini-vacation in your mouth! -
Sugar-Free Option: Omit the confectioners’ sugar and use a sugar substitute in the cream cheese layer. This adjustment makes it a guilt-free indulgence for those watching their sugar intake.
It’s amazing how effortlessly you can please everyone without compromising taste! -
Layered Varieties: Create distinct layers by adding a thin layer of sliced strawberries or blueberries on top of the bananas before the cream cheese layer. This brings a beautiful pop of color and flavor.
These vibrant additions can change the visual appeal and make every piece a delightful surprise! -
Peanut Butter Swirl: Integrate a layer of creamy peanut butter into the cream cheese mixture for a decadent flavor fusion. The combination of banana and peanut butter is simply irresistible.
Every slice becomes a rich, nutty adventure perfect for peanut butter fans!
For more delicious inspirations, you might also want to check out my favorite Raspberry Chia Pudding or indulge in a slice of Tiramisu Chia Pudding. Each recipe is crafted to please any palate!
Mother’s Day Banana Pudding Dream Bars Recipe FAQs
What type of bananas should I use for this recipe?
Absolutely! It’s best to use ripe bananas for the sweetest flavor and optimal texture. Look for bananas with a few brown spots, as they indicate ripeness and increased sweetness, making them perfect for layering in your bars.
How should I store the Banana Pudding Dream Bars?
You can store these delectable bars covered in the refrigerator for up to 3-4 days. Make sure to use an airtight container to keep them fresh and to prevent any absorption of odors from the fridge.
Can these bars be frozen?
Very! To freeze, wrap the uncut bars tightly in plastic wrap followed by aluminum foil. This will protect them from freezer burn. They can be stored this way for up to 2 months. When ready to serve, simply thaw in the refrigerator overnight.
What should I do if the pudding is too runny?
If you find your pudding layer is too runny, it might be due to using too much milk. Always stick to the specified 1½ cups for optimal thickness. If it happens, you can try chilling it longer to allow it to set more firmly. For best results, follow the instructions closely next time.
Are there any dietary considerations for these bars?
While this recipe contains dairy and gluten from the Oreos, you can make adjustments. Use gluten-free Oreos to cater to gluten sensitivities, and for a dairy-free version, substitute the cream cheese with a plant-based cream cheese alternative and use coconut whipped cream instead of Cool Whip. Always check ingredient labels for allergens!
How long should I chill the bars before serving?
For the best texture, it’s crucial to chill the bars for at least 2 hours before serving. This allows the layers to meld together and firm up, making for cleaner cuts and a more delightful experience with every slice.
Delight Mom with Irresistible Mother's Day Banana Pudding Dream Bars
Ingredients
Equipment
Method
- Crush 20 Golden Oreos in a blender until fine crumbs. Combine with melted unsalted butter and press into a greased 8x8-inch dish. Freeze for 30 minutes.
- Whisk instant banana pudding mix with 1½ cups of milk for 2 minutes until thickened. Set aside.
- Mash 1 ripe banana, add cream cheese, confectioners’ sugar, and vanilla extract. Beat until creamy, then fold in 1 cup of Cool Whip.
- Layer sliced bananas on the chilled crust, spread cream cheese mixture over the bananas, and pour thickened pudding on top.
- Spread remaining Cool Whip over pudding layer and sprinkle with crushed Oreos. Cover and refrigerate for at least 2 hours.
- Cut into squares while still cold and serve with optional banana slices or whipped cream.
Leave a Reply