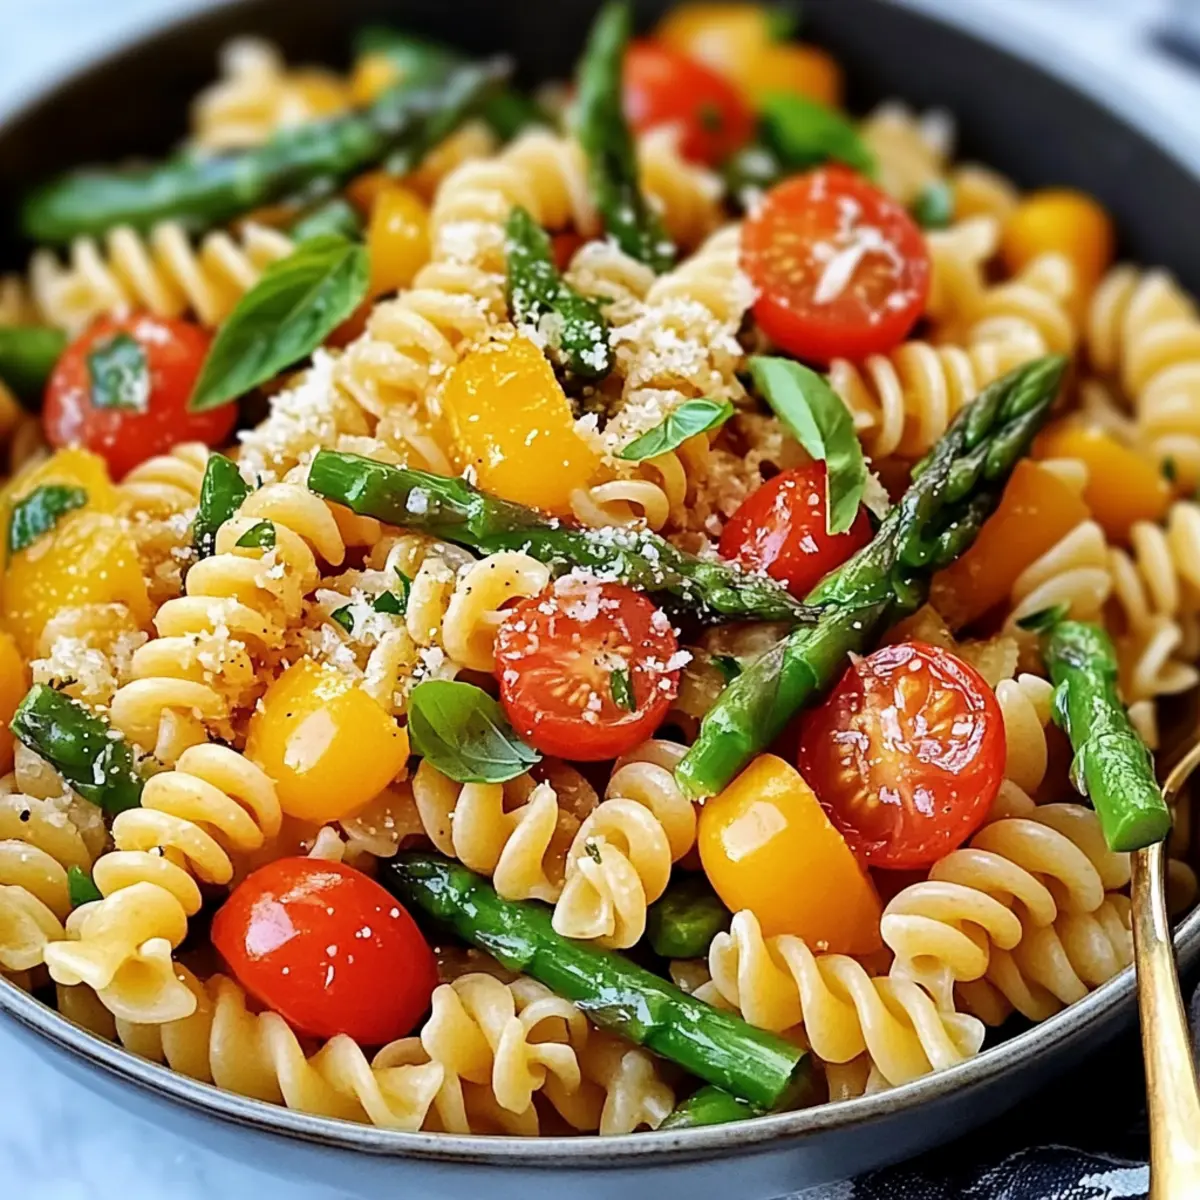
As I reached for the vibrant veggies at the market, the allure of a colorful spring pasta recipe danced in my mind. This dish is not just a feast for the eyes; it’s a celebration of fresh flavors that perfectly encapsulates the joy of the season. Picture perfectly al dente pasta mingling with tender asparagus, sweet bell peppers, and juicy cherry tomatoes, creating a medley that is as nutritious as it is delicious. The best part? This recipe is quick and easy to whip up, making it ideal for those busy weeknights when you’re craving a comforting yet healthy meal. So, why not brighten up your dinner table with this delightful Colorful Spring Pasta? Are you ready to join me in crafting a dish that speaks to the essence of spring?
Why is Spring Pasta a Must-Try?
Vibrant Colors: This dish is a visual delight with each ingredient showcasing the beauty of spring’s bounty. Nutritious Components: Packed with vitamins from fresh vegetables, it’s a healthy option for any meal. Quick and Easy: Perfect for busy weeknights, you can whip it up in under 30 minutes. Versatile Recipe: Customize with your favorite proteins or gluten-free pasta options for tailored nutrition. Additionally, if you’re looking for more delicious dinner ideas, check out my easy Chicken Broccoli Pasta or flavorful Buttered Lobster Pasta. This spring pasta is surely a dish you’ll want to make again and again!
Colorful Spring Pasta Ingredients
Here’s everything you need to create an unforgettable Colorful Spring Pasta!
For the Pasta
- Pasta – Your favorite type, like penne or spaghetti; gluten-free pasta also works beautifully!
For the Sauté
- Olive Oil – A healthy fat that enhances vegetable flavors and promotes a delightful sauté.
- Garlic (minced) – A flavor powerhouse that adds aromatic depth to your dish.
- Asparagus – Adds a fresh crunch and bright color; substitute with broccoli or zucchini if desired.
- Bell Peppers – These sweet beauties provide vibrant color and delicious sweetness; any variety works!
- Cherry Tomatoes – Bursting with juiciness and acidity; regular tomatoes can work in a pinch.
- Frozen Peas – Sweet and nutritious, adding a pleasant pop; fresh peas can be used if available.
- Basil and Parsley (fresh, chopped) – Aromatic herbs that elevate the dish with freshness; dried herbs can suffice in a pinch.
- Salt and Pepper – Essential for enhancing the overall flavor.
- Red Pepper Flakes – For a hint of heat; feel free to omit for a milder experience.
- Parmesan Cheese or Nutritional Yeast – Adds umami richness; can be left out if you’re going dairy-free.
Now you have all the ingredients ready to bring vibrant spring flavors to your dinner table!
Step‑by‑Step Instructions for Colorful Spring Pasta Recipe
Step 1: Boil the Pasta
Start by bringing a large pot of salted water to a rolling boil over high heat. Once boiling, add your pasta, stirring occasionally to prevent sticking. Cook according to package instructions until al dente, usually around 8-10 minutes. Reserve 1 cup of the pasta water before draining; this starchy water will help bind the Colorful Spring Pasta later.
Step 2: Sauté the Garlic
While the pasta cooks, heat 2 tablespoons of olive oil in a large skillet over medium heat. Add the minced garlic and sauté for about 1 minute, stirring constantly until fragrant but not browned. This will create a lovely aromatic base for your colorful veggies in the upcoming steps.
Step 3: Add the Vegetables
Next, toss in the asparagus, bell peppers, and cherry tomatoes into the skillet. Sauté for 5-7 minutes, stirring occasionally, until the vegetables are tender yet still vibrant. You want them to maintain their color and crunch, contributing to the fresh appeal of the Colorful Spring Pasta.
Step 4: Incorporate the Peas and Herbs
Stir in the frozen peas and continue cooking for an additional 2-3 minutes, allowing them to heat through. Then, add the chopped basil and parsley, mixing well to combine. The fresh herbs will elevate the dish’s aroma and flavor profile, turning this pasta into a seasonally succulent meal.
Step 5: Combine Pasta with Vegetables
Now it’s time to reunite the pasta with its colorful companions! Carefully add the drained pasta to the skillet, tossing everything together gently. If the mixture feels a bit dry, gradually pour in the reserved pasta water until the texture is perfect for your Colorful Spring Pasta.
Step 6: Season and Serve
Lastly, season the combined dish with salt, pepper, and red pepper flakes to taste. Stir well and cook for another minute to meld all the flavors together. Serve your Colorful Spring Pasta warm, garnished with a sprinkle of Parmesan cheese or nutritional yeast for an extra touch of flavor.
Expert Tips for Colorful Spring Pasta
- Vegetable Crunch: Ensure vegetables stay vibrant and crisp by not overcooking them; a tender yet crunchy texture is ideal for your Colorful Spring Pasta.
- Creamy Option: For a luscious finish, add a splash of cream or some ricotta right before serving to elevate the dish’s richness.
- Taste Test: Adjust seasonings at the end! Your palate is key in creating a perfectly balanced flavor in your Colorful Spring Pasta.
- Starch Helper: Remember to save that reserved pasta water! It’s crucial for achieving the right sauciness to your dish.
- Ingredient Swaps: Don’t hesitate to mix it up; substitute any veggies you have on hand to keep your Colorful Spring Pasta fresh and exciting!
Colorful Spring Pasta Recipe Variations
Feel free to explore these delightful twists and enhancements that bring your Colorful Spring Pasta to the next level!
-
Dairy-Free: Substitute Parmesan cheese with nutritional yeast for a creamy, cheesy flavor without the dairy.
-
Protein Boost: Add grilled chicken or chickpeas to make this a hearty meal. Both options add extra protein and keep you satisfied.
-
Gluten-Free: Use gluten-free pasta for an equally delicious version, perfect for those with dietary restrictions.
-
Extra Greens: Toss in baby spinach or kale for added nutrients and a vibrant color boost. They wilt beautifully and add to the fresh profile.
-
Flavorful Upgrade: Try squeezing fresh lemon juice over the finished dish for a zesty kick that brightens the overall flavor. Citrus complements the veggies beautifully.
-
Nutty Texture: Incorporate toasted pine nuts or walnuts for a crunchy finish that contrasts well with the tender pasta and veggies.
-
Spice it Up: Add sliced jalapeños or a pinch of cayenne pepper if you’re looking for a delightful spicy kick. It’ll elevate the flavor profile and keep things exciting.
-
Seasonal Switch: Embrace seasonal produce by swapping in zucchini or green beans based on what’s freshest at the market, keeping it vibrant and diverse.
If you’re inspired to try more delicious options, why not check out my easy One Pot French Onion Pasta or the satisfying Ground Beef Orzo? Each recipe brings its own character to the table!
What to Serve with Colorful Spring Pasta?
Elevate your dining experience by pairing this vibrant dish with complementary sides that enhance its fresh flavors.
-
Garlic Bread: The warm, buttery crunch of garlic bread makes the perfect vehicle for delicious pasta sauce and adds a comforting touch.
-
Mixed Green Salad: A crisp salad brimming with seasonal greens, cucumbers, and a light vinaigrette balances the richness of the pasta, providing a refreshing bite.
-
Roasted Vegetables: Roasting brings out the natural sweetness in veggies like carrots and zucchini, creating a delightful contrast to the sautéed ones in your pasta.
-
Herbed Quinoa: This fluffy grain, seasoned with fresh herbs, adds a nutty flavor while packing extra nutrients, making it a nutritious complement to your sunny dish.
-
Fruit Salad: A fruity medley with strawberries, citrus, and melons adds a sweet, vibrant contrast, rounding out your meal beautifully while refreshing the palate.
-
White Wine: A chilled glass of crisp Sauvignon Blanc harmonizes with the fresh herbs and vegetables, enhancing the overall dining experience with its acidity and floral notes.
Make Ahead Options
These Colorful Spring Pasta components are ideal for busy home cooks looking to save time! You can chop and prepare all your vegetables up to 24 hours in advance, storing them in an airtight container in the refrigerator to maintain their freshness. Additionally, you can cook the pasta in advance and toss it with a little olive oil to prevent sticking, keeping it fresh for up to 3 days. When you’re ready to enjoy your meal, simply sauté the prepared veggies, toss in the pasta, and heat through for just a few minutes, adding a splash of reserved pasta water if needed for a delightful finish. This way, you’ll have a vibrant, nutritious meal ready without any stress!
How to Store and Freeze Colorful Spring Pasta
Fridge: Keep your Colorful Spring Pasta in an airtight container for up to 3 days. Reheat gently on the stovetop with a splash of water or oil to restore moisture.
Freezer: For long-term storage, freeze the pasta in a freezer-safe, airtight container for up to 2 months. When ready to enjoy, thaw in the fridge overnight and reheat on the stovetop.
Reheating: For best results, reheat pasta on low heat in a skillet, adding a drizzle of olive oil or a splash of pasta water to keep everything silky and delicious.
Assembly: Consider assembling the dish, but store the pasta and vegetables separately if you plan to freeze portions. This will help maintain the veggies’ texture when reheated.
Colorful Spring Pasta Recipe FAQs
How do I choose the best vegetables for my Colorful Spring Pasta?
Absolutely! Look for fresh, seasonal vegetables with vibrant colors. For instance, asparagus should be bright green and firm, while bell peppers should be crisp without dark spots on their skin. Cherry tomatoes ought to be plump and shiny. If you’re buying frozen peas, ensure they are bright green and free from ice crystals, indicating freshness.
How should I store leftover Colorful Spring Pasta?
You can store your Colorful Spring Pasta in an airtight container in the refrigerator for up to 3 days. When you’re ready to eat, just reheat it on low in a skillet, adding a splash of water or oil to prevent it from drying out. This method keeps the flavors intact and ensures a delightful meal again!
Can I freeze Colorful Spring Pasta?
Certainly! To freeze, place the cooled pasta in a freezer-safe container or bag, removing as much air as possible. Your Colorful Spring Pasta can be stored in the freezer for up to 2 months. To enjoy, simply thaw it overnight in the refrigerator and reheat gently in a skillet, adding olive oil or reserved pasta water to keep it moist.
What should I do if my vegetables become too soft while cooking?
Very good question! If you find your vegetables turning mushy while sautéing, it’s usually because they’ve been cooked too long. To prevent this, aim for vibrant color and crispness. Cook them just until tender, about 5-7 minutes, then quickly combine with the pasta. Next time, try increasing the heat slightly to ensure a quick sauté, preserving their crunch.
Are there any dietary considerations for making this recipe?
Absolutely! This Colorful Spring Pasta can easily be made gluten-free by selecting gluten-free pasta alternatives. For dairy-free options, omit the Parmesan cheese or replace it with nutritional yeast, which adds a beautiful umami flavor without dairy. If you’re cooking for pets, be cautious of ingredients like garlic and onions, which are harmful to them—stay focused on the fresh veggies for your own tasty meal!
How can I modify the pasta for a heartier meal?
If you’re looking to bump up the nutrition and satiety, you can add proteins like grilled chicken, sautéed shrimp, or even chickpeas! Simply toss the protein into the skillet with the vegetables or mix them in with the pasta at the end. The more the merrier when it comes to customizing your Colorful Spring Pasta to fit your cravings!

Delicious Colorful Spring Pasta Recipe for Fresh Flavors
Ingredients
Equipment
Method
- Start by bringing a large pot of salted water to a rolling boil. Add your pasta and cook according to package instructions until al dente, usually around 8-10 minutes. Reserve 1 cup of the pasta water before draining.
- While the pasta cooks, heat the olive oil in a large skillet over medium heat. Add the minced garlic and sauté for about 1 minute until fragrant.
- Toss in the asparagus, bell peppers, and cherry tomatoes into the skillet. Sauté for 5-7 minutes until the vegetables are tender yet vibrant.
- Stir in the frozen peas and cook for an additional 2-3 minutes. Then, add the chopped basil and parsley, mixing well to combine.
- Carefully add the drained pasta to the skillet, tossing everything together gently. Use reserved pasta water if the mixture feels dry.
- Season with salt, pepper, and red pepper flakes to taste. Stir well and cook for another minute. Serve warm, garnished with Parmesan or nutritional yeast.
Leave a Reply