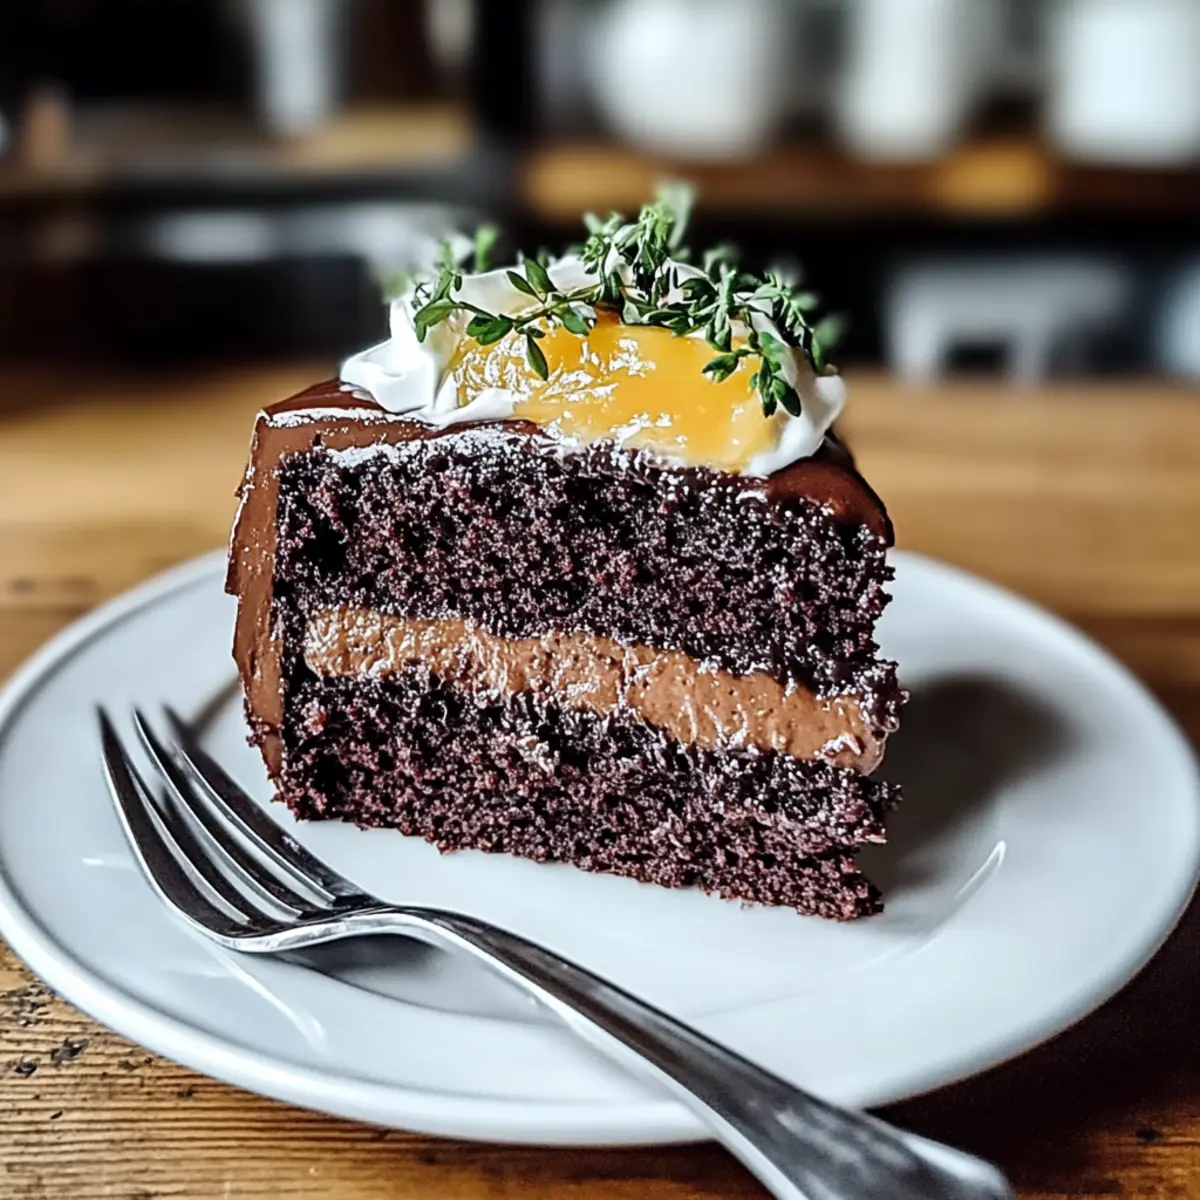
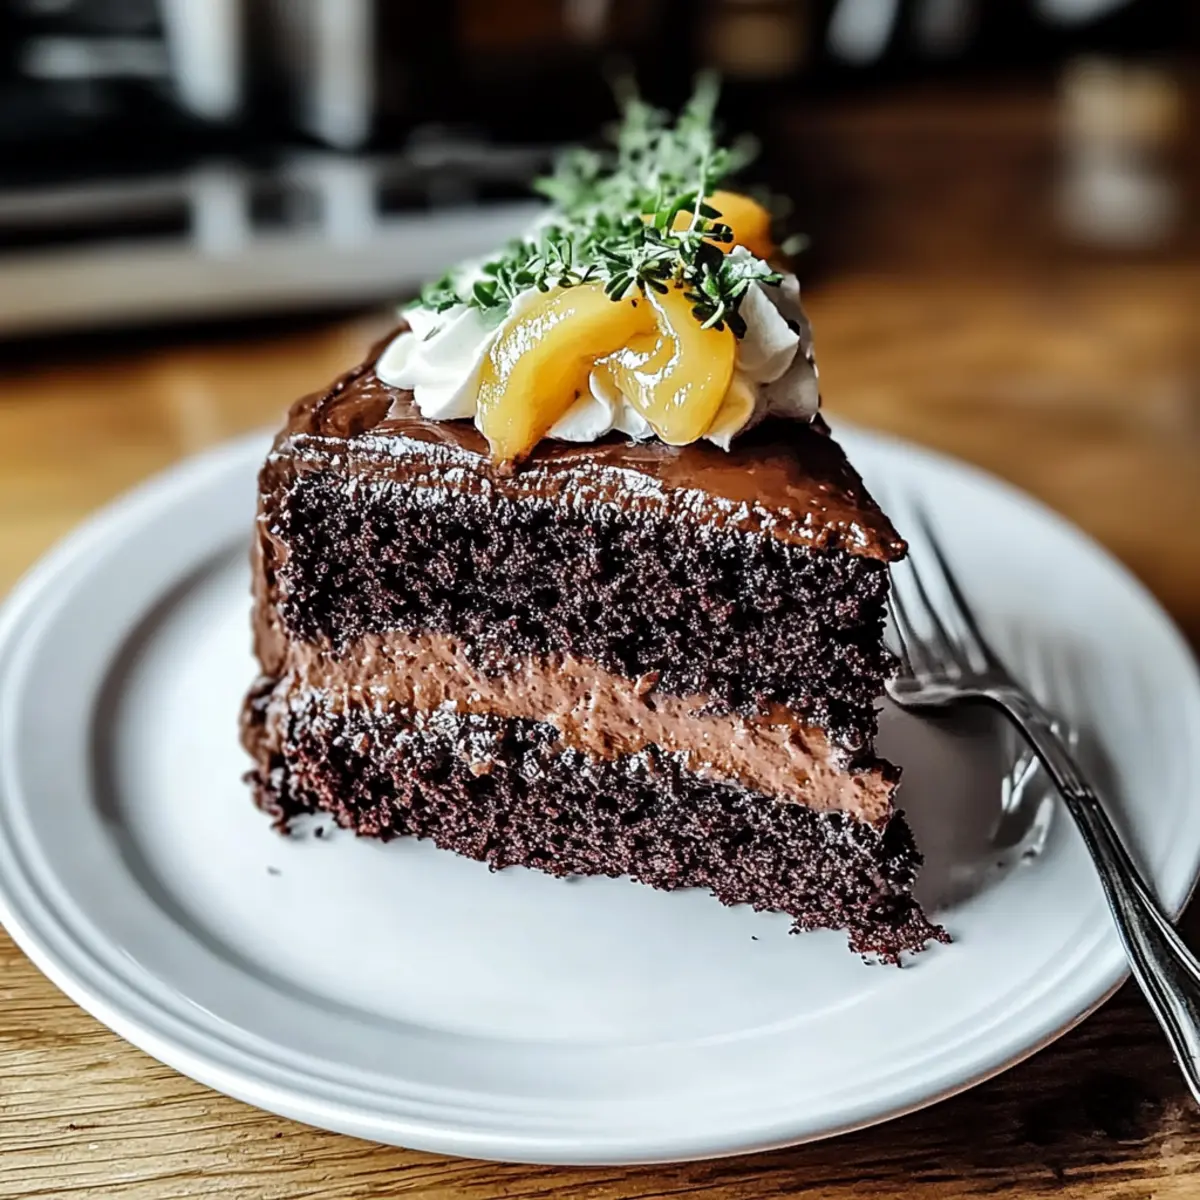
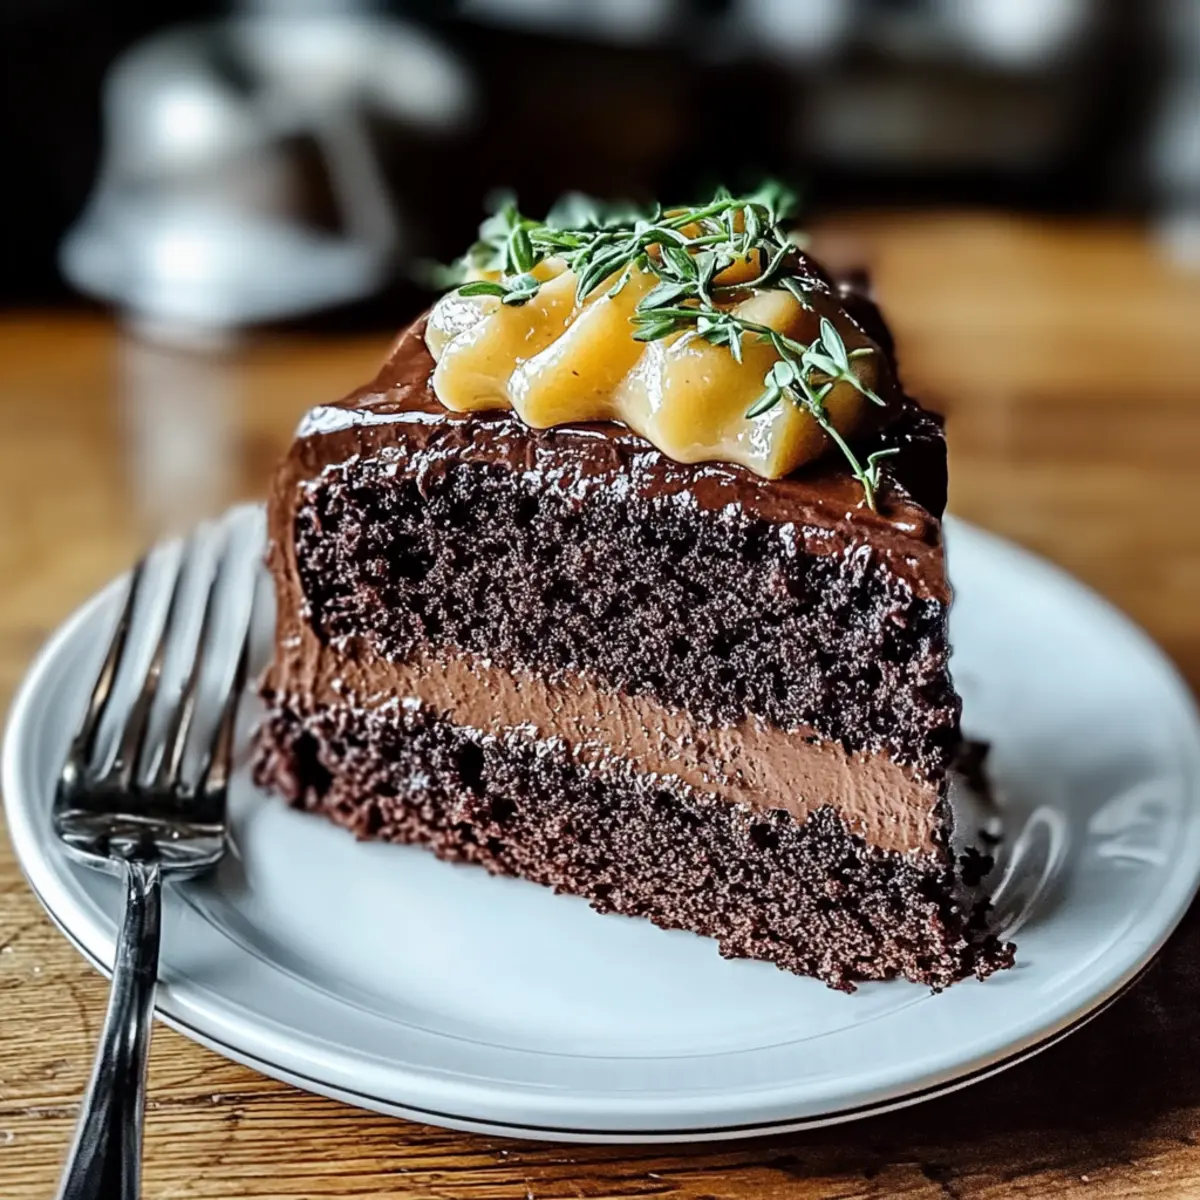
There’s something undeniably magical about a slice of cake that transports you back to simpler times. The Ultimate Brooklyn Blackout Cake does just that, offering layers of rich chocolate cake slathered in creamy chocolate pudding and light whipped cream. This recipe isn’t just for seasoned bakers; it’s perfect for anyone looking to impress at a gathering or simply indulge at home. Plus, you can adapt it for gluten-free or dairy-free diets, ensuring everyone can join in on the chocolatey goodness. With every forkful, you’ll find it not only satisfies your sweet tooth but also weaves a delicious story that brings family and friends together. Ready to uncover the secret to this beloved treat? Let’s get baking!
Why is this cake so irresistible?
Magical Layering: This Brooklyn Blackout Cake features rich layers of moist chocolate, creamy pudding, and fluffy whipped cream that create a decadent experience for every chocolate lover.
Adaptable Recipe: With gluten-free and dairy-free options available, everyone can enjoy a slice of this fantastic delight, making it perfect for gatherings.
Nostalgic Goodness: Each bite transports you back to childhood memories, evoking feelings of comfort and joy. It’s a conversation starter at any party!
Easy Instructions: Even novice bakers will find this cake a breeze to whip up, leading to a delicious result that seems far more complex than it really is.
Impress Your Guests: Bring this showstopper to your next gathering, and watch everyone’s eyes light up, making it a cherished favorite among friends and family. For a uniquely delicious dessert experience, why not serve it alongside our delightful Strawberry Custard Cake? Your guests will certainly thank you!
Brooklyn Blackout Cake Ingredients
For the Cake
- All-purpose flour – Provides structure for the cake; can substitute with a gluten-free flour blend for gluten-free options.
- Granulated sugar – Adds sweetness and moisture; ensure freshness for maximum flavor.
- Unsweetened cocoa powder – Key flavor component for rich chocolate taste; use high-quality cocoa for the best results.
- Baking powder & Baking soda – Leavening agents that help the cake rise; check for freshness to avoid flat cakes.
- Salt – Enhances flavor and balances sweetness; essential for depth in baked goods.
- Large eggs – Binds ingredients together and adds moisture; use room temperature eggs for better emulsion.
- Whole milk – Contributes richness and moisture; can replace with almond or oat milk for dairy-free options.
- Vegetable oil – Keeps the cake moist; can substitute with melted butter for added flavor.
- Vanilla extract – Provides aromatic sweetness and enhances other flavors; avoid imitation extracts for the best taste.
- Boiling water – Blooms the cocoa, intensifying the chocolate flavor.
For the Pudding
- Chocolate pudding mix (instant) – Adds moisture and creaminess; can experiment with flavored pudding for variation.
- Milk (for pudding) – Cold milk is recommended for proper consistency.
For the Frosting
- Heavy whipping cream – Adds richness for frosting; can substitute with a dairy-free whipping cream.
- Powdered sugar – Sweetens and stabilizes the whipped cream frosting.
Step‑by‑Step Instructions for Brooklyn Blackout Cake
Step 1: Preheat the Oven
Begin by preheating your oven to 350°F (175°C). While the oven is heating, take two 9-inch round cake pans and grease them well with butter or oil. Dust the pans lightly with flour, tapping out any excess, ensuring they are ready for the batter. This step is crucial to prevent the cake from sticking.
Step 2: Mix the Dry Ingredients
In a large mixing bowl, whisk together 2 cups of all-purpose flour, 2 cups of granulated sugar, and ¾ cup of unsweetened cocoa powder along with 1 ½ teaspoons of baking powder, 1 ½ teaspoons of baking soda, and 1 teaspoon of salt. Combine these dry ingredients thoroughly for about 2 minutes to eliminate any lumps and set the foundation for the rich flavor of your Brooklyn Blackout Cake.
Step 3: Incorporate the Wet Ingredients
Add 2 large eggs, 1 cup of whole milk, ½ cup of vegetable oil, and 2 teaspoons of vanilla extract to the dry mixture. Using a hand mixer or whisk, blend the ingredients gently on medium speed until you achieve a smooth and luscious batter, about 2-3 minutes. This creates a cohesive mixture that contributes to the cake’s moist texture.
Step 4: Add Boiling Water
Next, carefully stir in 1 cup of boiling water into the batter. This step is essential as it enhances the cocoa flavor, making your cake incredibly rich. The batter will be quite thin, which is normal and will lead to a beautifully moist Brooklyn Blackout Cake. Take care to combine well but avoid over-mixing.
Step 5: Bake the Cake
Pour the batter evenly between your prepared cake pans, ensuring they are filled to about two-thirds full. Place them in the preheated oven and bake for 30-35 minutes. To check for doneness, insert a toothpick into the center of each cake; it should come out clean or with a few moist crumbs attached.
Step 6: Cool the Cake Layers
Once baked, remove the pans from the oven and let them cool in the pans for about 30 minutes. After this initial cooling period, carefully transfer the cakes onto a wire rack to cool completely. This step prevents the layers from becoming soggy and ensures they set properly, making it easier for assembly.
Step 7: Prepare the Pudding Layer
While the cakes are cooling, prepare the pudding mixture. In a separate bowl, whisk together 1 package of chocolate pudding mix with 2 cups of cold milk until the mixture thickens, usually around 2 minutes. Set the pudding aside to allow it to reach a creamy consistency, which will beautifully complement your Brooklyn Blackout Cake layers.
Step 8: Whip the Cream for Frosting
In another mixing bowl, pour 1 cup of heavy whipping cream and add ½ cup of powdered sugar. Using a hand mixer, beat the mixture at medium-high speed until soft peaks form, which typically takes about 3-5 minutes. This light, fluffy frosting will serve as the perfect topping for your cake.
Step 9: Assemble the Brooklyn Blackout Cake
To assemble, place one cooled cake layer on a serving plate. Spoon a generous layer of chocolate pudding over the top, spreading it evenly. Carefully position the second cake layer on top of the pudding, and then cover the entire cake with the whipped cream frosting. For a professional touch, smooth the frosting around the edges and top.
Step 10: Optional Garnishing
For a final flourish, you can sprinkle cocoa powder or add chocolate shavings on top of the whipped cream frosting. This extra decoration not only enhances the aesthetic but also increases the chocolate flavor, making your Brooklyn Blackout Cake a stunning showstopper, ready to impress anyone at your gathering!

How to Store and Freeze Brooklyn Blackout Cake
-
Room Temperature: Keep leftover cake covered in a cake dome or plastic wrap for up to 2 days to maintain its moisture and flavor.
-
Fridge: Store any remaining slices in an airtight container in the refrigerator for up to 4-5 days. Always ensure it’s well-covered to avoid drying out.
-
Freezer: Wrap individual slices tightly in plastic wrap and place them in a freezer-safe bag to freeze for up to 3 months. Thaw in the fridge overnight before serving.
-
Reheating: If desired, reheat the cake slices gently in the microwave for about 10-15 seconds to restore their warmth and softness, enhancing the indulgence of your Brooklyn Blackout Cake.
Make Ahead Options
These Brooklyn Blackout Cake components are perfect for meal prep, allowing busy home cooks to save time during the week! You can prepare the cake layers up to 3 days in advance—just wrap them tightly in plastic wrap once they’ve cooled completely. The pudding can also be made up to 24 hours ahead; simply store it in the refrigerator to maintain its creamy consistency. On the day you plan to serve, whip the cream just before assembly for the freshest taste. Just layer the cooled cake, spread the pudding, and top with whipped cream for a showstopper dessert that’s just as delicious as when freshly made!
Expert Tips for Brooklyn Blackout Cake
-
Quality Ingredients: Use high-quality cocoa powder and chocolate pudding mix for the richest flavor. This elevates your Brooklyn Blackout Cake to gourmet status.
-
Room Temperature Eggs: Ensure your eggs are at room temperature for better emulsion and a smoother batter. This is a common step that many overlook, impacting the cake’s texture.
-
Preventing Sticking: Don’t skip the greasing and dusting of the cake pans. Even with a moist batter, properly preparing the pans will prevent sticking, allowing for perfect layering.
-
Cool Completely: Allow the cake layers to cool completely before frosting to prevent melting your whipped cream. This step ensures the frosting stays fluffy and beautiful.
-
Avoid Over-Mixing: Mix the wet ingredients just enough to combine without incorporating too much air. Over-mixing can lead to a dense cake, which we want to avoid for a light and airy Brooklyn Blackout Cake!
What to Serve with Brooklyn Blackout Cake
The Ultimate Brooklyn Blackout Cake is a showstopper, and pairing it with delightful sides enhances the sweetness of each rich slice.
- Vanilla Ice Cream: The creamy sweetness of vanilla ice cream complements the cake’s chocolate richness, balancing flavors beautifully.
- Fresh Berries: A garnish of fresh strawberries or raspberries adds a tart contrast, brightening the dessert while providing a pop of color.
- Chocolate Sauce: Drizzling chocolate sauce over the cake intensifies its decadent chocolate flavor, creating an indulgent treat that’s irresistible.
- Espresso: A cup of strong espresso or coffee enhances the chocolate experience, making this a perfect after-dinner delight.
- Whipped Cream: Extra dollops of whipped cream on the side elevate the dessert’s lightness, inviting guests to savor every bite with a fluffy texture.
- Mint Leaves: A fresh mint sprig as a garnish not only adds a vibrant color but also offers a refreshing flavor that contrasts beautifully with the cake.
- Coconut Whipped Cream: For a lighter topping, use coconut whipped cream, introducing a tropical twist that pairs wonderfully with chocolate.
- Chocolate-Covered Fruits: Serve chocolate-dipped strawberries or bananas on the side for a fun, bite-sized treat that enhances the decadence!
- Chocolate Tart: A slice of rich chocolate tart alongside provides a delightful texture change, perfect for duo dessert lovers.
- Chilled Milk: An ice-cold glass of milk is the classic accompaniment everyone loves, making each bite of Brooklyn Blackout Cake feel like a nostalgic treat!
Brooklyn Blackout Cake Variations & Substitutions
Feel free to let your creativity run wild with these delightful twists on the Brooklyn Blackout Cake, ensuring every bite stays exciting and delicious!
-
Gluten-Free: Substitute all-purpose flour with a gluten-free flour blend to enjoy this rich cake without worry.
-
Dairy-Free: Use almond milk and a dairy-free whipped cream to cater to dairy sensitivities while maintaining the cake’s lusciousness.
-
Flavored Pudding: Experiment with different pudding flavors like banana or caramel for a unique twist that surprises every palate.
-
Nutty Flavor: Incorporate ground almonds or hazelnuts into the batter for a delightful crunch that complements the rich chocolate layers.
-
Less Sugar: Swap granulated sugar with coconut sugar or a low-calorie sweetener to cater to those watching their sugar intake.
-
Spice it Up: Add a pinch of cinnamon or espresso powder to intensify the chocolate flavor, creating a delightful depth that excites your taste buds.
-
Decorative Toppings: Garnish with fresh berries or crushed nuts for a touch of elegance that adds texture and flavor appeal.
For a little something extra, serve your cake alongside a scoop of decadent Japanese Cotton Cheesecake or a slice of our delightful Angel Cake Churro for a dessert table that will wow your guests!
Brooklyn Blackout Cake Recipe FAQs
How do I select the best ingredients for Brooklyn Blackout Cake?
For the best results, I recommend using high-quality unsweetened cocoa powder and granulated sugar. When choosing the flour, consider a gluten-free blend if you’re accommodating dietary needs. Make sure your eggs are fresh and at room temperature, as this helps create a better emulsion in your batter.
How should I store leftover Brooklyn Blackout Cake?
Store any leftover cake in an airtight container at room temperature for up to 2 days to retain moisture. If you have more leftovers, it’s best to refrigerate the slices in an airtight container for 4-5 days. This keeps them fresh and prevents drying out.
Can I freeze Brooklyn Blackout Cake?
Absolutely! To freeze, wrap individual slices tightly in plastic wrap, then place them in a freezer-safe bag. This method will preserve them for up to 3 months. When you’re ready to enjoy, simply thaw the slices in the fridge overnight before serving.
What should I do if my cake layers stick to the pans?
To prevent sticking, make sure to grease your pans thoroughly and dust them with flour before pouring in the batter. If you find the cake still sticks, run a knife around the edges and gently shake the pan while tapping it against the counter to loosen it. This can help release the cake without breakage.
Are there any dietary considerations for pets or allergies with this cake?
Yes, this cake is rich in ingredients that can be harmful to pets, especially chocolate. Keep it safely stored away from pets. Additionally, it contains common allergens like eggs, dairy, and gluten. Consider using dairy-free and gluten-free alternatives if you or your guests have specific dietary restrictions or allergies.
What’s the best way to keep the layers from getting soggy after assembly?
To maintain the cake’s integrity, assemble it just before serving to prevent the layers from becoming too moist. If you do need to prepare it in advance, keep the whipped cream frosting separate until you’re ready to serve. Enjoy your delightful Brooklyn Blackout Cake!
Irresistible Brooklyn Blackout Cake: A Chocolate Dream Come True
Ingredients
Equipment
Method
- Preheat your oven to 350°F (175°C) and prepare two 9-inch round cake pans with butter or oil and flour.
- In a large bowl, whisk together flour, sugar, cocoa, baking powder, baking soda, and salt for about 2 minutes.
- Add eggs, milk, oil, and vanilla to the dry mix and blend until smooth, about 2-3 minutes.
- Stir in boiling water carefully, mixing until well combined but not over-mixed.
- Pour the batter into prepared pans and bake for 30-35 minutes or until a toothpick comes out clean.
- Cool the cakes in the pans for 30 minutes, then transfer to a wire rack to cool completely.
- Prepare pudding by whisking pudding mix with cold milk until thick, about 2 minutes.
- In another bowl, beat heavy cream and powdered sugar until soft peaks form, about 3-5 minutes.
- Assemble by layering one cake, adding chocolate pudding, then the second cake, topping with whipped cream frosting.
- Optionally, garnish with cocoa powder or chocolate shavings.
Leave a Reply