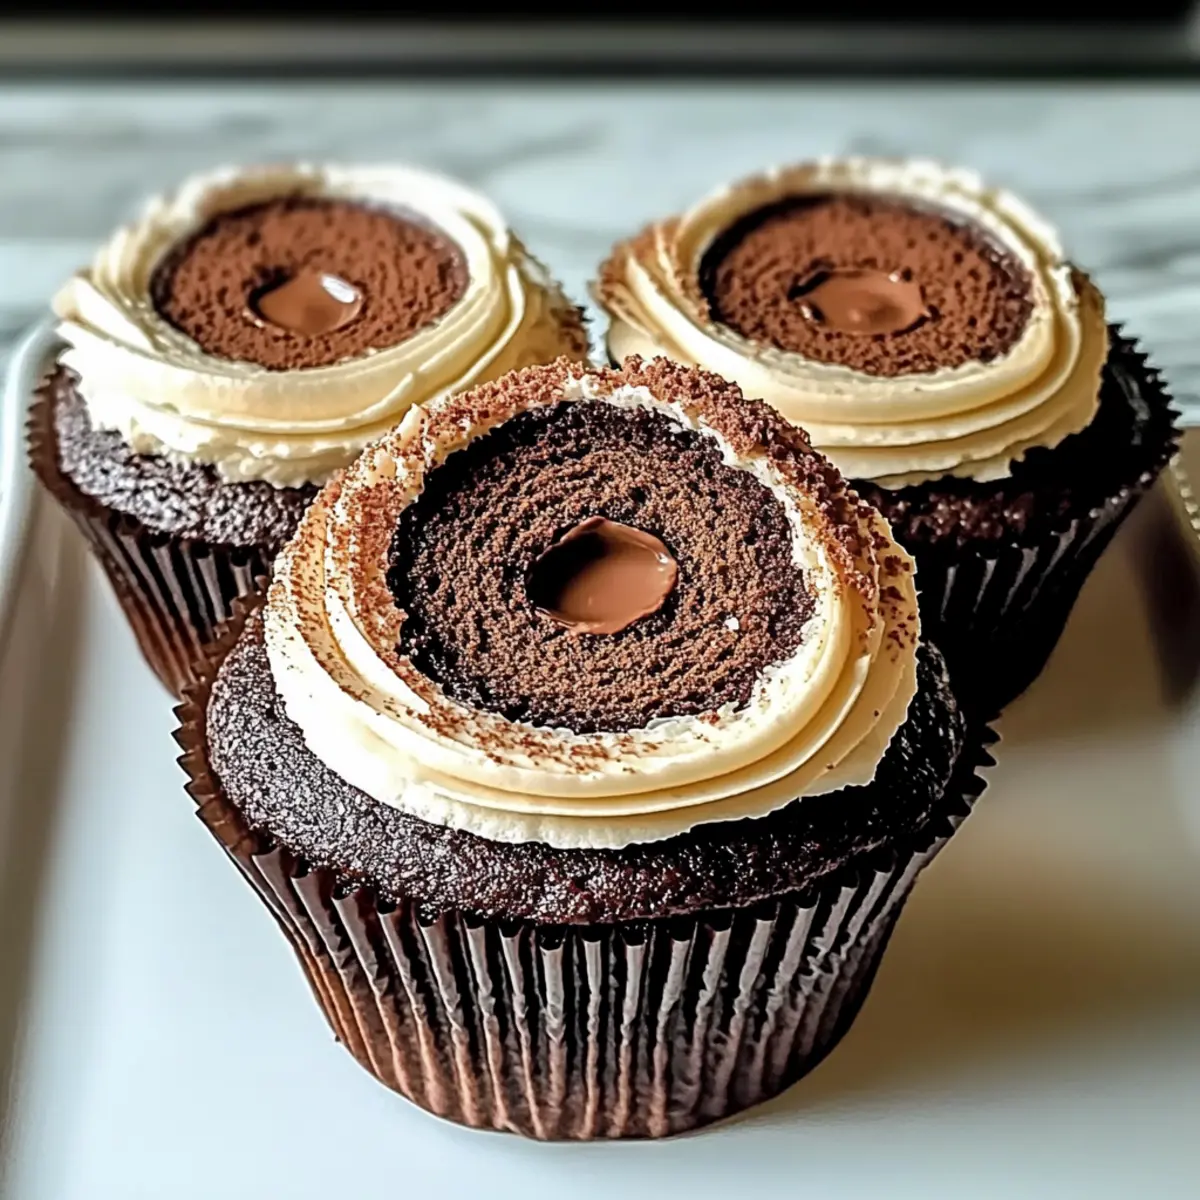
As I stood in my kitchen the other day, the sweet smell of chocolate wafting through the air, I found myself lost in a delightful daydream of decadent desserts. This moment of bliss inspired me to create these irresistible Chocolate Tiramisu Cupcakes. With their rich chocolate base and a luxurious coffee-infused filling, each bite transports you straight to dessert paradise. Not only are these cupcakes a showstopper that can elevate any gathering, but they can also be whipped up in under 30 minutes—perfect for those last-minute cravings! Plus, with gluten-free options, they’re a treat everyone can enjoy. Are you ready to dive into this delightful adventure?
Why are Chocolate Tiramisu Cupcakes a Must-Try?
Irresistible Indulgence: These cupcakes combine the classic flavors of tiramisu with a rich chocolate base, giving you a dessert that’s absolutely heavenly.
Quick Prep Time: Whip up these delights in under 30 minutes, making them perfect for spontaneous dessert cravings or unexpected guests.
Gluten-Free Options: Enjoy a delicious treat that caters to everyone’s dietary needs without compromising flavor.
Customizable Flavors: Experiment with additional liqueurs or toppings like fresh berries or chocolate shavings to make each batch uniquely yours.
Crowd-Pleasing Treat: They’re not just gorgeous—they’re a guaranteed hit at any gathering, pleasing both chocolate and coffee lovers alike.
Elevate your dessert game even further with classic options like Cottage Cheese Chocolate for a twist or delightful Tiramisu Chia Pudding for a healthier choice!
Chocolate Tiramisu Cupcake Ingredients
For the Cupcakes
- All-Purpose Flour – Provides structure to the cupcakes; substitute with a gluten-free all-purpose blend if necessary.
- Cocoa Powder – Adds a rich chocolate flavor; consider dark cocoa for an even deeper taste.
- Baking Powder – Acts as the leavening agent; keep it fresh for the best rise.
- Granulated Sugar – Sweetens the cupcake batter; coconut sugar can be used as a healthier alternative.
- Eggs – Bind the ingredients together and add moisture; use flax eggs for a vegan option.
- Milk – Contributes moisture to the batter; almond milk works well for a dairy-free version.
- Vegetable Oil – Keeps the cupcakes moist; melted butter is a great substitute.
- Espresso – Infuses a rich coffee flavor; instant coffee can also work in a pinch.
For the Filling
- Mascarpone Cheese – Creates the yummy creamy filling; ricotta can be a good alternative.
- Cocoa Powder (for dusting) – Finishes off the treating, adding a touch of bitterness to balance sweetness.
Experience the delightful taste of Chocolate Tiramisu Cupcakes with these carefully selected ingredients!
Step‑by‑Step Instructions for Chocolate Tiramisu Cupcakes
Step 1: Preheat and Prepare
Begin by preheating your oven to 350°F (175°C) and lining a muffin tin with cupcake liners. This ensures a smooth release once the Chocolate Tiramisu Cupcakes are baked. Take a moment to gather your ingredients and equipment, including mixing bowls and a whisk, to set yourself up for a delightful baking experience.
Step 2: Mix Dry Ingredients
In a large mixing bowl, sift together the all-purpose flour, cocoa powder, baking powder, and granulated sugar. This step adds air and combines the dry ingredients well, providing the base for your cupcakes. Stir until evenly mixed, and watch for any lumps; you want a smooth texture to help create the perfect chocolatey delights.
Step 3: Combine Wet Ingredients
In another bowl, whisk together the eggs, milk, and vegetable oil until smooth and well blended. This mixture will add moisture and richness to your Chocolate Tiramisu Cupcakes. Once everything is combined, you’ll see a creamy consistency—this is a sign you’re ready to move forward!
Step 4: Bring Together the Mixtures
Gradually pour the wet ingredients into the dry ingredients, gently folding the mixture together. Be careful not to overmix; small lumps are completely acceptable! Stir until just combined, and let the anticipation build as you prepare to fill your cupcake liners with this luscious batter.
Step 5: Fill and Bake
Spoon the batter into the prepared cupcake liners, filling each about two-thirds full to allow for rising. Place the muffin tin in the preheated oven and bake for 18–20 minutes, or until a toothpick inserted into the center comes out clean. Enjoy the heavenly aroma wafting through your kitchen as they bake!
Step 6: Cool Down
Once baked, remove the Chocolate Tiramisu Cupcakes from the oven and let them cool in the tin for about 5 minutes. Then, carefully transfer them to a wire rack to cool completely. Proper cooling is crucial to achieving the perfect texture, so resist the urge to rush this step!
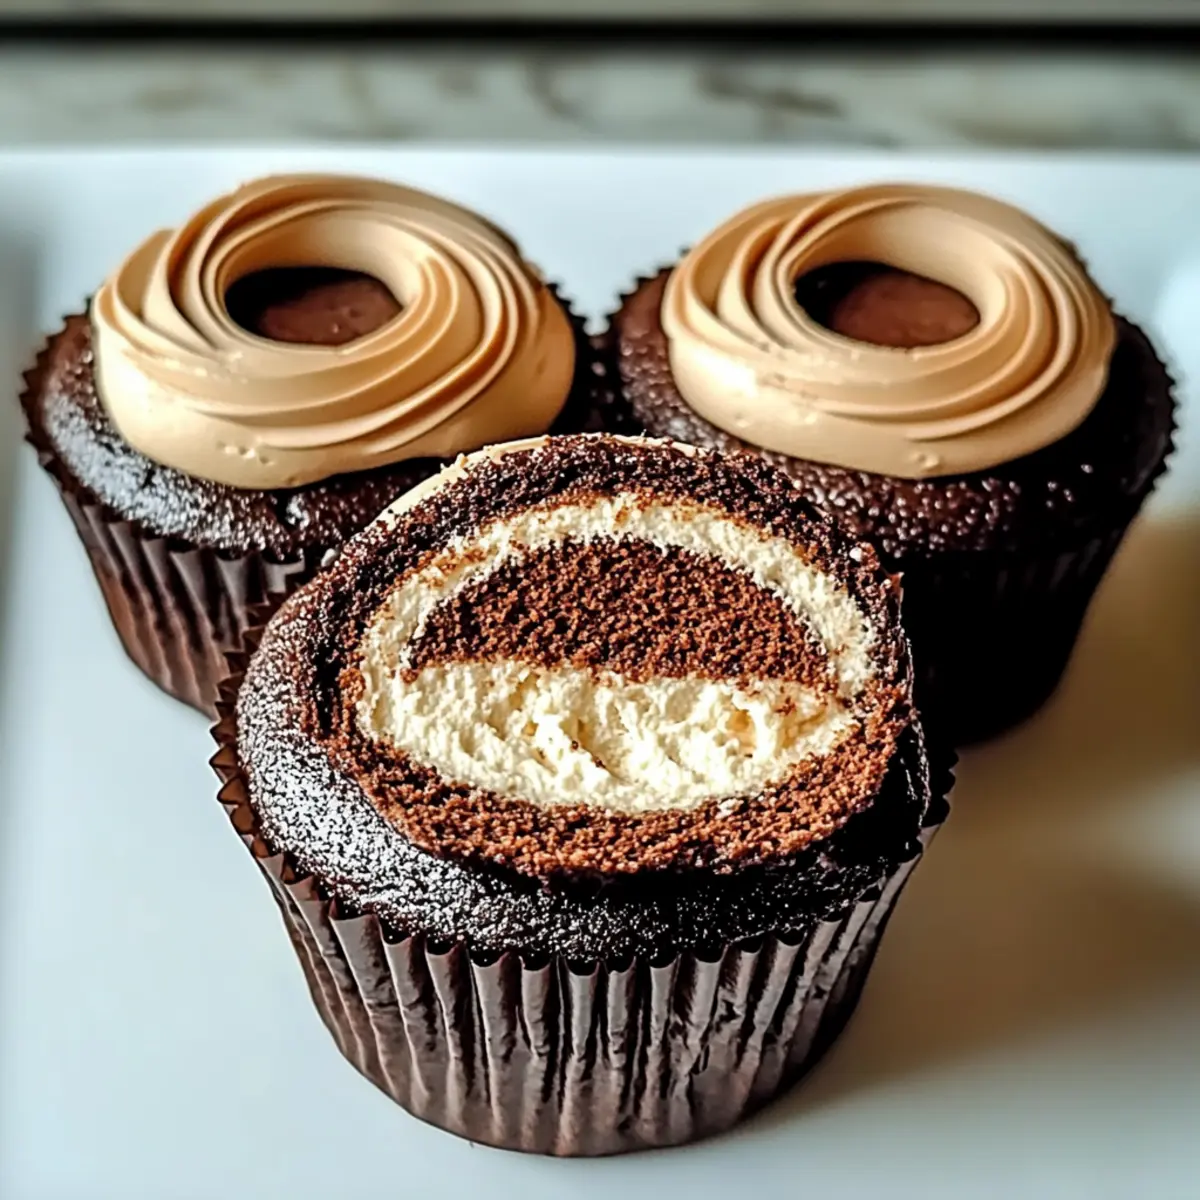
Step 7: Make the Filling
While the cupcakes cool, prepare the creamy filling by whipping together the mascarpone cheese and espresso until fluffy. This coffee-infused mixture adds a luxurious touch to your cupcakes. The filling should be smooth and spreadable, ready to elevate your Chocolate Tiramisu Cupcakes to another level of deliciousness.
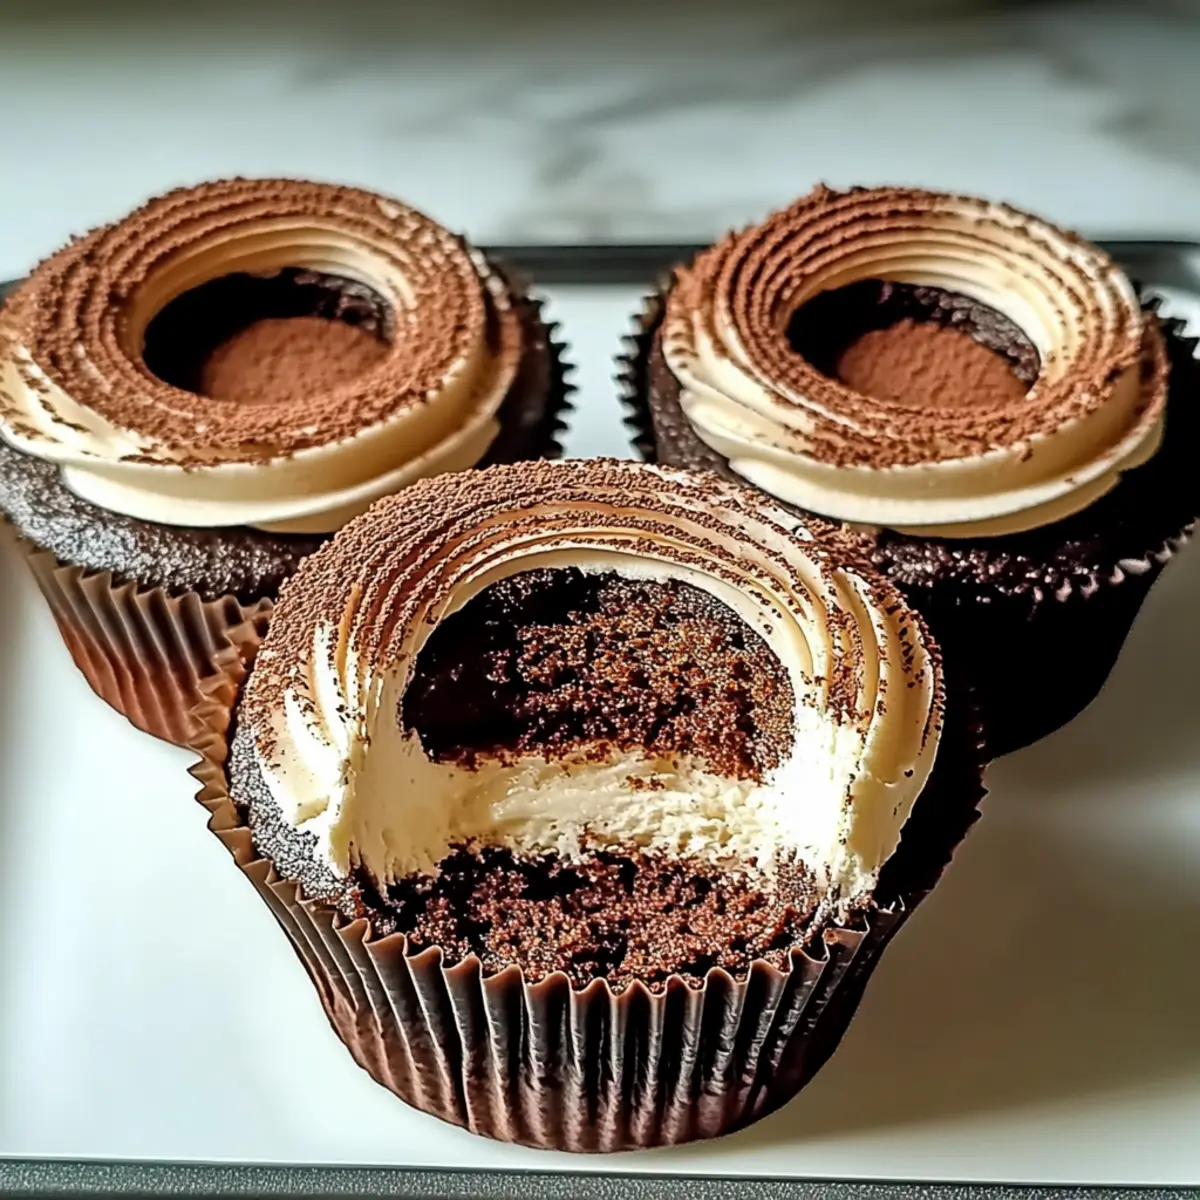
Step 8: Assemble Cupcakes
Once the cupcakes are completely cool, slice off the tops and hollow out a bit of the center if desired. Use a piping bag or a spoon to fill each cupcake generously with the mascarpone and espresso mixture. Each bite should burst with decadent flavor, mirroring the classic tiramisu experience.
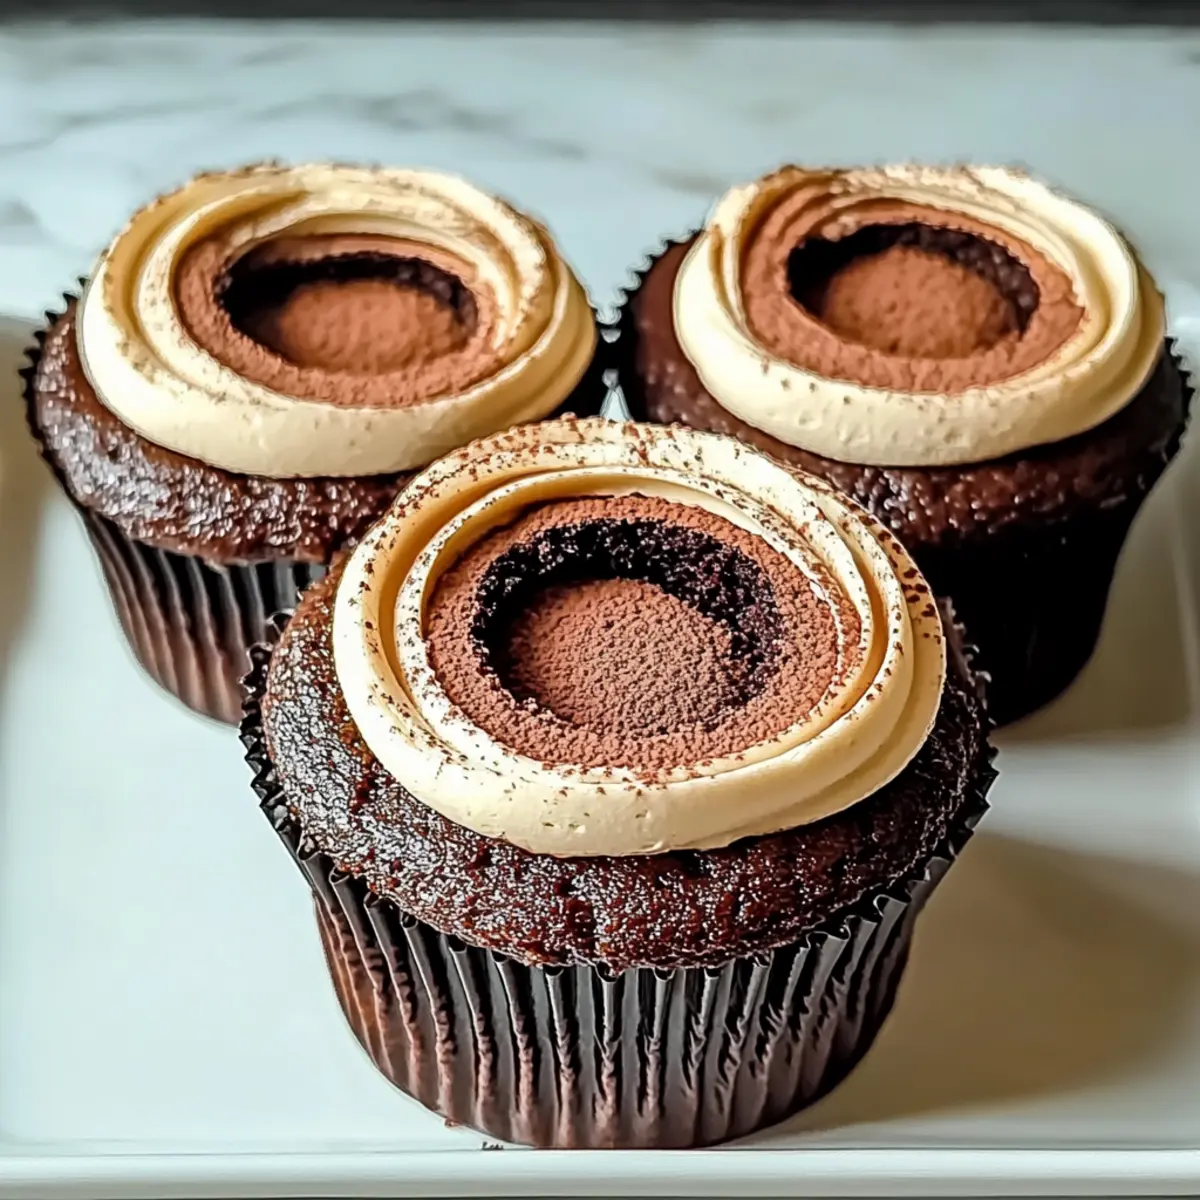
Step 9: Dust with Cocoa
To finish your Chocolate Tiramisu Cupcakes, dust the tops with cocoa powder for a beautiful and bittersweet finish. This final touch enhances the luxurious flavors and makes your cupcakes look even more enticing. Now they’re ready to be served at your next gathering or enjoyed as a special treat!
Chocolate Tiramisu Cupcakes Variations & Substitutions
Feel free to let your creativity soar as you customize these delightful cupcakes to fit your taste and dietary needs!
- Gluten-Free: Substitute all-purpose flour with a gluten-free all-purpose blend for a delightful treat anyone can enjoy.
- Dairy-Free: Use almond or oat milk instead of regular milk, and try a dairy-free cream cheese for the filling.
- Egg-Free: Replace eggs with flax eggs (1 tablespoon of ground flaxseed mixed with 2.5 tablespoons of water) for a vegan-friendly version.
- Flavor Boost: Add a splash of your favorite flavored liqueur, like amaretto or hazelnut, to the filling for an elevated taste experience.
- Texture Twist: Incorporate finely chopped nuts (like walnuts or hazelnuts) into the cupcake batter for a delightful crunch.
- Low Sugar: Substitute granulated sugar with a sugar alternative like erythritol or monk fruit for a healthier option without sacrificing flavor.
- Fruity Addition: Fold in some mini chocolate chips or dried fruits, such as cherries or cranberries, into the batter for extra bursts of flavor.
- Whipped Cream Topping: Top with a dollop of whipped coconut cream instead of the traditional mascarpone for a lighter finish.
For even more indulgent dessert options, consider exploring White Chocolate Orange for a twist or satisfying cravings with creamy Cotton Cheesecake Cupcakes!
Expert Tips for Chocolate Tiramisu Cupcakes
-
Cool Completely: Allow cupcakes to cool entirely before filling; this prevents the filling from melting and ensures a delightful texture.
-
Mix Gently: Avoid overmixing the batter; too much mixing can lead to rubbery cupcakes. Lumps are perfectly fine!
-
Accurate Measurement: For the best results, measure ingredients carefully. Use a kitchen scale if possible, especially for flour and sugar.
-
Moisture Boost: If your cupcakes turn out dry, brush them lightly with brewed coffee to add moisture and enhance the coffee flavor.
-
Customize Wisely: Experiment with flavors in the filling, but balance them well; too much liqueur can overwhelm the chocolate with the filling for Chocolate Tiramisu Cupcakes.
Make Ahead Options
These Chocolate Tiramisu Cupcakes are a dream for busy cooks looking to save time without sacrificing flavor! You can bake the cupcakes up to 24 hours in advance; simply store them in an airtight container to keep them fresh and moist. For an even easier experience, prepare the creamy mascarpone filling ahead of time and refrigerate it for up to 3 days. Just before serving, fill the cooled cupcakes with the espresso-infused mixture, and dust with cocoa powder for that finishing touch. This way, you can enjoy delicious, made-from-scratch desserts with minimal effort on the day of your gathering!
What to Serve with Chocolate Tiramisu Cupcakes?
Elevate your dessert experience by pairing your delightful cupcakes with complementary flavors and textures that will have everyone coming back for more.
-
Rich Vanilla Ice Cream: A scoop of this classic treat adds creaminess, balancing the dense chocolate and coffee flavors beautifully.
-
Fresh Berries: Juicy strawberries or raspberries provide a burst of freshness and acidity, cutting through the sweetness for a well-rounded treat.
-
Espresso Shot: For coffee lovers, a shot of espresso alongside adds an extra kick, enhancing the coffee flavor in the cupcakes while providing a delightful end to a meal.
-
Whipped Cream: A dollop of lightly sweetened whipped cream adds a fluffy texture that perfectly contrasts the rich filling of the cupcakes, making each bite even more indulgent.
-
Chocolate Sauce Drizzle: A warm drizzle of chocolate sauce can amplify the chocolate experience, creating a decadent dessert that doesn’t hold back on flavor.
-
Amaretto Coffee: Pair your cupcakes with a cup of amaretto-flavored coffee for a nutty twist that harmonizes with the tiramisu essence.
-
Dark Chocolate Shavings: Sprinkle some dark chocolate curls on top for an extra touch of elegance and a hint of bitterness that will balance the sweetness.
-
Raspberry Sauce: A tart raspberry sauce can brighten up each bite, adding a layer of complexity that perfectly complements the rich chocolate and coffee flavors.
How to Store and Freeze Chocolate Tiramisu Cupcakes
Room Temperature: Keep cupcakes at room temperature for up to 2 days in an airtight container to maintain their freshness and moisture.
Fridge: Store in the refrigerator for up to 5 days, but be sure to cover them well to prevent drying out.
Freezer: If you want to store them longer, freeze the cupcakes without filling for up to 3 months; wrap individually in plastic wrap, then place in a freezer-safe bag.
Reheating: To enjoy, thaw at room temperature, then fill with espresso mascarpone cream before serving.
Chocolate Tiramisu Cupcakes Recipe FAQs
How do I select the best ingredients for my Chocolate Tiramisu Cupcakes?
Choosing good-quality ingredients is vital for achieving the best flavor. Look for fresh eggs, as they add moisture and help bind everything together. When selecting cocoa powder, opt for unsweetened dark cocoa for a richer chocolate flavor. Also, ensure that your baking powder is fresh—this helps achieve the perfect rise. If you’re considering gluten-free options, select a reliable gluten-free all-purpose blend that mimics traditional flour’s texture.
What’s the best way to store my Chocolate Tiramisu Cupcakes?
To keep your cupcakes fresh, store them at room temperature in an airtight container for up to 2 days. For longer storage, they can be refrigerated for up to 5 days. Just make sure to seal them well to retain moisture. If you choose to store them in the fridge, I recommend letting them come to room temperature before serving for the best taste experience.
Can I freeze Chocolate Tiramisu Cupcakes?
Absolutely! To freeze your cupcakes, first let them cool completely. Then, wrap each cupcake individually in plastic wrap and place them in a freezer-safe bag. They can last up to 3 months in the freezer. When you’re ready to enjoy them, simply thaw them at room temperature. After thawing, add the espresso mascarpone filling and enjoy your treat!
What should I do if my cupcakes turn out dry?
If you find your Chocolate Tiramisu Cupcakes are a bit dry, don’t worry! Try brushing them with a little freshly brewed coffee or espresso to infuse moisture. Alternatively, consider tweaking the measurements next time—making sure not to overmeasure flour or overmix the batter could also help maintain their moisture. If they still turn out dry, a scoop of ice cream can help balance the texture!
Are these cupcakes suitable for someone with gluten intolerance?
Yes! You can easily make Chocolate Tiramisu Cupcakes gluten-free by using a certified gluten-free all-purpose flour blend. Just be sure to read the labels carefully to avoid cross-contamination. The flavor remains intact, and everyone can enjoy this delightful dessert without worry!
Decadent Chocolate Tiramisu Cupcakes You Can't Resist
Ingredients
Equipment
Method
- Preheat your oven to 350°F (175°C) and line a muffin tin with cupcake liners.
- In a large mixing bowl, sift together the all-purpose flour, cocoa powder, baking powder, and granulated sugar.
- In another bowl, whisk together the eggs, milk, and vegetable oil until smooth and well blended.
- Gradually pour the wet ingredients into the dry ingredients, folding gently to combine.
- Spoon the batter into the prepared cupcake liners, filling each about two-thirds full.
- Bake for 18–20 minutes, or until a toothpick inserted into the center comes out clean.
- Let the cupcakes cool in the tin for about 5 minutes before transferring them to a wire rack.
- Whip together the mascarpone cheese and espresso until fluffy for the filling.
- Slice off the tops of the cooled cupcakes and fill each with the mascarpone and espresso mixture.
- Dust the tops with cocoa powder before serving.
Leave a Reply