As I took a moment to breathe in the sweet, zesty aroma wafting from the oven, I realized that dessert isn’t just about satisfying a craving; it’s about creating experiences. This Classic Orange Tart is my go-to recipe for impressing family and friends, effortlessly combining a bright, citrusy flavor with a velvety smooth texture. It’s wonderfully simple, perfect for any occasion, and a refreshing alternative to heavier desserts. Plus, the customizable nature of this recipe allows you to swap in your favorite nuts or sweeteners, making it as versatile as it is delightful. Whether served at a dinner party or as a cozy treat at home, each slice promises to brighten your day. Ready to whip up some sunshine in your kitchen? Let’s dive into the recipe!
Why is this Orange Tart a Must-Try?
Elegance and Simplicity: This Classic Orange Tart combines delightful flavors with uncomplicated steps, making it accessible for any home chef.
Bright Citrus Flavor: The use of fresh oranges adds an irresistible zest that refreshes each bite, perfect for lifting your spirits.
Customizable Delight: Feel free to explore variations—swap oranges for lemons or add your favorite nuts to the tart crust, allowing for personal touches.
Perfect for Celebrations: Ideal for gatherings, this dessert impresses guests with its stunning appearance and delightful taste. Pair it with a dollop of whipped cream or check out some tasty combos like our Caramelized Onion Tarts for a balanced menu!
Make-Ahead Option: Whip it up days in advance without sacrificing freshness; simply chill and serve when ready, ensuring a stress-free dessert experience.
Classic Orange Tart Ingredients
For the Crust
- Oranges – Essential for both juice and zest; choose ripe navel or Valencia oranges for maximum flavor.
- Flour – Forms the basis of the pastry; all-purpose flour is recommended, but gluten-free flour can work as a substitute.
- Powdered Sugar – Offers sweetness to the crust; granulated sugar can be used if needed.
- Almond Flour – Adds richness and helps ensure a tender crust; you can substitute with more all-purpose flour if desired.
- Salt – Enhances the overall flavor of the crust.
- Butter – Unsalted butter creates a flaky, flavorful pastry; choose unsalted for better control over salt levels.
- Egg Yolks – Essential for a rich filling and crust binding.
- Cold Water – Helps bring the pastry dough together for optimal consistency.
For the Orange Curd
- Superfine Sugar – Ideal for sweetening the curd; it dissolves easily for a smooth texture. Substitute with finely ground granulated sugar if necessary.
- Cornstarch – Thickens the orange curd, resulting in a velvety filling.
- Gelatin (optional) – Stabilizes the curd for improved texture; can be omitted if you prefer a lighter filling.
For the Topping
- Heavy Cream – Integral for a luscious whipped topping that complements the tart perfectly.
- Powdered Sugar (for whipping cream) – Sweetens the whipped cream, enhancing the overall dessert experience.
This Classic Orange Tart recipe not only brings delightful flavors to your table but also showcases your culinary skills without overwhelming you. It’s a delightful way to incorporate a burst of citrus into your dessert repertoire!
Step‑by‑Step Instructions for Classic Orange Tart
Step 1: Make the Dough
In a food processor, combine flour, powdered sugar, almond flour, salt, and the zest of one orange. Pulse until well mixed, then add the chilled butter in chunks, processing until the mixture resembles coarse crumbs. Next, incorporate the egg yolk and enough cold water to form a shaggy dough, ensuring not to overmix. Chill the dough in the refrigerator for at least 15 to 60 minutes.
Step 2: Prepare Tart Shell
Roll out the chilled dough on a lightly floured surface to fit a 9-inch tart pan. Carefully transfer the rolled dough into the pan, pressing it evenly into the bottom and sides. Freeze the tart shell for about 30 minutes. After freezing, blind-bake the shell at 200°C (390°F) for 12-15 minutes, using foil and weights, until the edges are lightly golden, then remove the weights and bake for an additional 5-10 minutes until fully golden.
Step 3: Make Orange Curd
In a saucepan, gently heat the fresh orange juice over medium-low heat. In a bowl, whisk together the egg yolks, superfine sugar, and cornstarch until smooth. Gradually temper the egg mixture by slowly whisking in the warm orange juice. Pour this mixture back into the saucepan and cook on low heat, stirring constantly until the curd thickens and coats the back of a spoon. Remove from heat, then stir in gelatin (if using) and butter until melted and smooth.
Step 4: Assemble Tart
Once the orange curd has cooled to room temperature, pour it into the pre-baked tart shell, spreading it evenly. Cover the tart with plastic wrap and refrigerate for a minimum of 3 hours, or overnight if possible, allowing the filling to set and flavors to meld beautifully.
Step 5: Prepare Topping
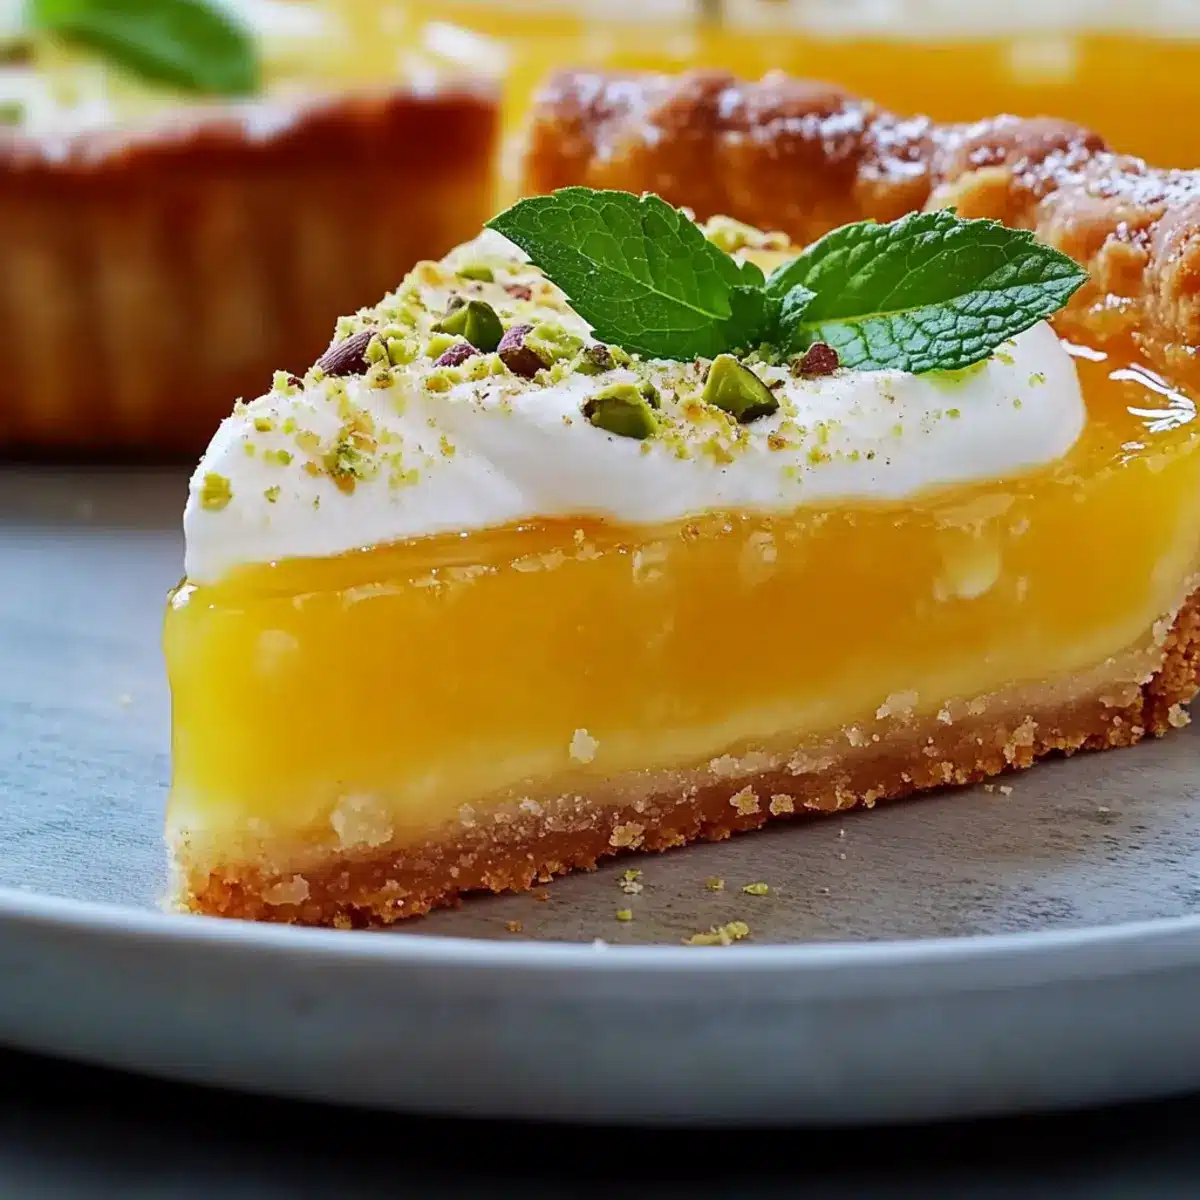
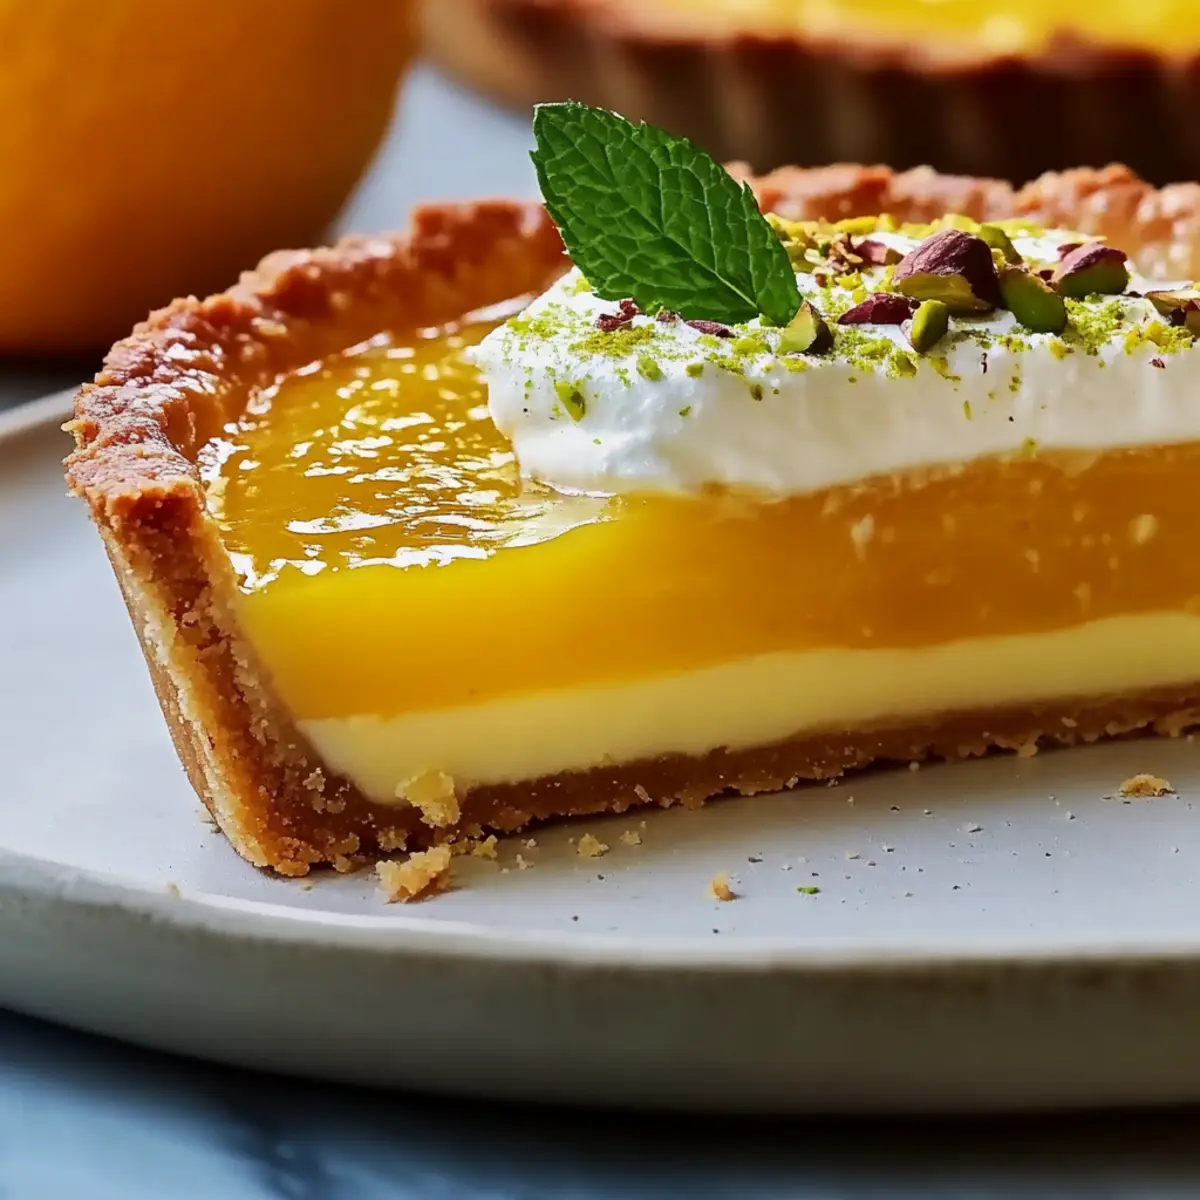
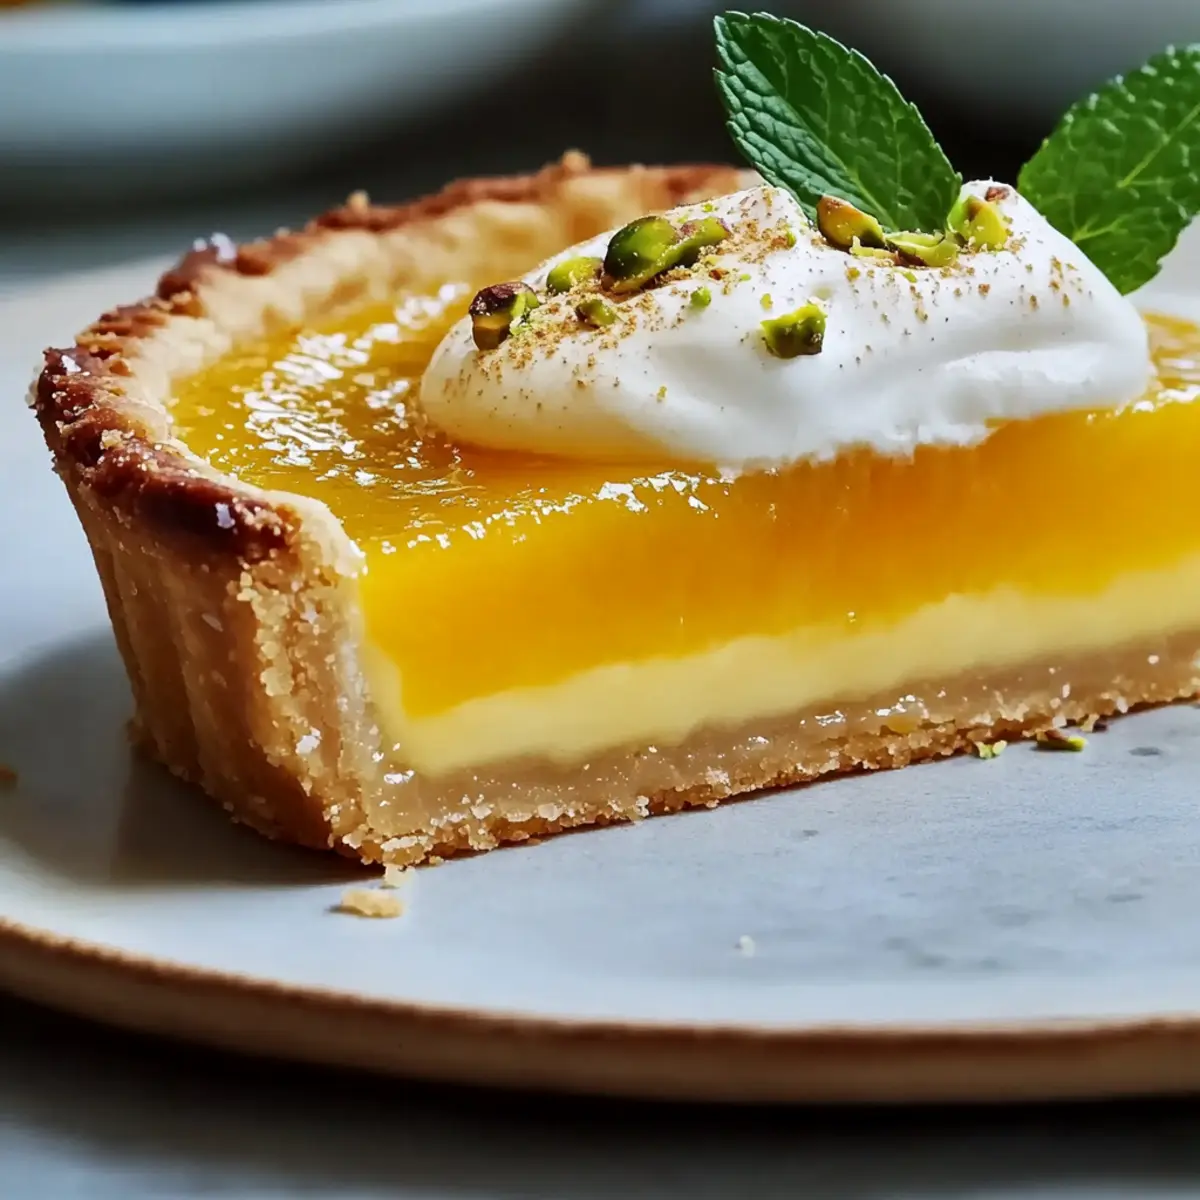
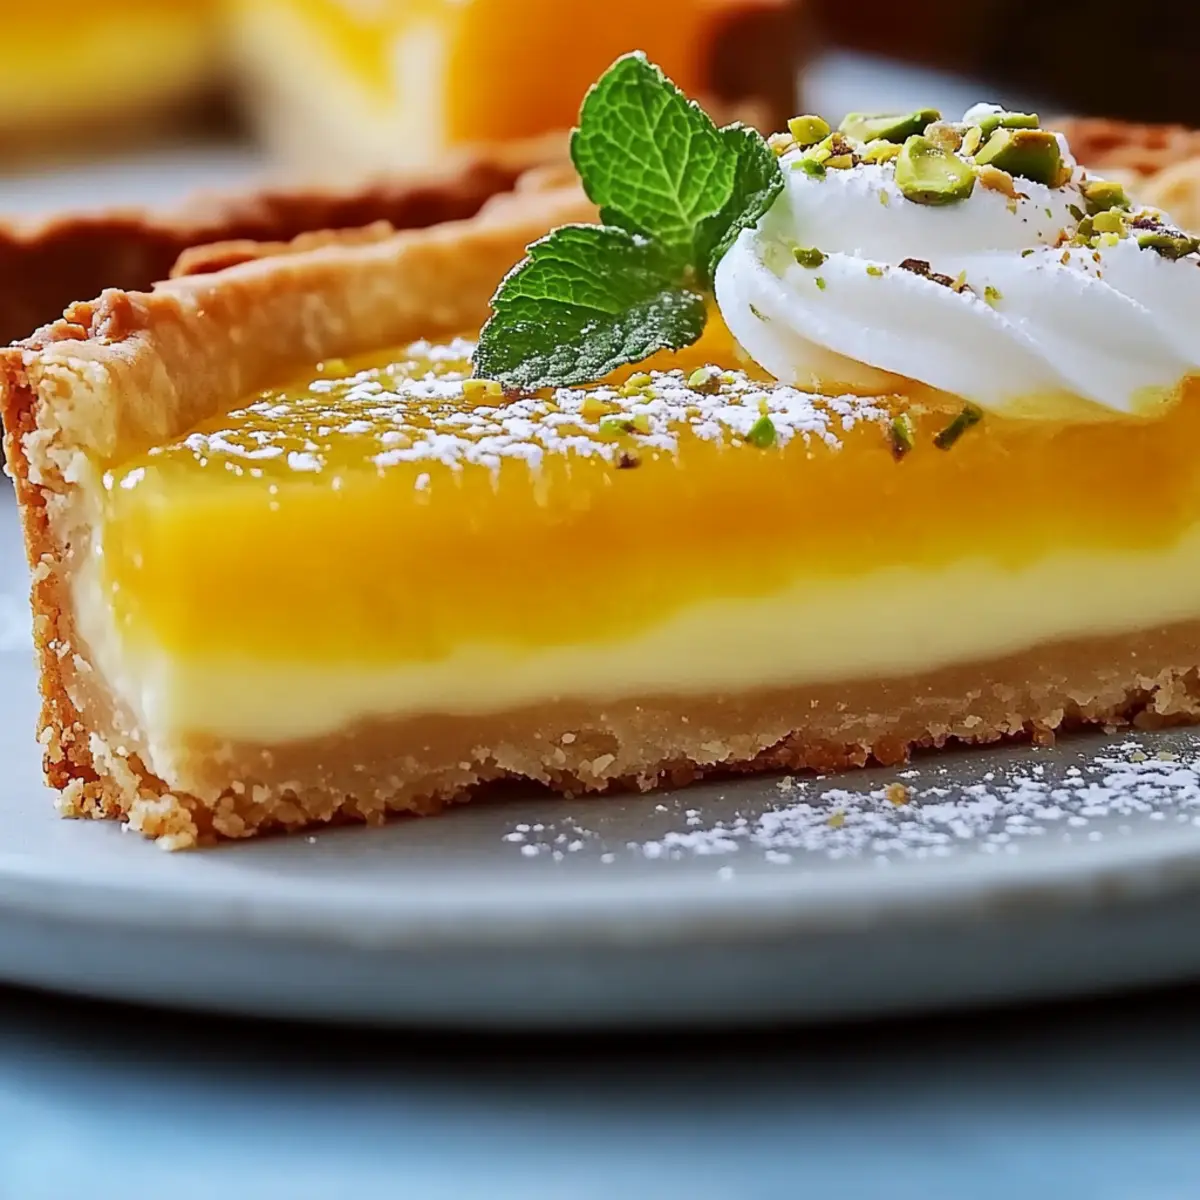
Before serving the Classic Orange Tart, whip the heavy cream with powdered sugar in a mixing bowl until stiff peaks form. Once the tart has set, remove it from the refrigerator and garnish with dollops of whipped cream, sprinkle crushed pistachios on top, and add a few fresh mint leaves for an extra touch of elegance.
How to Store and Freeze Classic Orange Tart
Fridge: Keep the classic orange tart covered in the refrigerator for up to 3 days. This helps maintain its texture and flavor while keeping it fresh for dessert cravings.
Freezer: If you want to store the tart for longer, you can freeze it for up to 2 months. Wrap it tightly in plastic wrap and then foil to protect it from freezer burn.
Reheating: It’s best served chilled, but if you’ve frozen it, simply thaw it overnight in the refrigerator before serving. Add whipped cream and garnishes just before enjoying!
Make-Ahead Tips: You can prepare the tart up to 2 days in advance, storing it in the fridge. Assemble and add toppings right before serving to keep everything fresh and luscious.
Classic Orange Tart Variations
Make this classic orange tart your own with these exciting twists and substitutions!
- Lemon Twist: Swap oranges for fresh lemons to create a refreshing, zesty tart that’s equally delightful. Bright, tangy flavors will leave your guests smiling!
- Graham Cracker Crust: For a simple change, substitute the traditional pastry crust with a graham cracker crust for added sweetness and crunch. This no-fuss option can also save time!
- Nutty Addition: Mix finely chopped nuts like pecans or walnuts into the tart crust for extra texture and flavor. Nuts add delightful crunch and a depth of taste.
- Berry Topping: Top your tart with seasonal berries, like raspberries or blueberries, for a burst of color and sweetness. Their tartness complements the creamy orange curd beautifully.
- Vanilla Infusion: Stir in a touch of vanilla extract or orange liqueur into your orange curd for a sophisticated flavor twist. The aromatic notes elevate the entire dessert experience.
- Chili Heat: If you’re feeling adventurous, add a pinch of chili powder or cayenne pepper to the orange curd for a surprising kick. The heat balances the sweetness and brings an exciting contrast.
- Whipped Cream Alternatives: Substitute heavy cream with coconut cream for a dairy-free option that offers a tropical twist. Just whip until fluffy for a dairy-free indulgence!
- Mini Tarts: Turn this classic dessert into individual mini tarts for a charming presentation at parties. They’re perfect for guests who prefer smaller, more manageable bites.
For more culinary inspiration, consider pairing this tart with delightful dishes like our White Chocolate Orange Creamsicle Truffles or hearty main dishes like Indulge in Classic Osso Buco. Enjoy exploring these variations!
Expert Tips for Classic Orange Tart
-
Chill Your Dough: Ensure your dough is well-chilled to prevent it from becoming too soft and sticky, making it easier to roll out for a perfect crust.
-
Use Fresh Ingredients: Opt for fresh oranges for the best flavor and zest; their brightness truly lifts the classic orange tart experience.
-
Don’t Rush the Baking: Carefully blind bake until golden to avoid a soggy crust; rushing this step can lead to disappointing texture.
-
Check Curds Consistency: Stir the orange curd constantly while cooking to prevent it from scrambling; the perfect curd should be silky smooth.
-
Allow Proper Setting Time: Refrigerate the assembled tart overnight if possible. This allows the flavors to meld and the filling to set beautifully for a clean slice.
Make Ahead Options
These Classic Orange Tarts are perfect for meal prep, allowing you to create a stunning dessert without the last-minute rush! You can prepare the tart crust up to 2 days in advance, wrapping it tightly in plastic wrap after it has cooled to maintain its freshness. The orange curd can be made and stored in the refrigerator for up to 3 days; simply cover it with plastic wrap directly on the surface to prevent a skin from forming. When ready to serve, pour the curd into the prepared crust and chill for at least 3 hours or overnight to set. Finish with whipped cream and toppings just before serving for that fresh, delightful touch!
What to Serve with Classic Orange Tart?
Pairing this bright and zesty dessert with complimentary dishes can truly elevate your dining experience.
-
Creamy Mashed Potatoes: The rich, buttery flavor of mashed potatoes offers a lovely contrast to the tart’s citrus punch, making them a comforting side.
-
Herb-Infused Roasted Chicken: Juicy chicken seasoned with fresh herbs will round out your meal, grounding the vibrant flavors of the tart and providing savory satisfaction.
-
Fresh Green Salad: A crisp salad with tangy vinaigrette will cleanse your palate, balancing the sweetness of the orange tart while adding a refreshing crunch.
-
Sparkling Water with Citrus: Enhance your dining experience with a glass of sparkling water infused with citrus slices. It’s a light and invigorating drink that harmonizes beautifully.
-
Vanilla Ice Cream: The creaminess of vanilla ice cream pairs wonderfully with the tangy notes of the tart, melting into the curd and creating a symphony of flavors.
-
Chocolate-Dipped Strawberries: For an elegant touch, serve chocolate-dipped strawberries alongside, as their sweetness complements the tart’s zestiness, creating a delightful contrast.
-
Mint Tea: A fragrant cup of mint tea provides a soothing finish to your meal and coordinates well with the fresh mint garnish of the tart.
-
Mini Lemon Tarts: For dessert lovers, serving mini lemon tarts offers a delightful choice, echoing the citrus theme and giving a dainty alternative to the classic orange tart.
Classic Orange Tart Recipe FAQs
How do I select the best oranges for this recipe?
Absolutely! For the best flavor in your Classic Orange Tart, choose ripe navel or Valencia oranges. Look for oranges that are heavy for their size and have a vibrant, firm skin with no dark spots. The juicier the orange, the better the tart will be!
How should I store my Classic Orange Tart?
Your tart can be stored covered in the refrigerator for up to 3 days. To keep it fresh, wrap it lightly with plastic wrap or keep it in an airtight container. This will help maintain the tart’s texture and delicious flavor for your dessert cravings.
Can I freeze the Classic Orange Tart?
Yes, you can freeze your Classic Orange Tart! Wrap the entire tart tightly in plastic wrap and then in foil to avoid freezer burn. It can be stored in the freezer for up to 2 months. When you’re ready to enjoy, simply thaw it overnight in the refrigerator before serving and add your whipped cream topping.
What should I do if my pastry crust is tough?
Very! A tough pastry crust usually comes from overworking the dough. To fix this, ensure you handle the dough just until combined and chill it before rolling. If it has already baked, it’s best served with a generous layer of whipped cream to soften the texture in each bite!
Are there any dietary considerations for this recipe?
You can easily adapt the Classic Orange Tart for dietary restrictions! Substitute all-purpose flour with a gluten-free blend for a gluten-free option. For the orange curd, feel free to replace sugar with a suitable sweetener, like stevia, if you prefer a low-sugar option. Just ensure you check the compatibility of your substitutions with the recipe for the best results.
Irresistible Classic Orange Tart for Bright Celebrations
Ingredients
Equipment
Method
- In a food processor, combine flour, powdered sugar, almond flour, salt, and zest of one orange. Pulse until mixed; add chilled butter and process until resembling coarse crumbs. Incorporate egg yolk and enough cold water to form a shaggy dough. Chill the dough for 15-60 minutes.
- Roll out chilled dough to fit a 9-inch tart pan, transferring it carefully into the pan. Freeze the shell for 30 minutes. Blind-bake at 200°C for 12-15 minutes until lightly golden, then bake an additional 5-10 minutes after removing weights.
- Gently heat fresh orange juice in a saucepan. Whisk egg yolks, superfine sugar, and cornstarch together until smooth. Temper the egg mixture by whisking in warm orange juice. Pour back into the saucepan, cook on low heat, stirring constantly until thickened. Stir in gelatin and butter until melted.
- Once cooled, pour orange curd into the pre-baked tart shell, spreading evenly. Cover and refrigerate for at least 3 hours or overnight.
- Before serving, whip heavy cream with powdered sugar until stiff peaks form. Garnish the tart with dollops of whipped cream, crushed pistachios, and fresh mint leaves.
Leave a Reply