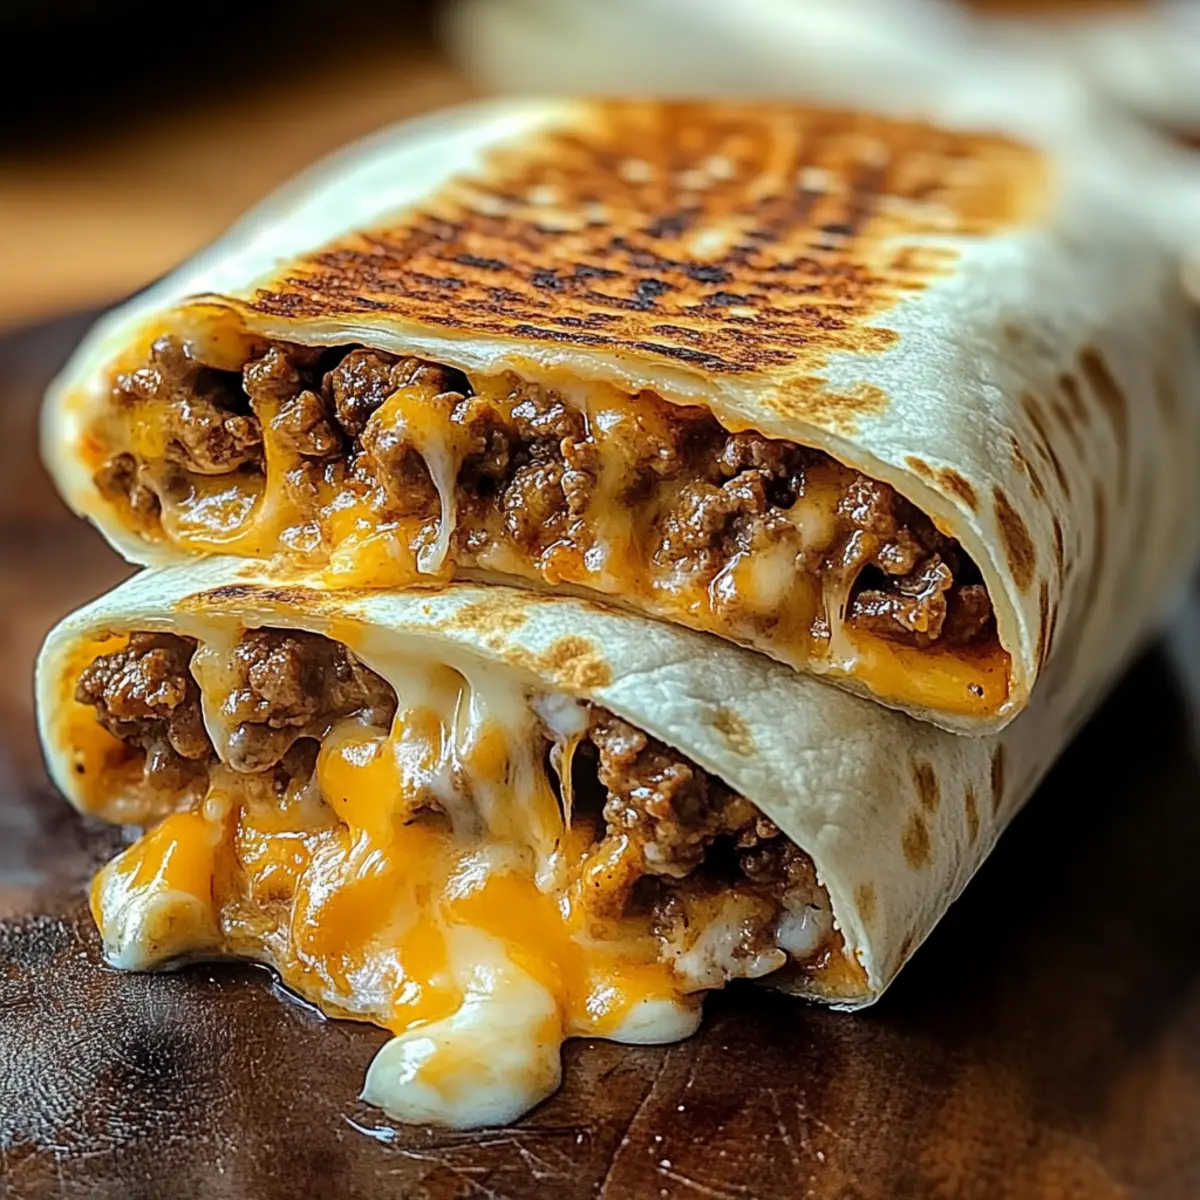
It was just another hectic weeknight when I found myself craving something indulgent yet comforting—a true guilty pleasure that wouldn’t take all evening to prepare. Enter the Grilled Cheese Burrito, a Taco Bell copycat recipe that combines all my favorite elements into one irresistible wrap. In under 30 minutes, you can transform simple ingredients into a gooey, melty delight that satisfies both your taste buds and your hunger. The beauty of this recipe lies in its adaptability; whether you’re vegetarian or dairy-free, it can be customized to meet your dietary needs without sacrificing flavor. Ready to elevate your weeknight dinners with this hands-on, fun meal? Let’s create a masterpiece that’ll have everyone asking for seconds!
Why You’ll Crave This Burrito?
Quick and Easy: This Grilled Cheese Burrito comes together in under 30 minutes, making it perfect for busy weeknights. Customizable Options: You can easily adapt it for vegetarian or dairy-free diets, ensuring everyone at the table can enjoy. Bold, Savory Flavors: The combination of seasoned beef, creamy cheese, and zesty chipotle sauce creates a mouthwatering experience. Crowd-Pleaser: Everyone loves a good burrito, and this one will have your family and friends raving! For another fun twist on comfort food, check out Cheeseburger Macaroni Soup or try elevating your dinner with Chicken Cordon Cheese. Perfect for Leftovers: Make extras and enjoy them for lunch the next day!
Grilled Cheese Burrito Ingredients
For the Filling
- Ground Beef – The main protein source, adding heartiness; substitute with beans or tofu for a vegetarian version.
- Taco Seasoning – Provides a savory, spicy flavor; use homemade seasoning for an extra fresh taste.
- Cooked White Rice – Adds bulk and texture; quinoa can be a gluten-free substitute.
- Nacho Cheese Sauce – Key for creaminess and flavor; consider a homemade or dairy-free option.
- Chipotle Sauce – Introduces spice and depth; adjust quantity based on your heat preference.
- Sour Cream – Adds creaminess and tang; Greek yogurt or a dairy-free alternative works well too.
For the Cheesy Layers
- Shredded Cheddar Cheese – Melts beautifully, enhancing flavor and texture; use Monterey Jack or plant-based cheese as a swap.
- Shredded Mozzarella – Provides that gooey stretch; any mild cheese can be a good substitute.
For the Tortilla
- Large Flour Tortillas – Encases your delicious fillings; opt for whole wheat or gluten-free tortillas if preferred.
- Butter or Oil – For grilling; enhances flavor and promotes browning; non-stick spray is a lighter alternative.
This Grilled Cheese Burrito recipe is an easy and delicious way to bring comfort food into your home!
Step‑by‑Step Instructions for Grilled Cheese Burrito
Step 1: Cook the Beef
In a large skillet, heat your stovetop over medium heat and add the ground beef. Brown it for about 8 to 10 minutes, breaking it apart as it cooks. Once browned, drain any excess grease, then stir in taco seasoning with a splash of water. Simmer for 5 minutes until the mixture is thick and fragrant.
Step 2: Warm the Tortillas
While the beef is simmering, prepare large flour tortillas to ensure they are pliable. You can warm them in a skillet for about 30 seconds on each side or use a microwave for 10–15 seconds. This will make it easier to fold and roll your Grilled Cheese Burrito without tearing the tortillas.
Step 3: Assemble the Burrito
Now it’s time to build your Grilled Cheese Burrito. Lay a warm tortilla flat on a clean surface. Start by adding a scoop of cooked rice, followed by the seasoned beef mixture, then drizzle nacho cheese sauce and chipotle sauce for that spicy kick. Top with a dollop of sour cream and sprinkle shredded cheddar and mozzarella cheese generously over the fillings.
Step 4: Grill the Burrito
Preheat your skillet over medium heat, adding a small pat of butter or a splash of oil. Once hot, place the burrito seam-side down in the skillet and sprinkle more shredded cheese on top. Grill for about 3 to 4 minutes until the bottom is golden brown and the cheese starts to melt, then carefully flip the burrito and grill for another 3 to 4 minutes.
Step 5: Serve and Store
After grilling, remove the burrito from the skillet and let it rest for a minute before cutting it in half. This allows the cheesy goodness to settle. If you have leftovers, store them in an airtight container in the fridge for up to 3 days. Reheat on a skillet to maintain that crispy exterior when ready to enjoy again.
How to Store and Freeze Grilled Cheese Burrito
Fridge: Store leftover Grilled Cheese Burrito in an airtight container for up to 3 days. Reheat on a skillet to maintain its crispy exterior.
Freezer: Wrap individual burritos tightly in foil to keep them fresh for up to 1 month. Thaw in the refrigerator overnight before reheating for the best texture.
Reheating: To reheat, place the burrito in a skillet over medium heat for about 4–5 minutes per side, or until heated through and the cheese is melty again.
Assembly Tips: When storing, make sure to let the burrito cool completely before sealing to prevent condensation, which can make the burrito soggy.
Grilled Cheese Burrito Variations
Feel free to experiment and make this Grilled Cheese Burrito your own with these delightful twists!
- Vegetarian: Swap out the ground beef for black beans or grilled vegetables for a hearty, meat-free option.
- Dairy-Free: Use plant-based cheese and sour cream alternatives to enjoy all the creaminess without dairy.
- Spicy Kick: Add fresh jalapeños or a few dashes of your favorite hot sauce for an extra layer of heat.
- Bulk It Up: Incorporate cooked quinoa or farro in addition to rice for a nuttier flavor and satisfying texture.
- Extra Cheesy: For the ultimate indulgence, double the amount of cheese inside before grilling for a gooey center.
- Herb Infusion: Sprinkle fresh cilantro or green onions into the filling for an added pop of freshness.
- Sweet Finish: Drizzle a bit of honey or a sweet chipotle sauce on top for a contrasting sweetness to the spice.
Elevating your comfort food doesn’t have to be limited to burritos—if you’re craving a different flavor experience, don’t forget to explore Cheeseburger Macaroni Soup or indulge in the cheesy bliss of Chicken Cordon Cheese. Enjoy the culinary journey!
Make Ahead Options
These Grilled Cheese Burritos are perfect for meal prep enthusiasts! You can prepare the filling (ground beef, rice, and sauces) up to 24 hours ahead. Simply cook the beef and mix in the taco seasoning, letting it cool before storing it in an airtight container in the refrigerator. You can also warm the tortillas and keep them wrapped in foil until you’re ready to assemble. When it’s time to serve, just fill, grill, and enjoy that gooey, crispy goodness—just as delicious as when made fresh! For best results, grill the burritos just before serving to maintain their crispy exterior.
Expert Tips for Grilled Cheese Burrito
- Warm Tortillas: Ensure tortillas are warm and pliable for easier wrapping. Cold tortillas tend to tear and make assembly difficult.
- Grill it Right: Press down gently on the burrito while grilling to achieve that perfectly crispy exterior. This prevents it from puffing up too much.
- Cheese Layers: Don’t skimp on the cheese! More cheese on top helps create a beautiful crust while sealing in the delicious filling inside your Grilled Cheese Burrito.
- Freezer-Friendly: Wrap individual burritos in foil and freeze for up to one month. Just remember to thaw in the fridge overnight before reheating.
- Customize Wisely: Keep in mind dietary preferences when customizing. Make it vegetarian or dairy-free without losing flavor by using quality substitutes.
What to Serve with Easy Grilled Cheese Burrito?
Enjoy a cozy and satisfying meal by pairing your burrito with these delicious sides and drinks.
-
Salsa Fresca: A fresh, zesty salsa adds a burst of flavor and complements the burrito’s rich fillings, enhancing every bite.
-
Guacamole: Creamy avocados create a delightful contrast to the cheesiness, making each mouthful a heavenly combination of textures.
-
Refried Beans: These tender, savory beans add heartiness to your meal, perfect for scooping up with tortilla chips or a spoon.
-
Spicy Rice: A zesty side of cilantro-lime rice provides a fragrant and flavorful base that perfectly balances the burrito’s richness.
-
Corn on the Cob: Sweet, grilled corn brings a pop of sweetness, providing an enjoyable crunch next to your gooey burrito.
-
Chips and Cheese Dip: Crispy tortilla chips paired with warm cheese dip create a fantastic appetizer that sets the tone for a cozy feast.
-
Crisp Green Salad: A light salad with fresh vegetables and vinaigrette cuts through the richness, offering a refreshing contrast to every bite.
-
Iced Tea or Lemonade: Refreshing drinks like iced tea or homemade lemonade cleanse the palate between bites and keep the meal light and enjoyable.
-
Brownies or Churros: Finish off the evening with indulgent brownies or crispy churros for a sweet treat that echoes the comfort of your burrito.
Grilled Cheese Burrito Recipe FAQs
How do I choose the right ingredients for my Grilled Cheese Burrito?
Absolutely! For the freshest taste, pick vibrant, fresh ingredients. Choose ground beef that’s ideally 80/20 for a perfect fat content that keeps it juicy. If opting for a vegetarian version, beans should be firm and undamaged, while cheese should be gooey and meltable. Pay attention to tortillas—look for ones that are pliable and soft for easier wrapping.
How should I store the leftover Grilled Cheese Burrito?
You can store your leftover Grilled Cheese Burrito in an airtight container in the fridge for up to 3 days. Just be sure to let them cool completely before sealing to avoid condensation, which can make them soggy. When you’re ready to enjoy them again, give them a quick reheat on a skillet for that crispy exterior.
Can I freeze my Grilled Cheese Burrito?
Absolutely! Wrap individual burritos tightly in foil and freeze them for up to 1 month. To reheat, simply thaw them in the refrigerator overnight before placing in a skillet over medium heat for about 4-5 minutes per side until heated through and the cheese is melty again. This process helps maintain that delightful texture!
What issues might I encounter while making my burrito?
Very! If your tortillas are tearing during assembly, they might be too cold. Warm them up in the microwave or skillet for 10–15 seconds so they’re more pliable. Additionally, if your burrito isn’t getting crispy, try pressing it down gently with a spatula while grilling. This promotes even grilling and minimizes puffing.
Are there any dietary considerations for this recipe?
Certainly! If you’re making this burrito vegetarian or dairy-free, ensure to use quality substitutes to keep flavors rich. For example, choose plant-based cheese options that melt well. Be mindful of allergies, especially to dairy or gluten; opt for gluten-free tortillas and check labels on sauces and cheese for allergens.
Can I customize my Grilled Cheese Burrito?
The more the merrier! Feel free to mix and match ingredients according to your taste preferences. For an extra kick, add jalapeños or sriracha. Swap the beef for shredded chicken or black beans for a different protein. The key is to adjust the quantities and types of spices to make the dish your own!
Irresistible Grilled Cheese Burrito That's Easy to Make at Home
Ingredients
Equipment
Method
- In a large skillet, heat your stovetop over medium heat and add the ground beef. Brown for about 8 to 10 minutes, breaking it apart as it cooks. Drain excess grease, then stir in taco seasoning with a splash of water. Simmer for 5 minutes until thick and fragrant.
- While the beef is simmering, warm the tortillas in a skillet for about 30 seconds on each side or in the microwave for 10–15 seconds.
- Lay a warm tortilla flat, add a scoop of cooked rice, seasoned beef mixture, drizzle nacho cheese sauce and chipotle sauce, top with sour cream and shredded cheeses.
- Preheat skillet over medium heat, add butter or oil. Place burrito seam-side down, sprinkle more cheese on top. Grill for about 3 to 4 minutes until golden brown and cheese starts to melt, then flip and grill for another 3 to 4 minutes.
- Remove burrito from skillet and let it rest for a minute before cutting in half.
Leave a Reply