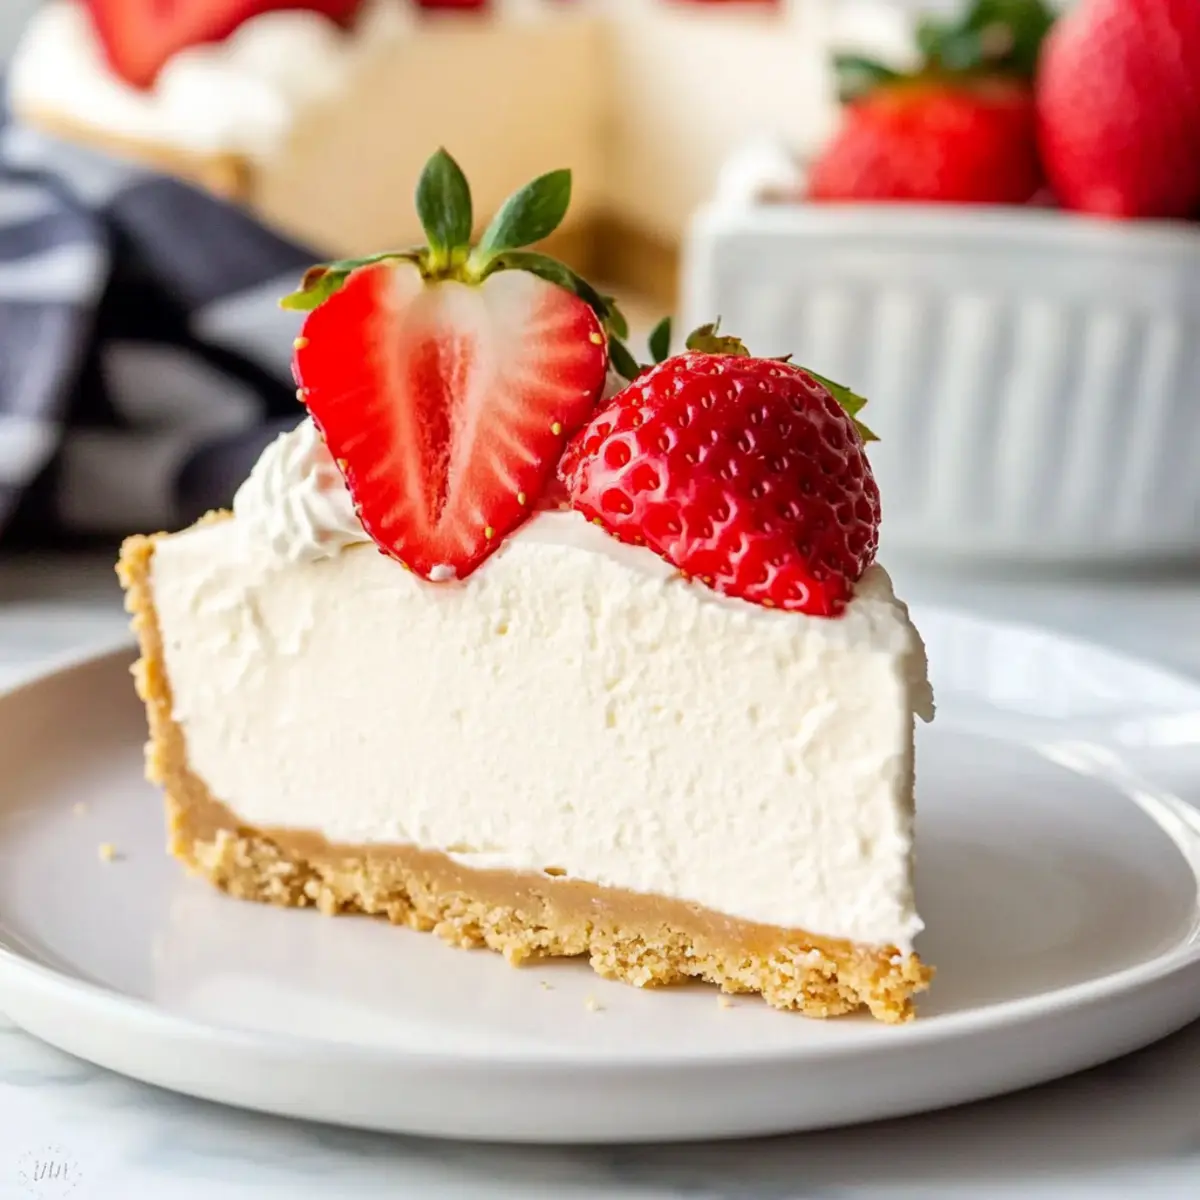
As I stood in my kitchen on a sweltering summer afternoon, the last thing I wanted was to turn on the oven. That’s when I remembered my go-to recipe for a No Bake Cheesecake—a creamy delight that’s as easy to make as it is to devour. This dessert is an absolute winner, featuring a silky texture and rich flavors, making it perfect for gatherings or a sweet treat just for yourself. Not only is it a breeze to whip up, but it also requires no baking, allowing you to beat the heat while impressing your family and friends. Just a few hours of chill time, and you’ll have a spectacular dessert that feels indulgent without all the fuss. Curious about the secret to achieving that perfect, airy filling? Let’s dive into this fabulous recipe!
Why is This No Bake Cheesecake Amazing?
Simplicity at Its Best: You’ll appreciate how easy it is to create this decadent dessert with minimal effort and no baking involved.
Rich, Creamy Texture: The combination of cream cheese and heavy whipping cream results in a delightfully smooth filling that melts in your mouth.
Customize with Ease: Add your favorite fruit toppings or flavored extracts to make it uniquely yours, just like with my Croissant Breakfast Bake for another great brunch option.
Time-Saving Treat: Whip it together in under 30 minutes and let it chill—perfect for busy days or last-minute gatherings!
Crowd-Pleaser: Whether for a family dinner or a party, this cheesecake is guaranteed to impress, satisfying even the pickiest dessert lovers.
Versatile Serving Options: Pair it with chocolate sauce or fresh berries, letting you tailor the presentation and flavors to fit any occasion!
No Bake Cheesecake Ingredients
• Get ready to create a dessert masterpiece with these simple ingredients!
For the Crust
- Graham Cracker Crumbs – Provides the base for your cheesecake; swap with gluten-free options like digestive biscuits if needed.
- Unsalted Butter – Binds everything deliciously together; coconut oil works as a dairy-free alternative.
- Sugar – Sweetens the crust; try brown sugar for a deeper, richer flavor.
For the Filling
- Cream Cheese – The star of your cheesecake, ensuring that rich, creamy texture; full-fat yields the best results.
- Powdered Sugar – Essential for sweetness and smoothness without grittiness; it makes your cheesecake truly delightful.
- Vanilla Extract – Adds aromatic depth; opt for pure vanilla for the best flavor.
- Heavy Whipping Cream – Whipped to airy perfection, it gives your filling that light texture; use cold cream for maximum volume.
For the Topping
- Fresh Strawberries – Brighten up your cheesecake with fruity freshness; feel free to mix it up with other berries for variety.
Step‑by‑Step Instructions for No Bake Cheesecake
Step 1: Prepare the Crust
In a medium bowl, combine graham cracker crumbs, melted butter, and sugar until the mixture resembles wet sand. Use a fork to blend thoroughly, ensuring there are no dry spots. Press this mixture into the bottom of a 9-inch springform pan evenly and firmly. Once done, refrigerate the crust for at least 30 minutes while you prepare the filling.
Step 2: Make the Filling
In a large mixing bowl, use a hand mixer to blend softened cream cheese, powdered sugar, and vanilla extract until the mixture is smooth and creamy, which should take about 2–3 minutes. In a separate bowl, whip the cold heavy whipping cream until stiff peaks form, roughly 3–5 minutes. Gently fold the whipped cream into the cream cheese mixture, creating a light and airy filling for your no bake cheesecake.
Step 3: Assemble the Cheesecake
Pour the creamy filling over the chilled crust in the springform pan, using a spatula to spread it into an even layer. Smooth the top for a polished finish and cover the pan with plastic wrap. Refrigerate the cheesecake for at least 8 hours, or ideally overnight, allowing it to set completely and develop its delightful flavors.
Step 4: Serve and Garnish
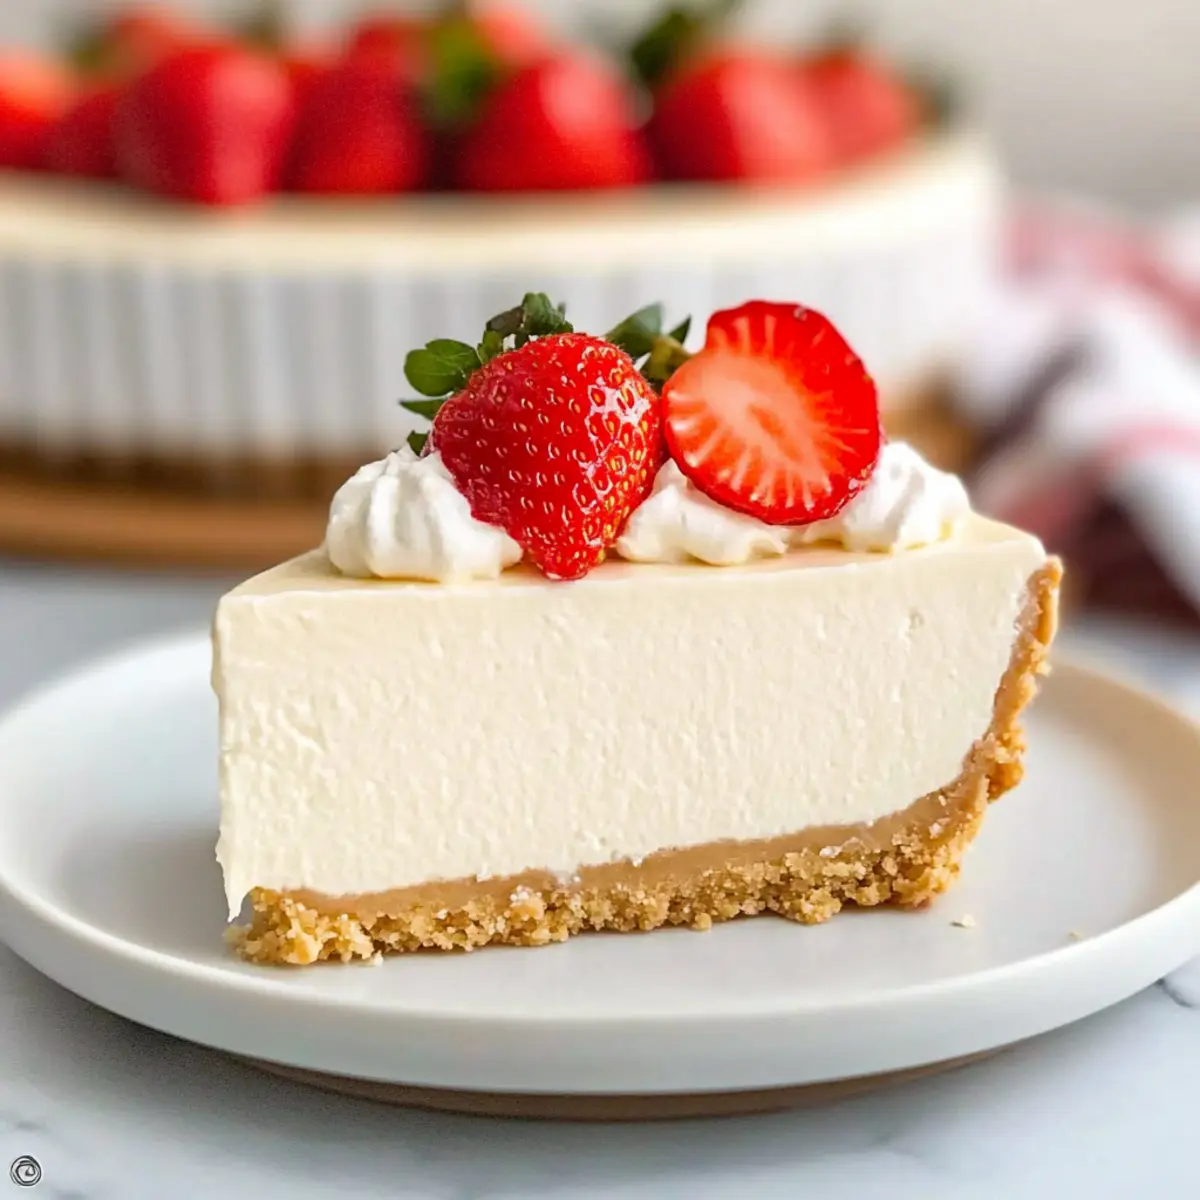
Once the cheesecake is firmly set, carefully run a knife around the edges of the springform pan before releasing the sides. For an elegant touch, whip additional heavy cream to soft peaks and pipe it around the edges of the cheesecake. Lastly, garnish with fresh strawberries or your choice of fruit for a colorful presentation, then slice and serve this delicious no bake cheesecake to amaze your guests!
Make Ahead Options
These delightful No Bake Cheesecake options are perfect for meal prep, saving you time on busy days! You can prepare the crust and filling up to 24 hours in advance. Simply make the crust, press it into your springform pan, and refrigerate it. For the filling, mix and fold as directed, then refrigerate it separately in an airtight container. When you’re ready to enjoy your cheesecake, pour the filling over the chilled crust and allow it to set for at least 8 hours or overnight. This way, you ensure that your dessert maintains its silky texture and flavor, making your busy weeknights much sweeter without compromising on quality!
How to Store and Freeze No Bake Cheesecake
Fridge: Keep the cheesecake tightly covered with plastic wrap or in an airtight container for up to 3 days. This ensures it stays fresh and every bite remains creamy.
Freezer: For longer storage, slice the cheesecake and wrap each piece individually in plastic wrap, then place in a freezer-safe bag. It will last for up to 3 months!
Thawing: When ready to enjoy, simply transfer the cheesecake slices to the fridge to thaw overnight for the best texture and flavor.
Reheating: No need to reheat—this no bake cheesecake shines when served cold, maintaining its delightful creamy texture.
No Bake Cheesecake Variations
Feel free to get creative with your cheesecake and make it uniquely yours with these delightful variations and substitutions!
-
Gluten-Free Crust: Use gluten-free graham crackers or almond flour instead of traditional crumbs for a gluten-free delight.
-
Dairy-Free Option: Substitute cream cheese and heavy cream with cashew cream and chilled coconut cream for a luscious, dairy-free experience. It’s just as creamy!
-
Flavorful Twists: Experiment with extracts like almond or lemon for added depth. Your no bake cheesecake can have new flavor layers that surprise the palate.
-
Chocolate Lover’s Dream: Mix unsweetened cocoa powder into the filling or use chocolate cookies as the crust base to indulge in a chocolaty variation that’s hard to resist.
-
Fruit-Infused Goodness: Swirl in a homemade berry compote or layer fresh fruit like blueberries or raspberries right into the filling for a fruity explosion.
-
Zesty Lemon Variation: Incorporate lemon zest into the filling for a fresh citrus kick that balances the creamy richness wonderfully.
-
Nutty Crunch: Add crushed nuts, such as pecans or almonds, to the crust for a delightful crunch that enhances the texture and flavor profile.
-
Spicy Kick: For those who like a little heat, sprinkle some cinnamon or even a hint of cayenne pepper into the filling to contrast the sweetness.
Pair this with a drizzle of chocolate sauce or a dollop of lemon curd, just like with my Baked Cod in Coconut Lemon Cream Sauce for a wonderful flavor experience! Don’t forget to look at my indulgent Condensed Milk Baked Rice Pudding for additional dessert ideas. Happy baking!
Expert Tips for No Bake Cheesecake
-
Room Temperature Cream Cheese: Ensure your cream cheese is at room temperature to prevent lumps in your filling. This tip is vital for achieving a smooth, creamy texture.
-
Chill Overnight: For the best results, chill your no bake cheesecake overnight. This allows it to set properly, enhancing both flavor and texture.
-
Avoid Over-Whipping: When whipping the cream, stop once you reach soft peaks. Over-whipping can lead to a grainy topping that doesn’t hold well.
-
Customize Your Flavor: Don’t hesitate to explore different flavor extracts or toppings! Adding lemon or almond extract can elevate your no bake cheesecake experience.
-
Freezing Leftovers: If you have any cheesecake left, slice and wrap in plastic for freezing. This way, you can enjoy this delightful treat later—just thaw in the refrigerator!
What to Serve with No Bake Cheesecake
Elevate your no bake cheesecake experience with these delightful pairings that perfectly complement its creamy richness.
-
Fresh Berries: Bursting with juicy flavor, fresh berries like strawberries, blueberries, or raspberries add a refreshing contrast to the rich cheesecake.
-
Chocolate Sauce: A drizzle of silky chocolate sauce creates a decadent twist, enhancing the dessert’s indulgence while providing a rich layer of flavor.
-
Whipped Cream: Lightly sweetened whipped cream adds an airy texture and balances the cheesecake’s creaminess, making each bite extraordinary.
-
Mint Leaves: Garnishing with fresh mint leaves brings a pop of color and a refreshing herbal note to offset the sweetness of the cheesecake.
-
Lemon Curd: A spoonful of tangy lemon curd adds a zesty brightness that beautifully contrasts the richness, taking your cheesecake to the next level.
-
Coffee or Espresso: Serve alongside a warm cup of coffee or espresso to complement the dessert’s sweetness, offering a cozy balance of flavors.
These pairings not only enhance every bite but also create an inviting table that celebrates your delicious creation!
No Bake Cheesecake Recipe FAQs
What type of cream cheese should I use for optimal flavor?
For the best results, I recommend using full-fat cream cheese as it creates a rich and creamy texture. Low-fat versions may not yield the same smooth consistency and can result in a denser filling.
How can I tell if my strawberries are ripe and ready to use?
Look for bright red strawberries with a shiny surface and a sweet aroma. If they have dark spots all over or feel mushy, they are likely overripe. Opt for strawberries that are firm, plump, and free from blemishes for that fresh topping!
How should I store my no bake cheesecake once it’s made?
To keep your cheesecake fresh, cover it tightly with plastic wrap or place it in an airtight container. It can be stored in the fridge for up to 3 days. Keep an eye on the texture—if you notice it starting to dry out, consider adding some whipped cream as a topping to refresh it.
Can you freeze no bake cheesecake? If so, how?
Absolutely! To freeze your no bake cheesecake, first slice it into individual servings and wrap each slice tightly in plastic wrap. Then, place the wrapped slices in a freezer-safe bag. The cheesecake will maintain its delicious flavor and texture for up to 3 months. When you’re ready to enjoy, simply transfer the slices to the fridge the day before to thaw.
What if my whipped cream doesn’t reach soft peaks?
If your whipped cream isn’t coming together, ensure that your heavy cream is cold and that you’re using a clean bowl and beaters. Whip on medium to high speed until you achieve soft peaks, which should take about 3 to 5 minutes. If it’s still liquid after that, it may be a sign of lower fat content or not enough whipping—try again!
Are there any common allergies I should be aware of with this recipe?
Yes, this no bake cheesecake contains dairy, specifically cream cheese and heavy whipping cream, which can be problematic for individuals with lactose intolerance or dairy allergies. To create a dairy-free version, substitute with lactose-free cream cheese and coconut cream for the filling. Always check labels for hidden allergens, especially if serving guests!
Irresistible No Bake Cheesecake That's Effortlessly Delicious
Ingredients
Equipment
Method
- In a medium bowl, combine graham cracker crumbs, melted butter, and sugar until the mixture resembles wet sand. Press this mixture into the bottom of a 9-inch springform pan evenly and firmly. Refrigerate the crust for at least 30 minutes.
- In a large mixing bowl, blend softened cream cheese, powdered sugar, and vanilla extract until smooth and creamy, about 2–3 minutes. In another bowl, whip the cold heavy whipping cream until stiff peaks form, roughly 3–5 minutes. Gently fold the whipped cream into the cream cheese mixture.
- Pour the creamy filling over the chilled crust and smooth the top. Cover the pan with plastic wrap and refrigerate for at least 8 hours, ideally overnight.
- Once set, run a knife around the edges before releasing the sides. Garnish with fresh strawberries or your choice of fruit before serving.
Leave a Reply