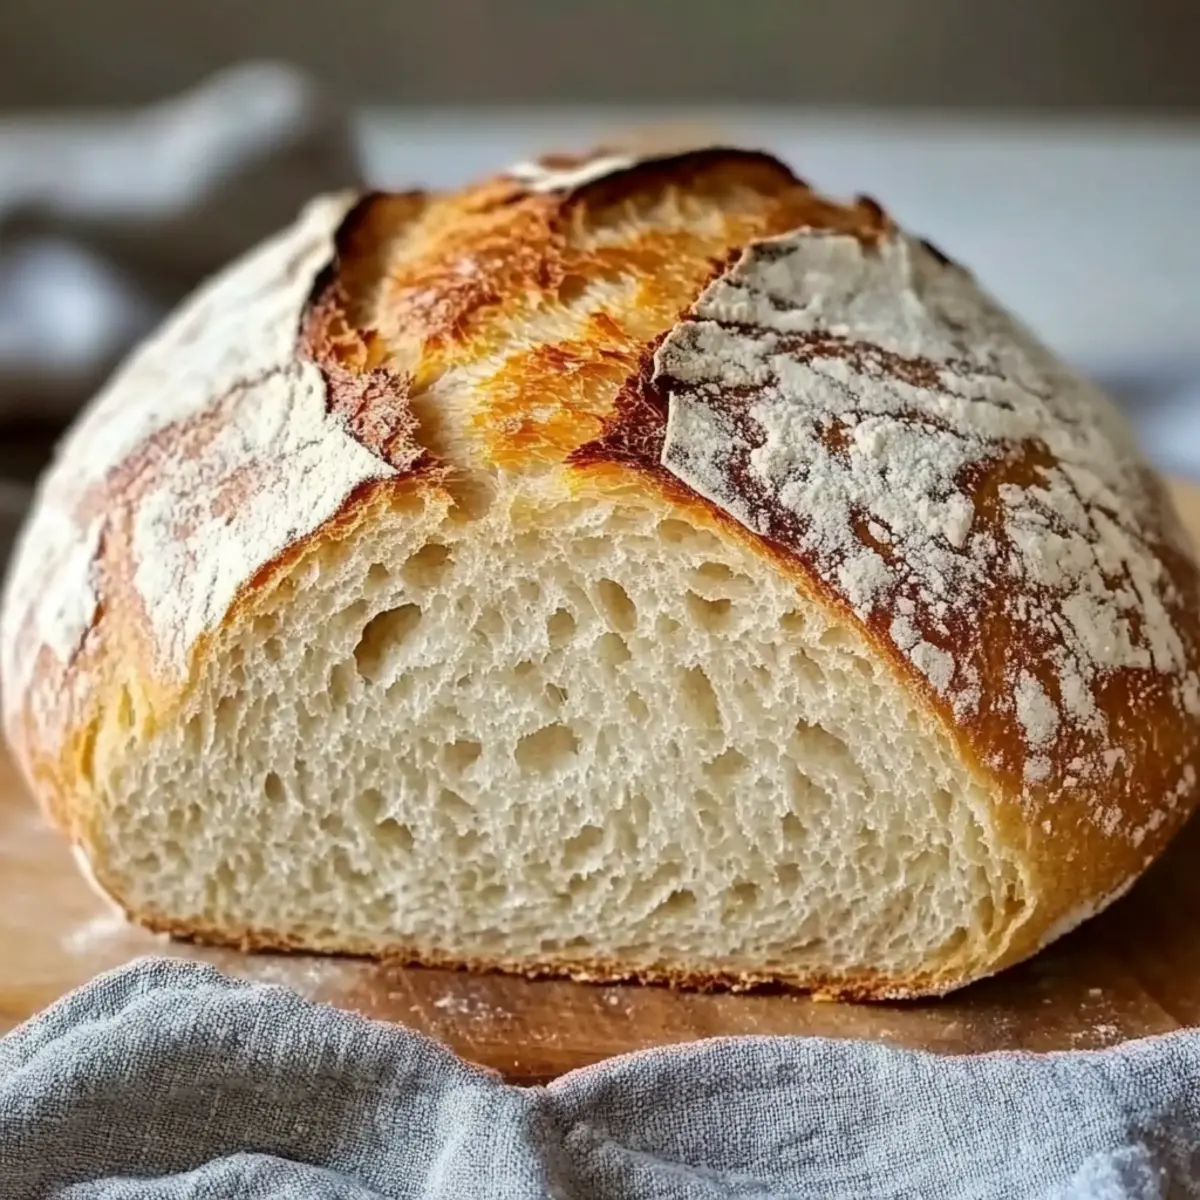
As I stood in my kitchen, the enticing smell of freshly baked bread wafted through the air, instantly transporting me to cozy bakeries far away. It’s that warm embrace I craved, yet my desire for a gluten-free option left me searching for something just right. Enter my Easy No Knead Gluten Free Bread! This recipe captures the essence of homemade goodness without the laborious kneading process. With minimal prep time and simple ingredients, it’s a breeze to whip up, making it perfect for both busy weeknights and leisurely weekends. Just imagine slicing into that beautifully crusty exterior, revealing a soft, chewy center ready to elevate your favorite spreads or sandwiches. Trust me, it’s not just bread; it’s a delightful journey to comfort. Ready to embark on this adventure and impress your taste buds?
Why is No Knead Gluten Free Bread Amazing?
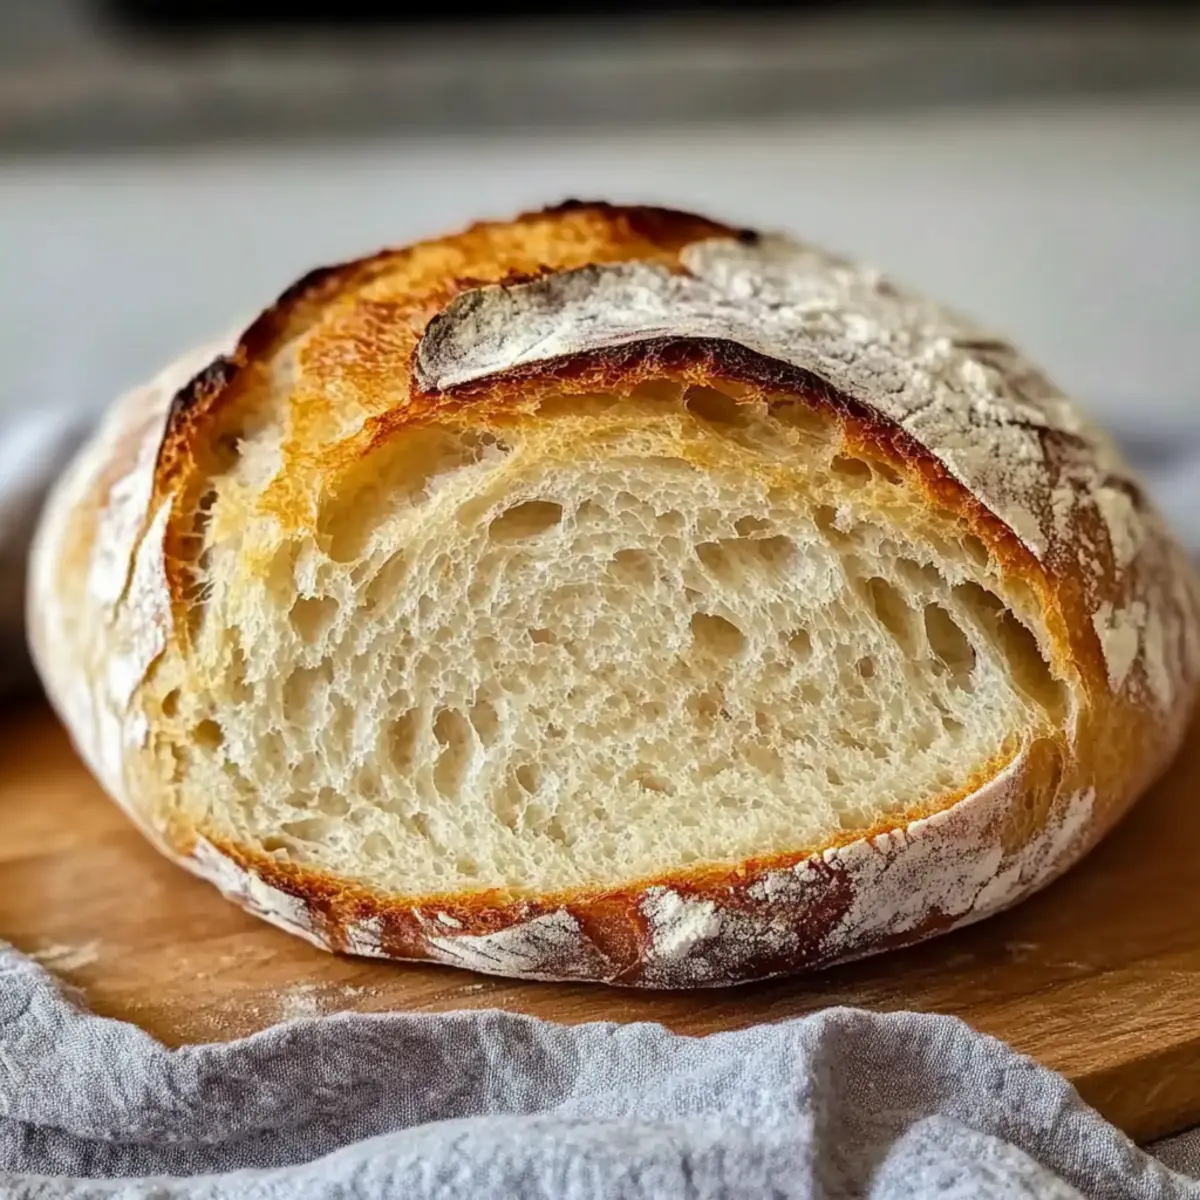
Simplicity reigns supreme with this recipe! You’ll enjoy the ease of preparation, requiring just a handful of ingredients and minimal effort. Deliciously Chewy on the inside and crispy on the outside, this bread offers a texture that rivals your favorite artisanal loaves. Versatility matters too—great as sandwiches, paired with soups, or simply spread with butter. Plus, it saves you time, letting you enjoy freshly baked bread without the elbow grease of traditional kneading. You’re going to want to pair this with an irresistible topping; try it alongside some Sugar Donut Bread for a delightful breakfast treat that complements your gluten-free lifestyle!
No Knead Gluten Free Bread Ingredients
• Everything you need for perfect, easy bread!
For the Dough
- Gluten Free All-Purpose Flour Blend – Provides the structure for the bread; if you have a blend you like, feel free to use that!
- Instant Yeast – Helps the bread rise without needing pre-activation; regular yeast can be substituted, but may require adjusting rising times.
- Sea Salt – Enhances flavor beautifully; using regular table salt is fine, just expect a slight taste difference.
- Olive Oil – Adds moisture and richness; you can swap in melted butter or coconut oil for a twist in flavor.
- Sugar – Aids in browning and adds a touch of sweetness; honey or agave syrup works well as substitutes in small amounts.
- Warm Water – Activates yeast and hydrates the flour; ensure it’s warm but not too hot, which may kill the yeast.
- Apple Cider Vinegar – Provides acidity and enhances texture; you can omit it, but you’ll miss out on that flavorful depth!
This No Knead Gluten Free Bread is a delightful way to enjoy freshly baked goodness without the fuss. Get ready to savor every slice!
Step‑by‑Step Instructions for Easy No Knead Gluten Free Bread
Step 1: Mix Dry Ingredients
In a large mixing bowl, whisk together 3 cups of gluten-free all-purpose flour blend, 2 teaspoons of instant yeast, 1 teaspoon of sea salt, and 1 tablespoon of sugar. Ensure there are no lumps in the flour mixture, as this will help the bread rise evenly. The color of the blend should be uniform, indicating it’s well mixed.
Step 2: Combine Wet Ingredients
Gradually pour in 1 ½ cups of warm water, 2 tablespoons of olive oil, and 1 tablespoon of apple cider vinegar into the dry mixture. Stir with a spatula or wooden spoon until a sticky dough forms, ensuring no dry flour remains. This step will take about 1–2 minutes; the dough will be very wet but should hold together.
Step 3: Let Dough Rise
Cover the bowl tightly with plastic wrap and let the dough rest at room temperature for about 1 hour. During this time, the dough should rise slightly, becoming more puffy but still sticky and dense. After an hour, it should have visibly expanded, indicating that the yeast is working its magic.
Step 4: Preheat the Oven
Preheat your oven to 425°F (220°C) for at least 15 minutes before baking. While the oven heats up, prepare a loaf pan by lining it with parchment paper. This will help release the bread once it’s baked and ensure even browning without fussing with greasing.
Step 5: Transfer and Shape the Dough
Carefully transfer the sticky dough into the prepared loaf pan using a rubber spatula. Smooth the top with the spatula to create an even surface, as this will help your Easy No Knead Gluten Free Bread rise beautifully while baking. The dough will be soft and slightly jiggly but should hold its shape.
Step 6: Bake the Bread
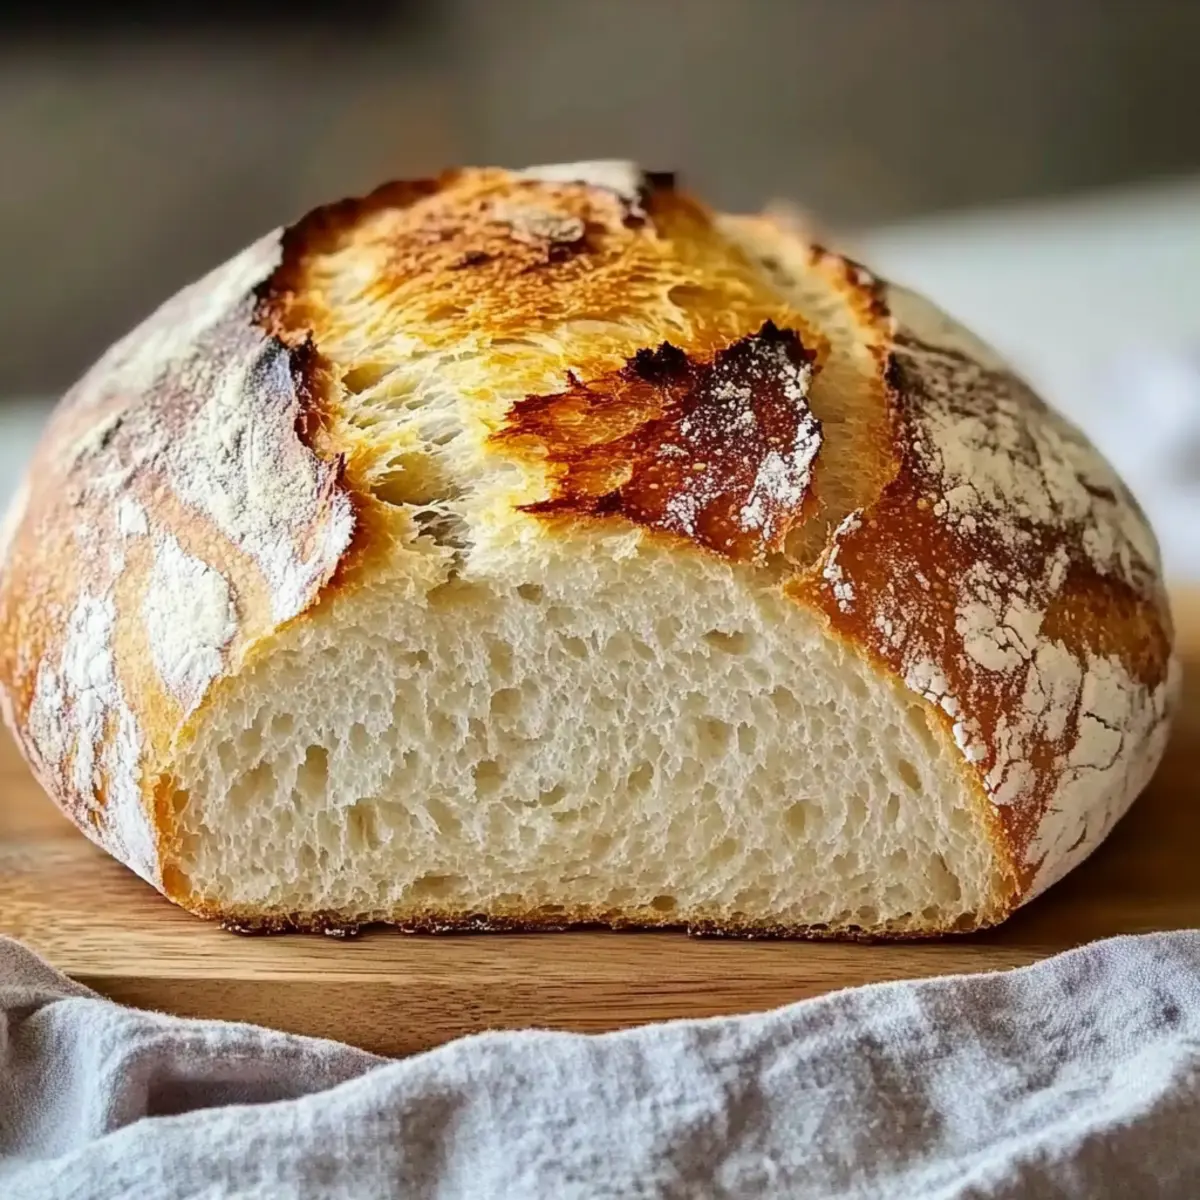
Place the loaf pan in the preheated oven and bake for 55–60 minutes. The bread is done when it’s golden brown on top and sounds hollow when tapped gently on the bottom. You’ll notice a wonderful aroma wafting through your kitchen as it bakes—this is a sure sign of deliciousness!
Step 7: Cool Before Slicing
Once baked, remove the bread from the oven and let it cool in the pan for 10 minutes. After cooling, carefully lift the bread out using the parchment paper and place it on a wire rack. Allow it to cool completely before slicing to ensure that the texture sets perfectly, making it easier to enjoy your Easy No Knead Gluten Free Bread!
How to Store and Freeze No Knead Gluten Free Bread
Room Temperature: Wrap leftover bread in a clean tea towel or place it in a bread box for optimal freshness. It stays tasty for up to 2 days.
Fridge: You can store your No Knead Gluten Free Bread in an airtight container for up to 5 days. Although it’s safe, the flavor may diminish slightly.
Freezer: For longer storage, slice and freeze the bread with parchment paper between the slices. This keeps it fresh for up to 3 months, perfect for easy toasting later.
Reheating: To enjoy it warm, simply toast slices in a toaster or reheat in a preheated oven at 375°F (190°C) for about 10 minutes, enhancing the crust’s texture.
Make Ahead Options
These Easy No Knead Gluten Free Bread are a lifesaver for busy home cooks looking to save time in the kitchen! You can prepare the dough up to 24 hours in advance and let it rest in the refrigerator, which enhances the flavor without sacrificing quality. Simply follow the initial steps up until the dough has risen, then cover it tightly with plastic wrap and refrigerate. When you’re ready to bake, allow the dough to come to room temperature for about 30 minutes before transferring it to the prepared loaf pan. This way, you’ll enjoy fresh, warm bread with minimal effort, making it perfect for those hectic weeknights!
No Knead Gluten Free Bread Variations
Feel free to explore delightful twists with your Easy No Knead Gluten Free Bread that will dazzle your taste buds!
-
Seeded Crunch: Add a handful of sunflower seeds or pumpkin seeds to the dough for added texture and flavor.
-
Herb Infusion: Mix in dried herbs such as thyme or basil for an aromatic uplift. Imagine that fresh scent wafting through your kitchen!
-
Garlic Boost: Incorporate minced garlic into the dough for a savory kick that pairs wonderfully with olive oil.
-
Nutty Flavor: Consider folding in some finely chopped walnuts or almonds for a delightful nutty essence in every slice.
-
Sweet Surprise: Add a swirl of honey into the dough before baking for a hint of sweetness that pairs beautifully with breakfast spreads.
-
Tangy Twist: Substitute apple cider vinegar with fresh lemon juice for a zesty flavor profile that brightens the bread.
-
Spicy Kick: Sprinkle in some red pepper flakes for those who love a spicy touch. Enjoy the warmth with a savory addition to your dishes!
-
Savory Cheese Addition: Fold in shredded cheese like cheddar or parmesan for a rich, cheesy loaf, perfect for sandwiches or alone!
With these easy variations, you can customize your No Knead Gluten Free Bread to make it the star of your meals. Enjoy pairing it with dishes like my delicious Crab Shrimp Stuffed and Pizza Hot Pockets for a truly satisfying feast!
What to Serve with Easy No Knead Gluten Free Bread
Imagine the warm, inviting aroma of freshly baked bread enhancing your meal, creating smiles around the table and deepening conversations.
- Creamy Tomato Soup: The perfect dip for your gluten-free bread, warming flavors meld beautifully, creating a comforting duo during chilly evenings.
- Herbed Olive Oil Dip: A vibrant complement, with aromatic herbs, blended into rich olive oil; it adds earthiness while enhancing the bread’s wonderful texture.
- Avocado Toast: Simple, nutritious, and trendy, spread crushed avocado on toasted slices for a fresh, creamy bite that delights the palate.
- Garlic Roasted Vegetables: The crusty bread acts as an excellent vehicle for savory roasted veggies, adding depth and flavor to your meal.
- Honey Butter Spread: A sweet and creamy topping transforms your gluten-free bread into a delectable treat. Picture each bite glazed with a delightful drizzle of honey.
- Crisp Salad with Lemon Vinaigrette: Balance rich flavors with a refreshing salad; the acidity of the dressing enhances the bread’s wholesome notes.
- Red Wine: Pairing your bread with a light red wine elevates the experience, crafting a cozy atmosphere with every sip.
- Dark Chocolate Dessert: Finish your meal on a sweet note; the bitterness of dark chocolate marries well with the slight sweetness of the bread, bringing joy to your taste buds!
- Cheese Platter: Combining creamy cheeses with the yeastiness of the bread creates a stunning appetizer, perfect for entertaining or a casual night in.
Expert Tips for No Knead Gluten Free Bread
• Use Accurate Measurements: Ensure you’re using the correct measurements for ingredients, especially the gluten-free flour blend, to achieve consistent results.
• Warm Water Temperatures: Be mindful of the water temperature; it should be warm to the touch but not hot, as excess heat can kill the yeast, preventing your bread from rising.
• Rest Time is Key: Don’t rush the rising process! Allow the dough to rest for the full hour at room temperature to achieve that perfect airy texture in your No Knead Gluten Free Bread.
• Avoid Overmixing: When combining wet and dry ingredients, mix just until combined. Overmixing can result in dense bread rather than the fluffy loaf you’re aiming for.
• Check for Ready Bread: Tap the bottom of the bread; it should sound hollow when fully baked. Adjust baking time according to your oven for the best results.
• Cooling is Essential: Let the bread cool completely on a wire rack before slicing to lock in moisture and enhance its texture. Slicing too soon can cause it to become gummy.

No Knead Gluten Free Bread Recipe FAQs
What type of gluten-free flour blend should I use?
I recommend a high-quality gluten-free all-purpose flour blend that contains xanthan gum, as it provides desirable structure and texture to the bread. However, feel free to use any gluten-free blend you prefer; just ensure it’s designed for baking to achieve the best results!
How should I store leftover No Knead Gluten Free Bread?
To keep your bread fresh, wrap it in a clean tea towel and store it in a bread box at room temperature for up to 1-2 days. If you place it in an airtight container in the fridge, it can last up to 5 days, though the flavor may slightly diminish. For the absolute best taste, I often suggest freezing it.
Can I freeze No Knead Gluten Free Bread?
Absolutely! To freeze, slice the bread and place parchment paper between the slices to prevent sticking. Store in an airtight container or a resealable freezer bag for up to 3 months. When you’re ready to enjoy it, simply toast the slices straight from the freezer or reheat them in a preheated oven.
What if my dough doesn’t rise?
If your dough doesn’t rise as expected, it could be due to the yeast being expired or the water being too hot. Ensure that your water is warm but not exceeding 110°F (43°C). Give the dough a little extra time to rise; temperatures in your kitchen can impact rising time. If it still doesn’t rise, the yeast might need replacing.
Is this No Knead Gluten Free Bread safe for people with allergies?
While this recipe is gluten-free, it does contain olive oil, and apple cider vinegar can be omitted if you have sensitivities. If you’re cooking for someone with allergies, always double-check all ingredient labels, as cross-contamination may occur in packaged foods. For vegan options, substitute the honey with agave syrup!
Irresistible No Knead Gluten Free Bread You Can’t Resist
Ingredients
Equipment
Method
- In a large mixing bowl, whisk together the gluten-free flour blend, instant yeast, sea salt, and sugar. Ensure there are no lumps in the mixture.
- Gradually pour in warm water, olive oil, and apple cider vinegar. Stir until a sticky dough forms.
- Cover the bowl tightly with plastic wrap and let the dough rest at room temperature for about 1 hour.
- Preheat your oven to 425°F (220°C) for at least 15 minutes before baking.
- Carefully transfer the sticky dough into the prepared loaf pan and smooth the top with a spatula.
- Place the loaf pan in the preheated oven and bake for 55–60 minutes until golden brown on top.
- Once baked, remove the bread from the oven and let it cool in the pan for 10 minutes before removing it.
Leave a Reply