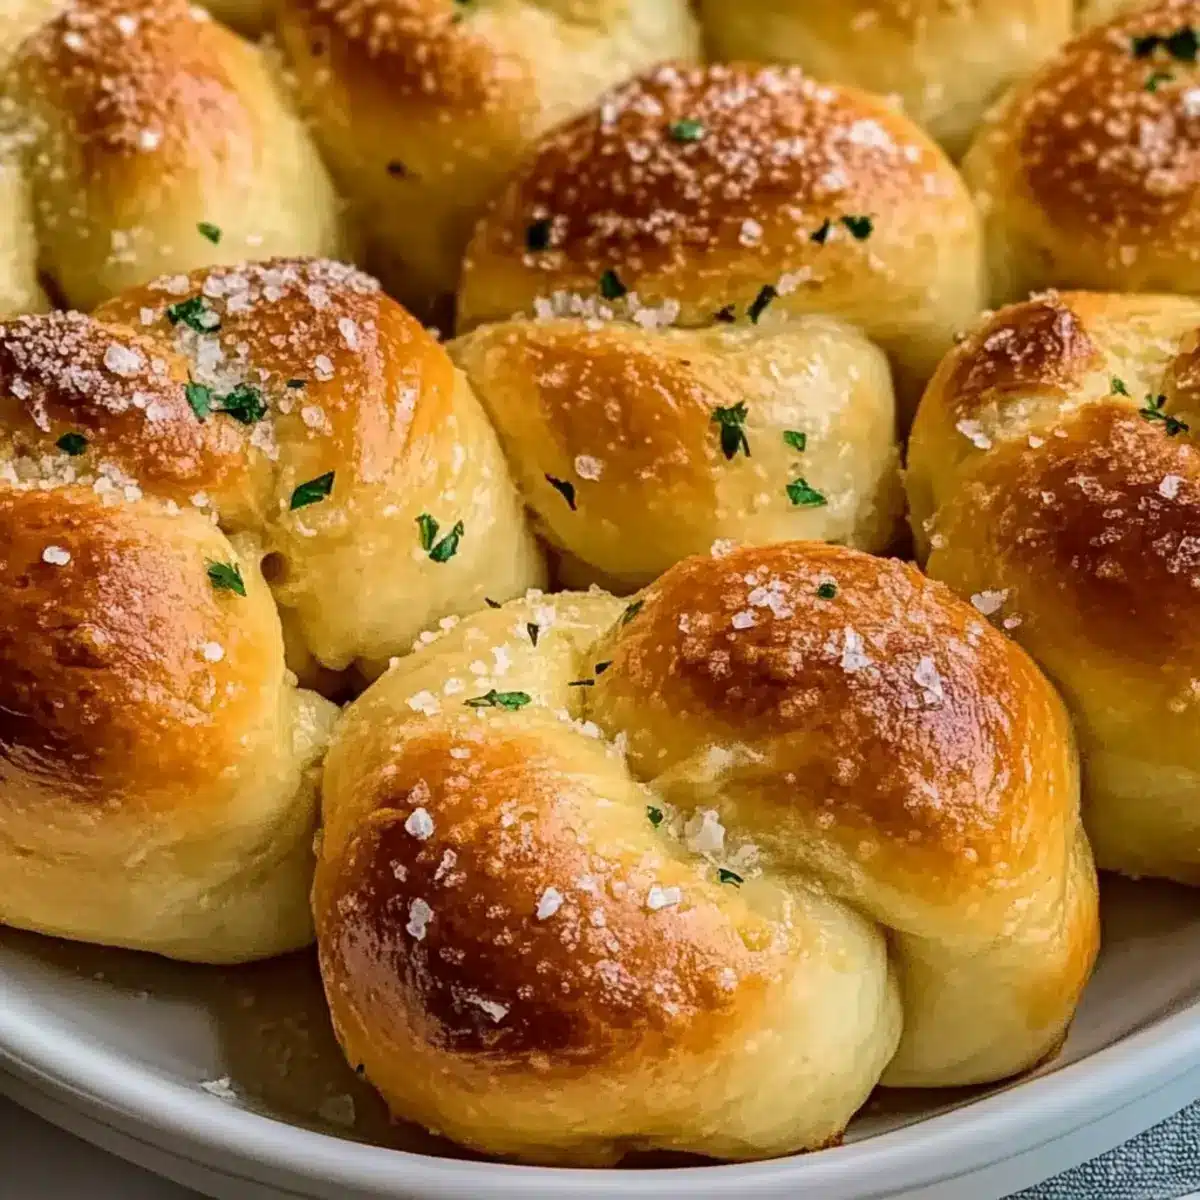
The aroma of freshly baked bread wafts through my kitchen, making it impossible to resist sneaking a garlic knot before they even cool. These Homemade Garlic Knots are not only a fluffy, buttery indulgence, but they also make for a quick and satisfying side dish or snack. The secret lies in the simple yet delightful combination of warm dough and a garlicky butter glaze that transforms these knots into pure comfort food. Whether you’re pairing them with pasta or enjoying them on their own, you’ll find they vanish faster than you can say “seconds, please!” Ready to elevate your baking game with this easy and irresistible recipe? Let’s roll those knots!
Why are these garlic knots irresistible?
Fluffy Texture: The homemade dough rises perfectly, creating a delightful softness that you just can’t get with store-bought options.
Buttery Goodness: Each knot is coated in a rich garlic butter glaze that adds an irresistible flavor, ensuring every bite is heavenly.
Quick & Easy: With optional shortcuts like store-bought pizza dough, you can whip up these snacks in no time without compromising taste!
Versatile Treat: Perfect as a companion for pasta, like our popular Garlic Butter Beef, or simply dipped in marinara sauce for a savory snack.
Family Favorite: These knots are bound to become a hit at your next family gathering, disappearing faster than you can serve them!
Homemade Garlic Knots Ingredients
For the Dough
• All-Purpose Flour – Provides structure and chew; opt for flour that forms gluten easily for the best texture.
• Instant Yeast – Facilitates quick dough rising, yielding those delightful fluffy knots.
• Sugar – Feeds the yeast and adds a hint of sweetness to balance the flavors.
• Warm Water – Activates the yeast; it should feel like warm bath water for optimal results.
• Olive Oil – Introduces moisture and flavor, enhancing the overall taste of the dough.
• Salt – Enhances flavor and balances sweetness, creating a well-rounded dough.
For the Garlic Topping
• Unsalted Butter – Forms the base for the garlic topping, providing a rich buttery finish.
• Fresh Garlic – Finely minced for a bold, aromatic flavor; fresh is best for maximum taste.
• Parsley – Chopped for a pop of color and fresh herby brightness on your knots.
• Sea Salt Flakes – Adds a crunchy finish and elevates the garlic butter experience.
Elevate your snacking with these Homemade Garlic Knots that are just bursting with flavor!
Step‑by‑Step Instructions for Homemade Garlic Knots
Step 1: Activate Yeast
In a large mixing bowl, combine warm water, sugar, and instant yeast. Let this mixture sit for about 5 minutes until it becomes foamy on top, indicating that the yeast is activated and ready to work its magic. This step is crucial for ensuring that your homemade garlic knots rise beautifully and become light and fluffy.
Step 2: Mix the Dough
Once the yeast is frothy, drizzle in the olive oil, then add all-purpose flour and salt into the bowl. Stir the mixture until a dough starts to form, then turn it out onto a floured surface. Knead the dough for 6-8 minutes until it’s smooth and elastic, creating the perfect base for your yummy garlic knots.
Step 3: First Rise
Place the kneaded dough in a lightly oiled bowl and cover it with a damp cloth or plastic wrap. Let it rise in a warm environment for about 1 hour, or until it has doubled in size. This initial rise helps create those fluffy, soft textures that make homemade garlic knots so irresistible.
Step 4: Shape the Knots
After the dough has risen, punch it down to release any air bubbles. Divide it into 12 equal pieces and roll each piece into a long rope, about 8 inches in length. Tie each rope into a knot and tuck the ends underneath for a neat appearance. Your cute knots are now ready to rise again!
Step 5: Second Rise
Place your formed knots on a parchment-lined baking sheet, leaving space between each one. Cover the knots lightly with a cloth and let them rise for another 20-30 minutes in a warm spot. This final rise ensures that your homemade garlic knots will be extra fluffy when they bake.
Step 6: Preheat the Oven
While your knots are rising, preheat your oven to 400°F (200°C). This temperature is perfect for baking the knots until they achieve that heavenly golden brown color. Once the oven is ready, you’ve already set the stage for baking your delightful, aromatic garlic knots.
Step 7: Bake the Knots
Carefully transfer the baking sheet into the preheated oven and bake the knots for 15-18 minutes. Keep an eye on them as they bake; they’re done when they turn a lovely golden brown and emit a tempting aroma that fills your kitchen.
Step 8: Prepare Garlic Butter
While the garlic knots are baking, melt the unsalted butter in a small saucepan over low heat. Add the finely minced garlic and let it simmer for 1-2 minutes, allowing the garlic to infuse its flavor into the butter. Remove from heat and stir in the chopped parsley for a fresh, herby lift.
Step 9: Brush and Serve
Once the homemade garlic knots are baked to golden perfection, brush them generously with the garlic butter mixture immediately. Sprinkle sea salt flakes over the top for that final touch. Serve these warm knots straight from the oven for a delightful snack or side dish that everyone will love!
Storage Tips for Homemade Garlic Knots
Room Temperature: Store leftover garlic knots in an airtight container at room temperature for up to 2 days to maintain their soft texture.
Fridge: If you need to keep them longer, refrigerate the knots in an airtight container for up to 5 days. Reheat in the oven to revive their freshness.
Freezer: For longer storage, freeze the garlic knots in a freezer-safe bag or container for up to 2 months. Thaw before reheating to enjoy their deliciousness.
Reheating: To bring back the delightful warmth and fluffiness, reheat the knots in the oven at 350°F (175°C) for about 10-15 minutes. Enjoy your Homemade Garlic Knots!
Expert Tips for Homemade Garlic Knots
Warm Water Matters: Ensure your water is warm but not hot; too much heat can kill the yeast, preventing the knots from rising.
Double Rise Delight: Allow the dough to rise twice—this ensures a wonderfully fluffy texture that’s essential for delicious homemade garlic knots.
Flavor Boost: For an even richer taste, brush with extra melted garlic butter just before serving; it elevates the flavor profile exponentially.
Check Yeast Freshness: If the yeast doesn’t foam after mixing with warm water, it may be expired. Always check your yeast for freshness before starting.
Shape & Chill: If you’re prepping ahead, shape the knots and refrigerate them. Let them come to room temperature for about 30 minutes before baking for best results.
Homemade Garlic Knots Variations & Substitutions
Feel free to get creative with these garlic knots and make them your own with delightful twists and substitutions!
-
Garlic Powder: Replace fresh garlic with 1 teaspoon of garlic powder mixed into the melted butter for a quicker option. This still delivers that great garlic flavor without the chopping!
-
Cheesy Knots: For a richer flavor, sprinkle grated Parmesan or mozzarella cheese on top of the knots before baking; it’ll create a beautifully gooey, cheesy finish.
-
Store-Bought Shortcut: Use store-bought pizza dough for an easy time-saving option. This means you can enjoy homemade garlic knots with minimal effort—perfect for busy evenings!
-
Herb Infusion: Add dried herbs like oregano or thyme to the dough for an aromatic twist. A little sprinkle goes a long way in enhancing the flavor profile.
-
Chili Garlic Twist: For a kick of heat, add a pinch of red pepper flakes to the melted garlic butter before brushing it onto the knots. It’ll elevate your knots to a whole new level of deliciousness.
-
Shape Variations: Instead of knots, shape the dough into mini rolls or sticks for a fun presentation. This variety keeps things interesting at your dinner table!
-
Garlic Butter Plus: Mix in a tablespoon of balsamic vinegar into the garlic butter for a tangy depth that complements the rich flavors beautifully; this unexpected twist is sure to impress!
-
Refrigerate for Later: Shape the knots ahead of time and place them in the fridge to bake fresh later. Let them sit at room temperature for 30 minutes before baking to ensure fluffy results.
For more delicious ideas, try pairing these knots with Cajun Garlic Chicken or enjoy them alongside Garlic Butter Beef for an unforgettable meal!
What to Serve with Homemade Garlic Knots
The joy of homemade garlic knots extends beyond just snacking; they can beautifully complement a variety of dishes.
- Creamy Tomato Soup: The richness of the soup pairs perfectly with the buttery knots, creating a comforting bowl of warmth that’s hard to resist.
- Classic Caesar Salad: Crisp greens, crunchy croutons, and tangy dressing enhance the savory flavor of the garlic knots, making it a delightful meal.
- Garlic Parmesan Pasta: Elevate your meal with pasta coated in a garlic Parmesan sauce; the flavors merge well, creating a harmonious dining experience.
These knots are not only versatile but add a special touch to any meal. Whether you’re diving into your favorite pasta or savoring a comforting bowl of soup, they’re bound to disappear fast!
- Roasted Vegetables: Bright, roasted veggies offer a fresh contrast to the richness of the knots, refreshing your palate with each bite.
- Marinara Sauce: Serving the knots with warm marinara for dipping creates a delightful snacking situation that no one can say no to.
- Wine Pairing: A glass of lightly chilled Pinot Grigio balances the buttery richness while complementing the garlicky flavor—a perfect partner for your meal!
- Chocolate Lava Cake: End your meal with a sweet note; the gooey chocolate filling pairs surprisingly well with the buttery knots for dessert lovers.
Make Ahead Options
Homemade Garlic Knots are a fantastic option for meal prep, helping you save precious time during busy weeknights! You can shape the knots and place them on a baking sheet, then cover and refrigerate them up to 24 hours before baking. Make sure to let them sit at room temperature for about 30 minutes before popping them into the oven to ensure they rise beautifully. Alternatively, you can prepare the garlic butter in advance and keep it in the refrigerator for up to 3 days; just reheat it before brushing your baked knots for that irresistible garlic flavor. By prepping ahead, you’ll have golden, fluffy knots ready to enjoy with minimal effort!
Homemade Garlic Knots Recipe FAQs
How do I choose the right garlic for the best flavor?
Absolutely! Use fresh garlic instead of pre-minced for optimal taste. Fresh garlic has a more robust flavor and aroma that shines through in your garlic knots. Look for firm, plump cloves with no dark spots. If you can, aim for garlic that’s just been harvested for a sweeter, milder flavor.
How long can I store my leftover garlic knots?
Very! You can store leftover Homemade Garlic Knots in an airtight container at room temperature for up to 2 days. If you want to keep them longer, they can be refrigerated for up to 5 days. Just make sure to reheat them in the oven to bring back their fluffy goodness!
Can I freeze garlic knots?
Yes, indeed! To freeze your Homemade Garlic Knots, let them cool completely first. Then, wrap them tightly in plastic wrap or place them in a freezer-safe bag. They’ll stay fresh for up to 2 months. When you’re ready to enjoy them, simply thaw them at room temperature and reheat in the oven at 350°F (175°C) for about 10-15 minutes.
What should I do if my dough doesn’t rise?
If your dough doesn’t rise, don’t worry—it happens! First, check that your yeast is fresh; if it doesn’t foam in the water after 5 minutes, it’s expired. Additionally, make sure the water temperature is warm, not hot. If your kitchen is too cold, try placing the dough in a warmer spot or an oven with just the light on.
Are these garlic knots suitable for people with allergies?
Absolutely! However, if someone has a gluten allergy, it’s best to use a gluten-free flour blend as a substitute for all-purpose flour. Always check all ingredients for cross-contamination, especially if food allergies are a concern. Enjoy these knots as part of a vegetarian diet, as they’re free from meat and animal products.
Can I use store-bought pizza dough instead?
Yes, you can! To save time, you can use store-bought pizza dough as a shortcut. Just shape and tie the dough into knots as you would with homemade dough, then follow the same baking instructions. This option is quick and still gives you delicious homemade garlic knots!
Homemade Garlic Knots: Soft, Buttery Bites of Joy
Ingredients
Equipment
Method
- In a large mixing bowl, combine warm water, sugar, and instant yeast. Let this mixture sit for about 5 minutes until it becomes foamy on top.
- Once the yeast is frothy, drizzle in the olive oil, then add all-purpose flour and salt. Stir until a dough starts to form, then knead for 6-8 minutes until smooth and elastic.
- Place the kneaded dough in an oiled bowl and cover it. Let it rise for about 1 hour in a warm environment, or until doubled in size.
- After the dough has risen, punch it down and divide into 12 pieces. Roll each into an 8-inch rope and tie into knots.
- Place the knots on a parchment-lined baking sheet, cover lightly, and let them rise for another 20-30 minutes.
- Preheat your oven to 400°F (200°C) while the knots are rising.
- Bake the knots for 15-18 minutes until they turn golden brown and emit a tempting aroma.
- Melt the unsalted butter in a saucepan, add minced garlic, and simmer for 1-2 minutes. Stir in chopped parsley.
- Brush the baked knots generously with the garlic butter mixture and sprinkle with sea salt flakes.
- Serve warm as a delightful snack or side dish.
Leave a Reply