As the aroma of sweet and savory wafts through the kitchen, I can’t help but smile at the memory of game nights spent with friends, eagerly awaiting my signature dish: Candied Kielbasa Bites. These addictively delicious appetizers are an effortless way to elevate any gathering. With just a handful of ingredients, you can whip up these easy appetizers that combine sticky brown sugar and a kick of spice into bite-sized perfection. Perfect for game day or any celebration, they’re guaranteed to be the star of the table, pleasing both kids and adults alike. What’s even better is their adaptability—swap out kielbasa for your favorite sausage or play around with different sauces to put your unique spin on the recipe. Are you ready to impress your guests with this delectable delight?

Why Are Candied Kielbasa Bites So Irresistible?
Simplicity: This recipe is a breeze to prepare, requiring minimal effort and just a handful of ingredients, perfect for busy cooks.
Flavor Explosion: Each bite packs a punch of sweet, smoky, and savory flavors that will keep your guests coming back for more.
Versatility: Feel free to swap kielbasa for other sausages like chorizo or turkey, and adjust the glaze with your favorite sauces to create unique flavor profiles.
Crowd-Pleaser: These easy appetizers are perfect for game days or parties, appealing to both kids and adults alike. Similar to other crowd-pleasing snacks like Peanut Butter Bites, they’re sure to be a hit.
Make-Ahead Hero: Prep them in advance and store for parties, so you can enjoy the time with your friends without stress!
Candied Kielbasa Bites Ingredients
Get ready to create a mouthwatering dish that will steal the show at any gathering!
For the Glaze
- Brown Sugar – This primary sweetener creates that irresistible candied glaze; feel free to use light or dark for different flavor depths.
- Honey – Adds sweetness and a glossy finish; substitute with agave syrup for a unique twist.
- Ketchup – Brings tangy comfort to the sauce; swapping it for barbecue sauce can add a smoky flair.
- Dijon Mustard – Brightens the flavor profile; use yellow mustard for a milder taste or spicy brown for something bolder.
- Worcestershire Sauce – Enhances umami in the glaze; you can omit it if you’re out.
- Garlic Powder – Contributes subtle depth; consider using fresh garlic if you prefer a more pronounced flavor.
- Smoked Paprika (optional) – Introduces a delightful smokiness; feel free to skip if that’s not your style.
For the Kielbasa Bites
- Kielbasa Sausage – Provides a smoky, savory base for your bites; you can easily substitute with smoked sausage, chorizo, or turkey sausage for lighter options.
These Candied Kielbasa Bites will not only impress your guests but will also add a touch of homemade warmth that fast food simply can’t replicate!
Step‑by‑Step Instructions for Candied Kielbasa Bites
Step 1: Preheat Oven
Begin by preheating your oven to 350°F (175°C). While the oven heats up, prepare a baking tray by lining it with aluminum foil for easy cleanup. This will help your Candied Kielbasa Bites cook evenly and allow the delicious glaze to caramelize beautifully as they bake.
Step 2: Prepare Kielbasa
Next, take your kielbasa sausage and slice it into ½-inch thick rounds. Arrange these pieces in a single layer on the lined baking sheet, making sure they are not overcrowded. This ensures that each piece gets that sweet, sticky glaze and can cook perfectly.
Step 3: Make the Glaze
In a medium saucepan over low to medium heat, combine brown sugar, honey, ketchup, Dijon mustard, Worcestershire sauce, garlic powder, and smoked paprika if you’re using it. Stir the mixture gently until the sugar is fully dissolved and the glaze becomes smooth and bubbly. This usually takes about 5 minutes; keep an eye on it to prevent burning.
Step 4: Coat Kielbasa
Once the glaze is ready, pour it generously over the kielbasa slices on the baking sheet. Use a spatula or brush to ensure that each piece is evenly coated in the sticky glaze. The more glaze coverage, the better the flavor for your Candied Kielbasa Bites!
Step 5: Bake the Bites
Place the baking sheet in the preheated oven and bake uncovered for 20-25 minutes. Halfway through, use a spatula to stir the kielbasa, allowing the glaze to caramelize evenly. You’ll know they’re ready when the glaze is thick and bubbly, glistening on each bite.
Step 6: Serve Warm
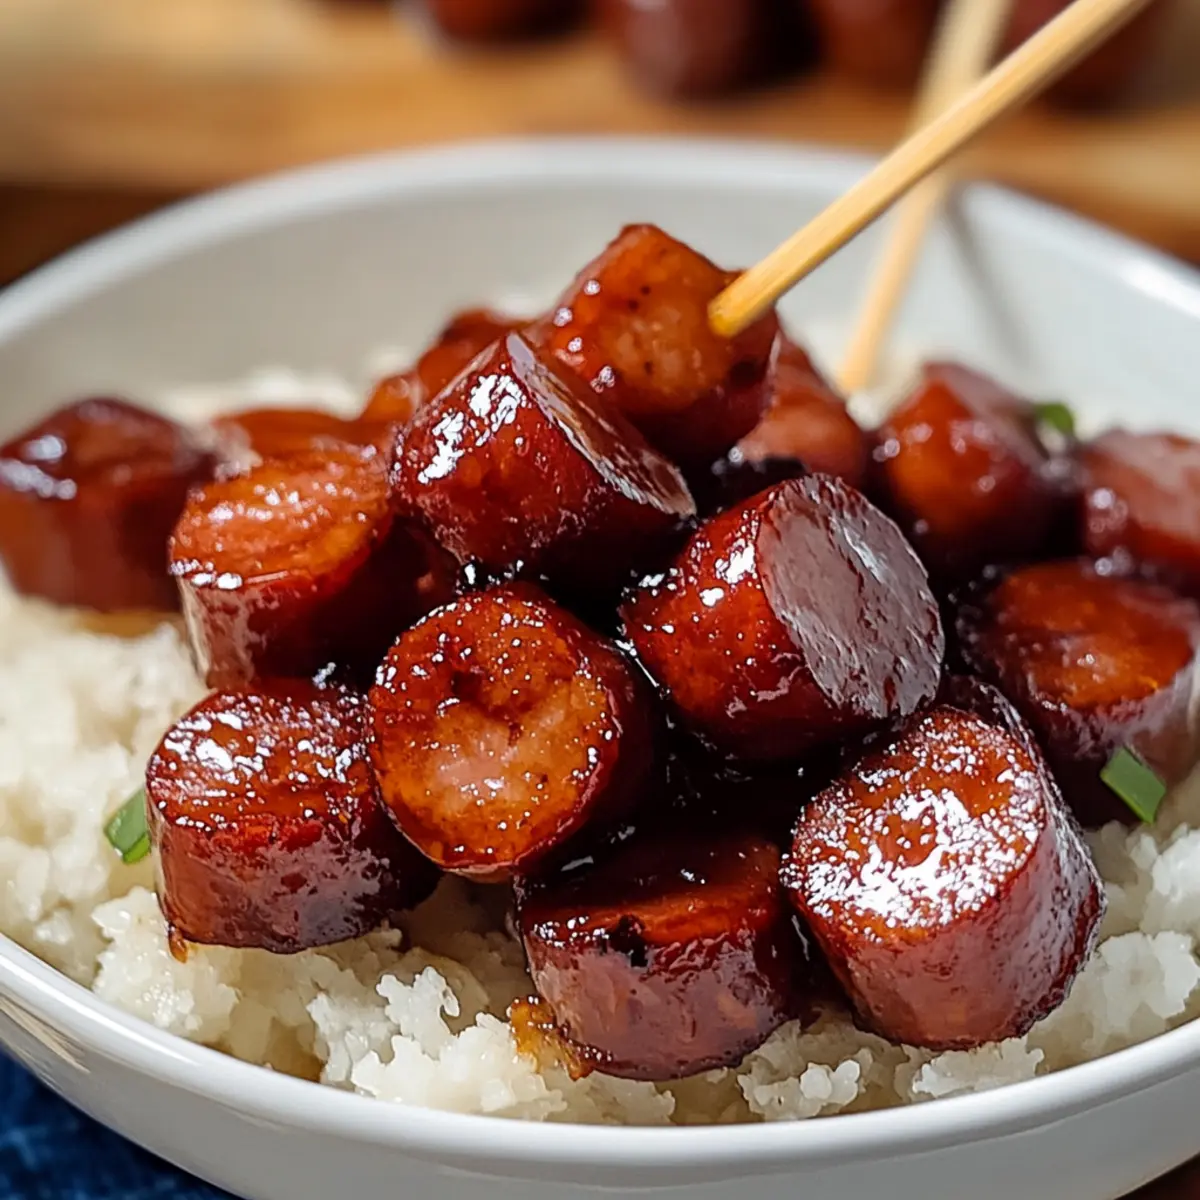
Once cooked, remove the Candied Kielbasa Bites from the oven and allow them to cool slightly. Serve these delightful bites warm, either on skewers for easy handling or over a bed of rice for a heartier meal. Enjoy the sweet and spicy flavors as they disappear from the plate!

Storage Tips for Candied Kielbasa Bites
Fridge: Store leftovers in an airtight container for up to 4 days. This keeps your Candied Kielbasa Bites fresh and flavorful!
Freezer: Ideal for freezing; place in a freezer-safe bag and store for up to 2 months. Perfect for quick meal prep later!
Reheating: Thaw overnight in the refrigerator, then reheat on the stovetop or in the microwave. Add a splash of water to maintain moisture during reheating.
Candied Kielbasa Bites Variations
Customize your Candied Kielbasa Bites to suit your taste and occasion—get creative with flavors and textures!
- Dairy-Free: Replace honey with maple syrup for an equally sweet flavor, perfect for vegan guests.
- Spicy Kick: Add sliced jalapeños or a splash of hot sauce to the glaze for a fiery version.
- Fruity Twist: Stir in diced apples or pears for a refreshing burst of sweetness alongside the savory.
- BBQ Style: Swap ketchup for your favorite barbecue sauce to create a smoky twist reminiscent of summer cookouts.
- Tropical Fusion: Incorporate pineapple chunks into the glaze; the juiciness complements the spicy yet sweet flavors beautifully.
- Vegetarian Version: Use plant-based sausage alternatives for a meat-free crowd-pleaser that still satisfies.
- Cranberry Zing: Mix in a bit of cranberry sauce for a tangy, festive flair that’s perfect during holidays.
- Herbed Goodness: Sprinkle freshly chopped rosemary or thyme over the bites before baking for an aromatic twist.
These variations make your Candied Kielbasa Bites not just easy but endlessly adaptable! If you’re looking for more delightful treats, try the Butter Beef Bites or the tangy Crispy Pickle Cheese Bites to keep your table full of surprises. Enjoy the fun of creating your versions!
Make Ahead Options
These Candied Kielbasa Bites are a fantastic choice for busy home cooks looking to simplify meal prep! You can slice the kielbasa and store it in an airtight container for up to 3 days in the refrigerator. Additionally, the glaze can be prepared and refrigerated separately for up to 24 hours; just reheat gently before pouring it over the sausage. To maintain flavor and texture, avoid mixing the glaze with the kielbasa until you’re ready to bake. When you’re ready to serve, simply combine the kielbasa and glaze, bake as directed, and enjoy the same sweet and spicy goodness, all while saving precious time for cherished moments with family and friends!
What to Serve with Irresistible Sweet and Spicy Candied Kielbasa Bites
As you prepare to indulge in these heavenly bites, envision a spread that complements their sweetness and spice, inviting everyone to gather around and savor every last morsel.
-
Creamy Mashed Potatoes: The smooth texture balances the sticky glaze, creating a comforting base for your kielbasa bites. A dollop of buttery richness rounds out the meal beautifully.
-
Crisp Green Salad: A fresh salad with crisp greens and a tangy vinaigrette provides a refreshing contrast to the savory bites. The crunch and acidity brighten up the flavors, making each bite feel lighter.
-
Honey-Glazed Carrots: Savory sweetness carries through here, echoing the flavors of the kielbasa, while tender carrots offer vibrant color and nutrition. They’re a delightful companion for both young and old at the table.
-
Garlic Breadsticks: Soft, warm breadsticks are perfect for mopping up excess glaze. Their flavor complements the sweet and spicy elements while their texture creates a satisfying contrast.
-
Coleslaw: A cooling, crunchy slaw lightens the plate and offsets the richer flavors of the kielbasa. Add a bit of apple or pineapple for a fruity twist that mirrors the sweetness of the glaze.
-
Ice-cold Beer or Cider: Pair your meal with a refreshing drink. A crisp lager or hard cider enhances the flavors while offering a lively, thirst-quenching experience, perfect for gathering around the game.
These pairings create a harmonious table, ensuring your Candied Kielbasa Bites steal the show while perfectly complementing every other dish!
Expert Tips for Candied Kielbasa Bites
-
Browning Option: Consider browning kielbasa in a skillet before coating; it enhances flavor by adding a delicious caramelized crust.
-
Spice Customization: For those who enjoy heat, mix in red pepper flakes or a splash of hot sauce into the glaze to elevate your Candied Kielbasa Bites.
-
Scaling Up: Planning a big gathering? Double the recipe! Ensure you stir well to prevent any pieces from being left uncoated in the glaze.
-
Storage Solutions: Refrigerate leftovers in an airtight container for up to 4 days, or freeze for future enjoyment. This makes for easy meal prep!
-
Serving Style: Serve with toothpicks for easy eating at gatherings. Alternatively, spoon them over rice or mashed potatoes for a comforting meal option!
Candied Kielbasa Bites Recipe FAQs
What kind of kielbasa should I use for the best flavor?
Absolutely! Traditional kielbasa is fantastic for this recipe, but feel free to experiment with other types of sausage. Smoked sausage, chorizo, or even turkey sausage work beautifully as lighter alternatives. Just make sure they have a bit of smoky flavor to complement the sweet glaze.
How should I store leftovers of Candied Kielbasa Bites?
You can store your leftovers in an airtight container in the fridge for up to 4 days. For longer storage, these bites freeze wonderfully! Just place them in a freezer-safe bag, ensuring as much air is removed as possible, and they’ll remain delicious for up to 2 months.
Can I freeze Candied Kielbasa Bites, and if so, how?
Very! To freeze, allow the Candied Kielbasa Bites to cool completely after baking. Then, transfer them to a freezer-safe bag, removing as much air as possible to prevent freezer burn. Label with the date, and they’ll be good for up to 2 months. When ready to enjoy, thaw overnight in the refrigerator and then reheat on the stovetop with a splash of water to keep them moist.
What if my glaze is too runny or not thickening?
If you find your glaze is runny after baking, don’t worry! Try returning the baking sheet to the oven for an additional 5-10 minutes. If it still seems too liquid, transfer the ingredients to a saucepan and cook over medium heat while stirring until it thickens. This method helps concentrate the flavors and gives you that sticky, caramelized finish that makes these Candied Kielbasa Bites so irresistible.
Are Candied Kielbasa Bites safe for pets?
No, it’s best to keep these bites away from pets! The combination of garlic powder, ketchup, and other ingredients can be harmful to dogs. Always keep human food, especially seasoned dishes, out of reach from your furry friends.
Can I adjust the sweetness level of the glaze?
Absolutely! If you prefer a less sweet option, you can reduce the amount of brown sugar or honey used in the glaze. Alternatively, substituting some of the brown sugar with additional Dijon mustard or Worcestershire sauce can help balance flavors while maintaining a delicious sweet-and-spicy profile.

Sweet & Spicy Candied Kielbasa Bites That Steal the Show
Ingredients
Equipment
Method
- Preheat your oven to 350°F (175°C) and line a baking tray with aluminum foil.
- Slice your kielbasa sausage into ½-inch thick rounds and arrange on the lined baking sheet.
- In a medium saucepan, combine brown sugar, honey, ketchup, Dijon mustard, Worcestershire sauce, garlic powder, and smoked paprika. Stir until the mixture is smooth and bubbly, about 5 minutes.
- Pour the glaze over the kielbasa slices, ensuring they are all evenly coated.
- Bake uncovered for 20-25 minutes, stirring halfway for even caramelization.
- Remove from the oven, let cool slightly, and serve warm.
Leave a Reply