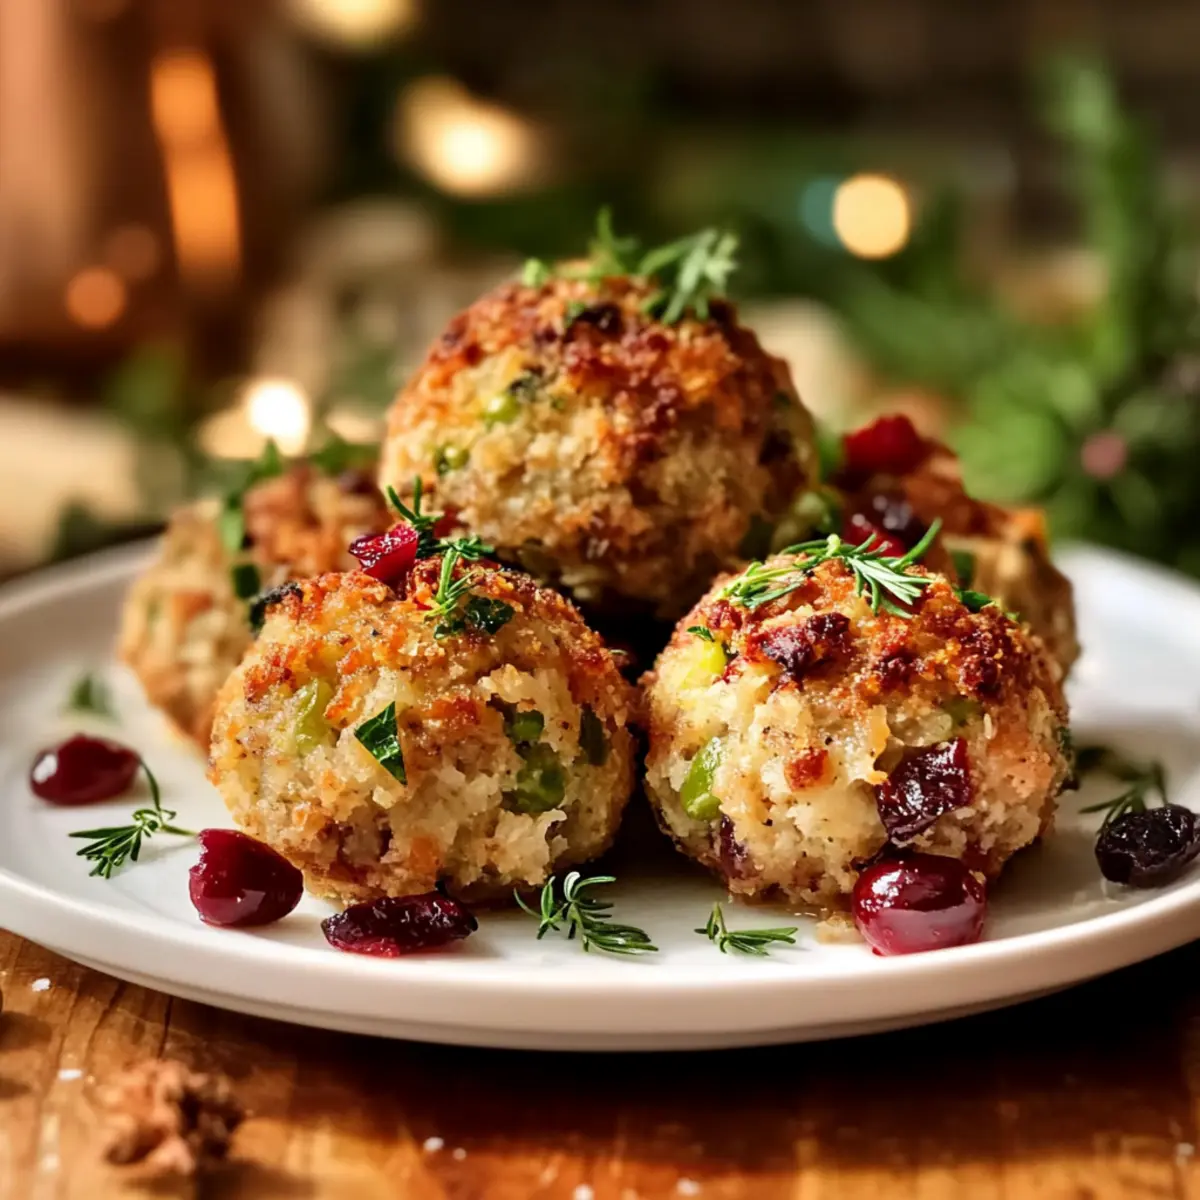
As the aroma of savory herbs fills my kitchen, I can’t help but feel a wave of nostalgia wash over me. Those comforting scents remind me of cherished gatherings and the love that goes into sharing homemade food. This is where these delightful Turkey Stuffing Balls come into play, transforming the classic stuffing experience into something portable and healthy. Not only are they perfect for holiday feasts, but these versatile bites can also adapt to your taste preferences with easy substitutions like ground chicken or gluten-free breadcrumbs. Plus, their delightful crispy exterior and tender interior make them a surefire hit with family and friends. Ready to discover how to whip up this tasty recipe? Let’s dive in and explore the joy of making Turkey Stuffing Balls together!
Why Are Turkey Stuffing Balls a Must-Try?
Versatile Ingredient Options: With simple substitutions like ground chicken or plant-based alternatives, everyone can enjoy these tasty bites!
Healthy Choice: Packed with lean turkey and fresh veggies, these balls are a guilt-free indulgence for your holiday gatherings.
Crowd-Pleaser: Guaranteed to please all palates, their delightful blend of flavors will have your friends and family coming back for seconds.
Perfectly Portable: The bite-sized nature makes them ideal for parties, picnics, or even a cozy family dinner.
Easy Prep and Cleanup: No fuss cooking means you can spend more time enjoying the company of your loved ones rather than slaving away in the kitchen.
Why not serve them alongside a refreshing side like Roasted Butternut Squash for a complete meal that shines?
Turkey Stuffing Balls Ingredients
For the Filling
- Ground Turkey – Offers lean protein as the main ingredient; can be swapped for ground chicken, beef, or a plant-based alternative for a vegetarian option.
- Breadcrumbs – Provides structure and a crunchy texture; for a gluten-free diet, choose gluten-free breadcrumbs.
- Onion – Adds sweetness and depth of flavor; be sure to dice finely for even cooking.
- Celery – Contributes moisture and a subtle crunch; also diced finely to maintain uniformity.
- Garlic – Boosts flavor; sauté until fragrant for the best taste.
For the Seasoning
- Fresh Parsley, Sage, Thyme – Infuses the stuffing balls with aromatic notes; you can use Italian seasoning, rosemary, or oregano as alternatives.
- Salt and Pepper – Essential for seasoning to taste.
Binding and Moisture
- Egg – Acts as a binder to keep the stuffing balls together.
- Chicken Broth – Ensures moisture and richness; adjust the amount for your desired texture.
Get ready to enjoy these delightful Turkey Stuffing Balls, perfect for a healthy twist on your holiday favorites!
Step‑by‑Step Instructions for Turkey Stuffing Balls
Step 1: Preheat the Oven
Begin by preheating your oven to 375°F (190°C). This important first step ensures that your Turkey Stuffing Balls will bake evenly and develop that golden-brown crispy exterior you’re looking for. While the oven heats up, gather your baking sheet and line it with parchment paper for easy cleanup later.
Step 2: Sauté the Vegetables
In a large skillet, heat a drizzle of olive oil over medium heat. Add the finely diced onion and celery, sautéing for 5–7 minutes until they become translucent and fragrant. Then, stir in the minced garlic and cook for an additional minute, allowing the aroma to fill your kitchen. This vital step infuses your Turkey Stuffing Balls with a savory base.
Step 3: Combine All Ingredients
In a spacious mixing bowl, combine the sautéed vegetables with ground turkey, breadcrumbs, fresh herbs, salt, pepper, chicken broth, and egg. Mix everything gently with your hands until just combined; be careful not to over-mix, as this can lead to dense stuffing balls. Aim for a moist yet cohesive mixture that holds together nicely.
Step 4: Shape the Turkey Stuffing Balls
Using your hands, form the mixture into tablespoon-sized balls, carefully rolling each one for a uniform shape. Place the formed balls onto your prepared baking sheet, ensuring to leave space between them for even baking. This step will give your Turkey Stuffing Balls the perfect shape for a delightful bite.
Step 5: Bake to Perfection
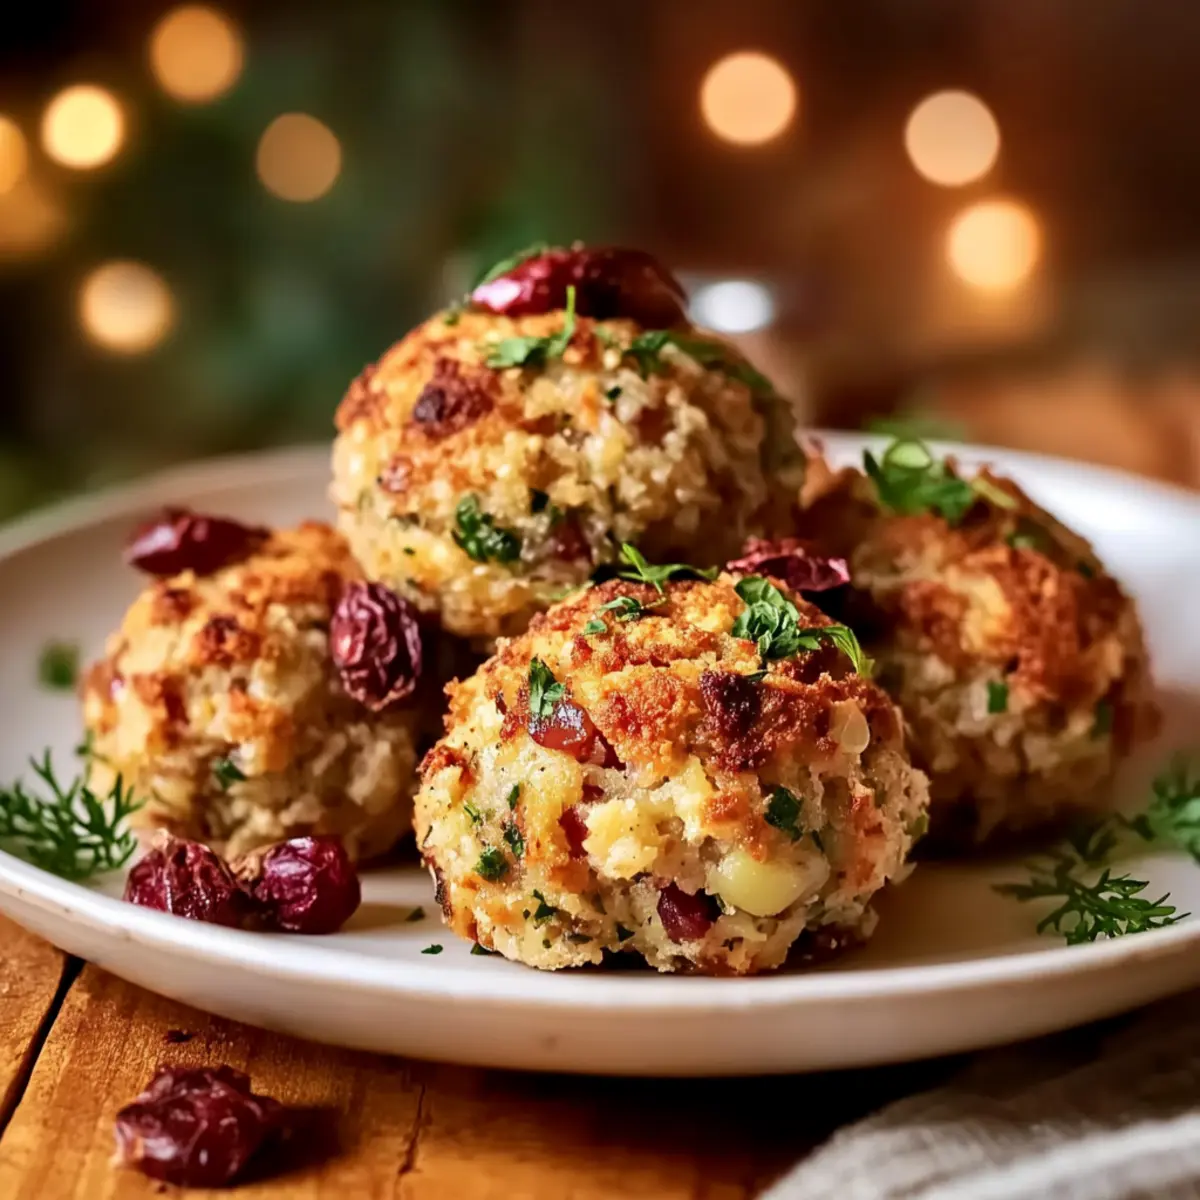
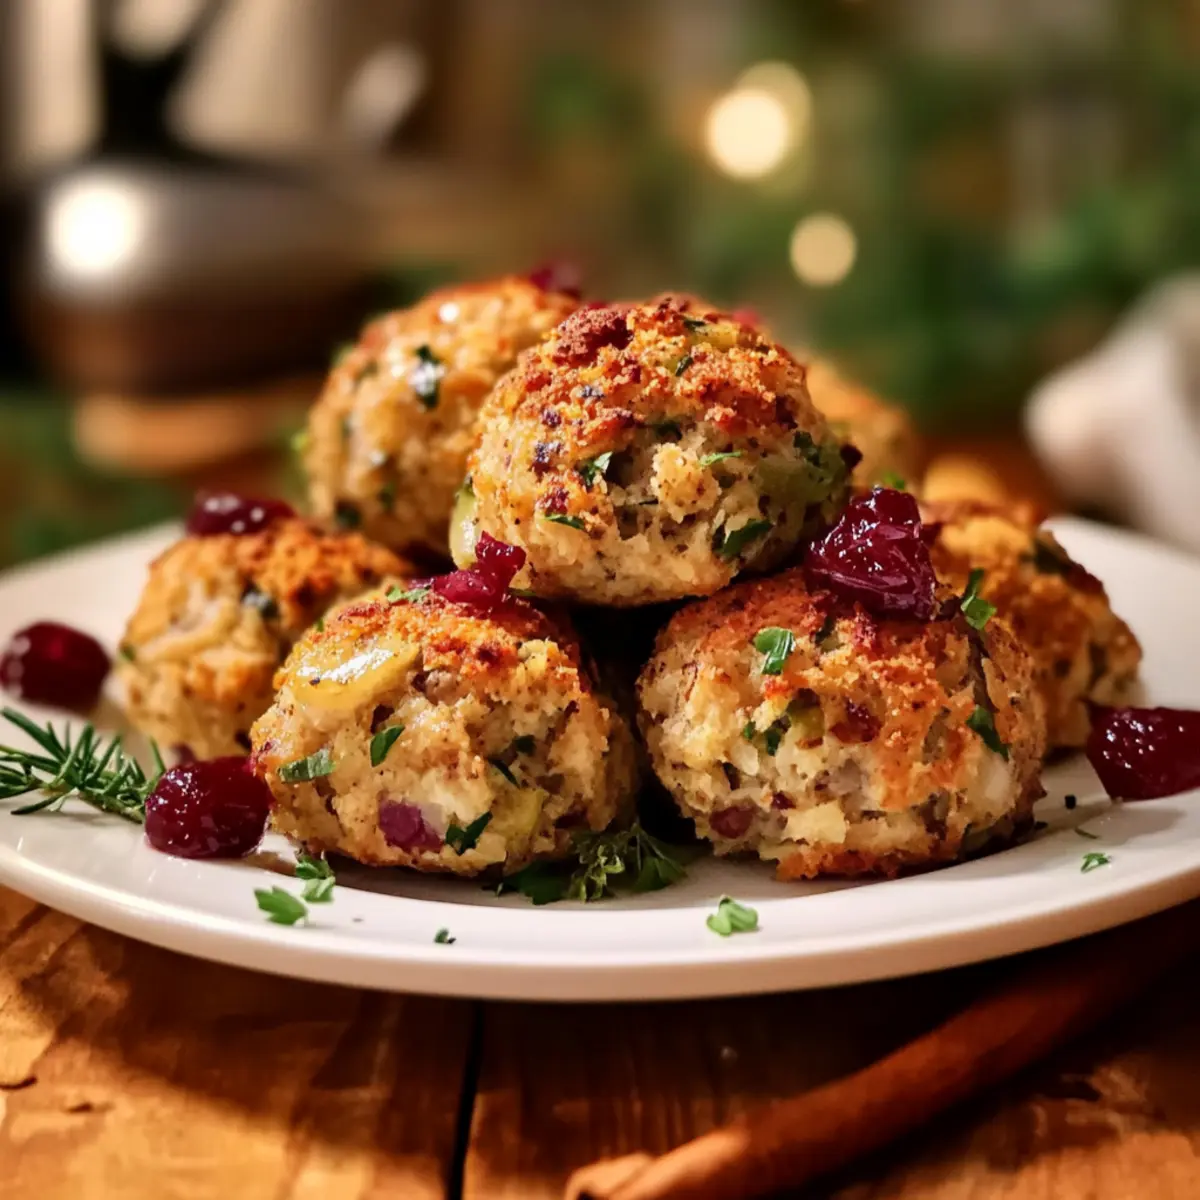
Transfer the baking sheet to your preheated oven and bake for 20–25 minutes. Halfway through the baking time, gently flip the Turkey Stuffing Balls to promote even browning. Keep an eye on them, as they should emerge golden brown and slightly crispy on the outside, while remaining tender inside.
Step 6: Cool and Serve
Once your Turkey Stuffing Balls are beautifully baked, remove them from the oven and let them cool for a few minutes on the baking sheet. This resting time allows them to firm up slightly, making them easier to serve. Dive in and enjoy these flavorful bites that are perfect for any gathering!

Expert Tips for Turkey Stuffing Balls
Avoid Overmixing: Keep it light: If you mix the ingredients too much, the stuffing balls can become dense. Just combine until everything is moist.
Moisture Matters: Use enough broth: To ensure your Turkey Stuffing Balls stay juicy, don’t skimp on the chicken broth. Adjust based on your desired texture.
Bake Evenly: Flip for perfection: Turning the balls halfway through baking helps achieve that beautiful golden brown color and crispiness all around.
Storage Savvy: Keep them fresh: Store any leftovers in an airtight container for up to 3 days in the fridge, or freeze for up to 3 months for future enjoyment.
Substitutions Galore: Get creative: Feel free to experiment with ground turkey substitutes, herbs, or even add in some nuts or dried fruits for a unique twist.
Make Ahead Options
These Turkey Stuffing Balls are perfect for meal prep enthusiasts! You can prepare the mixture up to 24 hours in advance by combining the ground turkey, sautéed vegetables, breadcrumbs, herbs, salt, pepper, chicken broth, and egg. Simply cover and refrigerate the mixture to preserve its freshness. Form the mixture into balls before baking for optimal results or shape them in advance and store them in the refrigerator. If you prefer to freeze, they can be kept for up to 3 months; just make sure to tightly wrap them. When you’re ready to serve, bake directly from the fridge or freezer (adding a few extra minutes to the baking time), and you’ll enjoy flavorful Turkey Stuffing Balls that are just as delicious as freshly made!
How to Store and Freeze Turkey Stuffing Balls
Fridge: Store in an airtight container for up to 3 days. Make sure they’re completely cooled before sealing to maintain freshness.
Freezer: For longer storage, freeze Turkey Stuffing Balls in a single layer on a baking sheet before transferring them to a freezer bag. They’ll be good for up to 3 months.
Reheating: When ready to enjoy, reheat from frozen by baking at 375°F (190°C) for about 15-20 minutes or until heated through, flipping halfway for even warmth.
Make-Ahead Tip: Prepare the mixture one day in advance and refrigerate it. Shape and bake just before serving to preserve their delightful texture.
What to Serve with Turkey Stuffing Balls?
Enhance your holiday spread with these delicious pairings that perfectly complement your Turkey Stuffing Balls.
-
Cranberry Sauce: This tangy and sweet sauce adds a vibrant contrast to the savory stuffing balls, elevating each bite.
-
Mashed Sweet Potatoes: Creamy and slightly sweet, these mashed potatoes bring a delightful texture that balances the stuffing balls’ crunch.
-
Garlic Green Beans: Crisp-tender green beans sautéed with garlic offer a fresh side that cuts through the richness of the main dish.
-
Roasted Brussels Sprouts: The caramelization on these earthy delights adds depth and a satisfying crunch that pairs wonderfully with the stuffing.
-
Harvest Salad: A fresh mix of greens, apples, and walnuts provides a light and crisp element, brightening up your meal.
-
Savory Gravy: Drizzle some warm gravy over both the turkey stuffing balls and accompanying sides for a comforting and cohesive feast.
These pairings will not only enhance the flavors of your Turkey Stuffing Balls but also create a well-rounded, inviting holiday meal your guests will adore!
Turkey Stuffing Balls: Creative Variations
Feel free to play around with these flavorful substitutions to make this dish truly your own!
- Ground Chicken: Swap turkey for chicken for a milder taste; it’s just as delicious and easy to prepare.
- Beef Alternative: Craving a heartier flavor? Substitute ground turkey with ground beef for a richer, savory option.
- Plant-Based Twist: For a vegetarian version, use plant-based ground meat or mix in additional diced vegetables for a hearty texture.
- Herb Options: If you don’t have fresh herbs, Italian seasoning or dried rosemary can easily elevate the flavor profile.
- Gluten-Free Option: Replace regular breadcrumbs with gluten-free breadcrumbs to accommodate dietary restrictions without sacrificing taste.
- Flavor Boost: Add chopped nuts or dried cranberries to the mixture for extra crunch and a hint of sweetness.
- Spice It Up: Introduce a kick by adding crushed red pepper flakes or diced jalapeños to the mix for a zesty finish.
- Mini Sliders: Transform these stuffing balls into mini sliders by layering them with gravy and serving them on small buns—perfect for game day!
These Turkey Stuffing Balls are incredibly versatile, just like the delightful Turkey Meatballs Pumpkin and the crowd-pleasing Spinach Garlic Meatballs. Enjoy the journey of flavor exploration!
Turkey Stuffing Balls Recipe FAQs
What kind of ground meat can I use for Turkey Stuffing Balls?
Absolutely! While ground turkey is the classic choice for Turkey Stuffing Balls, feel free to use ground chicken, beef, or even a plant-based option for a vegetarian version. Each alternative offers a different flavor profile and texture, allowing you to customize your stuffing balls to suit your preferences.
How do I store leftover Turkey Stuffing Balls?
To keep your Turkey Stuffing Balls fresh, place them in an airtight container in the refrigerator for up to 3 days. Make sure they cool completely before sealing to help maintain their flavor and texture. For longer storage, you can freeze them; they will keep well for up to 3 months.
Can I freeze Turkey Stuffing Balls, and if so, how?
Very much so! To freeze your Turkey Stuffing Balls, lay them out in a single layer on a baking sheet and freeze for about an hour. Once frozen, transfer them to a freezer-safe bag or container. They’ll stay delicious for up to 3 months, and when you’re ready to enjoy them, just bake from frozen at 375°F (190°C) for 15-20 minutes, flipping halfway through for even warmth.
What should I do if my stuffing mixture is too dry?
If you find your mixture to be on the dry side, simply add a little more chicken broth—start with a tablespoon at a time until it’s at your desired moisture level. The right texture should feel moist but not overly wet; this is crucial for achieving tasty, tender Turkey Stuffing Balls!
Are Turkey Stuffing Balls suitable for gluten-free diets?
Absolutely! To make your Turkey Stuffing Balls gluten-free, simply substitute regular breadcrumbs with gluten-free breadcrumbs. This small change allows you to maintain the delightful crunch while keeping the recipe safe for those with gluten sensitivities. Additionally, always double-check your chicken broth to ensure it’s also gluten-free!
Can I make Turkey Stuffing Balls ahead of time?
Definitely! You can prepare the mixture a day in advance. Just store it in the fridge, and when it’s time to serve, shape the balls and bake them fresh just before your gathering. This prep-ahead tip allows for a stress-free cooking experience when entertaining!
Savory Turkey Stuffing Balls for a Healthy Holiday Treat
Ingredients
Equipment
Method
- Preheat your oven to 375°F (190°C) and prepare a baking sheet with parchment paper.
- In a large skillet, heat olive oil, sauté the onion and celery until translucent, then add minced garlic.
- Combine the sautéed vegetables with ground turkey, breadcrumbs, herbs, salt, pepper, chicken broth, and egg in a mixing bowl.
- Form tablespoon-sized balls and place them on the baking sheet.
- Bake for 20–25 minutes, flipping halfway through until golden brown.
- Let cool for a few minutes before serving.
Leave a Reply