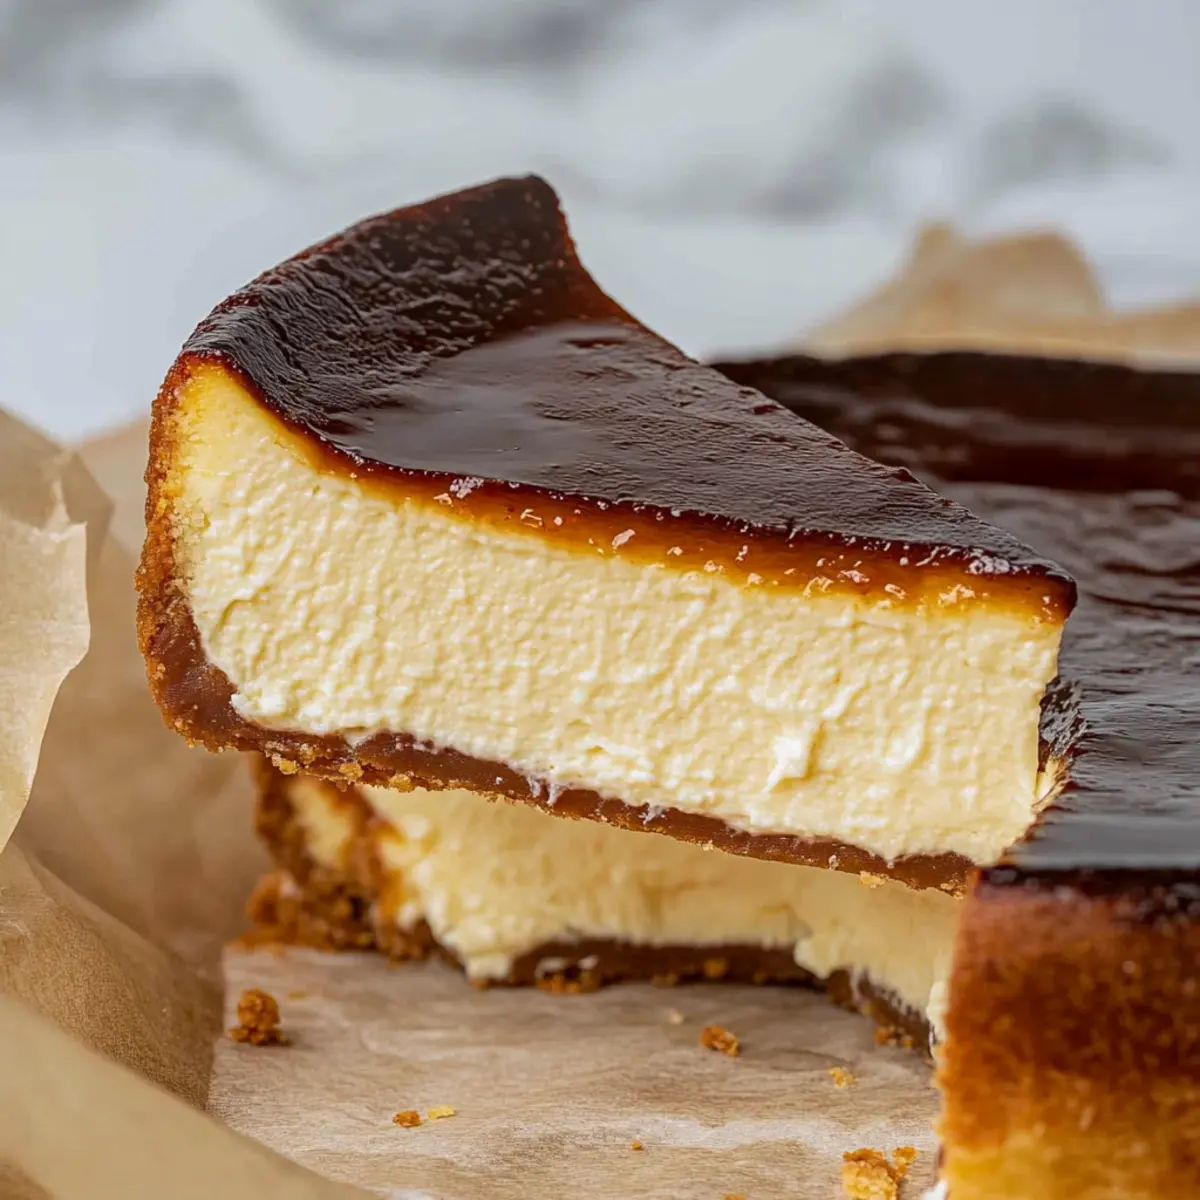
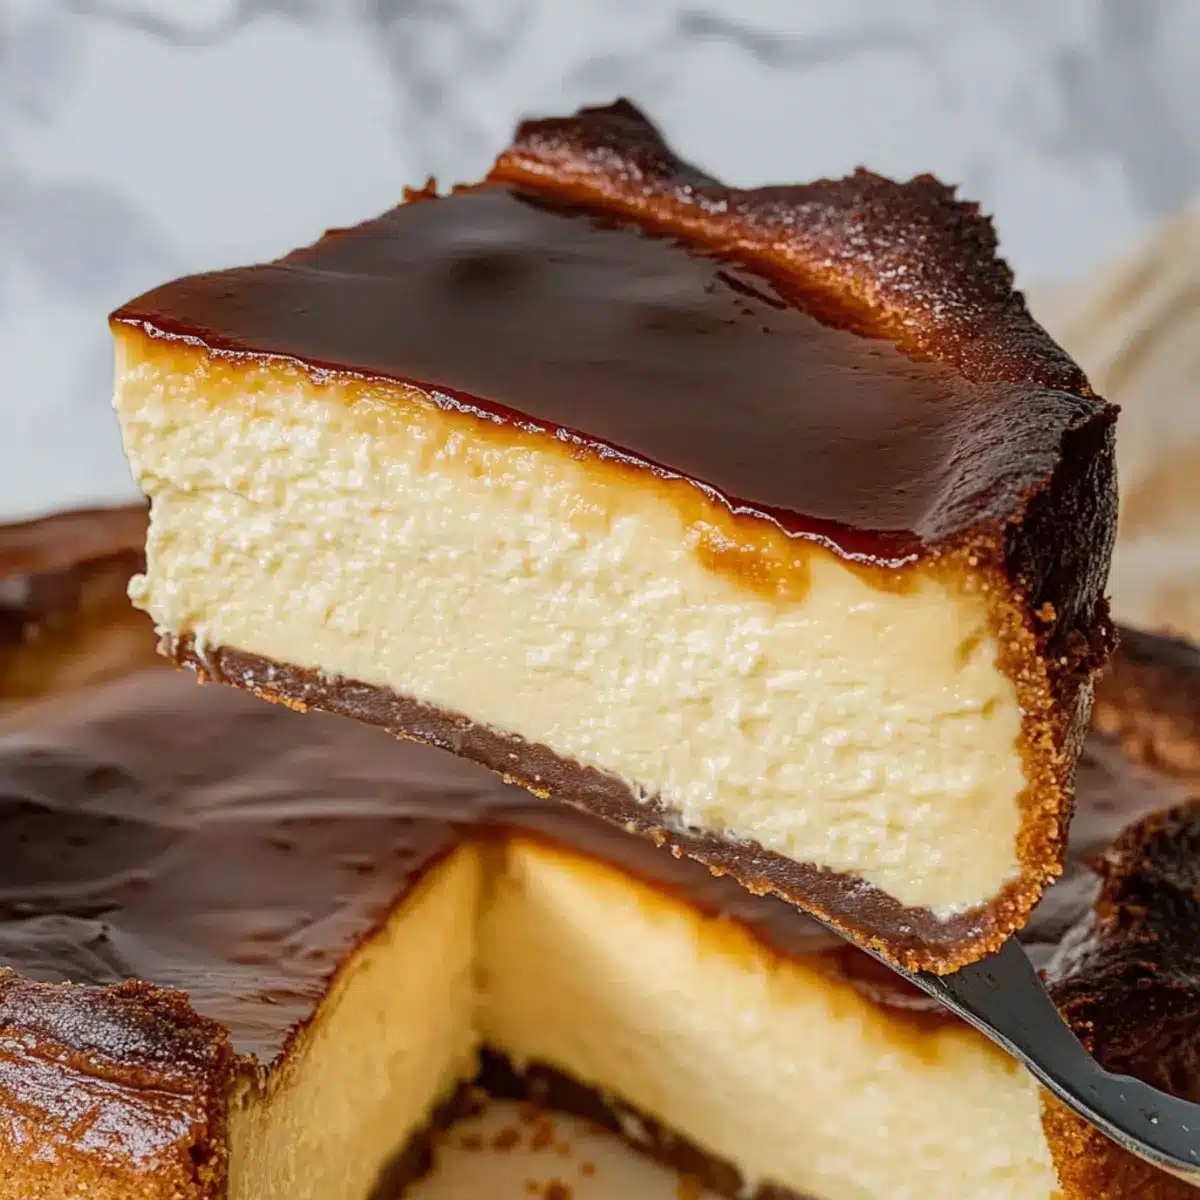
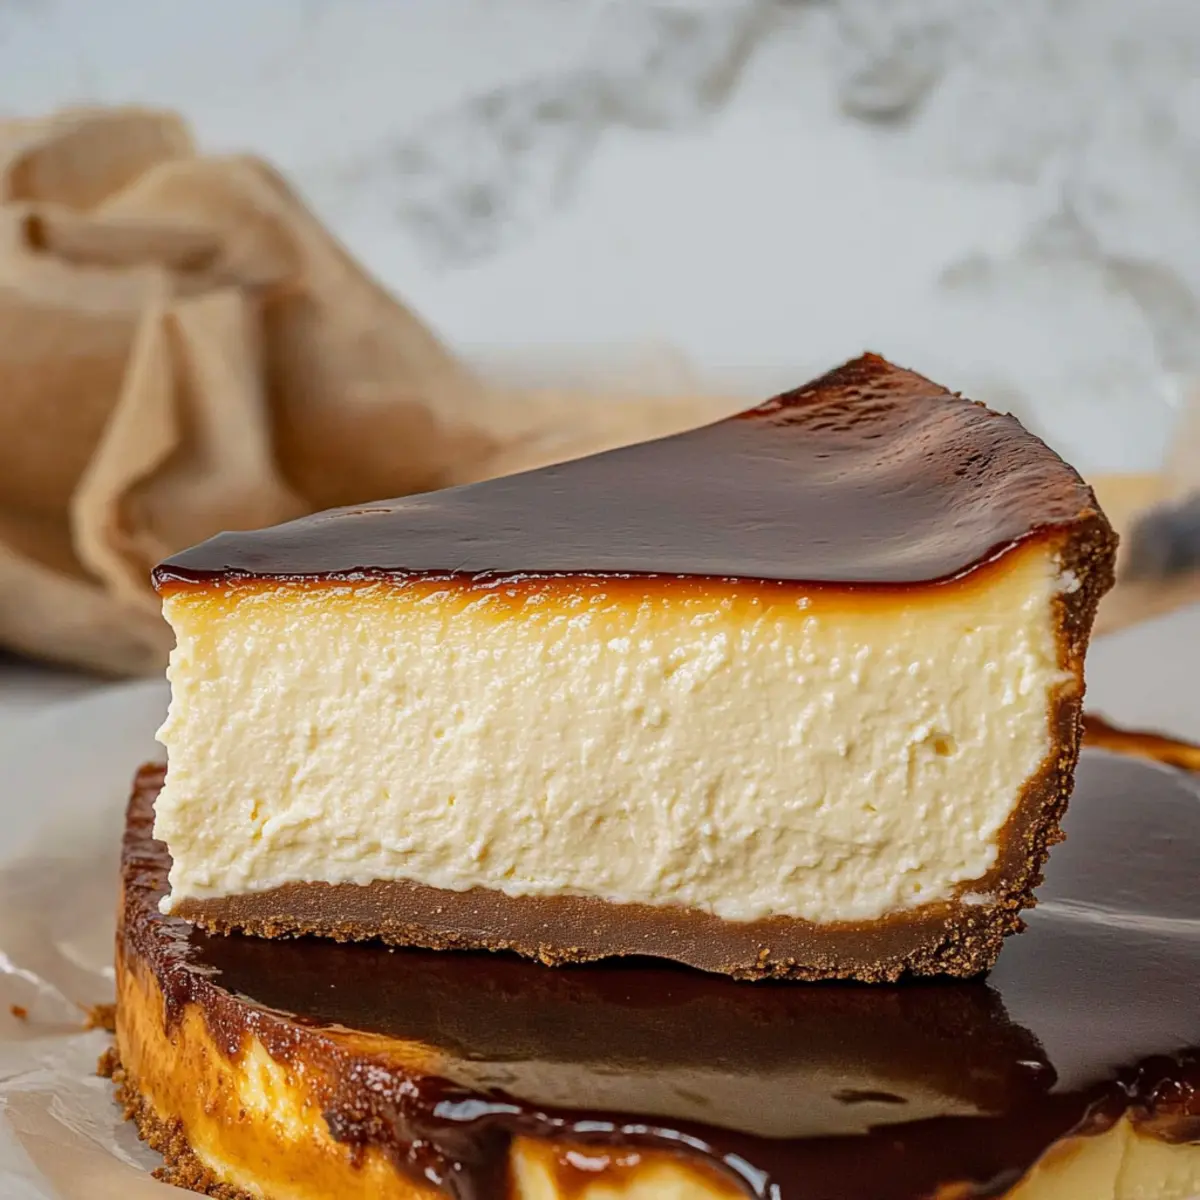
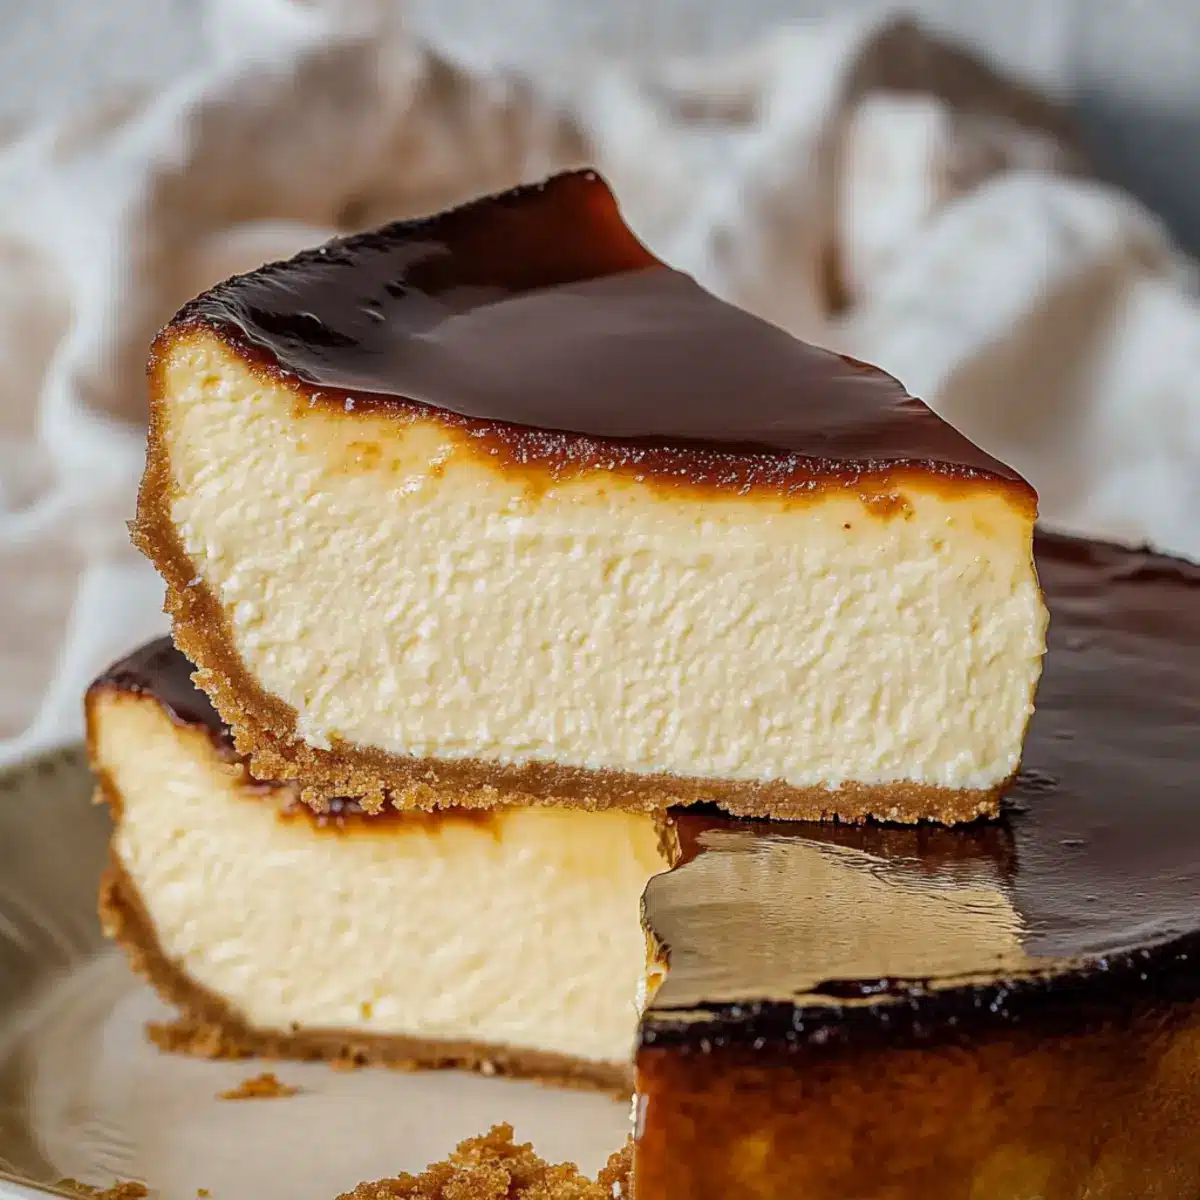
As I stood in my kitchen, the tantalizing aroma of caramelization filled the air, transporting me to the quaint streets of the Basque region. The Easy Basque Burnt Cheesecake emerged with its alluringly darkened top, hinting at the creamy delight beneath. With just five simple ingredients, this crustless wonder makes for a stunning dessert that’s not only a true crowd-pleaser but also incredibly easy to whip up—perfect for food enthusiasts of any skill level! The indulgent texture paired with that beautifully charred finish creates a balance that is both rich and surprisingly light. Trust me, your friends and family will be asking for seconds (and maybe thirds)! Are you ready to elevate your dessert game and impress your loved ones with this delightful treat?
Why is Basque Burnt Cheesecake so special?
Simplicity: With only five ingredients, this cheesecake is accessible for everyone in the kitchen.
Crowd-Pleaser: Its striking look and velvety texture make it the star of any gathering, ensuring everyone will want a slice.
Minimal Effort: The one-bowl preparation means mixing and baking with ease, making clean-up a breeze!
Unique Flavor: The combination of a caramelized crust and creamy center creates an indulgent experience unlike any other cheesecake.
Versatile: Serve it chilled, or pair it with fresh fruits or a light dessert wine for an elevated touch—perfect for any occasion!
For a delightful twist, try it alongside my Japanese Cotton Cheesecake for a taste adventure.
Basque Burnt Cheesecake Ingredients
• To create this Easy Basque Burnt Cheesecake, gather these five simple ingredients that make this dessert a classic delight!
For the Cheesecake
- Cream Cheese – Provides the base and creamy richness; full-fat Philadelphia is recommended for best results.
- Granulated Sugar – Sweetens the cheesecake and helps develop the iconic caramelized top; reduce only if you prefer a less sweet dessert.
- Eggs – Essential for structure; add them slowly to keep the batter dense and creamy.
- Heavy Cream – Contributes to a rich, custard-like texture, so use full-fat (around 36%) for optimal creaminess.
- All-Purpose Flour – Adds a touch of structure to the cheesecake, crucial for keeping it together as it cools.
Give this Easy Basque Burnt Cheesecake a try, and you’ll soon see why it’s become a favorite!
Step‑by‑Step Instructions for Easy Basque Burnt Cheesecake
Step 1: Preheat the Oven
Begin by preheating your oven to 220°C (430°F) without using a fan. While it heats, grab your trusty 8-inch springform pan and line it with parchment paper, making sure the paper extends over the edges. This will ensure easy removal of the cheesecake after baking and provides a beautiful presentation.
Step 2: Mix the Base Ingredients
In a large mixing bowl, combine room-temperature cream cheese, granulated sugar, and all-purpose flour. Using a hand mixer on low speed, mix these ingredients until you achieve a smooth, lump-free consistency. This step is crucial for the creamy texture of your Easy Basque Burnt Cheesecake, so take your time to ensure everything blends well together.
Step 3: Incorporate the Eggs
Next, add the eggs into the creamy mixture, one at a time. Mix on low speed just until combined after each addition. This gradual incorporation helps to maintain the cheesecake’s dense and creamy texture. After the last egg, the batter should be thick and velvety, ready to embrace the final ingredient: heavy cream.
Step 4: Add the Heavy Cream
Slowly pour in the heavy cream while continuing to mix on low speed. You want to combine this until everything is fully incorporated without whipping the cream. The mixture should have a glossy finish, indicating it’s perfectly combined and ready to transform into a decadent Easy Basque Burnt Cheesecake.
Step 5: Pour and Prep for Baking
Pour the batter into the prepared springform pan, gently tapping the sides to release any air bubbles trapped within. The batter should fill the pan evenly, ensuring a consistent bake. At this stage, you can admire the creamy, luscious appearance before it heads into the oven for its transformative baking journey.
Step 6: Bake the Cheesecake
Place your springform pan in the preheated oven and bake for about 40 minutes, but start checking for doneness at around 30 minutes. You’re looking for a deeply golden top where the edges are set but the center remains slightly jiggly. This crucial step gives your Easy Basque Burnt Cheesecake its signature look and texture.
Step 7: Cool Before Refrigerating
Once baked to perfection, remove the cheesecake from the oven and allow it to cool completely in the pan. This can take about an hour. Cooling is essential as it allows the cheesecake to firm up before refrigerating for at least 4 hours or overnight. This helps intensify the flavors and achieve that ultimate creamy texture.
Basque Burnt Cheesecake Variations
Feel free to personalize this delightful dessert with these exciting twists that make each slice a new experience!
- Flavor Boost: Add a teaspoon of vanilla extract for a warm, aromatic touch that enhances the overall flavor profile.
- Citrus Freshness: Incorporate lemon or orange zest to brighten the taste, giving your cheesecake a refreshing zing.
- Chocolate Indulgence: Mix in a handful of chocolate chips for a decadent surprise that will delight chocolate lovers.
- Nutty Crunch: Stir in crushed nuts like almonds or hazelnuts for an appealing texture contrast and nutty flavor.
- Spicy Kick: Add a pinch of cinnamon or nutmeg to the batter for a cozy spiced twist that complements the cheesecake’s richness.
- Berry Swirl: Create a berry compote and swirl it into the batter before baking for a fruity layer that adds vibrancy.
- Ultra-Creamy: Substitute the heavy cream with mascarpone cheese for an even richer, creamier texture that’s simply irresistible.
- Unique Pairing: Try serving this cheesecake with a scoop of ice cream or alongside my delicious Japanese Cotton Cheesecake for a delightful mix of textures.
Each variation makes this cheesecake an ever-evolving delight, perfect for impressing friends and family!
What to Serve with Easy Basque Burnt Cheesecake
Indulge in a complete dining experience by pairing your cheesecake with flavors that complement its creamy richness and charred notes.
- Fresh Berries: A medley of blueberries, raspberries, and strawberries brightens up the plate, adding tartness and a pop of color that contrasts beautifully.
- Whipped Cream: Light and airy, freshly whipped cream offers a sumptuous texture, enhancing the overall dessert experience without overwhelming it.
- Espresso or Coffee: The deep flavors of coffee work harmoniously with the cheesecake, intensifying its sweetness while providing a comforting finish to your meal.
- Fruit Sorbet: A refreshing mango or lemon sorbet provides a zesty kick that cuts through the richness, making each bite a delightful journey.
- Almond Biscotti: Crunchy biscotti lends a satisfying texture to your dessert experience, each bite providing a nutty warmth that complements the cheesecake splendidly.
- Chocolate Sauce: A drizzle of rich chocolate sauce will elevate your Basque Burnt Cheesecake, adding a touch of decadence that chocolate lovers will adore.
- Dessert Wine: A sweet dessert wine like Moscato can beautifully balance the flavors, enhancing the indulgence of each bite while offering a delightful contrast to the cheesecake’s richness.
- Salted Caramel Sauce: Adding a swirl of salted caramel intensifies the flavor profile and offers a mouthwatering sweet-salty richness alongside the creamy cheesecake.
- Custard or Cream Anglaise: Pour a silky custard over each slice for an added layer of luxuriousness—the warmth enhances its flavors while providing a creamy touch that’s simply divine.
How to Store and Freeze Basque Burnt Cheesecake
Fridge: Store your cheesecake in an airtight container for up to 1-2 days. This keeps it fresh while preventing absorption of other flavors in your fridge.
Freezer: For longer storage, wrap the cheesecake tightly in plastic wrap, then place it in an airtight container. It can be frozen for up to 2 months, ensuring you can enjoy this delectable treat anytime!
Thawing: To enjoy your frozen Basque Burnt Cheesecake, transfer it to the fridge and let it thaw overnight. This keeps the texture intact while bringing back the rich flavors you love.
Reheating: Serve chilled, but if you enjoy it warm, gently warm the slices in a microwave for 10-15 seconds to slightly soften the center without melting the top.
Expert Tips for Basque Burnt Cheesecake
• Oven Accuracy: Use a digital oven thermometer to ensure precise baking temperature; incorrect temperatures can hinder the caramelization of the top.
• Mixing Wisely: Avoid overmixing the batter to prevent air incorporation. A dense, creamy texture is what you want for the perfect Basque Burnt Cheesecake.
• Proper Cooling: Let the cheesecake cool completely in the pan before refrigerating. This step ensures it firms up, maintaining its rich, custard-like texture.
• Storage Tips: Always cover the cheesecake when refrigerating. This prevents it from absorbing other flavors, ensuring you enjoy its deliciousness every time.
• Flavor Exploration: Don’t hesitate to experiment with flavors! Adding extracts like vanilla or zests like lemon can enhance your Basque Burnt Cheesecake even further.
Make Ahead Options
These Easy Basque Burnt Cheesecake preparations are perfect for busy weeknights! You can prepare the cheesecake batter up to 24 hours in advance by mixing all the ingredients and storing it in the refrigerator; just be sure to cover it tightly to maintain its creamy texture and flavor. When you’re ready to bake, pour the chilled batter into the lined springform pan and follow the baking instructions as usual. After baking, allow the cheesecake to cool completely, then refrigerate for at least 4 hours or overnight before serving to let those delightful flavors meld together beautifully. This way, you’ll have a stunning dessert ready with minimal effort on the day of your gathering!
Basque Burnt Cheesecake Recipe FAQs
What type of cream cheese should I use?
For the creamiest and richest texture, I highly recommend using full-fat Philadelphia cream cheese. It’s vital for achieving that perfect, dense center in your Basque Burnt Cheesecake. If you’re trying to reduce calories, opt for lower-fat options, but the texture may change slightly.
How should I store leftovers?
Store your cheesecake in an airtight container in the fridge for up to 1-2 days. Make sure it’s well-covered to prevent it from absorbing any other flavors from the fridge. If you don’t finish it in that timeframe, you can freeze it for longer storage!
Can I freeze the cheesecake?
Absolutely! To freeze, wrap the cheesecake tightly in plastic wrap and place it in an airtight container. It can be frozen for up to 2 months. When you’re ready to indulge again, simply transfer it to the fridge to thaw overnight. This will help maintain its rich texture.
What should I do if my cheesecake cracks during baking?
Cracking can happen but isn’t catastrophic! If it happens, don’t fret. Make sure to avoid overmixing the batter, as air bubbles can lead to cracks during the baking process. Additionally, you could cover any cracks with a light dusting of powdered sugar or a berry compote for a beautiful presentation!
Are there any dietary considerations for this recipe?
While the classic Basque Burnt Cheesecake contains dairy and gluten, you can make adaptations! For a gluten-free version, substitute the all-purpose flour with a gluten-free blend. Keep in mind that those with lactose intolerance might want to look for dairy-free cream cheese options or enjoy it in moderation.
Decadent Basque Burnt Cheesecake You'll Love to Make
Ingredients
Equipment
Method
- Preheat your oven to 220°C (430°F) without using a fan. Line an 8-inch springform pan with parchment paper.
- In a large mixing bowl, combine room-temperature cream cheese, granulated sugar, and all-purpose flour. Mix until smooth.
- Gradually add the eggs, mixing on low speed just until combined after each addition.
- Slowly pour in the heavy cream and mix until fully incorporated without whipping.
- Pour the batter into the prepared springform pan, gently tapping the sides to release air bubbles.
- Bake for about 40 minutes, checking for doneness at around 30 minutes. The top should be golden with a slightly jiggly center.
- Allow the cheesecake to cool completely in the pan for about an hour before refrigerating for at least 4 hours or overnight.
Leave a Reply