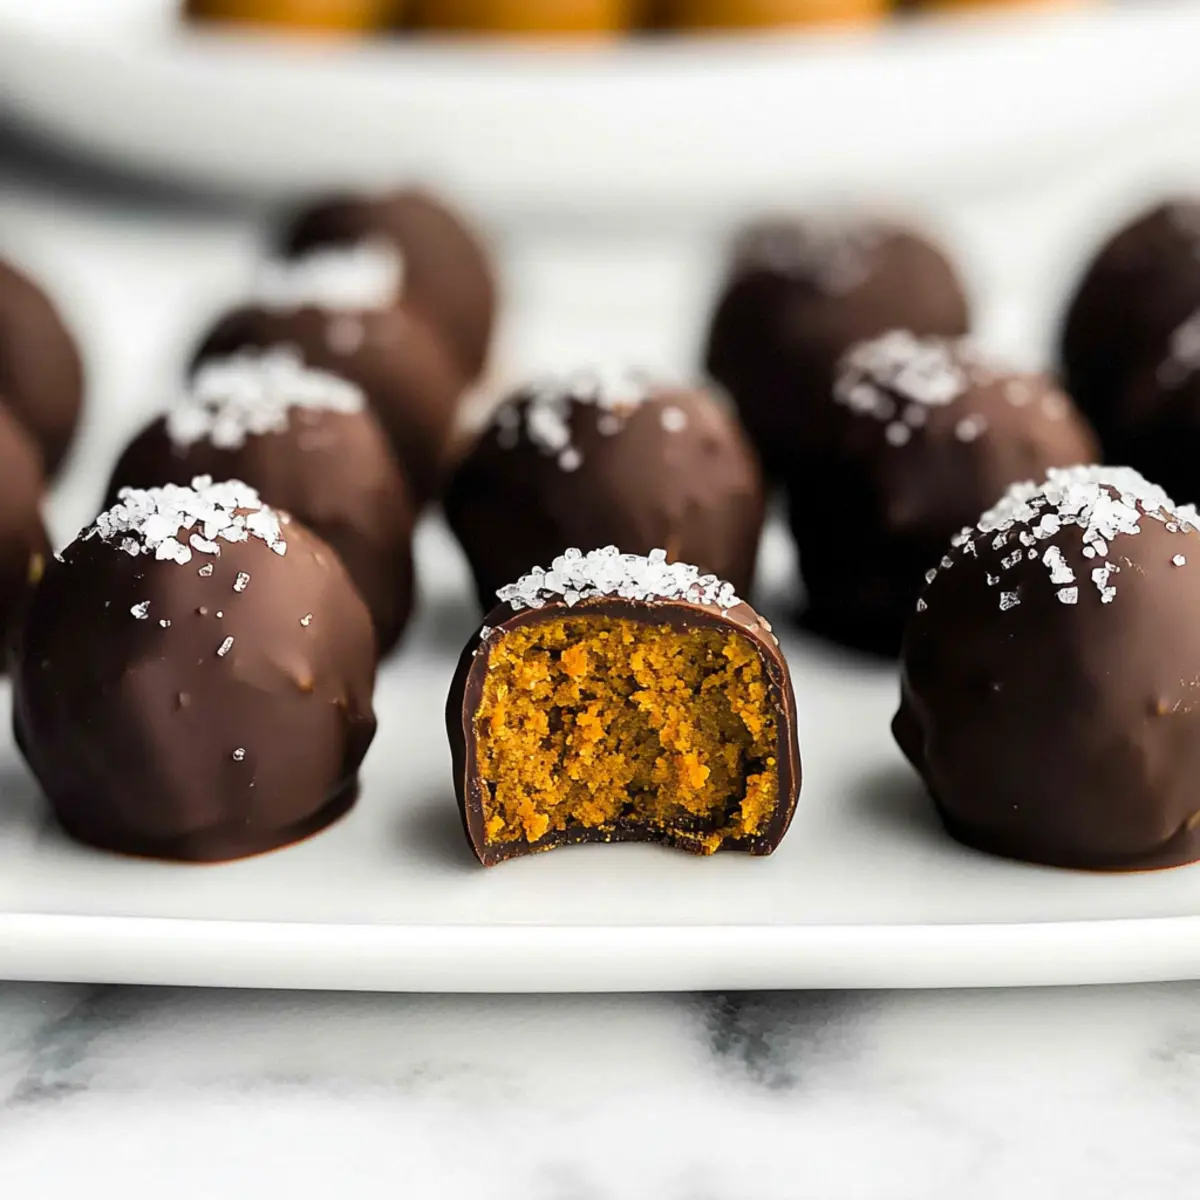
As the crisp autumn air settles in, there’s nothing quite like the comfort of indulging in seasonal treats. That’s where these Healthy Pumpkin Truffles come into play—whipping up these little bites of joy couldn’t be easier! They are a no-bake delight that captures the essence of pumpkin pie, all while being gluten-free, vegan, and low-sugar. Not only do they offer a guilt-free way to satisfy your sweet tooth, but they require just one bowl to make, making cleanup a breeze. Imagine sharing these gorgeous, chocolaty morsels at a fall gathering or sneaking one in as a mid-afternoon pick-me-up. Curious about how to create these enchanting truffles that are as simple as they are delicious? Let’s dive right in!
Why are Healthy Pumpkin Truffles a Must-Try?
Guilt-Free Indulgence: These truffles allow you to enjoy a mouthwatering treat without the extra calories, perfect for mindful eating.
Quick and Easy: With no baking involved, you can have these flavorful bites ready in no time.
Fall Flavors: Bursting with pumpkin spice goodness, they evoke the cozy, comforting scents of autumn.
Diet-Friendly Delight: Gluten-free, vegan, and low-sugar, they cater to a variety of dietary needs, making them accessible for everyone.
Impressive Treat: Share them at gatherings and watch as they disappear; everyone will be asking for your secret!
Chunky Variations: Feel free to mix in nut butters for added creaminess or swap out pumpkin for sweet potato for a delightful twist. Looking for other sweet treats? Check out these scrumptious Healthy Pumpkin Truffles or try these indulgent White Chocolate Truffles for more fall-inspired flavors!
Healthy Pumpkin Truffles Ingredients
For the Truffle Base
- Pumpkin Purée – Provides the rich, moist flavor; opt for canned pumpkin without added sugar for convenience.
- Homemade Pumpkin Spice – Infuses the truffles with warming spices like cinnamon and nutmeg; it’s easy to mix your own for a custom taste.
- Salt – Balances the sweetness and enhances the overall flavor profile.
- Liquid Stevia – A low-calorie sweetener that can be adjusted to your taste; consider coconut sugar for a less sweet version.
- Oat Flour – Adds a lovely structure; you can make it at home by grinding oats, or use any flour except coconut flour.
For the Chocolate Coating
- Dark Chocolate – Choose high-quality bars that melt well for a smooth coating; avoid chocolate chips for best results.
- Flaky Sea Salt – Adds a gourmet finishing touch that beautifully contrasts with the sweetness of the truffles.
These Healthy Pumpkin Truffles promise to bring a smile to your face and a sense of indulgence without the guilt. Get ready to impress your friends and family with this autumn-inspired treat!
Step‑by‑Step Instructions for Healthy Pumpkin Truffles
Step 1: Prepare Your Workspace
Begin by lining a baking tray with parchment or wax paper to prevent sticking. This step is essential for ensuring your Healthy Pumpkin Truffles can be easily lifted once they’ve set. Gather your mixing bowl, spatula, and measuring tools, so you’re ready to whip up these delightful treats in no time.
Step 2: Mix the Base Ingredients
In a medium bowl, combine the pumpkin purée, homemade pumpkin spice, salt, and liquid stevia. Stir these ingredients together until well incorporated. Gradually add the oat flour, mixing it in until the mixture forms a soft yet moldable dough. It should be slightly sticky but hold together well; if necessary, adjust with more flour or pumpkin purée.
Step 3: Shape the Truffles
Once the mixture is well blended, rub your hands with a neutral oil to prevent sticking, then scoop small amounts of the mixture and roll them into bite-sized spheres. Aim for a uniform size to ensure even coating and presentation. Arrange the rolled truffles neatly on the prepared baking tray, leaving some space between each for easy handling.
Step 4: Melt the Chocolate
In a microwave-safe bowl, break the dark chocolate into smaller pieces for quicker melting. Microwave the chocolate in 30-second intervals, stirring after each, until it’s completely melted and smooth. Ensure that you maintain a gentle heat to avoid burning the chocolate, which is critical for creating the perfect coating for your Healthy Pumpkin Truffles.
Step 5: Coat the Truffles
Using forks, dip each truffle carefully into the melted chocolate, ensuring it’s fully covered. Allow any excess chocolate to drip back into the bowl before placing the truffle back on the lined tray. This step is key to achieving a luscious coating for your truffles; be cautious to keep the truffles intact during this process.
Step 6: Add Finishing Touches
While the chocolate is still soft, sprinkle each coated truffle with flaky sea salt to enhance the flavor. This touch adds a gourmet aspect and balances the sweetness beautifully. Make sure to do this before the chocolate sets, as it will help the salt adhere perfectly to your Healthy Pumpkin Truffles.
Step 7: Chill Until Set
Place the tray of truffles in the refrigerator and chill for about 15-20 minutes, or until the chocolate coating has hardened completely. This cooling process is essential for setting the chocolate and achieving the wonderful texture of your truffles, transforming them from a gooey mixture into delightful bite-sized treats.
Step 8: Store and Enjoy
Once set, your Healthy Pumpkin Truffles are ready to be enjoyed! Store any leftovers in an airtight container in the refrigerator for up to five days, or freeze for longer storage. They make for a lovely fall treat to share with friends or keep for yourself as a guilt-free indulgence during those crisp autumn days!
Healthy Pumpkin Truffles Variations & Substitutions
Feel free to explore different options and make these delectable truffles your own!
-
Sweet Potato Swap: Replace pumpkin purée with sweet potato purée for a sweeter, earthier flavor. This twist is sure to impress with its unique taste.
-
Nut Butter Boost: Mix in almond or peanut butter to the truffle base for extra creaminess. The nutty flavor enhances the overall richness and provides healthy fats.
-
Maple Sweetener: Use maple syrup instead of stevia for a deeper, more complex sweetness, perfect for those who prefer a natural sugar alternative. It gives a nice autumn touch!
-
Cacao Nibs Crunch: Add cacao nibs into the mixture for a delightful texture and a hint of chocolate flavor. With every bite, you’ll get that satisfying crunch that elevates the experience.
-
Spice It Up: Experiment by adding a pinch of cayenne pepper or ground ginger to kick up the heat in these truffles. It creates an unexpected warmth that pairs wonderfully with the sweetness.
-
Coating Variety: Instead of dark chocolate, try coating with white chocolate for a sweeter treat or a blend of both. The visual contrast and flavor will make them even more irresistible.
-
Dairy-Free Chocolate: For a fully vegan treat, opt for dairy-free dark chocolate options. There are many delicious brands out there that melt beautifully and will keep your truffles plant-based.
-
Zesty Twist: Add orange or lemon zest to the truffle mixture for a bright citrusy pop. This refreshing addition complements the pumpkin spice beautifully, creating a unique flavor profile.
For more delightful desserts, don’t miss these scrumptious Healthy Pumpkin Truffles or try out the heavenly White Chocolate Truffles that are sure to please your palate!
Storage Tips for Healthy Pumpkin Truffles
Fridge: Store truffles in an airtight container in the refrigerator for up to 5 days, ensuring they remain fresh and flavorful for your enjoyment.
Freezer: For longer storage, freeze the Healthy Pumpkin Truffles in a single layer on a baking tray, then transfer to a freezer-safe bag for up to 3 months.
Thawing: When ready to enjoy, simply thaw the truffles in the fridge overnight or at room temperature for about 30 minutes before serving.
Reheating: There’s no need to reheat these delicious truffles, but you can let them sit at room temperature for a few minutes to soften any hardened chocolate before indulging!
Expert Tips for Healthy Pumpkin Truffles
-
Measure Carefully: Accurate measurement of oat flour is crucial to achieving the right texture. Too much can make them dry or crumbly.
-
Choose Quality Chocolate: Opt for high-quality dark chocolate bars for coating; chocolate chips may not melt smoothly and can lead to uneven textures.
-
Keep Chocolate Smooth: Use a warm surface or a panini press to maintain a smooth consistency when melting chocolate for the truffles.
-
Chill Hardening: Allow the truffles to set at room temperature for a few minutes after chilling if the chocolate appears too cool and lumpy.
-
Experiment with Add-ins: Feel free to mix in nut butters for creaminess or swap pumpkin puree with sweet potato puree for a lively twist on these Healthy Pumpkin Truffles.
What to Serve with Healthy Pumpkin Truffles?
Enjoying these delightful treats can inspire you to create a well-rounded fall-themed meal that tantalizes the senses.
- Creamy Mashed Potatoes: Their buttery richness balances the sweetness of the truffles, creating a meal that feels both comforting and indulgent.
- Apple Cider Salad: A crisp salad with tart apples and a light vinaigrette offers a refreshing contrast, enhancing the autumnal vibes of your dessert.
- Roasted Brussels Sprouts: With their earthy flavors and slight caramelization, they provide a savory counterpart that beautifully offsets the sweetness of healthy pumpkin truffles.
- Spiced Chai Tea: This warm, aromatic beverage complements the cozy pumpkin spice flavors, offering a relaxing finish to your fall gathering.
Each pairing harmonizes with the delicious flavors of pumpkin while adding different textures and tastes. You could even serve the truffles alongside a sweet pear tart for an elegant dessert course. Enjoy these delightful combinations this season!
Make Ahead Options
These Healthy Pumpkin Truffles are perfect for busy home cooks looking to save time! You can prepare the truffle base up to 24 hours in advance; simply mix the pumpkin purée, spices, and flour, and roll them into spheres, then store them in an airtight container in the refrigerator. To maintain their delicious quality, ensure they are covered well to avoid drying. When you’re ready to serve, simply melt the dark chocolate and coat the truffles; they will be just as delightful as when freshly made. For even longer storage, you can freeze the uncoated truffles for up to 3 months—just thaw before dipping!

Healthy Pumpkin Truffles Recipe FAQs
What type of pumpkin purée should I use?
Absolutely! Use canned pumpkin purée—just make sure it’s not pumpkin pie filling, as that contains added sugars and spices. This provides the right moisture and flavor for your truffles. If you prefer, you can also make your own by roasting and blending fresh pumpkin.
How should I store Healthy Pumpkin Truffles?
For best results, store the truffles in an airtight container in the refrigerator for up to 5 days. This keeps them fresh and ready for whenever you need a sweet treat!
Can I freeze Healthy Pumpkin Truffles?
Yes, you can! To freeze, place the truffles in a single layer on a baking tray and freeze until solid. Then, transfer them to a freezer-safe bag or container for up to 3 months. When you’re ready to eat them, simply thaw overnight in the fridge or at room temperature for about 30 minutes!
What if my truffles are too crumbly?
Very good question! If they’re crumbly, it usually means there’s too much oat flour. You can adjust by adding a small amount of pumpkin purée to bring the mixture together. Remember to mix gradually; too much at once can lead to a sticky mess.
Are these truffles safe for people with nut allergies?
Definitely! Since the basic recipe doesn’t contain nuts, they’re considered safe for those with nut allergies. However, always double-check your ingredients, especially if using alternatives like nut butter. It’s best to label them clearly, especially if sharing!
Can I make adjustments to the sweetener?
Of course! If you prefer a different sweetness, you can substitute liquid stevia with coconut sugar or maple syrup. Just keep in mind that the total sweetness level might change slightly, so taste the mixture as you go!
Deliciously Healthy Pumpkin Truffles for Guilt-Free Indulgence
Ingredients
Equipment
Method
- Line a baking tray with parchment or wax paper.
- In a medium bowl, combine the pumpkin purée, pumpkin spice, salt, and liquid stevia.
- Gradually add the oat flour and mix until a soft dough forms.
- Rub hands with oil, scoop the mixture, and roll into bite-sized spheres.
- Melt dark chocolate in a microwave-safe bowl in 30-second intervals.
- Dip each truffle in melted chocolate, then place back on the lined tray.
- Sprinkle with flaky sea salt before the chocolate sets.
- Chill in the refrigerator for about 15-20 minutes until set.
- Store leftovers in an airtight container in the refrigerator for up to 5 days.
Leave a Reply