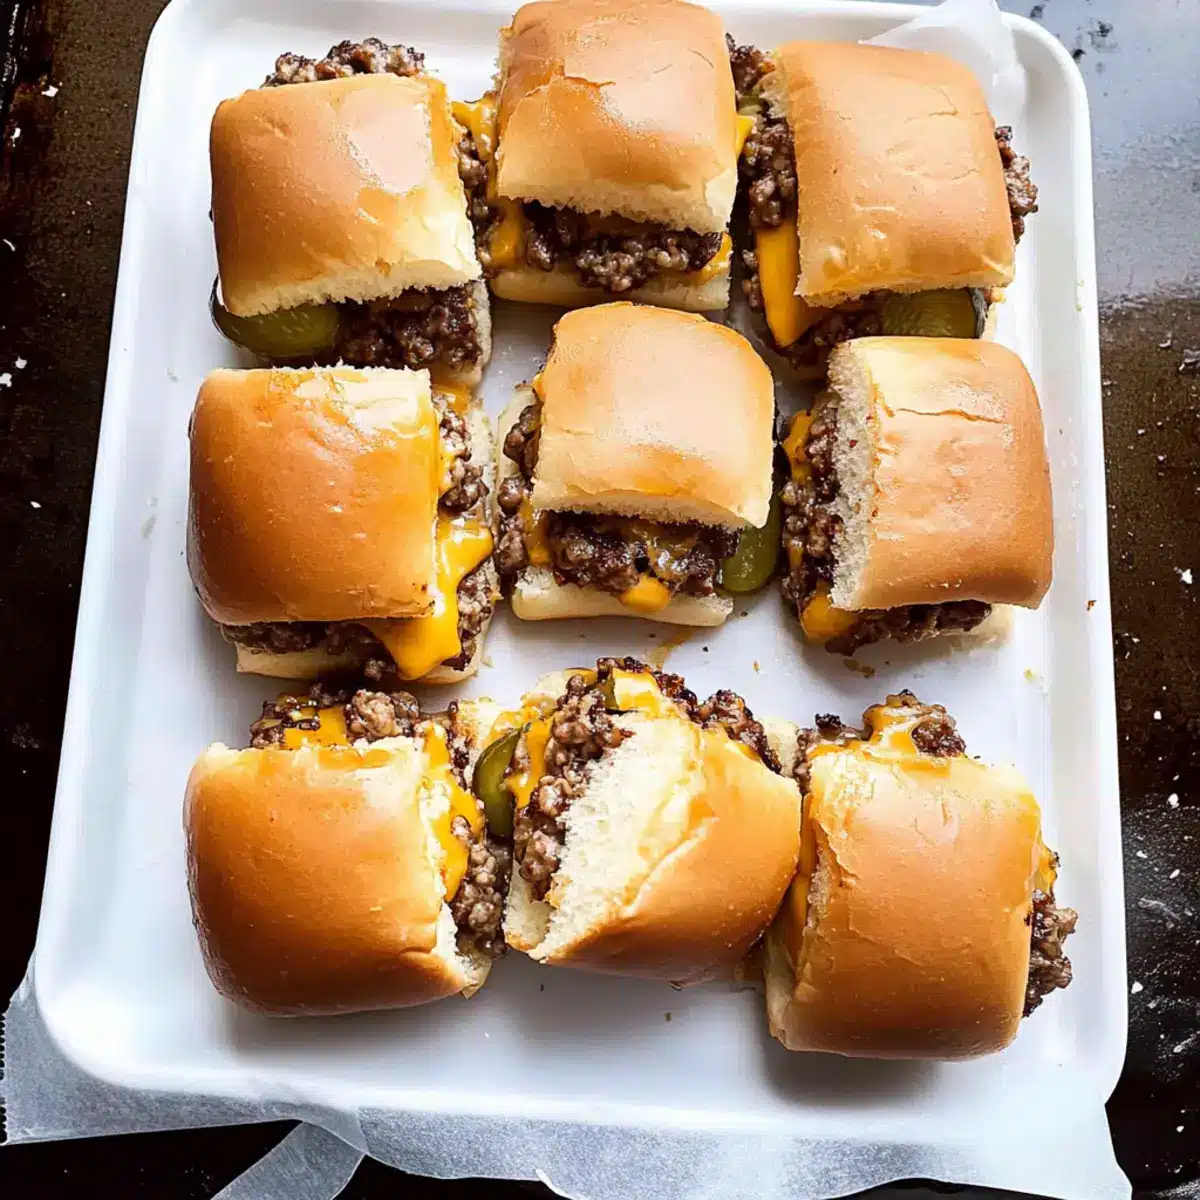
As I walked through the bustling farmers market, my eye caught the vibrant colors of fresh produce and the alluring smell of grilled meats wafting by. That’s when I knew I had to recreate those comfort-food vibes at home. Enter my Easy Cheeseburger Sliders—your new go-to recipe for any gathering! These mini masterpieces are crafted from soft Hawaiian rolls and savory ground beef, making them not just a breeze to whip up in 30 minutes, but also the ultimate crowd-pleaser. Whether it’s game day or a cozy family meal, these sliders promise satisfaction with every bite. Ready to impress your loved ones with a dish that’s sure to become a favorite? Let’s get cooking!
Why Are Cheeseburger Sliders a Must-Try?
Irresistible, the minute you smell them baking! These sliders capture that classic cheeseburger taste in a conveniently bite-sized treat. Quick and Easy: With just 30 minutes of prep, you’ll be ready to serve this deliciousness in no time. Versatile Options: Customize with turkey or veggie alternatives to suit any dietary preference. Crowd Favorite: Perfect for game day, parties, or family dinners, these sliders are always a hit, just like my Cheeseburger Macaroni Soup! Savory Satisfaction: Each slider is stuffed with gooey cheese and seasoned beef, making them a delectable choice that everyone will love. Get ready to relish the compliments!
Cheeseburger Sliders Ingredients
For the Sliders
- Hawaiian Rolls – Provides a sweet, soft base for the sliders; substitution: Use regular dinner rolls if unavailable.
- Lean Ground Beef – The primary protein source that adds heartiness; note: Choose a lean-to-fat ratio for balanced flavor and texture.
- Onion – Finely diced to enhance flavor and moisture in the filling; substitution: Use shallots for a milder flavor.
- Salt & Black Pepper – Essential seasonings for flavor enhancement; note: Adjust to taste.
- Garlic Powder – Adds depth and aromatic flavor; note: Fresh garlic can be used, minced.
For the Toppings
- Condiments (Mayo, Mustard, Ketchup) – Classic toppings for a traditional burger experience; customization: Adjust ratio based on personal preference.
- Dill Pickles – Adds crunch and tanginess; note: Use round slices for better slider assembly.
- Cheddar Cheese – Melts beautifully and provides a rich flavor; customization: Use different cheese varieties like American or Swiss for varied taste.
For Finishing Touches
- Melted Butter – For brushing the tops of buns, adding flavor and helping achieve a golden color; note: Can use olive oil as an alternative.
- Sesame Seeds – For garnishing, adding a slight crunch and visual appeal; optional: Omit if preferred.
Step‑by‑Step Instructions for Cheeseburger Sliders
Step 1: Preheat the Oven
Begin by preheating your oven to 350°F (175°C). While it warms up, line a baking sheet with parchment paper to prevent the sliders from sticking. This will ensure that your Cheeseburger Sliders come out perfectly golden and easy to serve.
Step 2: Cook the Beef Mixture
In a large skillet over medium heat, add the lean ground beef and finely diced onions. Cook for 5-6 minutes, breaking up the meat with a spatula until it’s browned and cooked through, with no pink remaining. Season with salt, black pepper, and garlic powder to enhance the flavor, then remove the skillet from heat.
Step 3: Assemble the Sliders
Grab your Hawaiian rolls and slice them in half horizontally. On the bottom halves of the rolls, spread your favorite condiments like mayo, mustard, and ketchup. Place a dill pickle slice on each before spooning on the savory ground beef mixture and topping with cheddar cheese for that melty goodness.
Step 4: Finish the Preparation
Cover the sliders with the top halves of the rolls, gently pressing down to unite the flavors. Then, brush melted butter generously on top of the buns for added flavor and to achieve that beautiful, golden appearance. If you like, sprinkle sesame seeds over the buttered tops for a delightful crunch.
Step 5: Bake the Sliders
Carefully transfer your assembled Cheeseburger Sliders to the preheated oven. Bake for 12-13 minutes or until the cheese is melted and the buns are lightly golden. Keep an eye on them so they don’t over-bake, as you want them soft and deliciously inviting to your guests.
What to Serve with Cheeseburger Sliders
Elevate your gathering with delightful sides that complement the savory goodness of these scrumptious sliders.
- Crispy Potato Fries: The classic pairing offers a satisfying crunch and salty goodness that perfectly balances the creamy, cheesy sliders. Golden and seasoned, they will have everyone reaching for seconds.
- Coleslaw: A refreshing side that adds a crunchy texture and a tangy bite, enhancing the rich flavors of the cheeseburgers. Its coolness contrasts beautifully with the warm sliders, making every bite a joy.
- Buffalo Chicken Dip: For those who crave a little kick, this spicy dip is the ultimate accompaniment. Serve it with tortilla chips or veggie sticks to enhance the game-day vibe.
- Garden Salad: Fresh greens with cherry tomatoes and cucumbers provide a nourishing contrast to the sliders’ richness. Drizzle with a light vinaigrette for a zesty finish that keeps your meal balanced.
- Macaroni and Cheese: Creamy and cheesy, this dish resonates with the comfort food theme, making it a hit with both kids and adults alike. The cheesy goodness is a perfect fit for your cheeseburger feast.
- Iced Tea or Lemonade: Refreshing beverages that cleanse the palate and complement the savory sliders. A sweetened tea or tart lemonade elevates the experience, quenching thirst without overpowering the meal.
- Grilled Veggies: Marinated and grilled vegetables add a wholesome touch, providing a mix of colors and flavors. Their smoky taste nicely contrasts with the sliders’ cheesey richness, making every bite memorable.
- Chocolate Chip Cookies: End on a sweet note with these classic treats. Warm from the oven, they create the perfect sweet and salty combination after indulging in sliders, leaving everyone satisfied.
Storage Tips for Cheeseburger Sliders
Fridge: Store leftover Cheeseburger Sliders in an airtight container for up to 3 days. This will keep them fresh and ready for snacking at a moment’s notice.
Freezer: For longer storage, wrap individual sliders in plastic wrap and place them in a freezer-safe bag. They can last up to 2 months in the freezer without losing flavor.
Reheating: To reheat, simply bake in a preheated oven at 350°F (175°C) for about 10-12 minutes or until heated through. This will help restore the sliders to their warm, cheesiness while avoiding sogginess.
Make Ahead Options
These Cheeseburger Sliders are perfect for meal prep, making them a fantastic choice for busy weeknights or gatherings! You can prepare the beef mixture up to 24 hours in advance; simply cool it completely before transferring it to an airtight container and refrigerating. Additionally, you can slice the Hawaiian rolls and gather your toppings a day ahead. When you’re ready to serve, layer the chilled beef on the rolls, add cheese, brush with melted butter, and bake as directed for 12-13 minutes. This simple prep will ensure deliciously fresh sliders that will taste just as good as if made on the spot, saving you time while impressing guests!
Expert Tips for Cheeseburger Sliders
-
Choose Quality Beef: Opt for a high-quality lean ground beef to ensure your sliders are juicy and flavorful. Avoid overly fatty cuts to prevent greasiness.
-
Even Cooking: Cook the beef mixture until it’s fully browned and no pink remains. This ensures safe eating and perfect flavor in every bite of your Cheeseburger Sliders.
-
Slice Rolls Properly: When cutting Hawaiian rolls, slice gently and avoid pressing down too hard to maintain the structure and help keep each slider intact during assembly.
-
Experiment with Toppings: Personalize your sliders with different toppings like jalapeños, crispy bacon, or even avocado for an extra layer of flavor and texture that complements the cheeseburger theme.
-
Butter for Shine: Brushing melted butter on top of the buns not only adds flavor but also gives your sliders a beautiful golden appearance that will have everyone’s mouths watering.
-
Serve Fresh: For the best taste experience, serve your Cheeseburger Sliders right out of the oven while they’re warm and cheesy. Enjoy them with a side of your favorite dipping sauce!
Cheeseburger Sliders Variations & Substitutions
Feel free to let your creativity shine as you customize these delectable sliders to suit your taste buds!
-
Turkey Sliders: Substitute ground beef with lean turkey for a lighter alternative that still packs a flavor punch. Turkey brings its uniquely mild taste, perfect for various topping experiments.
-
Veggie Sliders: Use black beans or chickpeas instead of meat for a tasty vegetarian option, spiced up with paprika and cumin. These sliders are bursting with flavor and nutritious goodness!
-
Cheese Variations: Experiment with different cheeses such as pepper jack for a spicy kick or provolone for a luxurious melt. Each cheese adds its distinct character, ensuring no two slider batches are ever the same.
-
Spicy Sliders: Add a few chopped jalapeños or a splash of hot sauce to the beef mixture to bring some heat. This fiery twist can turn your sliders into a sizzling sensation and liven up any gathering.
-
BBQ Flavored Sliders: Mix in some BBQ sauce with the beef before assembling for a smoky, tangy flavor. These BBQ sliders are perfect for summer cookouts and add a whole new layer of deliciousness.
-
Sweet Hawaiian Chicken Sliders: Swap the beef for shredded chicken tossed in sweet teriyaki sauce for a tropical twist. Coconut flakes can be a delightful addition, enhancing that Hawaiian flair.
-
Herb-Infused Sliders: Mix fresh herbs like chopped basil or cilantro into the beef blend. This fresh infusion not only brightens the flavors but also adds an aromatic flair to your sliders.
-
Bread Alternatives: Experiment with flavored bread like garlic knots or even portobello mushrooms for a gluten-free option. You can make your sliders fun and unique for everyone to enjoy, as seen in my Cheeseburger Macaroni Soup!
Embrace these variations to make the recipe uniquely yours, elevating your hosting game while keeping the essence of classic cheeseburger sliders intact!
Cheeseburger Sliders Recipe FAQs
What type of ground beef should I use for Cheeseburger Sliders?
Absolutely! For the best flavor and texture, opt for lean ground beef with an 80/20 lean-to-fat ratio. This ensures your sliders are juicy without being overly greasy. If you prefer a lighter option, ground turkey or plant-based alternatives can work beautifully too!
How should I store leftover Cheeseburger Sliders?
To keep your sliders fresh, store them in an airtight container in the fridge for up to 3 days. Just make sure they cool down before sealing them; this prevents moisture buildup that may lead to sogginess. For longer storage, you can wrap each slider in plastic wrap and place them in a freezer-safe bag, where they’ll stay good for up to 2 months.
Can I freeze Cheeseburger Sliders?
Very! Freezing Cheeseburger Sliders is easy and a great way to save leftovers. Simply wrap each slider individually in plastic wrap or aluminum foil. Place them in a freezer-safe bag, making sure to remove as much air as possible before sealing. When you’re ready to enjoy, just reheat in the oven at 350°F for about 10-12 minutes or until warmed through.
What can I do if my sliders turn out too dry?
If your sliders end up dry, don’t worry, you can make adjustments next time! Be sure to cook the ground beef just until it’s browned and avoid overcooking after it’s combined with the cheese. Consider adding a splash of beef broth or a little more sauce to keep the filling moist. You can also try using a fattier ground beef mix or incorporating additional toppings like avocado or salsa for added moisture.
Are Cheeseburger Sliders safe for pets?
While it might be tempting to share a slider with your furry friend, be cautious! Ingredients like onions and certain seasonings can be harmful to pets. If you wish to treat your pet, it’s best to prepare unsalted and unseasoned options specifically for them. Always consult your vet if you’re unsure about introducing new foods into your pet’s diet.
How do I ensure my sliders have the perfect bun texture?
Very important! To get that ideal slider bun texture, make sure not to overbake them. Keep them in the oven until the cheese is melty and the tops are lightly golden, around 12-13 minutes at 350°F. Brushing the tops with melted butter will not only enhance flavor but also add to that beautiful golden hue. If you notice the tops getting too brown too quickly, cover them with a piece of aluminum foil while baking.
Irresistible Cheeseburger Sliders: Perfect for Game Day Fun
Ingredients
Equipment
Method
- Preheat your oven to 350°F (175°C). Line a baking sheet with parchment paper.
- In a large skillet over medium heat, cook the lean ground beef and finely diced onions for 5-6 minutes until browned. Season with salt, black pepper, and garlic powder.
- Slice the Hawaiian rolls in half horizontally. Spread condiments, add dill pickle slices, the ground beef mixture, and top with cheddar cheese.
- Cover the sliders with the top halves of the rolls and brush melted butter on top. Optionally, sprinkle sesame seeds.
- Bake the sliders for 12-13 minutes until the cheese is melted and the buns are golden.
Leave a Reply