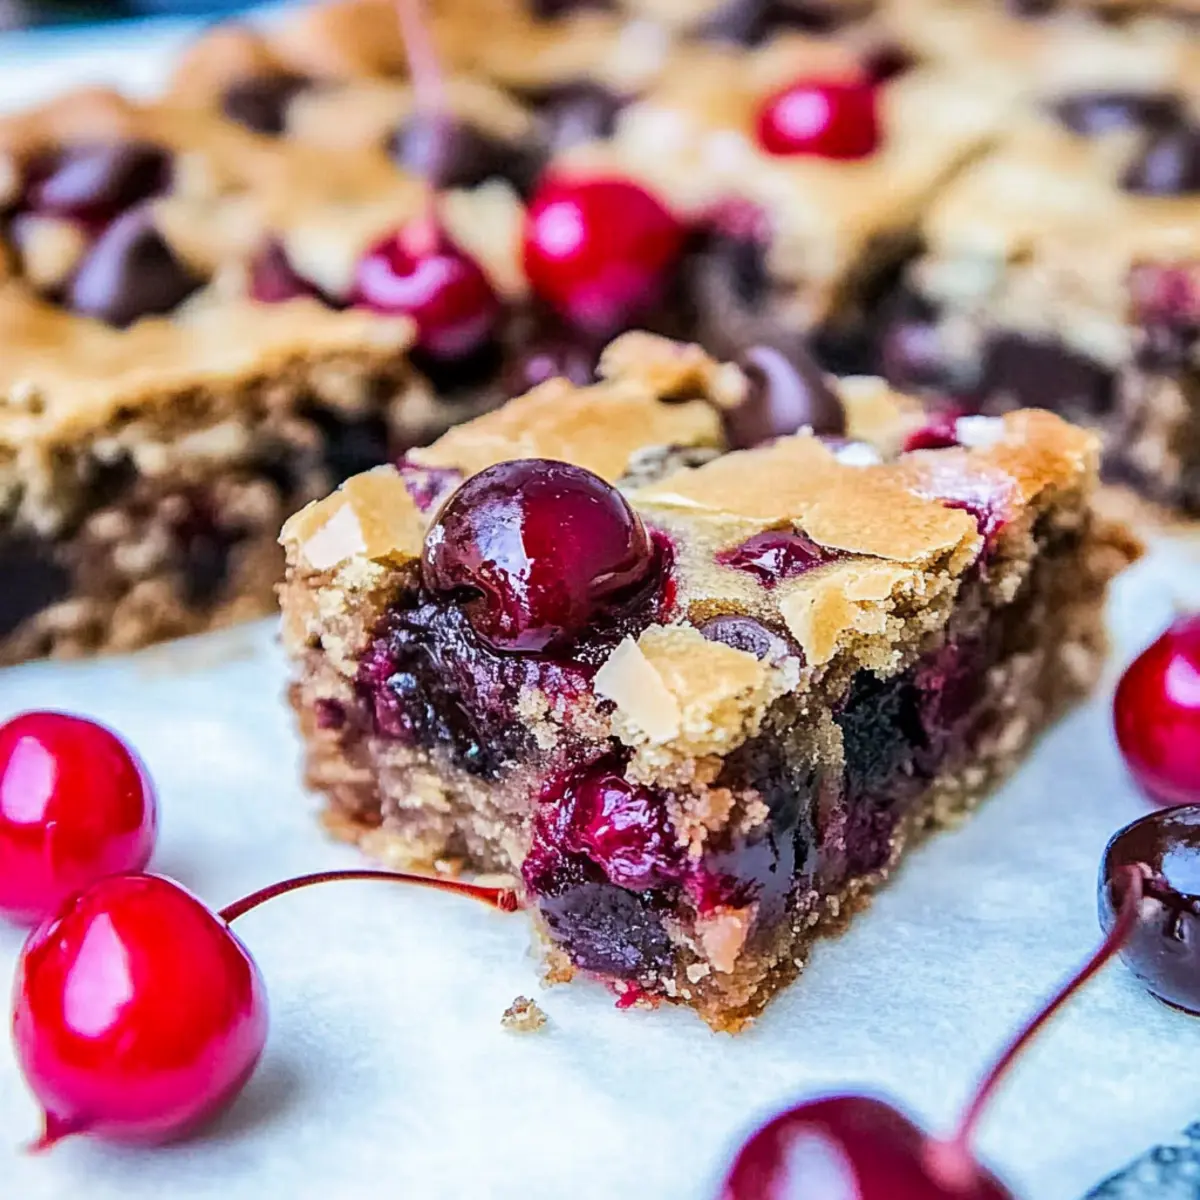
As the smell of cherries wafts through my kitchen, I’m transported back to summers filled with warm sunshine and sweet treats. That nostalgic feeling inspired my latest creation: Chocolate Chip Cherry Bars. These delightful bars combine the juicy burst of fresh cherries with rich semi-sweet chocolate, resulting in a moist, chewy texture that’s simply irresistible. With their quick, one-bowl preparation, they’re perfect for those busy days when you’re craving something homemade but don’t have much time. Plus, their flexibility allows you to swap in other fruits like peaches or plums for a fun twist! Ready to indulge in a slice and relive those glorious summer moments?
Why Are These Chocolate Chip Cherry Bars Special?
Irresistible Flavor: The sweet tang of cherries combined with rich chocolate creates an unmatched taste sensation that will leave everyone coming back for seconds.
One-Bowl Wonder: No mess here! You can whip up these bars in one bowl, making cleanup a breeze.
Versatile Ingredients: Feel free to swap cherries for other fruits like peaches or plums, embracing seasonal produce to keep each batch exciting!
Crowd-Pleasing Treat: Perfect for gatherings, these bars are sure to wow family and friends. Serve them warm with vanilla ice cream for an unforgettable dessert.
Quick Preparation: In under an hour, you can have a delicious homemade treat ready to impress!
Chocolate Chip Cherry Bars Ingredients
• Get ready to bake these delightful bars!
For the Batter
- Unsalted Butter – Provides richness and moisture; swap with margarine for a dairy-free option.
- Light Brown Sugar – Adds sweetness and depth of flavor; can be replaced with coconut sugar for a healthier alternative.
- Large Egg – Helps bind the ingredients together; for a vegan option, use a flax egg (1 tablespoon ground flaxseed mixed with 3 tablespoons water).
- Vanilla Extract – Enhances the overall flavor profile; almond extract can be used for a different taste.
- All-Purpose Flour – Gives structure to the bars; a gluten-free blend can replace this for gluten-free versions.
- Salt (optional) – Balances sweetness; omit if using salted butter.
- Semi-Sweet Chocolate Chips – Adds a chocolatey richness; swap with dark chocolate or white chocolate for variation.
- Cherries (fresh or frozen) – The star ingredient providing sweetness and moisture; while frozen can be used, fresh cherries are highly recommended for the best texture.
Step‑by‑Step Instructions for Chocolate Chip Cherry Bars
Step 1: Preheat the Oven
Begin by preheating your oven to 350°F (175°C). While the oven warms up, prepare an 8×8-inch baking pan by lining it with aluminum foil, ensuring it overhangs the edges for easy removal later. Spray the foil lightly with cooking spray to prevent sticking. This preparation will set you up for a smooth baking experience with your Chocolate Chip Cherry Bars.
Step 2: Melt the Butter
In a medium microwave-safe bowl, add your unsalted butter and microwave it for about 60 seconds until fully melted. Keep an eye on it to avoid burning; it should be bubbly and completely liquid. This melted butter will add rich moisture to your Chocolate Chip Cherry Bars, blending beautifully with the sugars in the next step.
Step 3: Combine Sugars and Egg
Remove the melted butter from the microwave and stir in the light brown sugar until the mixture is well combined and glossy. Next, add in a large egg and a splash of vanilla extract, and mix until everything is smooth and creamy. This step infuses your bars with sweetness and essential flavor, creating a delightful base for the remaining ingredients.
Step 4: Mix the Dry Ingredients
Gently incorporate the all-purpose flour and salt into the wet mixture, stirring just until combined. Be careful not to over-mix, as this could affect the chewy texture of your Chocolate Chip Cherry Bars. You want to achieve a thick batter while still allowing for some lumps—this will help keep the bars moist and soft.
Step 5: Fold in Chocolate and Cherries
Now comes the fun part! Fold in the semi-sweet chocolate chips and chopped cherries, ensuring they are evenly distributed throughout the batter. The chocolate should melt slightly, while the cherries add bursts of juiciness, making each bite an explosion of flavor. Be gentle during this step to maintain the batter’s integrity.
Step 6: Pour into the Baking Pan
Pour your luscious batter into the prepared baking pan, using a spatula to spread it evenly into the corners. Smooth the top for a nice finish; it doesn’t need to be perfect, but evenness will help ensure consistent baking. With everything in place, your Chocolate Chip Cherry Bars are ready for the oven.
Step 7: Bake to Perfection
Transfer the baking pan to the preheated oven and bake for 27 to 32 minutes. Keep an eye on them as they bake; the edges should pull away slightly from the pan, and the center should be set. A skewer may not come out clean due to the melted chocolate and juicy cherries, so trust your visual cues for doneness.
Step 8: Cool and Slice
Once baked, remove the pan from the oven and let the bars cool in the pan for at least 1 hour. This cooling time allows the bars to set properly, making slicing easier. After cooling, lift the bars out using the foil overhang, cut into squares, and serve your delightful Chocolate Chip Cherry Bars.
What to Serve with Chocolate Chip Cherry Bars
Indulging in a slice of these sweet, chewy bars makes creating a delightful meal easy and fun!
-
Vanilla Ice Cream: A scoop adds creaminess that beautifully contrasts the rich chocolate and fruity tartness of the bars.
-
Whipped Cream: Light and airy, it complements the fudgy texture, making every bite feel like a special treat.
-
Fresh Berries Salad: Toss seasonal berries for a refreshing burst of flavor, enhancing the fruity notes of the bars.
-
Coffee or Espresso: The deep, bold flavor of coffee balances the sweetness, creating a cozy, comforting dessert experience.
-
Lemonade or Iced Tea: Both drinks provide a refreshing contrast to the rich flavors of the bars, especially on warm days.
-
Chocolate Sauce Drizzle: Elevate the indulgence with a drizzle on top; it enhances the chocolatey goodness and adds visual appeal.
Each pairing enhances the experience, transforming a simple dessert into a memorable occasion!
Chocolate Chip Cherry Bars Variations
Feel free to let your creativity shine by customizing these delicious Chocolate Chip Cherry Bars to fit your taste!
-
Berry Blast: Swap cherries for an assortment of berries like blueberries or raspberries for a fresh, tart flavor.
-
Peachy Keen: Use diced fresh peaches in place of cherries to add a sweet, summery twist to your bars.
-
Plum Perfection: Substitute plums for an extra juicy and slightly tart alternative that still keeps the bars moist.
-
Nutty Crunch: Incorporate chopped walnuts or pecans to add a delightful crunch that complements the chewy texture.
-
Tropical Paradise: Drizzle with melted white chocolate or sprinkle coconut flakes on top before baking for a tropical flair.
-
Spiced Surprise: Add a dash of cinnamon or nutmeg to the batter for a warm, cozy flavor that dances on your palate.
-
Chocolate Lovers: Switch out semi-sweet chocolate chips for dark chocolate or even mint chocolate chips for a rich, bold taste.
-
Vegan Version: Replace the egg with a flax egg and enjoy the same chewy goodness in a plant-based way!
These variations not only keep the recipe interesting but also allow you to use whatever fresh fruit you have on hand. If you’re intrigued by combining flavors, you might also enjoy making Almond Cherry Cookies or a batch of delightful White Chocolate Orange treats. Happy baking!
Expert Tips for Chocolate Chip Cherry Bars
-
Don’t Over-Mix: Gently combine the ingredients to keep your Chocolate Chip Cherry Bars soft and chewy. Over-mixing can lead to a tough texture.
-
Watch for Doneness: Since the center may not look clean due to melting chocolate or juicy cherries, rely on the edges pulling away from the pan as a sign of readiness.
-
Use Fresh Cherries: Opt for fresh cherries whenever possible for the best flavor and texture. If using frozen, be prepared for a slight change in consistency and consider reducing the baking time.
-
Allow Cooling Time: Let the bars cool for at least an hour before slicing. This helps them set properly, resulting in cleaner cuts and better presentation.
-
Experiment with Variations: Feel free to switch out cherries for seasonal fruits like peaches or plums, and try adding nuts for extra crunch to keep things exciting!
How to Store and Freeze Chocolate Chip Cherry Bars
Room Temperature: Store your Chocolate Chip Cherry Bars in an airtight container at room temperature for up to 1 week to maintain their chewy texture and flavor.
Fridge: For extended freshness, refrigerate the bars in an airtight container for up to 2 weeks. This will help keep them moist while slightly firming them up.
Freezer: Freeze individually wrapped bars or an entire batch in an airtight container for up to 3 months. Let them thaw at room temperature when you’re ready to enjoy!
Reheating: To enjoy warm bars, microwave them for 10-15 seconds. This will revive the soft, gooey texture, making it feel like they just came out of the oven!
Make Ahead Options
These Chocolate Chip Cherry Bars are a fantastic choice for meal prep lovers seeking to save time during busy weeks! You can prepare the batter up to 24 hours ahead; simply mix together the melted butter, sugars, egg, and vanilla, then refrigerate it in an airtight container. For added convenience, chop and refrigerate the cherries separately to prevent excess moisture. On baking day, fold in the chocolate chips and cherries right before pouring into the pan and baking. This way, the bars will come out just as delicious, packed with flavor, and perfect for serving fresh throughout the week!
Chocolate Chip Cherry Bars Recipe FAQs
What cherries should I use for the Chocolate Chip Cherry Bars?
Absolutely! Fresh cherries are recommended for the best flavor and texture. Look for firm, plump cherries that are bright in color with minimal dark spots. If you use frozen cherries, keep in mind they may release extra moisture, potentially changing the bar’s consistency slightly.
How do I store Chocolate Chip Cherry Bars to keep them fresh?
You can store your Chocolate Chip Cherry Bars in an airtight container at room temperature for up to 1 week. For longer shelf life, refrigerate them where they’ll stay good for about 2 weeks. Just make sure they are sealed tightly to maintain moisture!
Can I freeze leftover Chocolate Chip Cherry Bars?
Yes, you can absolutely freeze your bars! Individually wrap each bar in plastic wrap and place them in an airtight container or freezer bag for up to 3 months. When you’re ready to enjoy, simply let them thaw at room temperature for a couple of hours. If you’re eager for a warm treat, microwave for 10-15 seconds to get that freshly-baked feel!
What should I do if my batter is too thick?
If your batter seems too thick while mixing, don’t worry! A little milk or water can help loosen it up. Add one tablespoon at a time, mixing gently until the desired consistency is reached. It’s always better to add gradually to avoid making the batter too runny.
Can my dog eat the Chocolate Chip Cherry Bars?
No, it’s best to avoid giving your dog any Chocolate Chip Cherry Bars. While cherries themselves are not toxic to dogs, the sugar and chocolate found in these bars can be harmful. Always keep dog-friendly treats on hand instead to ensure their safety!
Is it possible to make these bars gluten-free?
Yes, very! To make Chocolate Chip Cherry Bars gluten-free, simply substitute the all-purpose flour with a gluten-free flour blend. Also, make sure your chocolate chips are gluten-free, which is commonly the case, but always good to check the label before baking!
Chocolate Chip Cherry Bars That Are Bursting with Flavor
Ingredients
Equipment
Method
- Preheat your oven to 350°F (175°C) and prepare an 8x8-inch baking pan lined with aluminum foil.
- Melt the unsalted butter in a medium microwave-safe bowl for about 60 seconds.
- Stir in the light brown sugar until combined, then add in the large egg and vanilla extract, mixing until smooth.
- Gently incorporate the all-purpose flour and salt into the wet mixture, stirring just until combined.
- Fold in the semi-sweet chocolate chips and chopped cherries, ensuring they are evenly distributed.
- Pour the batter into the prepared baking pan and spread it evenly, smoothing the top.
- Bake for 27 to 32 minutes until the edges pull away from the pan.
- Let the bars cool in the pan for at least 1 hour before slicing.
Leave a Reply