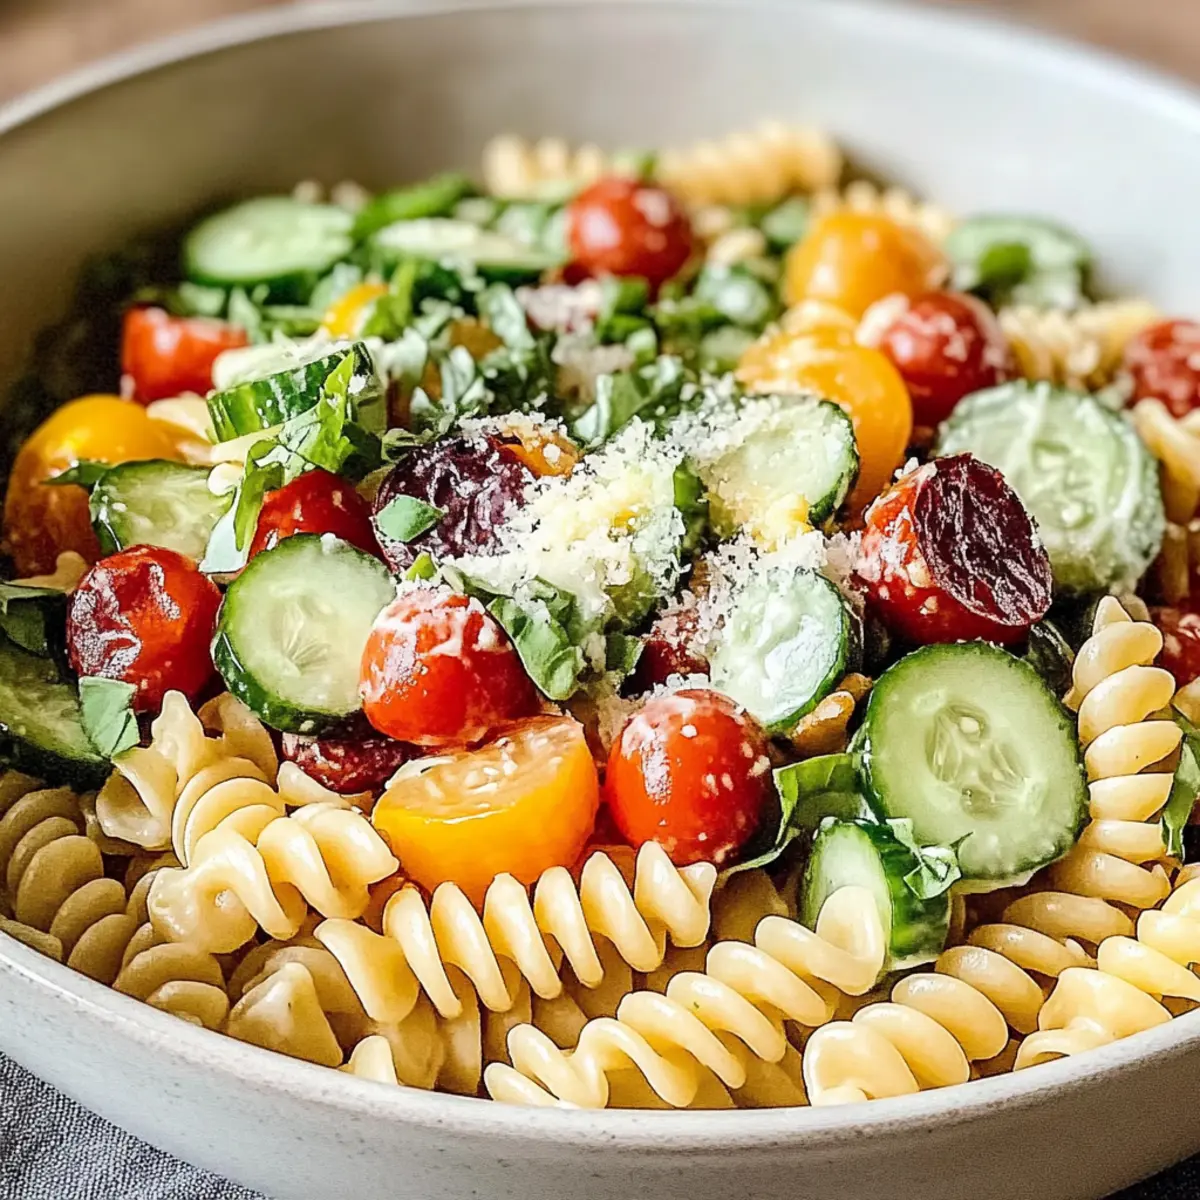
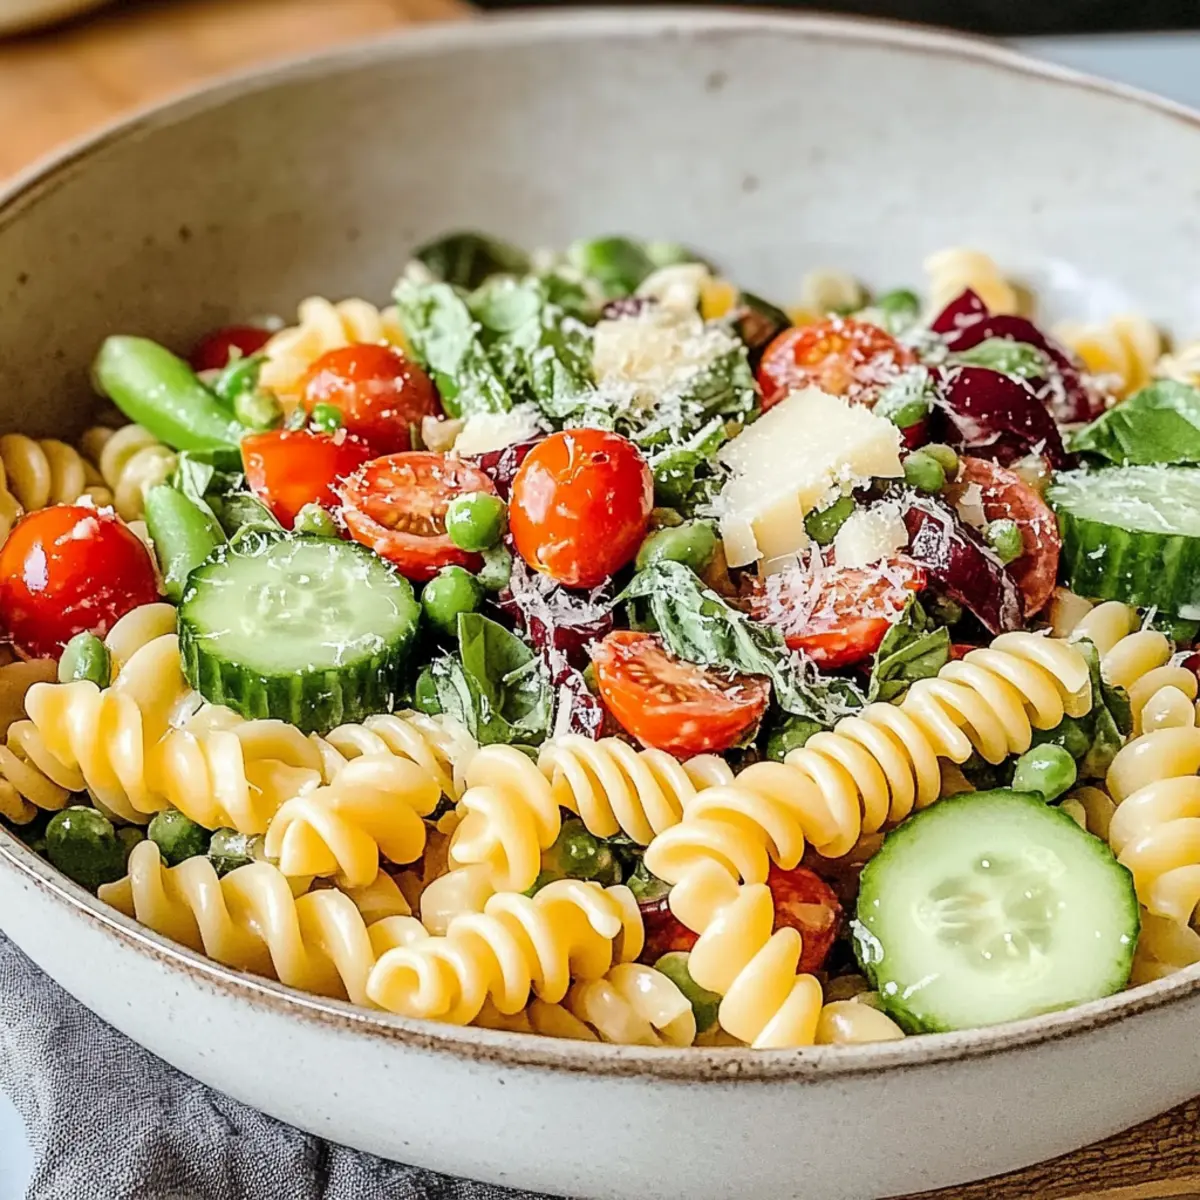
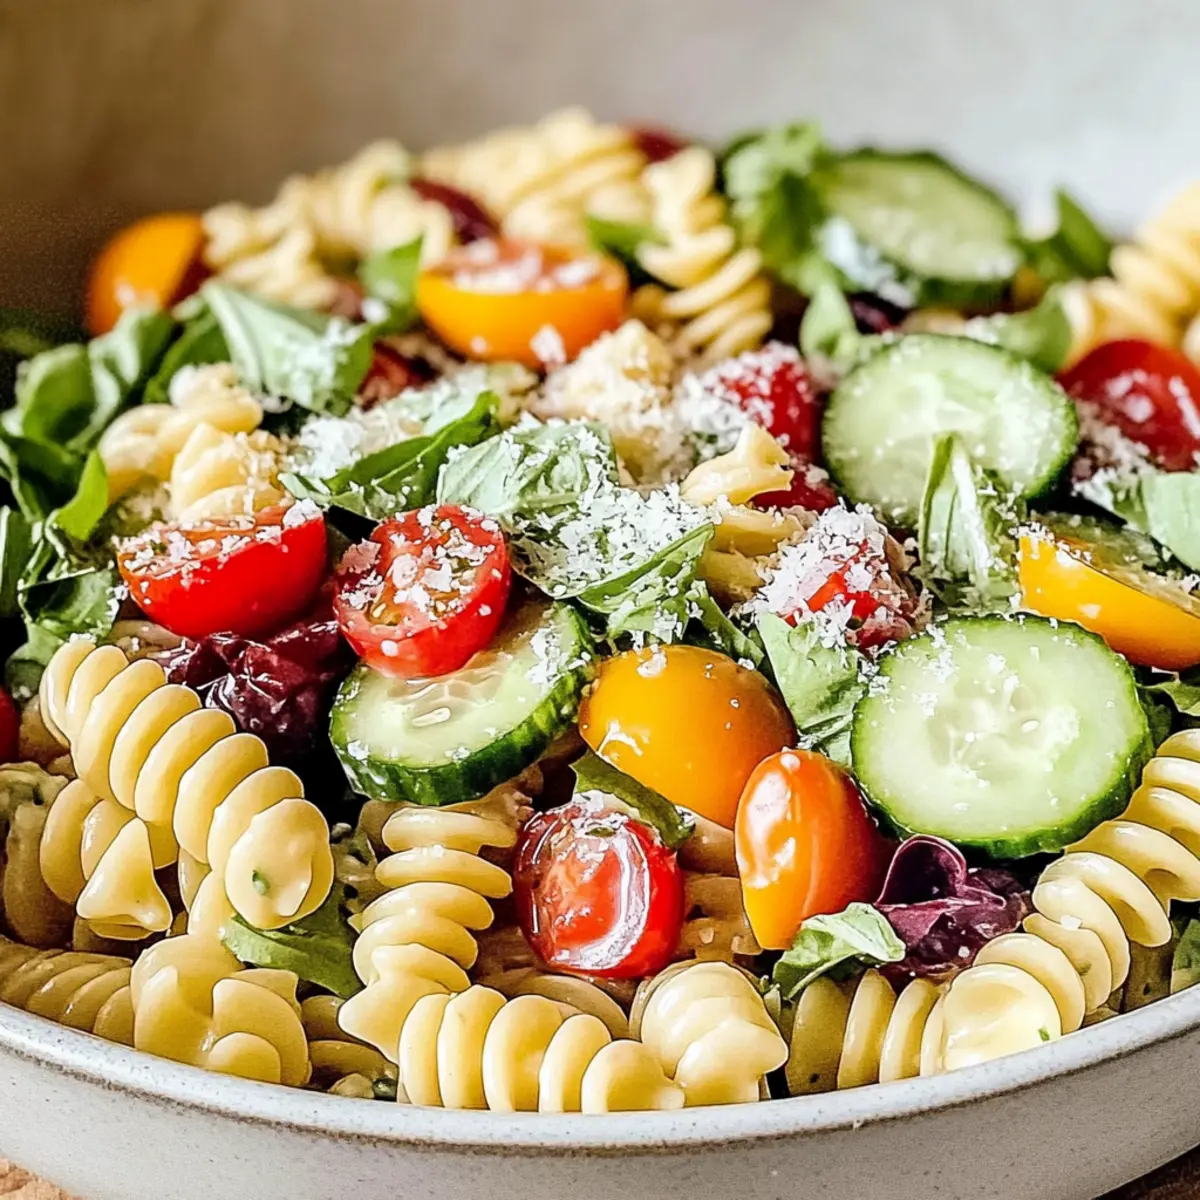
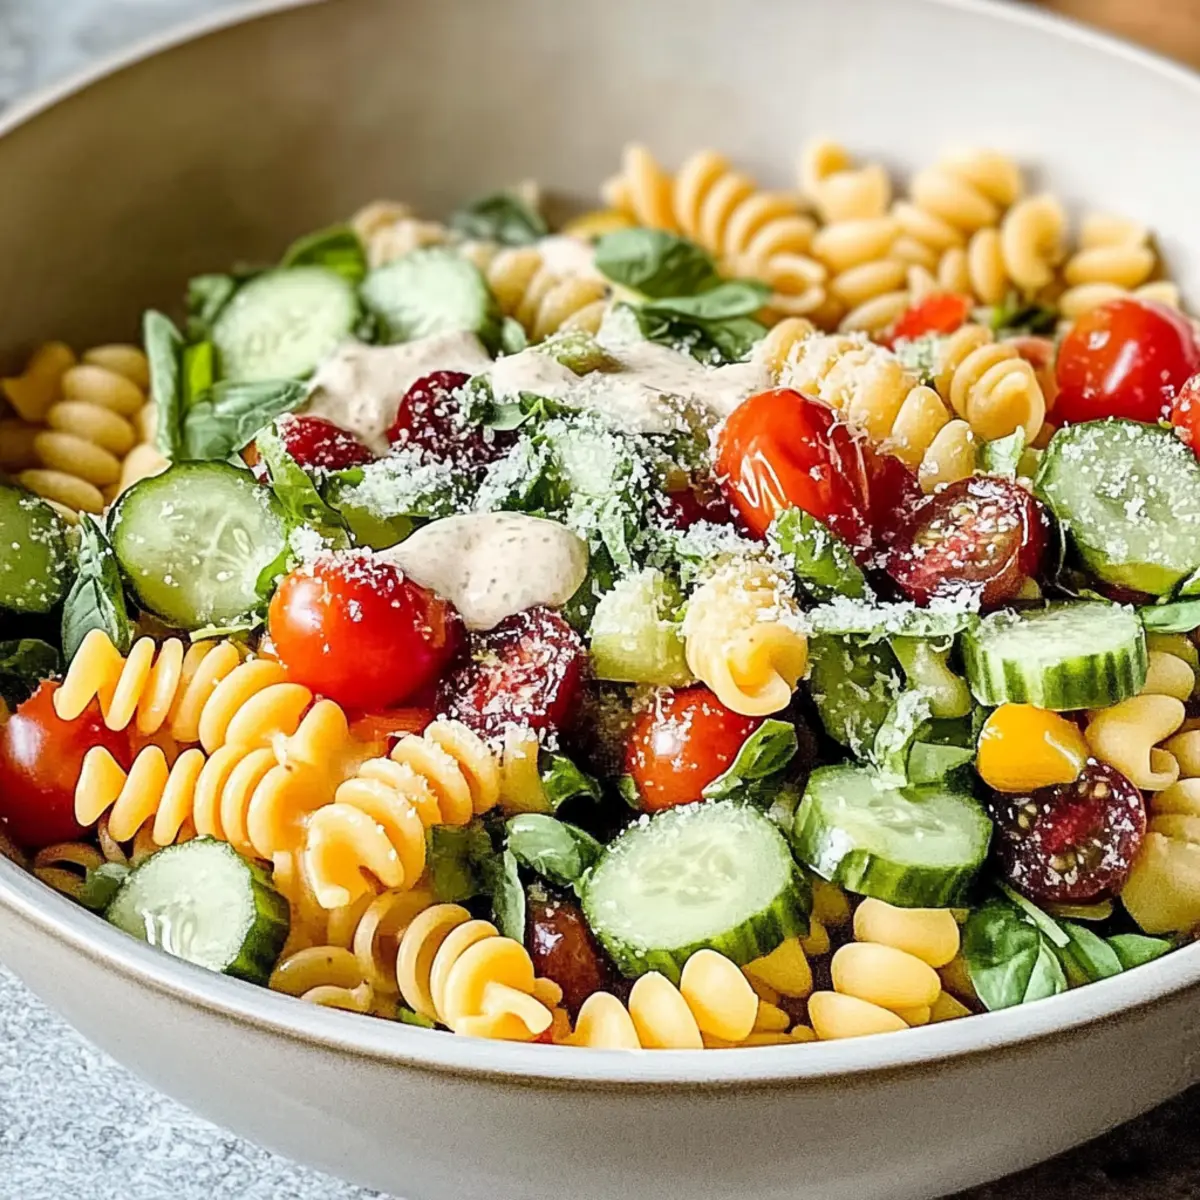
As I tossed together the vibrant ingredients of my Spring Pasta Salad with Italian Dressing, I could almost hear the vibrant chatter of friends gathered around a sunny picnic table. This refreshing salad is more than just a feast for the eyes; it’s a delightful medley of crunchy vegetables and aromatic dressing that’s as easy to whip up as it is to customize. Perfect for those warm afternoons, it’s a dish that brings people together, making it the ideal companion for gatherings or light lunches. With minimal prep time and the ability to adapt to whatever’s in your fridge, you’ll want to keep this recipe on hand. Are you ready to bring a splash of spring to your table? Let’s dig in!
Why is This Salad a Must-Try?
Vibrant, Crunchy Ingredients: Each serving bursts with fresh colors and flavors that make your plate pop—perfect for impressing guests!
Easy Preparation: With just a few basic steps, you’ll create a dish that’s as simple as it is delicious, leaving you more time to socialize.
Customizable Delight: Whether you’re adding grilled chicken for protein or loading up on your preferred veggies, this salad invites creativity—like substituting your own homemade Italian dressing for extra flavor!
Ideal for Gatherings: Bring this refreshing medley to picnics, potlucks, or family gatherings, and watch it vanish in no time—everyone will want seconds!
Chill & Serve: Make-ahead friendly, it allows the flavors to meld beautifully. Just toss into the fridge, letting the magic happen while you enjoy your time!
Spring Pasta Salad Ingredients
For the Pasta Base
• Short Pasta – Fusilli or penne work best for soaking up that delicious Italian dressing.
For the Vegetables
• Cherry Tomatoes – These little gems add sweetness; feel free to swap in grape tomatoes for a different touch.
• Cucumber – A refreshing crunch; English cucumbers are ideal for a seedless bite.
• Bell Peppers – Mix different colors for a vibrant look and added sweetness.
• Red Onion – Adds a layer of sharpness— soaking it in cold water can help mellow its flavor.
For the Dressing
• Italian Dressing – Provides zesty tang; go for homemade or store-bought, adjusting to your taste!
For the Creamy Element
• Parmesan Cheese – Rich and creamy; substitute with nutritional yeast for a vegan option if needed.
For the Fresh Touch
• Basil Leaves – Adds an aromatic brightness to the salad; parsley works too if you don’t have basil on hand.
This Spring Pasta Salad with Italian Dressing is not just a dish, but an invitation to enjoy the fresh flavors of the season!
Step‑by‑Step Instructions for Spring Pasta Salad with Italian Dressing
Step 1: Cook the Pasta
Begin by bringing a large pot of salted water to a rolling boil over high heat. Add your chosen short pasta, like fusilli or penne, and cook according to package instructions until al dente, usually around 8-10 minutes. Once finished, drain the pasta in a colander and rinse it under cold water to halt the cooking process and cool it down, ensuring a delightful texture for your Spring Pasta Salad.
Step 2: Prep the Veggies
While the pasta cools, grab a cutting board and chop the cherry tomatoes, cucumber, bell peppers, and red onion into bite-sized pieces. Aim for uniform sizes to ensure even distribution in your salad. The vibrant colors will add a fresh and festive look to your Spring Pasta Salad, making each serving a visual treat that invites everyone to dig in.
Step 3: Mix It All Together
In a large mixing bowl, combine the cooled pasta with the chopped vegetables, creating a colorful medley. Drizzle the mixture with your chosen Italian dressing and stir gently using a large spoon or spatula until everything is evenly coated. This step is essential for allowing each ingredient in your Spring Pasta Salad to shine with the tangy flavor of the dressing.
Step 4: Add Cheese & Herbs
Next, finely grate the Parmesan cheese and gently fold it into the pasta and vegetable mixture, along with the chopped basil leaves. This addition brings creaminess and a burst of aromatic freshness to your salad. Make sure to incorporate everything well, balancing the rich cheese with the bright flavors of your chosen ingredients.
Step 5: Toss & Chill
After thoroughly mixing, cover the bowl with plastic wrap or transfer the salad to an airtight container. Refrigerate for at least 30 minutes; this chilling time is crucial for the flavors to meld beautifully. The Spring Pasta Salad with Italian Dressing will taste even better after chilling, so plan ahead to enjoy its full flavor profile at your next gathering!
What to Serve with Spring Pasta Salad with Italian Dressing?
Elevate your meal with delightful pairings that complement the vibrant flavors of this refreshing salad.
-
Grilled Chicken: Juicy, tender pieces add protein and a smoky element that balances the crispness of the salad.
-
Garlic Bread: A warm, buttery loaf offers a comforting texture; its rich flavors pair beautifully with the tangy salad dressing.
-
Caprese Skewers: Combining fresh mozzarella and basil with cherry tomatoes enhances the Italian theme, bringing extra color and taste to your meal.
-
Fruit Salad: The sweetness and juiciness of seasonal fruits provide a refreshing contrast to the savory salad, making for a balanced and bright plate.
-
Lemonade or Iced Tea: Bright, citrusy drinks enhance the fresh flavors of the pasta salad, making them perfect companions for a sunny afternoon.
-
Tiramisu: This classic Italian dessert brings a touch of sweetness to your meal, creating a satisfying end to your vibrant dining experience.
Each of these pairings brings its unique character to the table, completing a delightful culinary experience that celebrates the joy of homemade food.
Make Ahead Options
These delightful Spring Pasta Salad with Italian Dressing options are perfect for busy home cooks aiming to streamline meal prep! You can prepare the pasta and chop your vegetables up to 24 hours in advance. Simply cook the pasta al dente, rinse it, and refrigerate it in an airtight container. Pre-chop the cherry tomatoes, cucumber, bell peppers, and red onion; keep them in separate containers to maintain freshness and prevent wilting. When you’re ready to serve, mix everything together with the Italian dressing, grated Parmesan, and basil leaves. Tossing right before serving ensures the salad stays crisp and delicious—perfect for those impromptu gatherings or busy weekdays!
Spring Pasta Salad with Italian Dressing Variations
Feel free to enjoy a variety of twists on this fantastic salad, elevating flavors and catering to your preferences!
-
Protein Boost: Add grilled chicken or chickpeas for a hearty touch. This not only enhances nourishment but adds satisfying texture and flavor.
-
Veggie Richness: Load up on extra vegetables! Try adding roasted zucchini, artichoke hearts, or even radishes for a fresh crunch. The more you add, the more colorful and inviting your salad becomes!
-
Cheese Swap: If you’re looking to keep it dairy-free, substitute Parmesan with nutritional yeast, providing a nutty flavor without the dairy. It’s a delicious alternative that maintains the creamy essence.
-
Heat Factor: Spice things up by incorporating sliced jalapeños or a sprinkle of crushed red pepper flakes. A little heat can tantalize your taste buds and add an exciting kick!
-
Flavorful Add-Ins: Toss in olives or sun-dried tomatoes for a burst of Mediterranean flavor. The brininess complements the salad perfectly, enhancing each bite.
-
Dressing Variations: Consider whipping up your own homemade Italian dressing. It allows you to regulate flavors and ingredients, crafting the perfect taste tailored to your palate.
-
Herb Alternatives: Missing fresh basil? No worries! Fresh parsley or dill also freshens up the salad beautifully, lending a unique flavor twist.
-
Nutty Crunch: Add toasted pine nuts or walnuts for a delightful crunch. They elevate the texture and bring a satisfying richness to your Spring Pasta Salad.
Remember, each variation adds a new layer of deliciousness to your meal, making it a versatile option for any occasion!
Expert Tips for Spring Pasta Salad
-
Chill for Flavor: Let the salad rest in the fridge for at least 30 minutes. This allows the flavors in your Spring Pasta Salad with Italian Dressing to meld beautifully.
-
Veggie Variations: Mix and match your favorite vegetables! If you don’t have a full ingredient list, substituting with available produce can add a personal touch.
-
Perfect Pasta: Cook pasta just until al dente to retain a nice bite. Overcooking can lead to mushy pasta, ruining the salad’s texture.
-
Adjust the Dressing: Start with less dressing and add more to taste. It’s easier to add than to remove, so keep it light to avoid soggy pasta!
-
Don’t Skip the Herbs: Fresh herbs elevate this salad. If basil is unavailable, parsley or oregano can also provide the fresh touch you need.
-
Protein Power: For a heartier version, consider adding grilled chicken or chickpeas. This not only boosts nutrition but also keeps your salad filling and satisfying.
Storage Tips for Spring Pasta Salad
-
Fridge: Store leftovers in an airtight container for up to 3 days. The flavors will deepen as the salad chills, making it even tastier!
-
Freezer: Freezing is not recommended for this Spring Pasta Salad with Italian Dressing, as the texture of the pasta and vegetables may become mushy upon thawing.
-
Reheating: This salad is best enjoyed cold, so avoid reheating. Serve straight from the fridge for optimal taste and texture!
-
Serving After Storage: Give the salad a gentle toss before serving to redistribute the dressing, ensuring each bite is flavorful and refreshing.
Spring Pasta Salad with Italian Dressing Recipe FAQs
How should I choose ripe vegetables for the salad?
Absolutely! When selecting vegetables like cherry tomatoes, look for ones that are plump with a bright, uniform color. Avoid those with wrinkles or dark spots. For cucumbers, select firm ones without soft spots; English cucumbers are ideal for their seedless texture. Bell peppers should be vibrant with a slight sheen, indicating freshness.
What’s the best way to store leftover Spring Pasta Salad?
Store any leftovers in an airtight container in the fridge for up to 3 days. This will help preserve the flavors and textures! As the salad sits, the flavors actually deepen, making it even more enjoyable on the second day. Just give it a quick toss before serving to refresh the dressing distribution.
Can I freeze the Spring Pasta Salad?
Freezing this Spring Pasta Salad with Italian Dressing is not recommended. The pasta and fresh vegetables may become mushy when thawed, leading to a less enjoyable texture. Instead, prepare only as much as you need to ensure it’s always fresh and delightful.
What if my pasta turns mushy? How can I fix it?
If you accidentally overcook your pasta, it can end up mushy, which is less than ideal for a salad. Always cook it just until al dente—about 8-10 minutes—then immediately drain and rinse with cold water. This halts the cooking process, helping maintain a pleasing bite. If you do end up with mushy pasta, a good trick is to add an extra crunch element, like nuts or crispy veggies, to balance out the texture.
Is this salad suitable for people with dietary restrictions?
Yes! This Spring Pasta Salad is flexible to accommodate various dietary needs. To make it vegetarian, simply skip the cheese and use a plant-based Italian dressing. For those who are vegan, substituting Parmesan with nutritional yeast is a fantastic option that brings a similar cheesy flavor! Always check ingredient labels to ensure all additions are allergy-friendly.
Colorful Spring Pasta Salad with Italian Dressing Delight
Ingredients
Equipment
Method
- Cook the Pasta: Bring a large pot of salted water to a boil. Add pasta and cook according to package instructions until al dente, about 8-10 minutes. Drain and rinse under cold water.
- Prep the Veggies: Chop cherry tomatoes, cucumber, bell peppers, and red onion into bite-sized pieces.
- Mix It All Together: In a large mixing bowl, combine cooled pasta and chopped vegetables. Drizzle with Italian dressing and mix until evenly coated.
- Add Cheese & Herbs: Fold in grated Parmesan cheese and chopped basil. Ensure everything is well mixed.
- Toss & Chill: Cover and refrigerate for at least 30 minutes to allow flavors to meld.
Leave a Reply