As the sizzling sound of marinated beef hits a hot pan, I can’t help but feel that wave of excitement wash over me. This Quick and Flavorful Beef Yakiniku brings a touch of Japan right into my kitchen, and it’s the perfect antidote when fast food starts to beckon. With tender, thinly sliced steak bathed in a savory-sweet marinade, this dish is not only dazzlingly delicious but also a speedy solution for busy weeknight dinners. Pair it with fresh rice and crisp veggies, and you’ve got a protein-rich meal that will make hearts—and stomachs—dance with joy. The best part? You can customize it for gluten-free needs or mix in your favorite vegetables for a fun twist. What’s your favorite twist on this classic?
What Makes Beef Yakiniku Special?
Unforgettable Flavor: The marinade combines sweet, savory, and spicy notes, creating an irresistible harmony that elevates your taste buds.
Quick Preparation: With minimal effort, this speedy dish is perfect for those busy weeknights when you’re tired of fast food.
Protein-Packed Delight: It’s not just about great taste—this meal is loaded with protein, making it nutritious and filling.
Customizable Options: Feel free to swap out ingredients; use tamari for a gluten-free version or add sliced vegetables for extra crunch, just like in this Garlic Butter Beef recipe.
Crowd Pleaser: Whether it’s a family dinner or a casual gathering, Beef Yakiniku is sure to impress everyone at the table with its delicious charm!
Beef Yakiniku Ingredients
Curious about what makes this dish so delicious?
For the Marinade
- Flank or Skirt Steak – Slice very thinly against the grain for tender pieces that melt in your mouth.
- Low-Sodium Light Soy Sauce – This ingredient adds umami goodness; use tamari for a gluten-free option.
- Gochujang (Korean Red Chili Paste) – Infuses the dish with heat and complexity; swap with sriracha if necessary.
- Mirin – Offers a sweet and tangy flavor; rice vinegar mixed with sugar can replace it in a pinch.
- Minced Ginger – Provides a fresh, aromatic kick; grated fresh ginger works well too.
- Garlic Powder or Paste – Delivers aromatic depth; fresh minced garlic can be an alternative.
- Sesame Oil – Adds a nutty richness that complements the beef; olive oil is a suitable substitute if needed.
- Neutral Oil (e.g., avocado or rapeseed) – Essential for cooking; canola or vegetable oil will also work.
- Light Brown Sugar – Adds sweetness; you can use white sugar as a quick substitute.
For Serving
- Sesame Seeds – Sprinkle for a delightful crunch; while optional, they elevate the dish nicely.
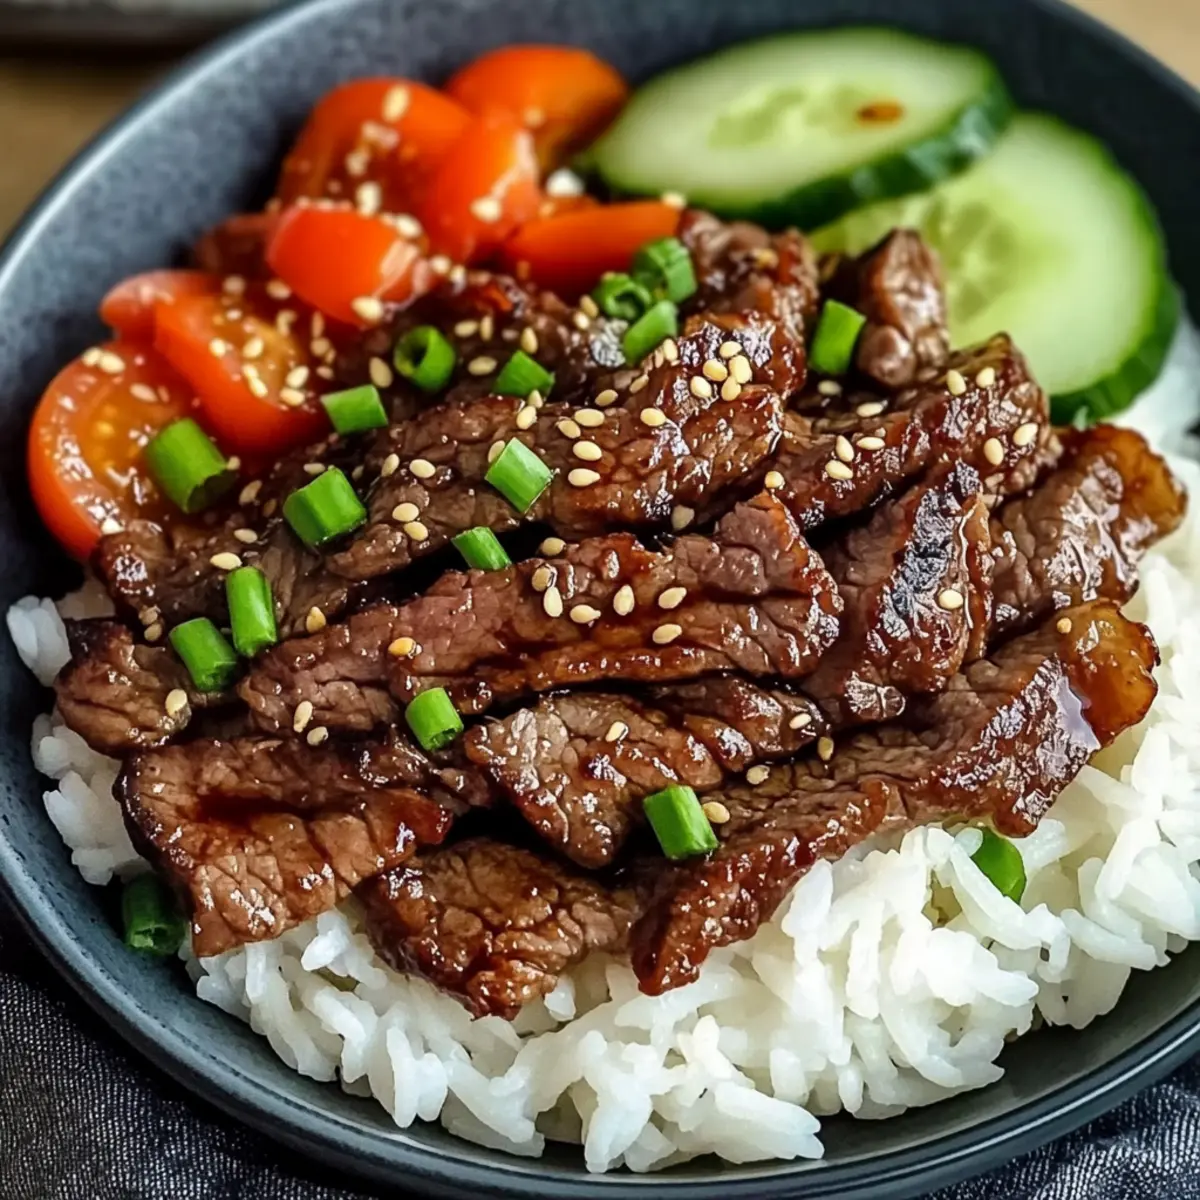
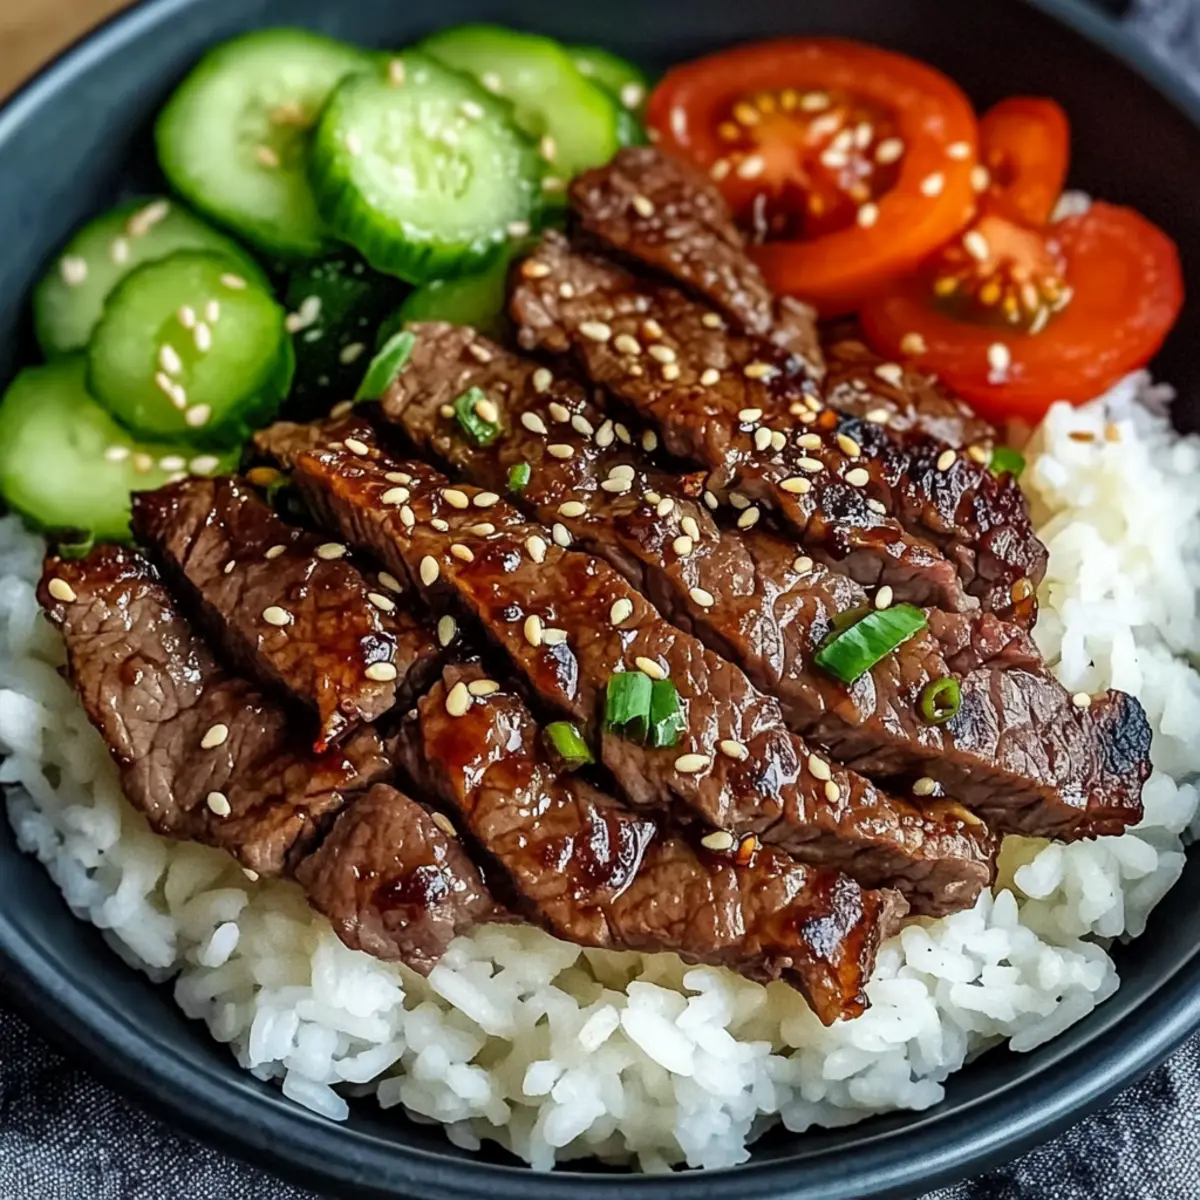
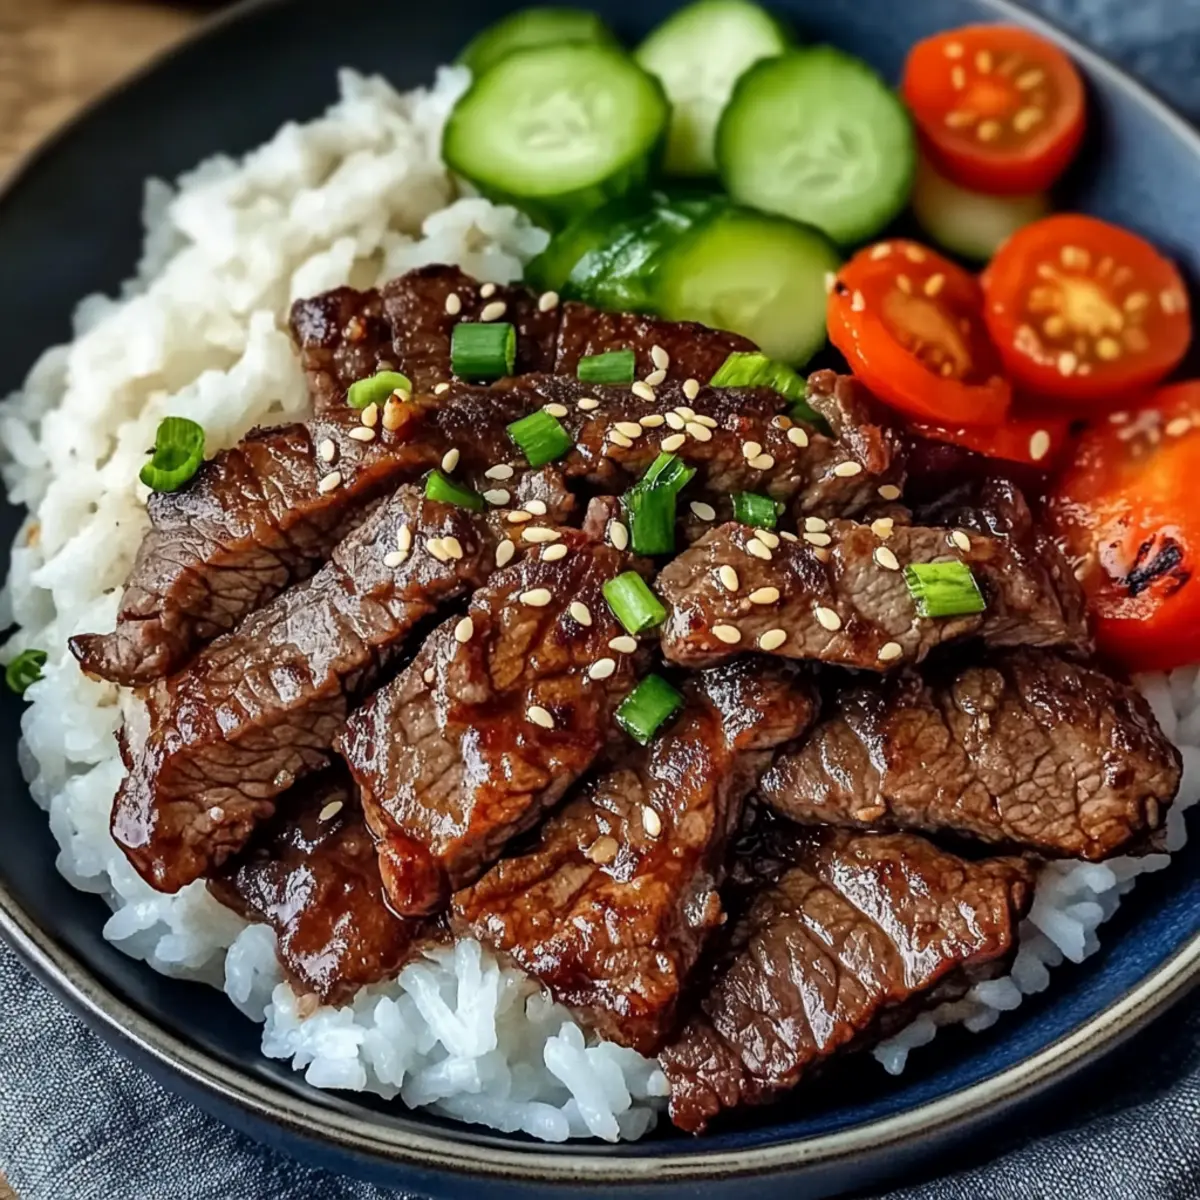
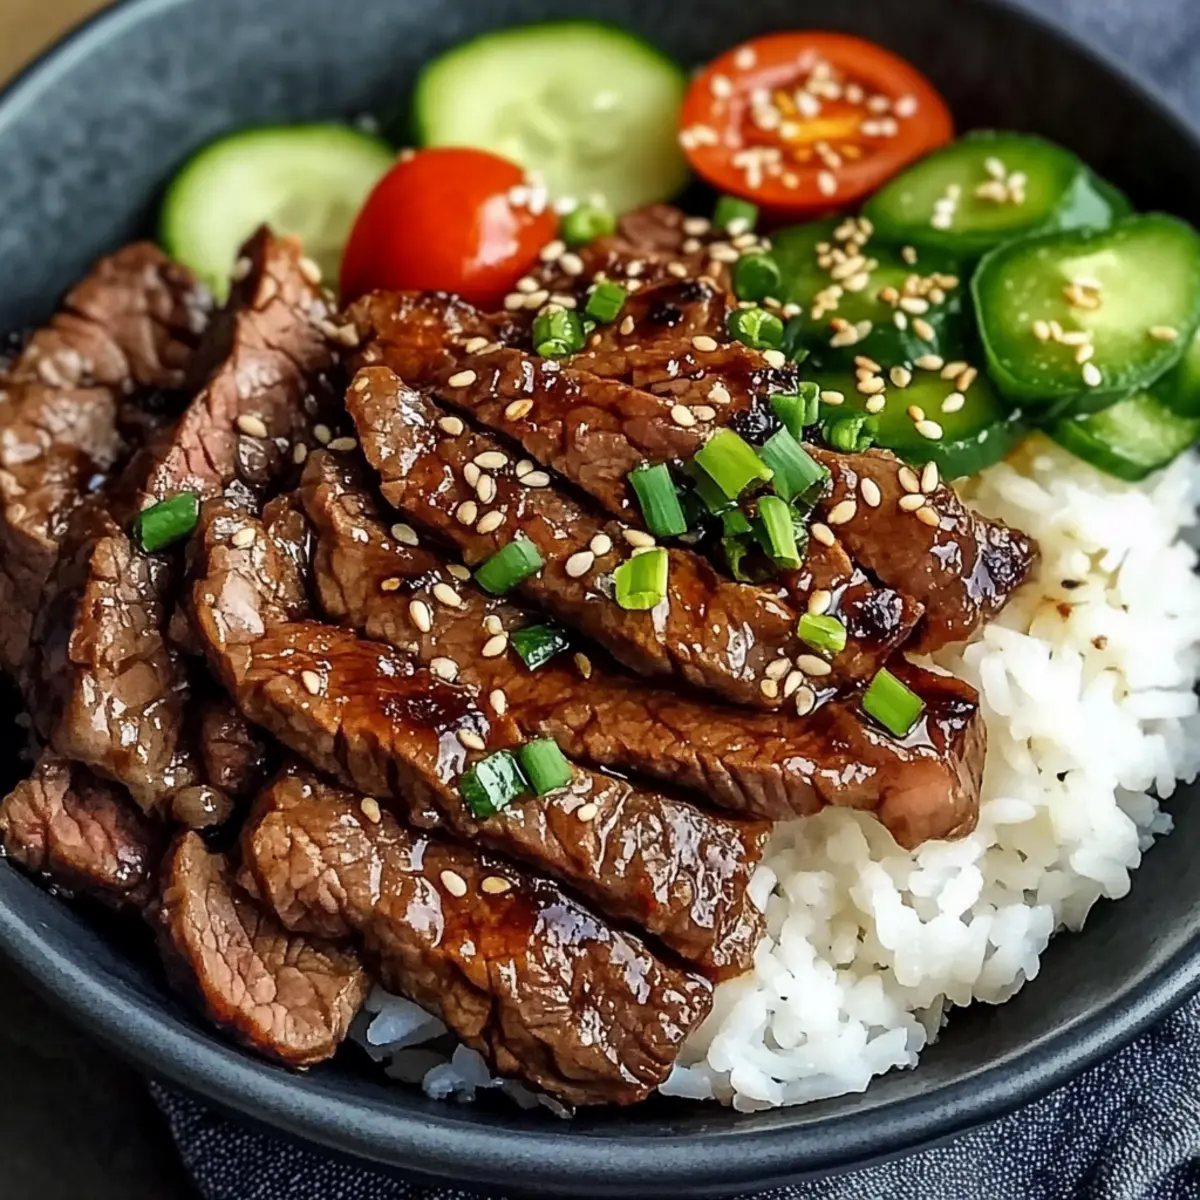
- Boiled Rice – A classic side to enhance the meal’s protein-rich profile; try cauliflower rice as a low-carb alternative.
- Chopped Cucumber and Tomato – Fresh vegetables to balance the dish and provide a refreshing crunch.
This Beef Yakiniku recipe is perfect for quick cook nights, and as you gather these ingredients, imagine all the delectable flavors dancing on your dinner table!
Step‑by‑Step Instructions for Beef Yakiniku
Step 1: Prepare Marinade
In a mixing bowl, whisk together ¼ cup of low-sodium light soy sauce, 1 tablespoon of gochujang, 2 tablespoons of mirin, 1 tablespoon of minced ginger, 1 teaspoon of garlic powder, 1 tablespoon of sesame oil, 1 tablespoon of neutral oil, and 1 tablespoon of light brown sugar. Ensure all ingredients are well combined, creating a smooth, glossy marinade that beautifully coats the beef, setting the stage for your flavorful Beef Yakiniku.
Step 2: Marinate Steak
Thinly slice 1 pound of flank or skirt steak against the grain and add it to the prepared marinade. Toss the beef until every piece is generously coated. Cover the bowl with plastic wrap and refrigerate for at least 2 hours, or up to 24 hours for deeper flavor. This step is crucial for developing the savory-sweet taste that will make your Beef Yakiniku shine.
Step 3: Preheat Pan
About 15 minutes before cooking, remove the marinated beef from the fridge to bring it to room temperature. Then, place a large wok or cast-iron skillet over high heat and let it heat up until it starts to shimmer, indicating it’s very hot. This high temperature is vital for achieving that perfect sear and caramelization on your beef.
Step 4: Cook Steak (in batches)
Add half of the marinated beef to the hot wok in a single layer, avoiding overcrowding. Sear the beef for 3 minutes without stirring, allowing it to develop a nice brown crust. After that, stir and cook for an additional 2-3 minutes until the beef is browned and slightly crispy around the edges. Transfer the cooked beef to a warm serving bowl.
Step 5: Repeat Cooking
Repeat the cooking process with the remaining batch of marinated beef, following the same method. This ensures even cooking and that each piece of beef achieves that desired caramelized exterior, essential for making your Beef Yakiniku truly delightful. The aroma filling your kitchen will be irresistible!
Step 6: Garnish and Serve
Once all the beef is cooked, sprinkle generously with sesame seeds for added texture and taste. Serve your vibrant Beef Yakiniku immediately with bowls of boiled rice and a side of chopped cucumber and tomato for a refreshing contrast. The combination of flavors and textures will uplift your meal, making every bite enjoyable.
Make Ahead Options
Beef Yakiniku is a fantastic choice for meal prep, letting you save valuable time during busy weeknights! You can marinate the beef up to 24 hours in advance, allowing the flavors to deepen and enhance. To prep ahead, simply slice your flank or skirt steak, mix the marinade ingredients, and combine them in a bowl, ensuring the beef is well-coated. Cover and refrigerate until ready to cook. When you’re ready to serve, just bring the marinated beef to room temperature before searing for that perfectly caramelized result. With these make-ahead steps, you’ll have a delicious and hassle-free meal waiting, just as flavorful as if made from scratch on the spot!
Storage Tips for Beef Yakiniku
Fridge: Store cooked Beef Yakiniku in an airtight container for up to 3 days. Make sure it’s completely cooled before sealing to maintain freshness.
Freezer: For longer storage, freeze the cooled beef in a freezer-safe bag for up to 2 months. Flatten the bag for efficient storage and quick thawing.
Reheating: To reheat, thaw overnight in the fridge if frozen, then gently warm in a skillet over medium heat until heated through. This keeps your Beef Yakiniku juicy and delicious!
Make Ahead: Marinate the beef up to 24 hours before cooking for richer flavor, making it easy to whip up this tasty dish when time is tight.
Expert Tips for Beef Yakiniku
Slicing Technique: Use a sharp knife to slice the beef against the grain. This ensures tenderness; consider slightly freezing the meat for easier cuts.
Marinating Time: For the best flavor, marinate the beef for at least 2 hours—or up to 24 hours. This allows the Beef Yakiniku to develop that rich, savory-sweet profile.
High Heat is Key: Achieve caramelization by ensuring your wok is hot enough before adding the beef. A high temperature prevents steaming and helps create a delightful crust.
Cook in Batches: Avoid overcrowding the pan to maintain that coveted crispy texture. Cooking in smaller batches allows for even cooking and a better sear.
Garnishing Touch: Don’t skip the sesame seeds! They add a nutty crunch that enhances the texture, lifting your Beef Yakiniku to a whole new level.
Vegetable Variations: Feel free to toss in sliced onions, bell peppers, or any veggies you love for added color and nutrition while you cook!
What to Serve with Quick and Flavorful Beef Yakiniku?
Elevate your meal experience by pairing this delightful grilled beef with complementary sides and drinks that bring out its rich flavors.
-
Jasmine Rice: The fluffy, fragrant rice absorbs the savory marinade, making it the perfect canvas to showcase your Beef Yakiniku.
-
Sautéed Bok Choy: Lightly cooked with garlic, this vibrant green vegetable adds a crunch and freshness that balances the dish’s sweetness.
-
Pickled Vegetables: A side of tangy pickled radish or cucumber provides a delightful contrast, enhancing the richness of the beef. Crunchy and refreshing, they add a burst of flavor with each bite.
-
Sesame Cucumber Salad: Toss sliced cucumbers in a light sesame dressing. The crispness and mild flavor enhance the meat, creating a refreshing bite.
-
Miso Soup: A warm bowl of miso soup provides a comforting element, offering umami that beautifully complements the savory notes of your Yakiniku.
-
Sapporo Beer: Enjoy this light, crisp Japanese beer alongside your meal, as it cleanses the palate and pairs wonderfully with the grilled flavors.
-
Fresh Fruit Salad: Finish on a sweet note with a colorful assortment of fresh fruits—think juicy watermelon, tart pineapple, and sweet strawberries—for a refreshing dessert that ties in flavors.
-
Green Tea: A soothing cup of green tea works well to balance the meal while adding its own rich history and flavor to your dining experience.
-
Sesame Seeds: Don’t forget to sprinkle some extra toasted sesame seeds over your sides for an added crunch and nutty flavor to enhance your meal!
Beef Yakiniku Variations to Try
Feel free to embark on a flavorful journey by customizing your Beef Yakiniku with these fun twists!
- Sriracha Swap: If gochujang isn’t on hand, sriracha works perfectly for that same delightful heat and tang. The result will still pack a spicy punch!
- Steak Alternatives: Try using sirloin or ribeye for a juicier, richer flavor. Each cut offers a different tasting experience that will get your taste buds tingling.
- Veggie Boost: Add sliced onions, bell peppers, or mushrooms right into the pan for extra texture and nutrition. It transforms your dish into a colorful, flavor-packed feast!
- Gluten-Free Option: Replace soy sauce with tamari or coconut aminos for a gluten-free alternative while keeping that umami richness intact.
- Herb Infusion: Toss in fresh herbs like cilantro or green onions just before serving to elevate the aroma and add a fresh finish. Every bite will feel bright and invigorating.
- Sweet Twist: If you’re looking for a sweeter profile, add more brown sugar or even a splash of honey to the marinade for a caramelized depth and complexity.
- Cauliflower Rice: For a low-carb option, swap out boiled rice with cauliflower rice, maintaining everything delicious without the extra carbs. This will encourage a whole new playful take on the meal!
- Szechuan Spice: Add a dash of Szechuan peppercorns for an electrifying blend of heat and a numbing sensation. It will send your taste buds on an adventurous thrill ride!
And if you’re delving into more culinary delights, consider making these delightful Beef Hot Honey Bowls or quick Garlic Butter Beef Bites. Each recipe holds its own unique magic!
Beef Yakiniku Recipe FAQs
What cut of beef is best for Beef Yakiniku?
For Beef Yakiniku, I recommend using flank or skirt steak. These cuts are flavorful and, when sliced very thinly against the grain, they become incredibly tender. If you can’t find these cuts, sirloin or ribeye can work well too, offering a different flavor profile.
How should I store leftover Beef Yakiniku?
Cooked Beef Yakiniku can be stored in an airtight container in the fridge for up to 3 days. Be sure the beef is completely cooled before sealing it. I often find that a splash of soy sauce helps keep it flavorful when reheating!
Can I freeze Beef Yakiniku? How do I do it?
Absolutely! You can freeze cooked Beef Yakiniku for up to 2 months. Once cooled, place it in a freezer-safe bag, pressing out any excess air before sealing. For easy thawing, lay the bag flat in the freezer, allowing it to freeze evenly. When you’re ready to enjoy it again, just thaw overnight in the fridge and gently reheat it on a skillet over medium heat until warmed through.
What if I don’t have gochujang for the marinade?
If you don’t have gochujang on hand, no worries! You can substitute it with sriracha or any other chili paste you like. Just keep in mind that these alternatives may alter the flavor slightly; adjust according to your heat preference. If you prefer a milder dish, a bit of ketchup mixed with sriracha can also work in a pinch!
Can this dish be made gluten-free?
Absolutely! To make Beef Yakiniku gluten-free, simply replace regular soy sauce with tamari or coconut aminos. Both options provide that wonderful umami flavor without the gluten. Be sure to double-check all other ingredients to ensure they’re also gluten-free.
How can I enhance the flavor while making Beef Yakiniku?
For added depth of flavor, consider marinating the beef for up to 24 hours in the refrigerator. This longer marination time allows the meat to absorb all the savory-sweet goodness of the marinade fully. Additionally, incorporating sliced mushrooms, bell peppers, or onions during the cooking process can bring another layer of texture and flavor to your dish!
Savory Beef Yakiniku: Quick Japanese Grilled Delight
Ingredients
Equipment
Method
- In a mixing bowl, whisk together the marinade ingredients until smooth.
- Thinly slice the steak and add to the marinade, covering and refrigerating.
- Preheat the pan over high heat.
- Cook half of the marinated beef in a single layer, searing for 3 minutes.
- Stir and cook for another 2-3 minutes, then transfer to a serving bowl.
- Repeat with the remaining beef.
- Garnish with sesame seeds and serve with rice and vegetables.
Leave a Reply