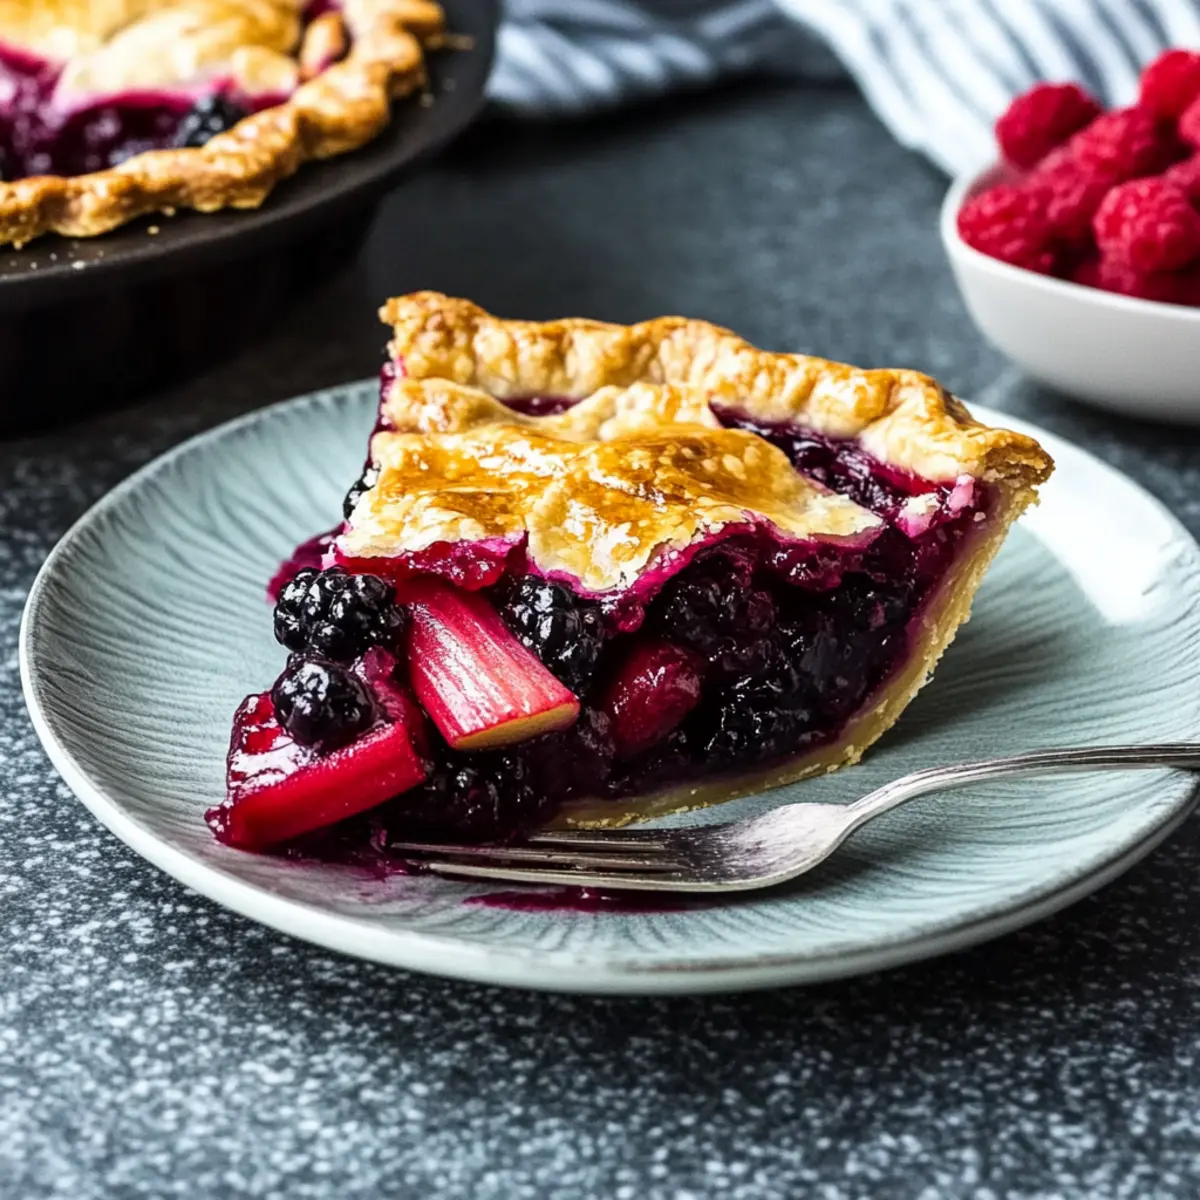
The sweet scent of summer wafts through my kitchen as I roll out dough for my Easy Homemade Bumbleberry Pie. This isn’t just any dessert; it’s a vibrant medley of mixed berries, apples, and a hint of rhubarb, perfectly cradled in a flaky crust. What I adore about this pie is how effortlessly it comes together, making it a go-to recipe for family gatherings and last-minute get-togethers. Plus, it’s a delightfully light option amidst the heavier holiday desserts—a balance of sweet and tangy that dances on your taste buds. Have you ever been caught daydreaming about a slice of homemade pie, just waiting to be pulled warm from the oven? Let’s dive into this delicious adventure together!
Why is Bumbleberry Pie a Summer Favorite?
Sweet, Tangy flavors unite in this delightful pie, showcasing a perfect mix of berries and fruits. Easy to make, this recipe is perfect for both novice bakers and seasoned chefs, ensuring anyone can impress loved ones with minimal effort. Versatile in nature, you can swap fruits based on what’s fresh or in season, making it a go-to treat for any gathering. Crowd-pleaser status? Absolutely! Serve it warm with a scoop of vanilla ice cream for a dessert that’s sure to elicit smiles. Don’t forget to check out our Deliciously Crockpot Pie for another fantastic dessert idea!
Bumbleberry Pie Ingredients
• Whether you’re whipping up this delightful dessert for a family barbecue or a cozy night in, gathering the right ingredients is key to a successful Bumbleberry Pie!
-
For the Crust
-
1/2 recipe Homemade Pie Crust – Provides the base and top crust. Note: can use store-bought crust for convenience.
-
For the Filling
-
1 cup chopped, peeled apple – Adds natural sweetness and structure. For substitution, use Granny Smith apples for a tart flavor.
-
1 cup chopped rhubarb – Contributes tartness that balances the sweetness of the berries. Can be omitted, or replaced with more apple if desired.
-
4 cups mixed berries – The star of the pie, offering vibrant flavor and natural juiciness. Use a combination of fresh or frozen; if using frozen, no need to thaw first.
-
1/2 cup granulated sugar – Sweetens the filling. Adjust based on the sweetness of the fruit.
-
3 tablespoons cornstarch – Thickens the filling to avoid a runny pie. No need to increase for frozen fruit.
-
1 teaspoon lemon juice – Enhances flavor and provides acidity.
-
For the Egg Wash
-
1 large egg – Used for egg wash, giving the crust a golden finish.
-
1 tablespoon water – Mixed with egg for egg wash application.
Feel free to gather these ingredients and get ready to create a delightful Bumbleberry Pie that everyone will love!
Step‑by‑Step Instructions for Bumbleberry Pie
Step 1: Preheat the Oven
Begin by preheating your oven to 425°F (220°C). This high temperature will create a beautifully crisp crust for the Bumbleberry Pie. While the oven heats, gather your mixing bowls and measuring cups so you’re ready for the next steps in crafting this delightful dessert.
Step 2: Prepare the Filling
In a large mixing bowl, gently toss together one cup of chopped, peeled apple, one cup of chopped rhubarb, and four cups of mixed berries along with half a cup of granulated sugar, three tablespoons of cornstarch, and one teaspoon of lemon juice. Stir the mixture until the fruits are well-coated, and set aside for a few minutes as you prepare the crust.
Step 3: Roll Out the Crust
Take half of your prepared pie crust and roll it out on a lightly floured surface until it’s about 1/8 inch thick. Carefully fit the crust into a 9-inch pie plate, trimming any excess dough that hangs over the edges. This will serve as the base for your Bumbleberry Pie, cradling the delicious filling inside.
Step 4: Fill the Pie
Pour the berry mixture into the prepared crust, spreading it evenly to ensure every slice will be packed with sweet fruit. Take a moment to admire the brilliant colors and luscious textures of the filling; it’s about to become a delicious pie masterpiece once baked.
Step 5: Add the Top Crust
Moisten the edge of the bottom crust with a little water. Roll out the other half of the pie crust and cover the filled pie, crimping the edges together to seal in the delectable filling. Make sure it’s snug but not overly tight, allowing space for the mixture to bubble and expand.
Step 6: Create Steam Vents
Using a sharp knife, make several slits in the top crust to allow steam to escape during baking. These cuts will not only help prevent the crust from bubbling up but will also create an appealing pattern. Next, brush the surface with an egg wash made from one large egg and one tablespoon of water for that golden finish.
Step 7: Bake at High Heat
Place the assembled Bumbleberry Pie on a baking sheet to catch any drips during baking, then slide it into the preheated oven. Bake for 15 minutes at 425°F (220°C) until the crust starts to brown slightly and aromas fill your kitchen, signaling the pie is well on its way.
Step 8: Lower the Temperature
After 15 minutes, reduce the oven temperature to 375°F (190°C) and continue baking for another 35-45 minutes. Keep an eye on the pie; the crust should turn golden and the filling should be bubbly. This is when the flavors meld beautifully into a satisfying treat.
Step 9: Tent with Foil if Needed
If you notice the crust browning too quickly while baking, gently cover the edges with aluminum foil to prevent burning. This little trick allows the filling to bubble away without sacrificing the beautiful crust you’ve created.
Step 10: Cool and Slice
Once your Bumbleberry Pie is golden and the filling is bubbling, remove it from the oven and let it cool completely on a wire rack. Allowing it to cool helps set the filling, making it easier to slice. This pie is best enjoyed after resting, giving you that perfect, beautiful slice to share!
Bumbleberry Pie Variations & Substitutions
Feel free to sprinkle your personal touch on this scrumptious dessert with these delightful variations!
-
Rhubarb Replacement: Substitute rhubarb with more apple or try tart cherries for a different twist! Both will provide that essential sweet-tart balance that makes this pie so enticing.
-
Berry Fusion: Combine various berries like strawberries, blueberries, or raspberries for unique flavors. This way, every bite can surprise you with a new flavor profile—a berry lover’s delight!
-
Vegan Option: Replace the egg wash with a mixture of non-dairy milk and a little maple syrup for that golden sheen, ensuring everyone can enjoy this pie.
-
Gluten-Free Crust: Use a gluten-free pie crust instead of traditional flour crust. This can make the pie friendly for those with gluten sensitivities without sacrificing its flaky texture.
-
Add Citrus Zest: Increase flavor by adding the zest of one lemon or orange to your filling. The resulting aroma and brightness will elevate your pie to a whole new level!
-
Nutty Crust: Incorporate ground nuts (like almonds or walnuts) into your crust for an earthy twist. The nutty flavor will complement the sweetness of the filling perfectly.
-
Spiced Filling: Add a pinch of cinnamon or nutmeg to your filling mix for a warm, aromatic touch. This addition will wrap you in cozy flavors reminiscent of a comforting kitchen.
-
Explore Sweeteners: Experiment with honey, maple syrup, or coconut sugar in place of granulated sugar for a different sweetness that complements the natural flavors beautifully—try it in Mini Keto Pie for a unique dessert experience!
By mixing and matching these substitutions, you’ll create a Bumbleberry Pie that feels distinctly yours while still capturing that quintessential summer essence. Happy baking!
Make Ahead Options
These Easy Homemade Bumbleberry Pies are perfect for meal prep enthusiasts! You can prepare the pie crust and filling up to 24 hours in advance—just keep them separate to maintain freshness. Roll out the crust and place it in the pie dish, then refrigerate. For the filling, mix the apples, rhubarb, and berries with sugar and cornstarch, and store it in an airtight container. When you’re ready to bake, simply fill the crust with the berry mixture, cover it with the top crust, and proceed with the baking instructions. By prepping ahead, you’ll save valuable time and enjoy a delicious homemade pie with minimal effort!
Expert Tips for Perfect Bumbleberry Pie
-
Check the Filling: Ensure the filling is bubbling before removing the pie from the oven for ideal texture and flavor.
-
Baking Time for Frozen Berries: If using frozen berries, anticipate increasing the baking time by 10-20 minutes to allow them to cook through thoroughly.
-
Prevent Over-Browning: If the crust begins to brown too quickly, tent it with foil to protect it while allowing the filling to bubble and thicken properly.
-
Crust Thickness: Aim for about 1/8 inch thickness when rolling out your crust; too thin might cause breakage, while too thick may not cook properly.
-
Cool to Set: Allow the Bumbleberry Pie to cool completely before slicing to let the filling set, ensuring neat and pleasant slices.
-
Adjust Sweetness: Taste your fruit mixture before baking; adjust sugar based on the sweetness of your berries for the best filling flavor.
What to Serve with Easy Homemade Bumbleberry Pie
There’s something magical about creating a full meal that pairs perfectly with a sweet, delightful pie.
- Creamy Vanilla Ice Cream: Smoothing a scoop of ice cream over warm pie creates a delicious contrast of temperatures and flavors — simply heavenly!
- Fresh Mint Leaves: A sprinkle of mint not only adds color but a refreshing herbal note that enhances the fruitiness of the pie.
- Whipped Cream: Light and airy, a dollop of fresh whipped cream adds creaminess, balancing the tangy sweetness of the berries perfectly.
- Lemonade: A chilled glass of tangy lemonade offsets the sugariness, making for a refreshing beverage choice.
- Shortbread Cookies: The buttery crunch of shortbread complements the softness of the pie crust, adding an extra layer of texture.
- Cheese Plate: A small assortment of tangy cheeses like goat or brie pairs wonderfully with pie, creating an unexpected yet delightful bite.
- Herbal Iced Tea: Sipping on refreshing iced tea infused with herbs like basil or mint further accentuates the summer vibes.
- Berry Sorbet: For a fruity twist, a scoop of berry sorbet echoes the pie’s flavors and brings another refreshing element to the table.
How to Store and Freeze Bumbleberry Pie
Room Temperature: Keep the pie covered at room temperature for up to 2 days. This allows the crust to stay crisp while retaining the delicious flavors of the filling.
Fridge: For longer freshness, refrigerate the pie for up to 5 days. Ensure it’s covered with plastic wrap or in an airtight container to prevent it from drying out.
Freezer: Freeze slices of the Bumbleberry Pie for up to 3 months. Wrap each slice tightly in plastic wrap, then place in a freezer bag to protect against freezer burn.
Reheating: To reheat, simply pop slices in the oven at 350°F (175°C) for about 15-20 minutes until warmed through, or enjoy cold for a refreshing treat!
Bumbleberry Pie Recipe FAQs
What kind of apples should I use for Bumbleberry Pie?
Absolutely! I recommend using Granny Smith apples for their tartness, which complements the sweetness of the mixed berries beautifully. If you’re looking for a sweeter profile, you can opt for Honeycrisp or Fuji apples instead.
How should I store Bumbleberry Pie?
To keep your pie fresh, cover it and store at room temperature for up to 2 days. For longer storage, refrigerate it in an airtight container for up to 5 days. This helps maintain the crust’s crispness and the delightful flavors of the filling.
Can I freeze Bumbleberry Pie?
Very! You can freeze slices of Bumbleberry Pie for up to 3 months. Wrap each slice tightly in plastic wrap, then place them in a freezer-safe bag or container. When you’re ready to enjoy, reheat the slices in the oven at 350°F (175°C) for about 15-20 minutes, or enjoy them cold!
What if my pie filling is too runny?
It’s common for pie fillings to be runny if not thickened properly! If you find this happening, ensure you use enough cornstarch in your mixture. If you’re working with frozen berries, they can release extra juices, so it might be helpful to slightly increase the cornstarch to about 4 tablespoons. Allow the pie to bake until the filling is bubbling, as this verifies it’s thickened properly.
Are there any allergies I should consider?
Yes, be mindful of common allergens such as gluten in the pie crust and potential sensitivity to fruits like berries and rhubarb. Additionally, ensure you use eggs for the wash if you have an egg allergy, or you can substitute it with a plant-based option like almond milk or coconut milk mixed with a bit of cornstarch.
How do I know when my Bumbleberry Pie is done baking?
To ensure the perfect bake, look for a golden-brown crust and bubbling filling. It usually takes about 35-45 minutes at a reduced temperature of 375°F (190°C) after the initial baking. If you notice the crust browning too quickly, tent it with foil. Allow it to cool completely to let the filling set before slicing!
Delicious Bumbleberry Pie: A Sweet Summer Delight
Ingredients
Equipment
Method
- Preheat your oven to 425°F (220°C).
- In a large mixing bowl, gently toss together the chopped apple, chopped rhubarb, mixed berries, granulated sugar, cornstarch, and lemon juice. Stir until the fruits are well-coated, and set aside.
- Roll out half of your prepared pie crust on a lightly floured surface until about 1/8 inch thick. Fit the crust into a 9-inch pie plate and trim excess dough.
- Pour the berry mixture into the prepared crust, spreading it evenly.
- Moisten the edge of the bottom crust with a little water, roll out the other half of the pie crust, and cover the filled pie, crimping the edges together.
- Make several slits in the top crust to allow steam to escape, then brush with egg wash.
- Place the assembled pie on a baking sheet and bake for 15 minutes at 425°F (220°C).
- Reduce the oven temperature to 375°F (190°C) and continue baking for another 35-45 minutes.
- If the crust begins to brown too quickly, tent it with foil.
- Once golden and bubbly, remove from the oven and let it cool completely on a wire rack.
Leave a Reply