There’s a certain magic in creamy desserts that can take us back, don’t you think? These irresistibly creamy mini cheesecakes are not just a treat for the taste buds; they evoke the warm nostalgia of baking days spent in Grandma’s kitchen, where every bite was a celebration. This easy recipe is tailored for busy bakers like you, allowing for a make-ahead strategy that’s perfect for your next gathering. Each delightful cheesecake has a rich, velvety filling nestled in a buttery crust, making it a crowd-pleaser with room for customization. Whether you opt for fresh berries or a drizzle of chocolate, these treats promise to impress and satisfy every palate. Ready to elevate your dessert game? Let’s dive into the world of creamy mini cheesecakes and discover your new favorite sweet escape!
Why Are These Mini Cheesecakes Irresistible?
Irresistible Creaminess: Each cheesecake boasts a velvety texture that melts in your mouth, recreating the nostalgic feel of Grandma’s baking.
Customizable Appeal: Whether you prefer a fruity topping or a decadent chocolate swirl, these mini treats can be tailored to your taste.
Time-Saving Delight: With a make-ahead option, you can whip these up quickly and store them for effortless entertaining.
Crowd-Pleasing Choice: Perfect for gatherings, these mini cheesecakes are not only visually stunning but also a hit among guests of all ages.
Gluten and Dairy Options: Ideal for various diets, they offer gluten-free and dairy-free alternatives, ensuring everyone can indulge.
Pair them with a cup of creamy Southern spaghetti bake for a delightful meal, or serve alongside a slice of mini keto crustless pumpkin pie for a festive touch!
Creamy Mini Cheesecake Ingredients
• Here’s what you need to make these delightful desserts!
For the Crust
- Digestive biscuits or graham cracker squares – The perfect base for a crumbly texture; swap with gluten-free biscuits for a gluten-free version.
- Unsalted butter – Essential for binding the crust; be sure to melt it for optimal mixing.
- Caster sugar – Sweetens the crust nicely; feel free to adjust the amount to your preference.
- Cinnamon powder (optional) – Adds a hint of warmth; can be omitted if you prefer a simpler flavor.
- Salt – Just a pinch enhances the overall flavor profile.
For the Filling
- Cream cheese – The star of the cheesecake; use block cream cheese for a smooth texture, and make sure it’s at room temperature for best results.
- Plain flour – Stabilizes the filling, helping to achieve that perfect consistency.
- Vanilla extract – Enhances the flavor beautifully; opt for pure extract for the best aroma.
- Sour cream (or plain yogurt) – Contributes to the creaminess and tang; a dairy-free substitute works as well.
- Lemon zest – Brightens the filling; just a bit goes a long way to enhance flavor.
- Eggs – Essential for structure; make sure they are also at room temperature for even mixing.
For the Topping
- Thickened or heavy cream – Used for the whipped topping; it adds a luxurious richness.
- Icing sugar or caster sugar – Sweetens the whipped cream for a delightful finish.
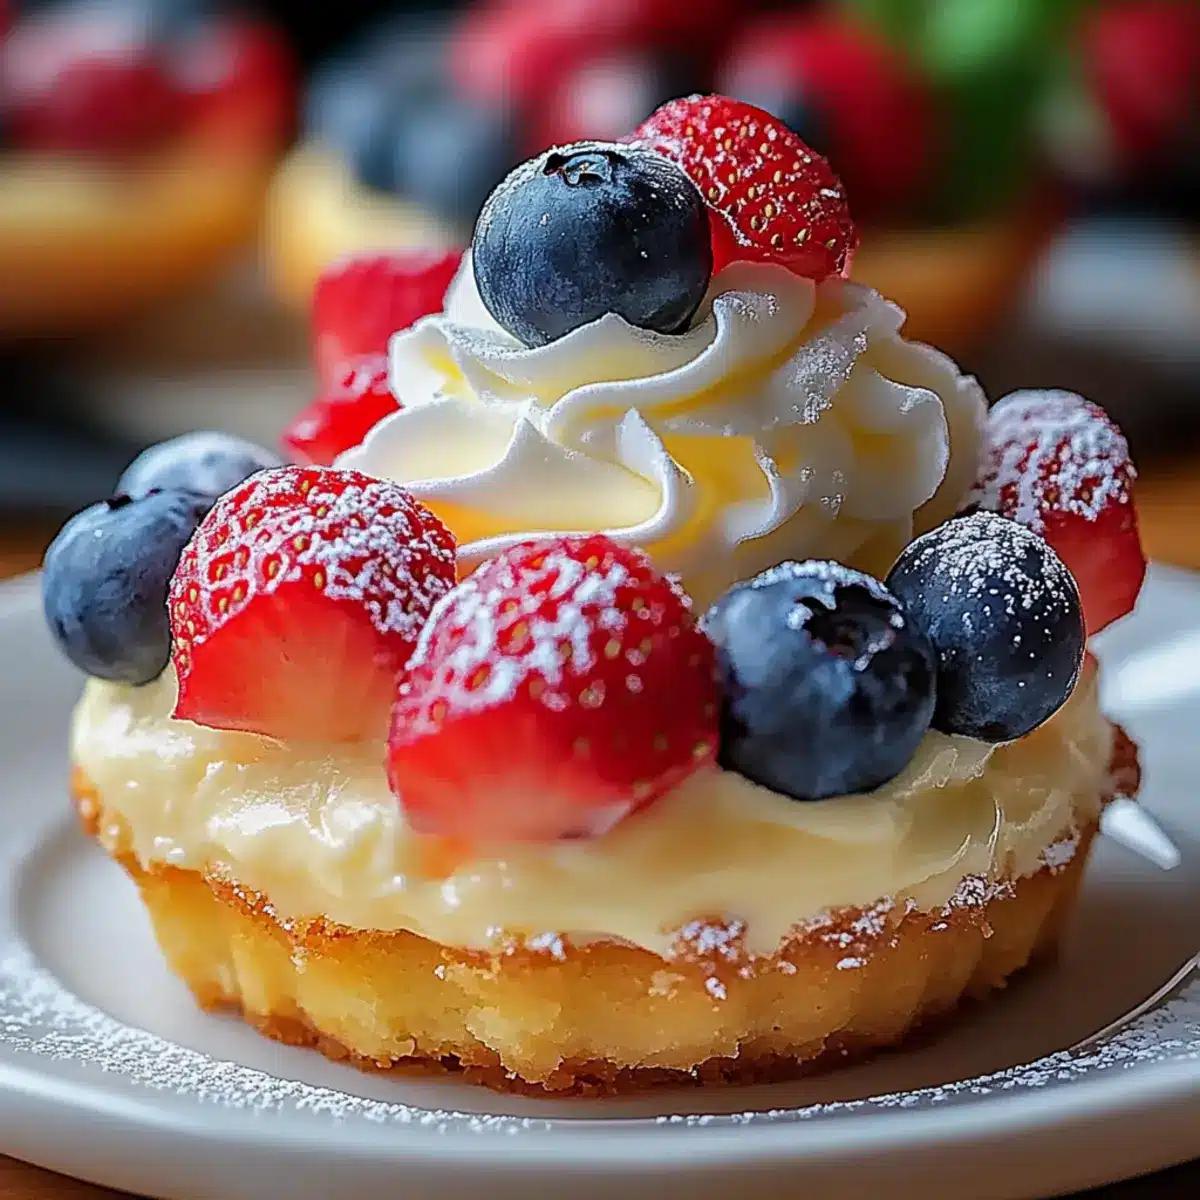
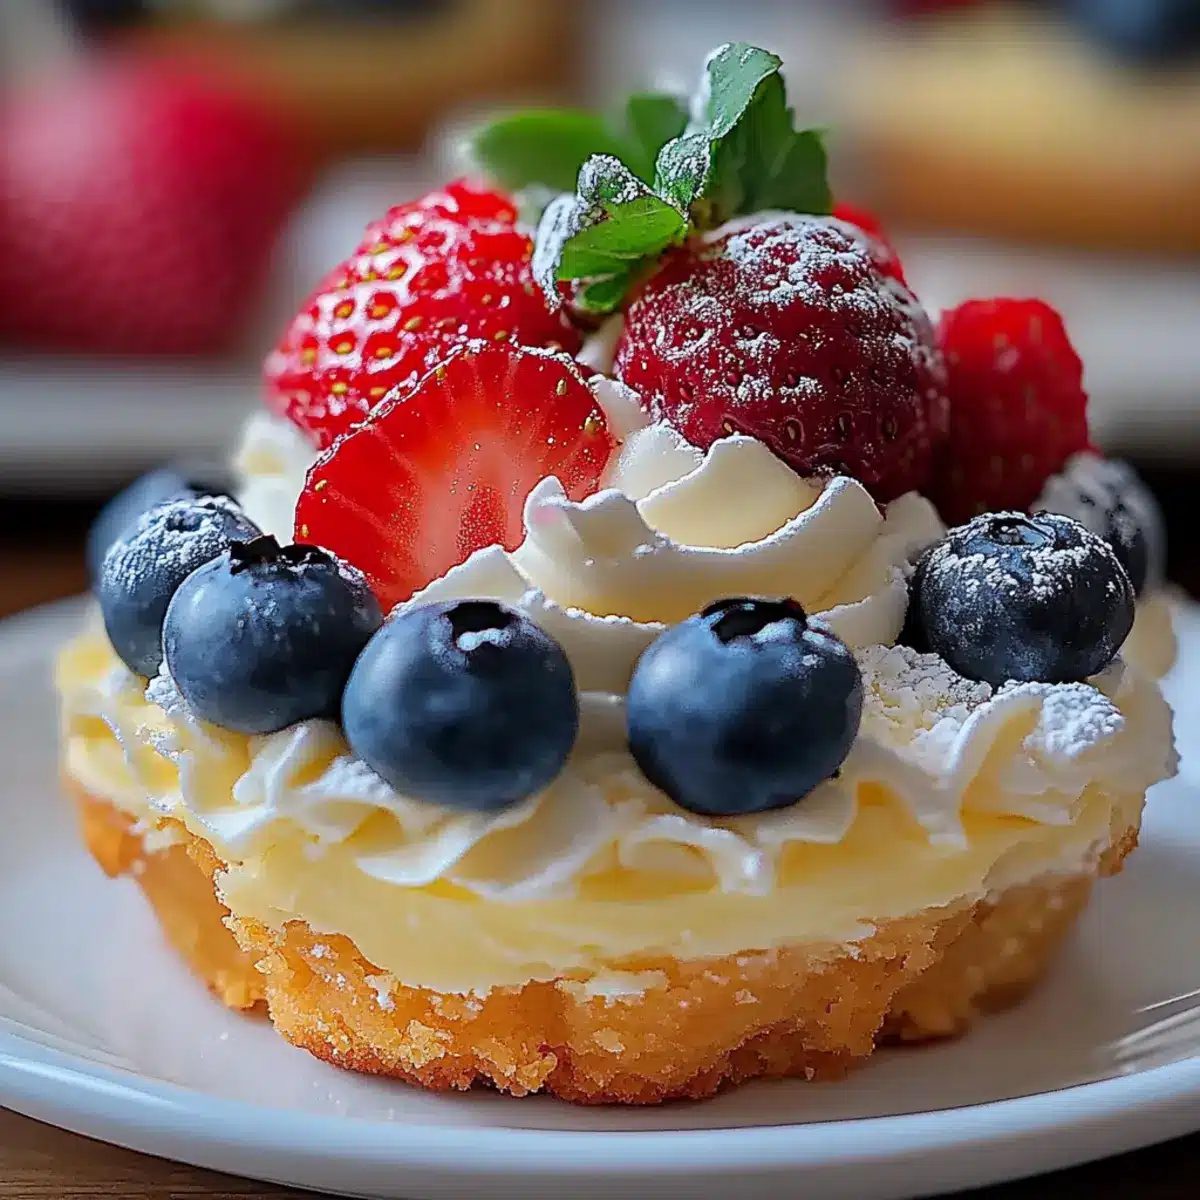
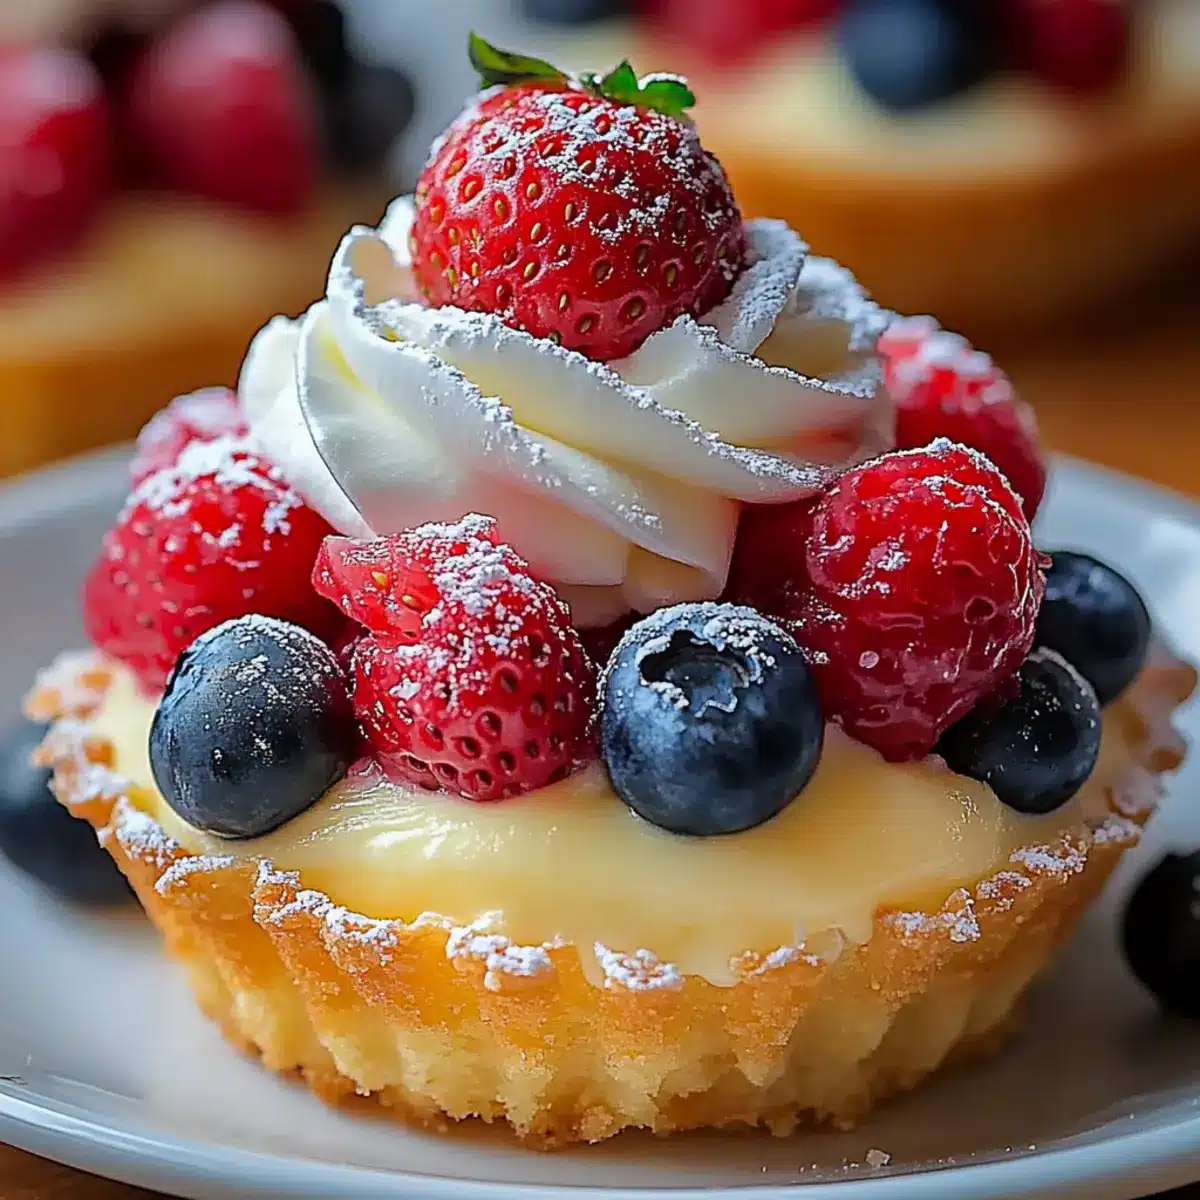
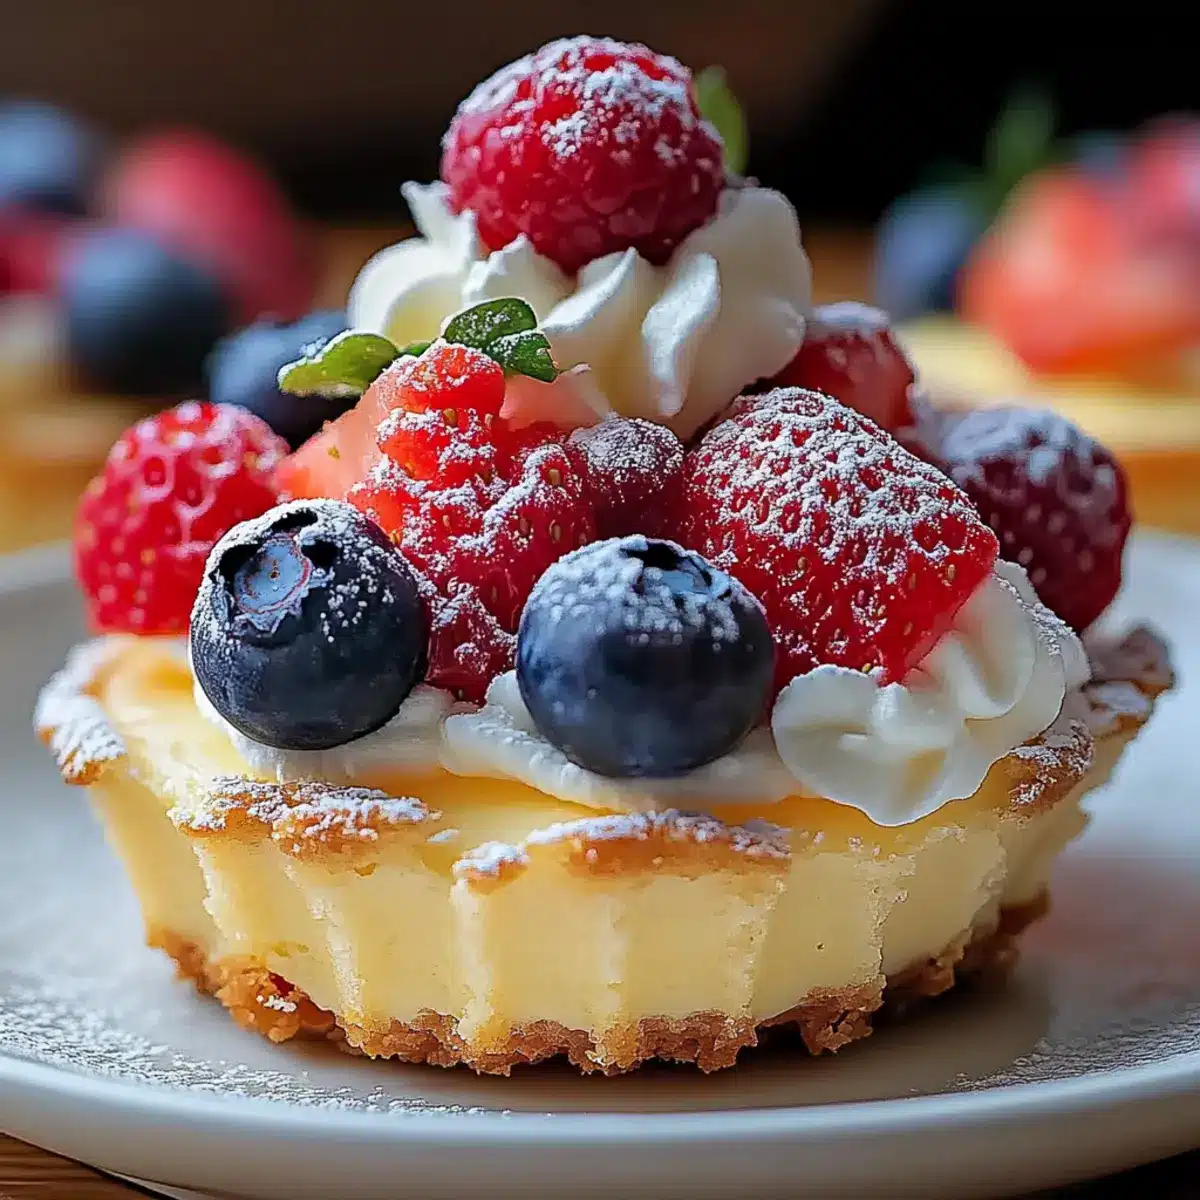
- Fresh berries (for garnish) – Add a splash of color and fresh flavor; a blend of strawberries, blueberries, or raspberries works wonderfully.
- Small sprigs of mint – Optional, but they add a lovely touch of freshness for presentation.
With these ingredients ready, you’re all set to create your Creamy Mini Cheesecakes! Enjoy personalizing them with your favorite toppings and get ready to impress your guests.
Step‑by‑Step Instructions for Creamy Mini Cheesecakes
Step 1: Preheat the Oven
Start by preheating your oven to 160°C (325°F), or 140°C if you’re using a fan oven. While the oven warms up, line a 12-hole muffin tin with paper liners to ensure easy removal of the cheesecakes later. This step sets the stage for baking your delightful Creamy Mini Cheesecakes.
Step 2: Make the Crust
In a mixing bowl, crush your digestive biscuits into fine crumbs, then combine them with the melted unsalted butter, caster sugar, cinnamon (if using), and a pinch of salt. Stir the mixture until it resembles wet sand, ensuring all crumbs are coated. This flavorful crust will provide a perfect base for your creamy cheesecakes.
Step 3: Press the Base
Spoon the crust mixture into each muffin cup, packing it firmly to create an even base. Use the back of a spoon or your fingers to press the mixture down well. Place the tin in the oven and bake for approximately 7 minutes, until set and slightly golden. Once baked, remove it from the oven and let it cool while you prepare the filling.
Step 4: Prepare the Filling
In a large mixing bowl, beat the room-temperature cream cheese with an electric mixer until smooth and creamy. Gradually mix in the plain flour, vanilla extract, sour cream, caster sugar, lemon zest, and a pinch of salt. Add the eggs one at a time, mixing until fully combined after each addition. This creamy filling brings the entire dessert together, making your cheesecakes irresistibly delicious.
Step 5: Fill the Cups
Pour the creamy filling into each muffin cup, filling them close to the top but not overflowing. Use a spoon or offset spatula to smooth the tops gently. Bake the filled cups in the oven for about 20 minutes, until the edges are set, but the center remains slightly jiggly. This will ensure that the Creamy Mini Cheesecakes have a perfect, velvety texture.
Step 6: Cool and Chill
Remove the muffin tin from the oven and allow the cheesecakes to cool in the tin for about 1 hour. Once cooled, transfer them to the refrigerator and chill for at least 6 hours, or overnight if possible. This chilling process is key for the flavors to meld and for achieving that signature creamy consistency in your mini cheesecakes.
Step 7: Whip the Topping
While the cheesecakes chill, prepare the whipped topping. In a bowl, beat the heavy cream with icing sugar and a splash of vanilla extract until soft peaks form. This light, fluffy topping will add a decadent finish to your Creamy Mini Cheesecakes, balancing out their rich flavor.
Step 8: Decorate and Serve
After chilling, remove the cheesecakes from the fridge. Top each mini cheesecake generously with the freshly whipped cream and garnish with an assortment of fresh berries and small sprigs of mint, if desired. For a final touch, dust lightly with icing sugar. Now, your Creamy Mini Cheesecakes are ready to impress your guests!
Expert Tips for Creamy Mini Cheesecakes
• Room Temperature Ingredients: Ensure all ingredients, especially cream cheese and eggs, are at room temperature. This helps achieve a smooth filling and prevents lumps in your creamy mini cheesecakes.
• Don’t Overbake: Keep an eye on your cheesecakes while baking; the center should remain slightly jiggly. Overbaking can lead to a dry texture, so trust your instincts!
• Chill for Flavor: Allow your cheesecakes to chill overnight in the fridge. This not only enhances the flavor but also helps them set perfectly to that irresistible creaminess.
• Mix Well: Beat the cream cheese thoroughly before incorporating other ingredients. This step is crucial for avoiding a lumpy filling.
• Customize Toppings: Feel free to mix and match toppings according to your favorite flavors. From fresh berries to chocolate drizzle, let your creativity shine!
• Substitutions Made Simple: If you’re looking for gluten-free or dairy-free options, don’t hesitate to use gluten-free biscuits for the crust or swap cream cheese with a dairy-free alternative to enjoy these creamy mini cheesecakes everyone can relish.
Make Ahead Options
These irresistibly creamy mini cheesecakes are perfect for busy cooks looking to save time! You can prepare the crust up to 24 hours in advance; simply store it in an airtight container at room temperature to maintain its crunch. The cheesecake filling can also be made ahead and refrigerated for up to 3 days. When ready to serve, pour the filling over the crusts and bake as directed. To ensure deliciousness, keep the cheesecakes covered while chilling, and whip the cream topping fresh right before serving. With these make-ahead strategies, you’ll enjoy delightful mini cheesecakes with minimal last-minute effort!
Creamy Mini Cheesecake Variations & Substitutions
Feel free to make these mini cheesecakes your own by trying out some exciting twists and substitutions!
- Gluten-Free Base: Substitute with gluten-free biscuits or use almond flour to create a crumbly crust that everyone can enjoy.
- Dairy-Free Alternative: Use a dairy-free cream cheese option and coconut cream to finish for an equally luscious dessert.
- Chocolate Lovers: Blend in cocoa powder or fold in melted chocolate for a rich, decadent flavor that chocolate fans will adore.
- Fruit-Infused: Mix blended fruit like strawberries or raspberries into the filling for a fresh, fruity twist that brightens every bite.
- Extra Zesty: Increase the lemon or lime zest for a sharper flavor kick that invigorates the creaminess of your cheesecakes.
- Spicy Undertones: A pinch of cayenne or chili powder can be added to the filling, offering a surprising and flavorful heat for the adventurous palate.
- Nutty Version: Incorporate finely chopped nuts into the crust, giving a delightful crunch that enhances the overall texture.
- Savory Option: For a fun twist, try a herb-infused cream cheese filling, making it a perfect appetizer for gatherings.
These variations invite your creativity into the kitchen, letting you tailor the mini cheesecakes to suit your flavor desires. To further delight your guests, consider serving them alongside a sumptuous slice of creamy Southern spaghetti bake or a festive mini keto crustless pumpkin pie.
What to Serve with Irresistibly Creamy Mini Cheesecakes?
Elevate your dessert experience with delightful pairings that complement the luxurious flavors of these mini cheesecakes!
- Fresh Berry Compote: A vibrant and tangy berry compote adds a pop of color that brightens the creamy mini cheesecakes and emphasizes their sweetness.
- Mocha Coffee: The rich, robust flavors of a mocha coffee provide a perfect contrast to the light cheesecake, making every bite an indulgent treat.
- Chocolate Drizzle: A simple drizzle of melted chocolate enhances the richness and introduces a gourmet flair to your mini desserts.
- Coconut Whipped Cream: This dairy-free alternative lends a tropical twist that pairs beautifully with the cheesecake’s creamy texture, keeping it light yet satisfying.
- Savory Cheese Platter: Balance out the sweetness with a savory cheese platter, featuring sharp cheeses that create a delightful contrast to the cheesecakes’ flavor profile.
- Mint Lemonade: This refreshing drink with a hint of mint offers a crisp palate cleanser that allows the cheesecakes to shine even brighter.
- Chocolate Ganache Cupcakes: Serve alongside moist chocolate cupcakes topped with silky ganache for an exciting dessert spread that caters to all tastes.
- Mini Fruit Tarts: For a delightful contrast in texture and flavor, mini fruit tarts provide a delightful crunch and a burst of freshness that perfectly complements the cheesecakes.
- Scone Bites: Light and flaky scone bites with clotted cream serve as a lovely addition to highlight the homemade feel of your dessert table.
- Vanilla Ice Cream: A scoop of creamy vanilla ice cream alongside will add an extra touch of decadence while contrasting the mini cheesecakes’ rich flavors.
How to Store and Freeze Creamy Mini Cheesecakes
Fridge: Store leftover creamy mini cheesecakes in an airtight container for up to 5 days. This keeps them fresh and ready for you to enjoy a sweet treat whenever the craving strikes.
Freezer: For longer storage, freeze the cheesecakes in a single layer on a baking sheet for 1-2 hours until firm, then transfer to an airtight container or freezer-safe bag. They can be frozen for up to 2 months.
Thawing: When you’re ready to indulge again, simply move the frozen cheesecakes to the fridge the night before to thaw slowly. This ensures a creamy texture upon serving.
Reheating: There’s no need to reheat; enjoy your creamy mini cheesecakes chilled, garnished with fresh toppings right before serving for an exquisite dessert experience!
Creamy Mini Cheesecakes Recipe FAQs
How do I select the best ingredients for my creamy mini cheesecakes?
Absolutely! For the crust, select digestive biscuits without dark spots for a fresher taste. The cream cheese should be a block variety at room temperature for optimal mixing. Eggs should also be at room temperature to ensure a smooth filling. When it comes to toppings like fresh berries, look for vibrant colors and firm textures, avoiding overripe or mushy fruits.
What’s the best way to store my mini cheesecakes?
Very! To keep your creamy mini cheesecakes fresh, store them in an airtight container in the refrigerator for up to 5 days. Make sure to separate layers with parchment paper if stacking, to prevent sticking. This way, you can easily enjoy them each day without loss of texture or flavor!
Can I freeze creamy mini cheesecakes, and if so, how?
Yes, you can! To freeze your cheesecakes, first, place them on a baking sheet in a single layer and freeze for about 1-2 hours until firm. Once solid, transfer them to an airtight container or a freezer-safe bag, layering parchment paper between each cheesecake. They can be frozen for up to 2 months. When you’re ready to dig in, thaw them overnight in the fridge for the best creamy results.
What if my cheesecake filling is lumpy?
It’s very common! If you encounter lumps in your filling, it’s likely from not beating the cream cheese thoroughly before adding other ingredients. To fix this, start by ensuring your cream cheese is at room temperature. Beat until completely smooth before gradually adding flour, sugar, and other ingredients. If you still have lumps, you can pass the mixture through a fine sieve to ensure a silky cheesecake filling.
Are there any dietary considerations I should keep in mind for my mini cheesecakes?
Absolutely! If you’re accommodating different dietary needs, consider using gluten-free biscuits for the crust and opting for dairy-free cream cheese to keep it inclusive. Check for allergies, particularly with toppings like nuts or specific fruits. Always ask your guests if they have any dietary restrictions to ensure everyone can enjoy your exquisite creamy mini cheesecakes!
How long can I freeze my mini cheesecakes for optimal taste and texture?
You can freeze your mini cheesecakes for up to 2 months. It’s best to label the container with the date so you can keep track. When ready to serve, move them to the fridge to thaw overnight. This ensures they remain deliciously creamy and perfect when you’re ready to indulge again!
Delight in Creamy Mini Cheesecakes with Custom Toppings
Ingredients
Equipment
Method
- Preheat your oven to 160°C (325°F), or 140°C for a fan oven. Line a 12-hole muffin tin with paper liners.
- Crush digestive biscuits into fine crumbs and combine them with melted butter, caster sugar, optional cinnamon, and a pinch of salt.
- Spoon the crust mixture into each muffin cup, packing it to create an even base. Bake for about 7 minutes until set.
- Beat room-temperature cream cheese until smooth. Gradually mix in flour, vanilla, sour cream, sugar, lemon zest, and salt, followed by eggs one at a time.
- Pour filling into each muffin cup, bake for about 20 minutes until edges are set but the center remains jiggle.
- Cool the cheesecakes in the tin for 1 hour, then transfer them to the refrigerator to chill for a minimum of 6 hours.
- Beat heavy cream with icing sugar until soft peaks form.
- Top each cheesecake with whipped cream and garnish with fresh berries and mint, if desired.
Leave a Reply