As I rummaged through my pantry the other day, I stumbled upon a bag of oats that had been inviting me to create something delicious. That’s when I decided it was time to whip up a batch of Easy Homemade Granola Bars—an ideal blend of chewy and crisp goodness. This satisfying snack not only caters to those craving something healthy but also proves to be remarkably versatile—perfect for busy schedules or leisurely weekend brunches. With options for nut-free and gluten-free versions, you can easily tailor these bars to suit your dietary needs without sacrificing taste. After just one bite, you’ll find yourself reaching for another, guaranteed! Curious about how to make these delights that are sure to become your new go-to snack? Let’s dive in!
Why are homemade granola bars amazing?
Healthy: These granola bars are packed with wholesome ingredients, meaning you can enjoy a guilt-free snack any time! Customizable: Tailor the flavor and texture to your liking; swap in your favorite nuts, seeds, or even chocolate chips. Easy to Make: With just a few simple steps, you can whip up a batch quickly, making them perfect for busy lives. Kid-Friendly: They are not only delicious but also a hit with kids, making snack time fun and nutritious. Perfect for Meal Prep: Make a big batch and store them for the week, ready to grab when hunger strikes!
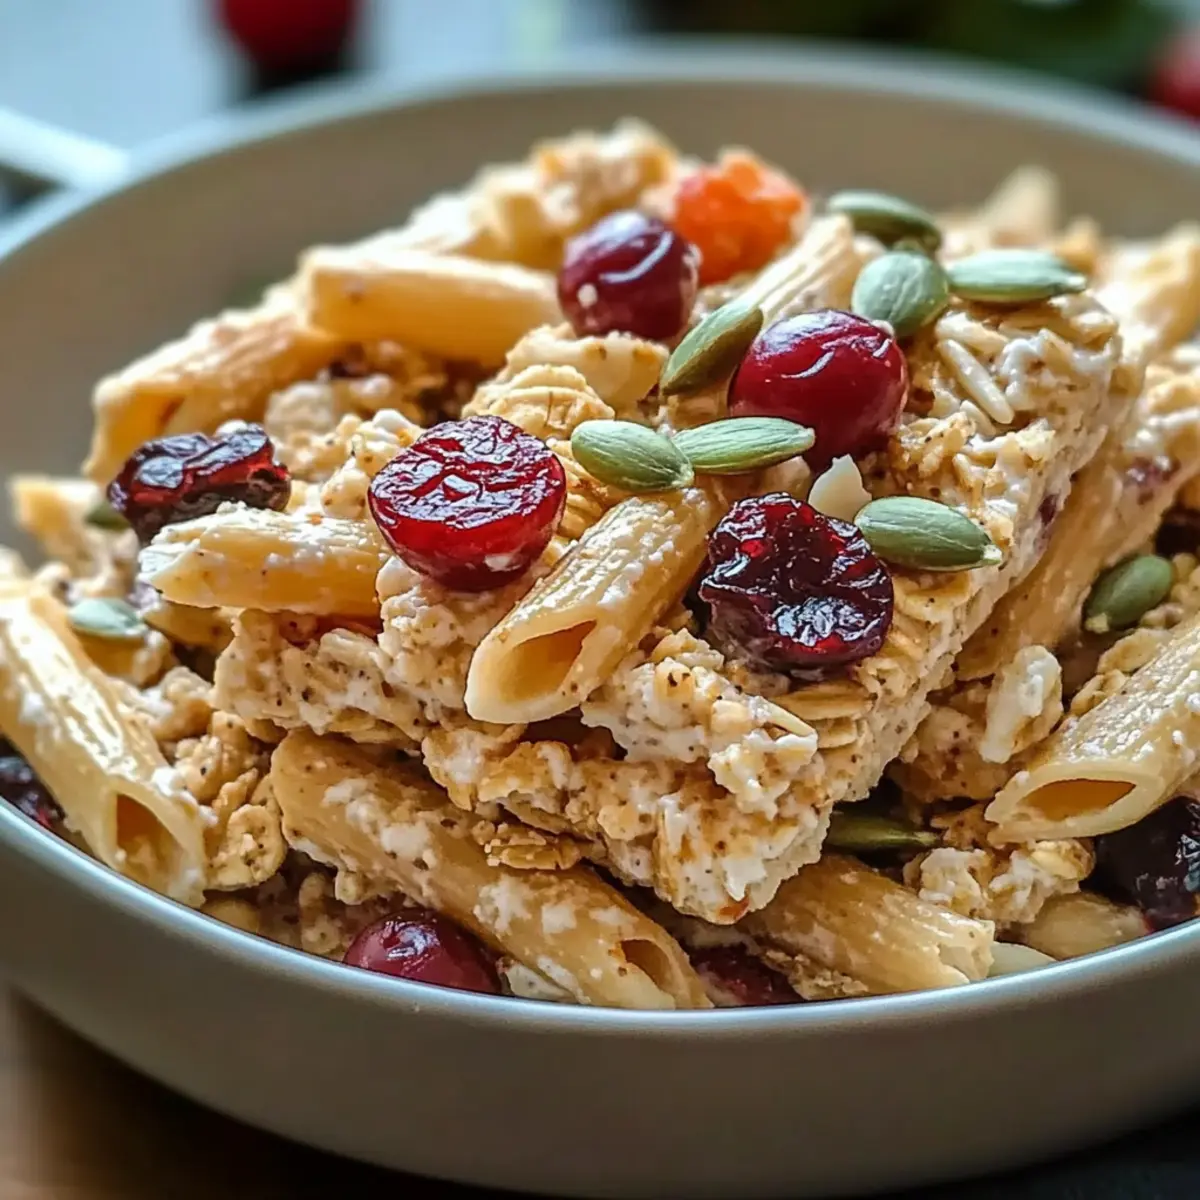
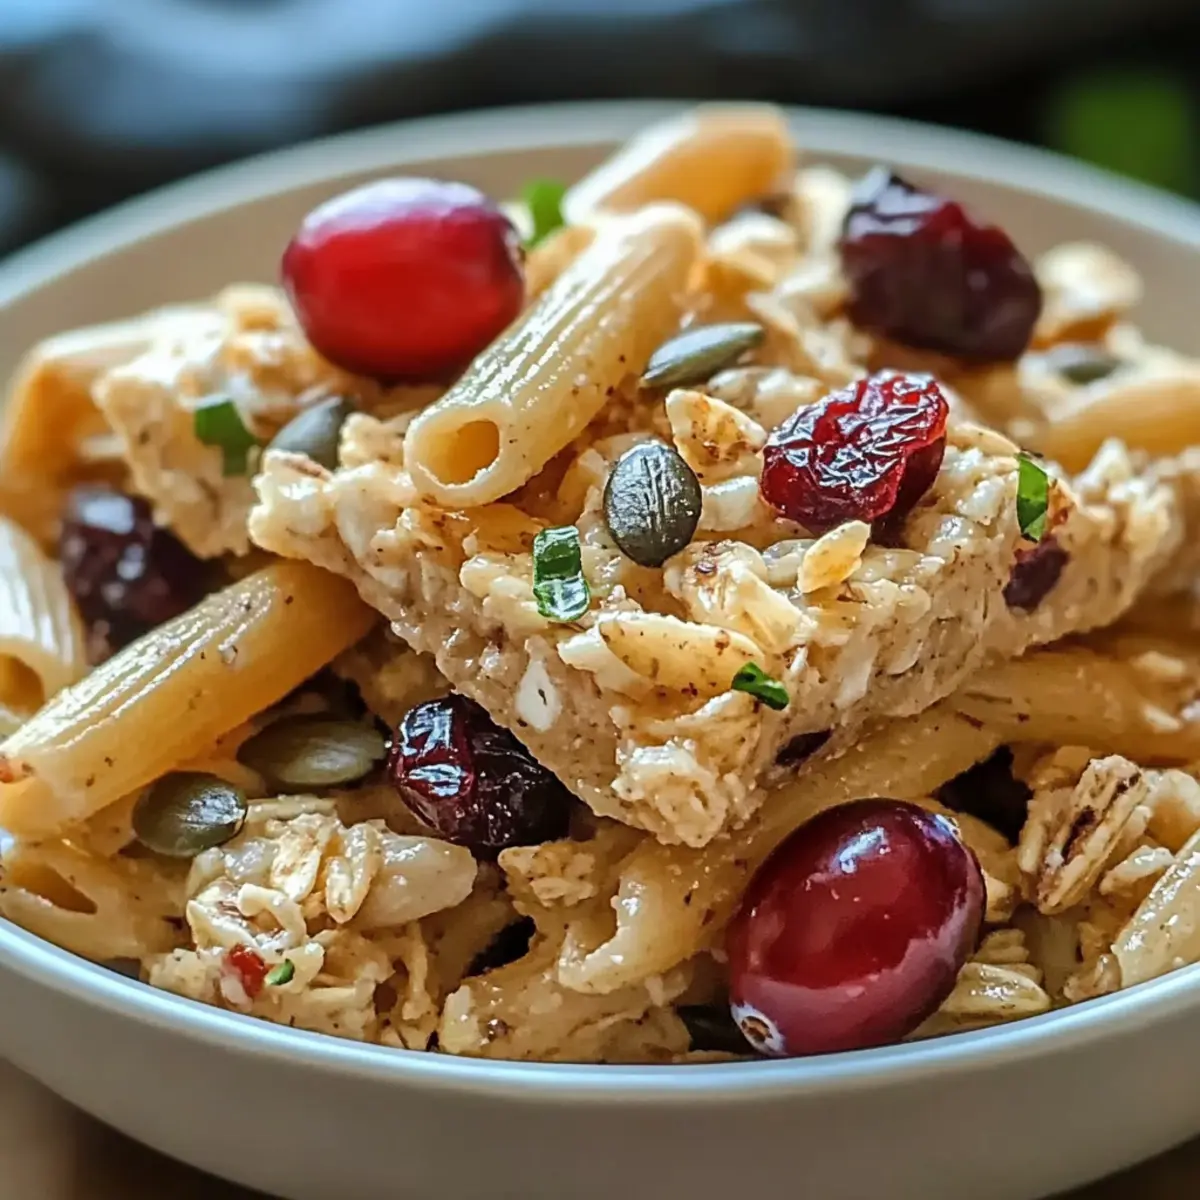
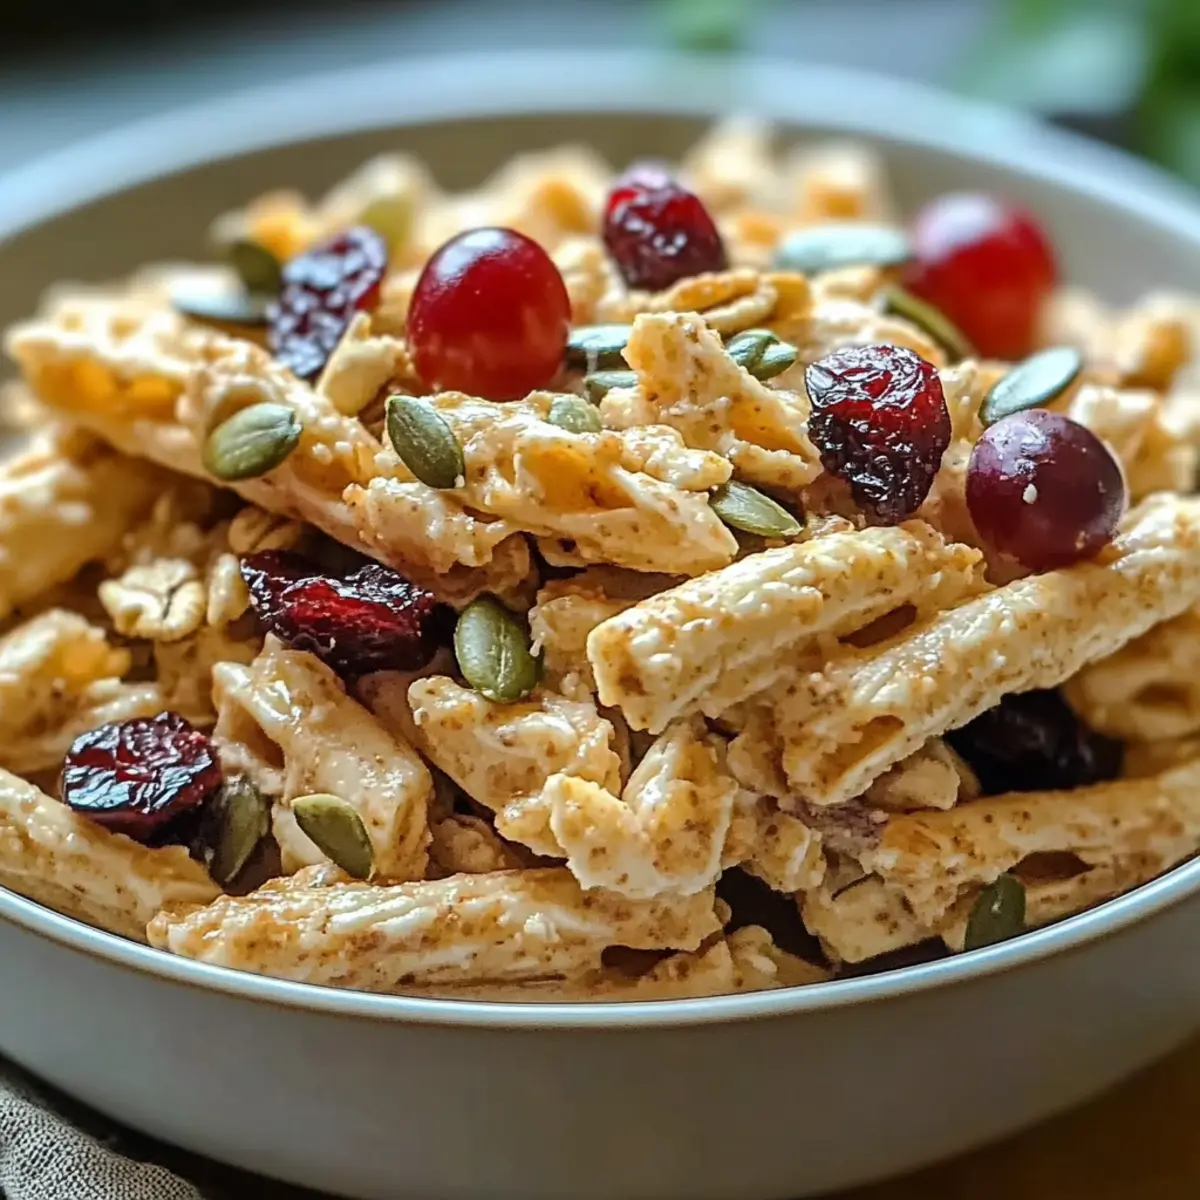
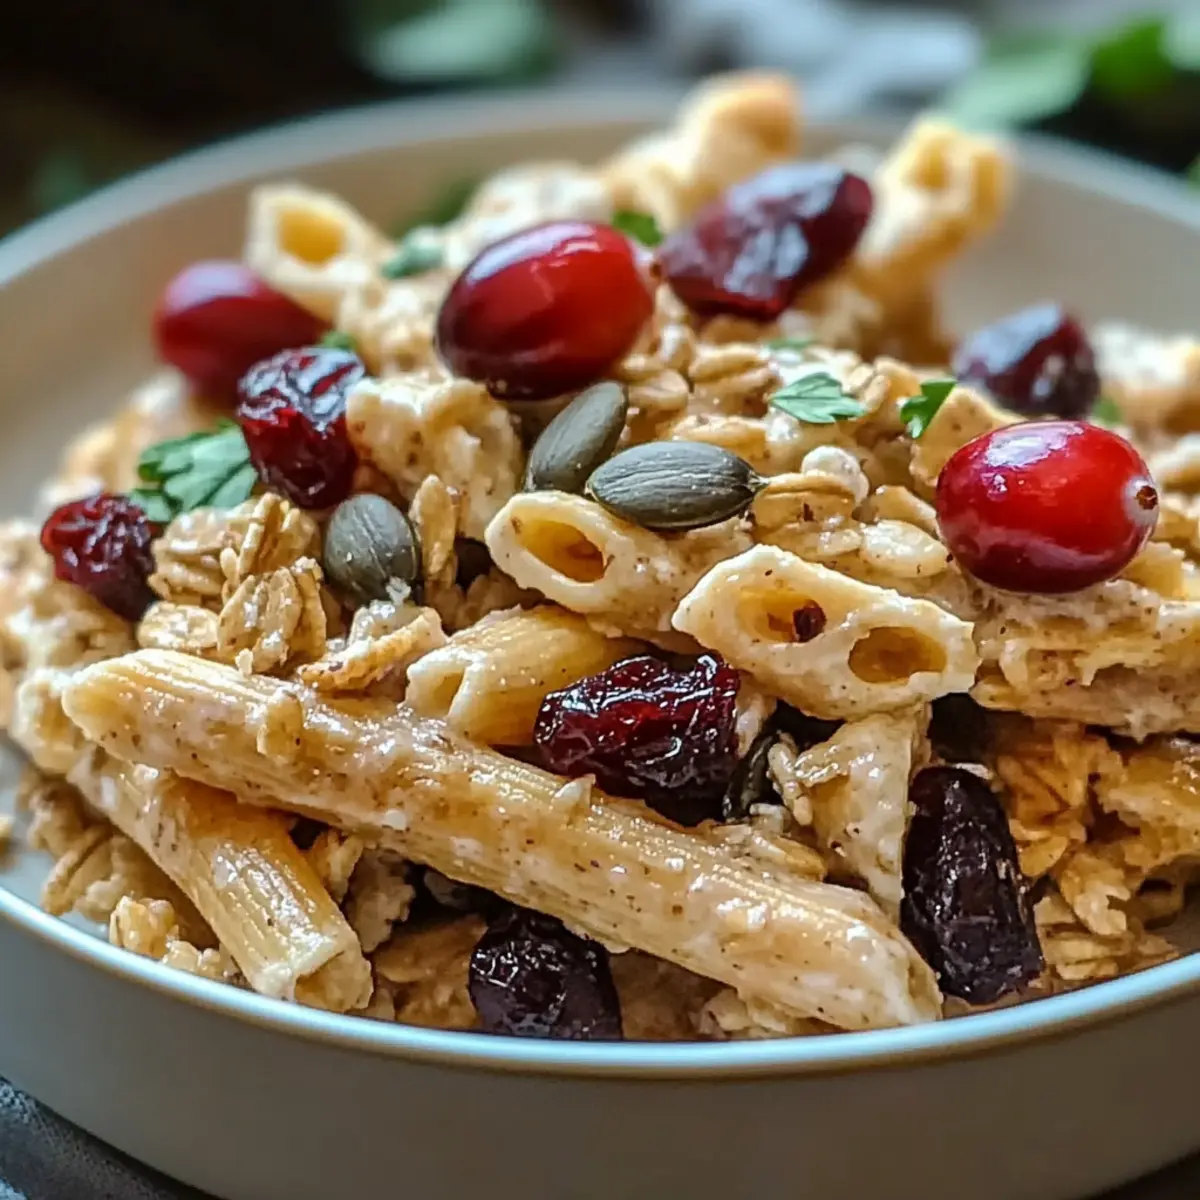
Greek Pasta with Feta & Olives Ingredients
For the Pasta
- Pasta – Choose your favorite type; penne or fusilli works best for holding sauce.
- Olive Oil – Adds richness; use quality extra virgin for enhanced flavor.
- Garlic – Fresh minced garlic elevates the dish with aromatic goodness.
For the Toppings
- Feta Cheese – Crumbled feta brings a creamy, tangy essence to the dish;, it’s a must for that Greek flair!
- Olives – Use Kalamata or green olives for a briny burst of flavor. Substitution: consider capers for a different tang.
- Cherry Tomatoes – Halved, they provide sweetness and brightness; feel free to substitute with sun-dried tomatoes for a richer flavor.
- Spinach or Arugula (optional) – A handful adds a nutritious touch and vibrant color.
For Seasoning
- Dried Oregano – A classic herb in Greek cuisine, enhancing the overall flavor profile.
- Salt & Pepper – Always season to taste; enhances all the delicious flavors beautifully.
These ingredients come together in a delightful harmony, making your Greek Pasta with Feta & Olives a dish you’ll want to repeat regularly!
Step‑by‑Step Instructions for Greek Pasta with Feta & Olives
Step 1: Preheat the Oven
Begin by preheating your oven to 350°F (175°C). While the oven warms up, gather two baking sheets and line them with parchment paper. This preparation ensures easy cleanup and helps the ingredients bake evenly as you create your Greek pasta with feta and olives.
Step 2: Cook the Pasta
In a large pot, bring salted water to a boil over high heat. Add your chosen pasta—penne or fusilli works wonderfully here. Cook the pasta until al dente, usually around 8-10 minutes, allowing it to retain some firmness. Drain the pasta and set it aside while you prepare the other ingredients.
Step 3: Sauté the Garlic
In a large skillet, heat a couple of tablespoons of quality extra virgin olive oil over medium heat. Add minced garlic and cook for 1-2 minutes, stirring occasionally until it becomes fragrant and golden, but be careful not to let it burn. This aromatic base will infuse your Greek pasta with rich flavor.
Step 4: Mix in the Vegetables
Introduce halved cherry tomatoes to the skillet, sautéing for another 3-4 minutes until they soften and burst. Then, fold in a handful of fresh spinach or arugula, cooking just until it wilts. The vibrant colors and flavors will make your Greek pasta truly inviting.
Step 5: Combine Ingredients
Add the cooked pasta to the vegetable mixture in the skillet. Sprinkle in crumbled feta cheese and your chosen olives. This step combines all the flavors into a cohesive dish, with the feta lending its creamy, tangy essence to the Greek pasta with feta and olives.
Step 6: Season & Serve
Season generously with dried oregano, salt, and pepper to taste, stirring gently to combine all ingredients. Cook for an additional 1-2 minutes until everything is heated through. Serve the pasta warm, garnished with extra feta and olives if desired, ready for a delightful meal.
What to Serve with Easy Homemade Granola Bars
These delightful bars are perfect for enhancing your snacking experience, whether you’re having a refreshing breakfast or a post-workout treat.
-
Greek Yogurt: The creamy texture pairs beautifully with the chewy granola bars, adding a protein boost for a satisfying meal.
-
Fresh Fruit Salad: A medley of berries and citrus adds a splash of color and refreshing sweetness that complements the rustic flavors of the bars.
-
Nut Butter Dip: A swirl of almond or peanut butter on the side elevates your snack time, enhancing the nutty undertones found in the bars.
-
Chia Seed Pudding: The smooth, rich texture offers a delightful contrast to the crunch of the granola bars, making for an indulgent but healthy choice.
-
Green Smoothie: A nutrient-packed blend of spinach, banana, and almond milk balances the sweetness of the bars while providing extra fiber and vitamins.
-
Herbal Tea: A warm cup of chamomile or mint tea creates a cozy atmosphere, perfectly matching the wholesome essence of homemade granola bars.
-
Homemade Trail Mix: Combine nuts, seeds, and dried fruits for a snack that mirrors the ingredients in the bars, creating a textural harmony that is irresistibly munchable.
How to Store and Freeze Granola Bars
- Room Temperature: Store these homemade granola bars in an airtight container for up to 1 week. This keeps them fresh and chewy, making them perfect for a quick snack or breakfast on the go.
- Fridge: For extended freshness, place the granola bars in the refrigerator, where they can last up to 2 weeks. This also enhances their firmness, making them easier to grab and enjoy.
- Freezer: If you want to prepare in advance, freeze the granola bars. Wrap them individually in plastic wrap, then place them in a freezer bag for up to 3 months. Simply thaw at room temperature before enjoying!
- Reheating: To revive any leftover bars, warm them in the microwave for 10-15 seconds. This will give them a soft, fresh-out-of-the-oven taste, making your granola bars irresistibly delicious again!
Expert Tips for Greek Pasta with Feta & Olives
-
Choose the Right Pasta: Select pasta shapes like penne or fusilli, which hold the sauce and toppings beautifully, enhancing your Greek pasta with feta and olives experience.
-
Fresh Ingredients Matter: Use fresh garlic and quality extra virgin olive oil to boost flavor depth significantly. Avoid dried herbs for the best results.
-
Don’t Overcook the Pasta: Cook your pasta until just al dente. Overcooking will lead to mushy texture, which can overshadow the delightful crunch of your vegetables.
-
Customize with Veggies: Feel free to incorporate other veggies like bell peppers or zucchini for added nutrition and flavor. This keeps your Greek pasta vibrant and exciting.
-
Experiment with Cheese: Although feta is classic, try adding a bit of goat cheese or ricotta for a creamier alternative. This can elevate your dish’s taste profile.
-
Garnish for Delight: When serving, sprinkle additional feta and olives on top to not only enhance the aesthetics but also to ensure each bite is bursting with flavor!
Make Ahead Options
These Easy Homemade Granola Bars are perfect for meal prep enthusiasts looking to save time on busy mornings! You can mix the dry ingredients (oats, nuts, seeds, and dried fruits) and store them in an airtight container for up to 3 days. The wet ingredients (nut butter and honey) can also be prepared and kept in the fridge for up to 24 hours. When you’re ready to bake, simply combine the mixtures, press them into the baking pan, and follow the final steps of baking and cooling. By prepping ahead, you’ll have delicious, nutritious snacks ready at a moment’s notice, ensuring that your homemade granola bars are just as delightful as if they were freshly made!
Variations & Substitutions for Greek Pasta with Feta & Olives
Feel free to mix things up and make this dish truly your own! The possibilities are endless, ensuring every bite is as delightful as the last.
- Whole Wheat Pasta: Swap out regular pasta for whole wheat for added fiber and a nuttier flavor. It’s a simple tweak that boosts nutrition without sacrificing taste.
- Feta Alternatives: Try goat cheese or ricotta if feta isn’t your favorite. Each cheese offers a unique creamy profile perfect for enhancing the overall dish.
- Add Protein: For a heartier meal, toss in cooked chicken or chickpeas. Both options add substance and make the pasta even more satisfying.
- Spicy Kick: Add red pepper flakes or diced jalapeños if you enjoy some heat. This brings a delightful warmth that complements the olives beautifully.
- Fresh Herbs: Incorporate fresh basil or mint for an aromatic twist. Their bright flavors contrast wonderfully with the richness of feta and olives.
- Zesty Lemon: A squeeze of fresh lemon juice just before serving adds a burst of acidity that really elevates the flavors of this pasta. It’s refreshing and uplifting!
- Oven-Baked Version: Consider baking the mixed pasta in the oven with added cheese on top for a delicious casserole-style dish. It’s a comfort food twist that everyone will love!
For more delicious ideas, you may want to try our Chicken Broccoli Pasta or indulge in the refreshing flavors of a Honeycrisp Apple Feta. Let your creativity shine through each variation!
Easy Homemade Granola Bars Recipe FAQs
What kind of oats should I use for granola bars?
Absolutely! For the best texture, use rolled oats—these provide the perfect balance of chewiness and help bind the bars. Instant oats can become too mushy, while steel-cut oats will take too long to soften.
How should I store homemade granola bars?
Store your bars in an airtight container at room temperature for up to 1 week. To extend their freshness, refrigerate them for up to 2 weeks. This way, they stay chewy and ready to grab when hunger strikes!
Can I freeze granola bars?
Very! To freeze your granola bars, wrap each piece individually in plastic wrap, then place them in a freezer bag. They’ll last up to 3 months in the freezer. When you’re ready to enjoy, simply thaw at room temperature for a tasty snack.
What if my granola bars come out crumbly?
If your bars are crumbly, it’s often due to not packing the mixture tightly enough in the baking pan. Next time, remember to really press the mixture down firmly before baking. Also, avoid overbaking; just monitor closely in the last few minutes to prevent them from becoming too dry.
Are there any allergy considerations I should keep in mind?
Definitely! If you or someone you’re serving has nut allergies, opt for seed butter like sunflower seed butter instead of nut butter. Always check labels on dried fruits and chocolates for potential allergens, and keep in mind that these bars can also be made gluten-free by ensuring your oats are certified gluten-free.
Can I customize the flavors of my granola bars?
Absolutely! Feel free to experiment! You can swap in your favorite nuts, seeds, or dried fruits. If you’re feeling adventurous, mix in some spices like cinnamon or vanilla extract to enhance the flavor profile.
Greek Pasta with Feta & Olives – A Flavorful Twist for Dinner
Ingredients
Equipment
Method
- Preheat your oven to 350°F (175°C) and line two baking sheets with parchment paper.
- In a large pot, bring salted water to a boil. Add the pasta and cook for 8-10 minutes until al dente. Drain and set aside.
- In a skillet, heat olive oil over medium heat. Add minced garlic and cook for 1-2 minutes until fragrant.
- Add halved cherry tomatoes to the skillet and sauté for 3-4 minutes. Stir in spinach or arugula until wilted.
- Combine the cooked pasta with the vegetables in the skillet. Add crumbled feta cheese and olives.
- Season with dried oregano, salt, and pepper. Cook for another 1-2 minutes and serve warm.
Leave a Reply