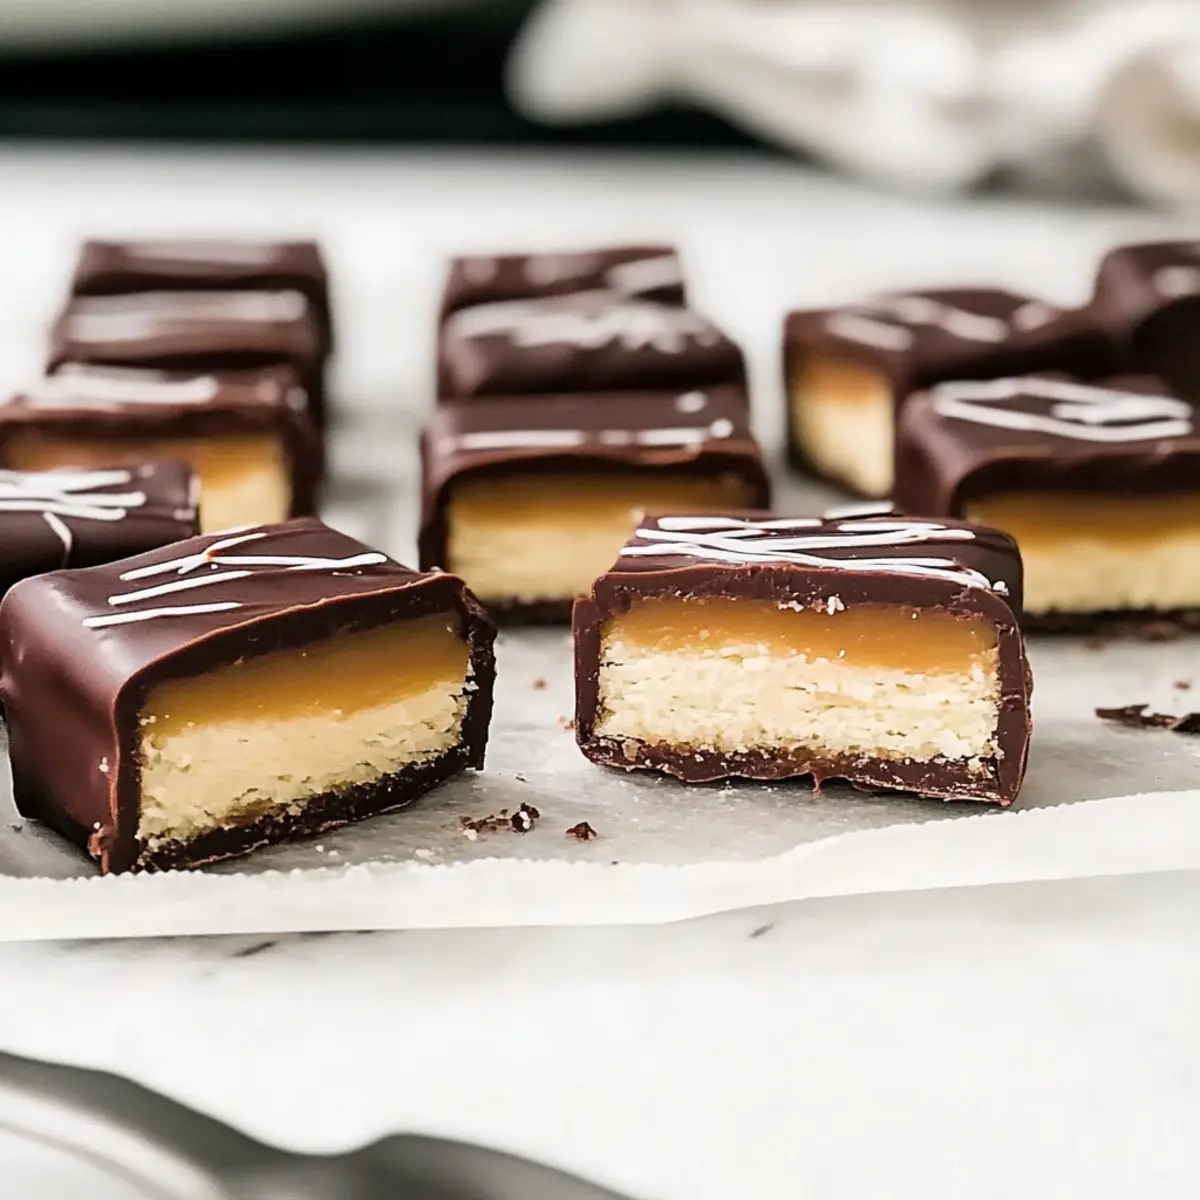
“Are you ready for a little kitchen magic? If you’ve ever craved the sweet and savory delight of a Twix bar without stepping into the store, then this homemade Twix Bars recipe is just for you! Not only is this a copycat version that will wow anyone who tastes it, but it’s also no-bake, making it an effortless treat to whip up. With layers of crunchy shortbread, gooey caramel, and luscious dark chocolate, these bars are the perfect balance of flavors and textures. Plus, they’re easily customizable for gluten-free needs. So, whether you’re looking for an indulgent snack or a standout dessert for your next gathering, these fabulous homemade Twix Bars are sure to impress. What flavor twist will you put on yours?”
Why Are Homemade Twix Bars Irresistible?
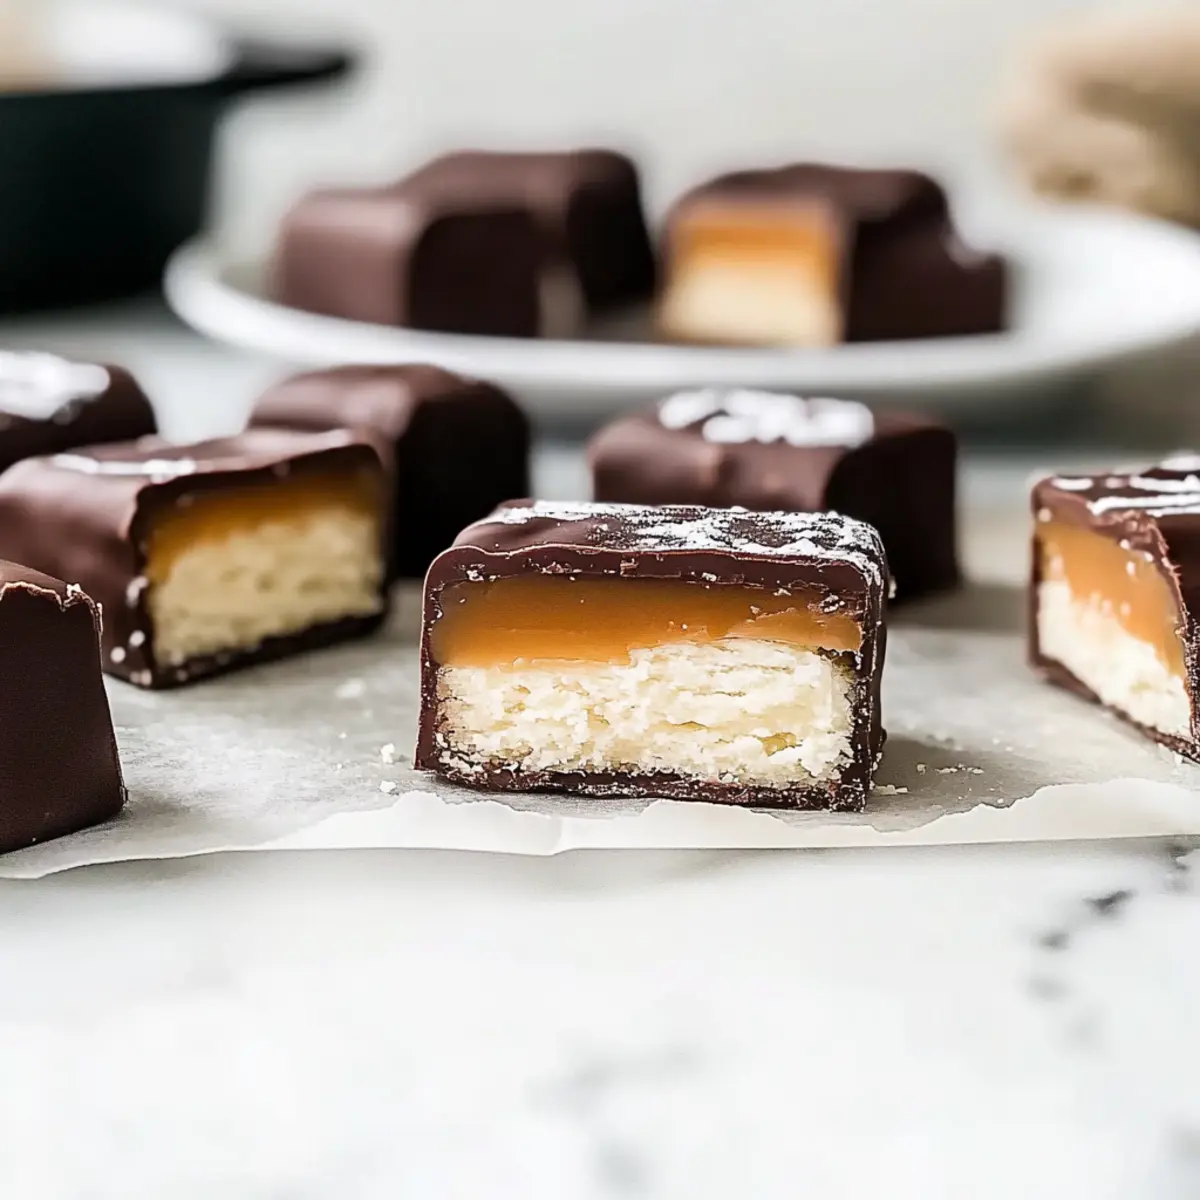
Decadence in Every Bite: These homemade Twix bars are a true delight, combining layers of buttery shortbread, rich caramel, and smooth chocolate for an unforgettable experience.
No Bake, No Hassle: With a no-bake approach, you’re just minutes away from savoring these treats without turning on the oven, making them perfect for spontaneous cravings!
Customizable Creations: Want to get creative? Substitute with gluten-free flour or your favorite chocolate, and even add nuts for an extra crunch.
Perfect for Sharing: Whether at a gathering or cozy night in, these bars are guaranteed to impress friends and family, making them a definite crowd-pleaser.
Indulge today and perhaps serve alongside a refreshing dish like Homemade Chicken Salad or some delightful Maple Donut Bars to complete your sweet spread!
Homemade Twix Bars Ingredients
For the Shortbread
• All-purpose flour – It provides the foundation for a crispy base; switch to a gluten-free flour blend for a gluten-free version.
• Granulated sugar (1/3 cup) – Sweetens the shortbread and enhances its flavor without substitutions.
• Unsalted butter (10 tablespoons) – Delivers richness; using unsalted gives you control over the final saltiness.
For the Caramel
• Granulated sugar (1 cup) – Essential for sweetness and caramelization; no substitutions recommended.
• Light corn syrup (1/4 cup) – Helps prevent crystallization; brown rice syrup or golden syrup can be used instead.
• Heavy cream (1/2 cup) – Adds creaminess to the caramel; coconut cream could be a great dairy-free substitute.
• Butter (6 tablespoons) – Adds richness to the caramel layer; again, go for unsalted for balanced flavor.
• Vanilla extract (1 teaspoon) – Enhances the flavor of your caramel; no substitutes needed.
For the Chocolate Coating
• Chocolate chips (12 ounces) – The perfect coating for the bars; choose semi-sweet, bittersweet, or milk chocolate based on your taste.
• Coconut oil – Helps achieve a smooth consistency when melting the chocolate; feel free to swap with another neutral oil if desired.
These Homemade Twix Bars are not only delicious but also a fun project to bring into your kitchen—let your creativity shine! Enjoy this delectable treat!
Step‑by‑Step Instructions for Homemade Twix Bars
Step 1: Prepare Shortbread Base
Start by beating 10 tablespoons of unsalted butter and 1/3 cup of granulated sugar in a mixing bowl for about 2-3 minutes until light and fluffy. Gradually mix in 1 cup of all-purpose flour and a pinch of salt until combined. Form the dough into a disc, wrap it in plastic wrap, and chill in the refrigerator for 30 minutes to firm up.
Step 2: Bake Shortbread
Preheat your oven to 350°F (175°C). Once chilled, roll out the dough and transfer it to a parchment-lined baking dish, pressing it evenly. Poke holes all over the surface with a fork to prevent bubbling and bake for 25 minutes. Watch for a golden-brown color, signaling that your shortbread base is ready to cool.
Step 3: Make Caramel
In a medium saucepan, combine 1 cup of granulated sugar, 1/4 cup of light corn syrup, 6 tablespoons of unsalted butter, and 1/2 cup of heavy cream. Heat over medium heat, stirring constantly for 15-20 minutes until it thickens and reaches a temperature of 240°F (soft-ball stage). Once ready, remove from heat and stir in 1 teaspoon of vanilla extract and a pinch of salt for enhanced flavor.
Step 4: Assemble Bars
Pour the warm caramel evenly over the cooled shortbread base, using a spatula to smooth the surface. Allow the combined layers to chill in the refrigerator for about 1 hour, or until the caramel has set firmly.
Step 5: Slice Bars
After chilling, lift the set Twix bars out of the pan using the parchment overhang. Use a sharp knife to cut the bars into bite-sized rectangles. For easier slicing, refrigerate them again for 10-15 minutes to ensure they’re firm.
Step 6: Coat with Chocolate
In a microwave-safe bowl, melt 12 ounces of chocolate chips along with 1 tablespoon of coconut oil until smooth, stirring every 30 seconds. Dip each bar into the melted chocolate, coating it thoroughly. Transfer to a parchment-lined sheet and refrigerate the bars until the chocolate sets, which usually takes about 30 minutes.

What to Serve with Irresistible Homemade Twix Bars
Elevate your dessert experience with delightful pairings that accentuate the sweet and crunchy layers of these homemade treats!
- Creamy Vanilla Ice Cream: A classic accompaniment; its rich creaminess balances the sweet, indulgent flavors of the Twix bars.
- Fresh Berries Medley: Juicy strawberries and tart raspberries add a refreshing touch, cutting through the sweetness for a well-rounded dessert.
- Espresso or Coffee: A warm cup of espresso enhances the chocolate notes, creating a comforting pairing perfect for an afternoon pick-me-up.
Serve these bars with a light, citrusy salad made with mixed greens, oranges, and a honey vinaigrette to refresh the palate. The brightness of the oranges offers a delightful contrast, letting the decadent bars shine. Enjoy each bite with a complimentary beverage like sparkling water to cleanse the taste buds between each indulgent morsel.
How to Store and Freeze Homemade Twix Bars
-
Fridge: Store your homemade Twix bars tightly covered in the refrigerator for up to 5 days to maintain freshness and prevent them from drying out.
-
Freezer: For longer storage, wrap each bar securely in plastic wrap and place them in an airtight freezer bag. They can be frozen for up to 3 months without losing flavor.
-
Thawing: When you’re ready to enjoy a frozen Twix bar, simply transfer them to the fridge to thaw overnight or at room temperature for about 30 minutes.
-
Reheating: For a warm treat, you can briefly microwave the bars for about 10 seconds to soften the chocolate and caramel slightly. Enjoy your delightful homemade Twix bars!
Expert Tips for Homemade Twix Bars
-
Temperature Matters: Ensure the caramel doesn’t exceed 240°F to prevent burning; use a candy thermometer for accuracy.
-
Chill for Success: Chill the shortbread before caramel topping for a better layer adhesion; it helps each bite hold together nicely.
-
Cut with Care: Use a sharp knife to slice the bars; refrigerating them for a bit first maintains clean edges and a beautiful presentation.
-
Room Temperature Chocolate: Let melted chocolate sit at room temperature before dipping; this prevents the chocolate from melting the caramel layer beneath.
-
Be Creative: Don’t hesitate to experiment—try adding nuts or alternate chocolate types to make your homemade Twix bars uniquely yours!
Make Ahead Options
These Homemade Twix Bars are perfect for meal prep enthusiasts! You can prepare the shortbread base and caramel layers up to 24 hours in advance for a time-saving treat. To do this, wrap the cooled shortbread tightly and store it in the refrigerator. For the caramel, let it cool after cooking, then pour it over the shortbread and chill until set. Before serving, simply dip the bars in melted chocolate and refrigerate for another 30 minutes to set. This way, you’ll maintain that delightful texture and flavor of fresh Homemade Twix Bars, making them an ideal solution for busy weeknights or sweet cravings!
Homemade Twix Bars Variations
Customize your homemade Twix bars to suit your cravings and dietary preferences—get creative!
-
Gluten-Free: Replace all-purpose flour with a gluten-free flour blend to enjoy the same delicious texture without the gluten.
-
Nutty Twist: Sprinkle crushed nuts, like almonds or hazelnuts, on top of the caramel layer before it sets for a delightful crunch.
-
Dairy-Free: Use coconut cream in place of heavy cream and substitute dairy chocolate with dairy-free chocolate chips for a creamy, vegan version.
-
Flavorful Chocolate: Experiment with different chocolate varieties, like dark, semi-sweet, or even white chocolate, to adjust sweetness and flavor richness.
-
Spicy Kick: Add a pinch of chili powder or cayenne pepper to the chocolate coating for a surprising heat that complements the sweetness beautifully.
-
Caramel Variants: Try flavored extracts like almond or mint in the caramel for a unique twist that enhances the overall taste profile.
-
Fruit Infusion: Add a layer of fruit preserves or raspberry puree on top of the caramel before adding the chocolate for a refreshing burst of flavor.
-
Extra Sweetness: Drizzle melted peanut butter or almond butter over the chocolate coating for an intensified nutty flavor that brings added richness.
Don’t forget to enjoy your homemade Twix bars alongside a delicious side like Homemade Chicken Salad or some scrumptious Maple Donut Bars to round out your sweet snack experience!
Homemade Twix Bars Recipe FAQs
How do I choose the best ingredients for Homemade Twix Bars?
Absolutely! Selecting fresh ingredients is key to making the best homemade Twix bars. For the shortbread, look for all-purpose flour that is finely milled—this helps achieve that perfect crunchy texture. For the caramel, granulated sugar should be free of clumps. And when it comes to chocolate, opt for high-quality chips. The richer the chocolate, the more it will elevate your bars!
What’s the best way to store my Homemade Twix Bars?
Very! To keep your homemade Twix bars fresh, store them tightly covered in the refrigerator for up to 5 days. This prevents them from drying out and ensures the caramel stays gooey. I often line a container with parchment paper before layering the bars to avoid sticking and make it easier to grab one when cravings hit!
Can I freeze my Homemade Twix Bars for later?
Absolutely! Freezing is a great option to extend the life of your homemade Twix bars. Wrap each bar tightly in plastic wrap and place them in an airtight freezer bag. They can be stored in the freezer for up to 3 months. When you’re ready to indulge, just transfer the bars to the fridge to thaw overnight. If you need them faster, leaving them at room temperature for about 30 minutes works wonders, too!
What if my caramel doesn’t come out smooth?
The more the merrier! If your caramel turns out grainy or crystallized, don’t worry; it happens to even the best of us. To troubleshoot, make sure you stir constantly while cooking. Also, keep an eye on the temperature; never let it exceed 240°F. If it does, try adding a splash of heavy cream and whisking vigorously until it smooths out. Remember that practice makes perfect, so don’t get discouraged!
Are there any dietary considerations for my Homemade Twix Bars?
Very much! If you’re considering dietary needs, you can easily make these bars gluten-free by substituting all-purpose flour with a gluten-free blend. For dairy-free options, use coconut cream in place of heavy cream and vegan butter. Just be sure to check your chocolate chips for dairy ingredients, as some brands offer dairy-free varieties that would work wonderfully in this recipe.
Can I add nuts or other ingredients to my Homemade Twix Bars?
Absolutely! Get creative by adding crushed nuts, like almonds or pecans, atop the caramel layer before it sets. It adds a delightful crunch and a nutty flavor that pairs perfectly with the sweet layers. You could also experiment with different types of chocolate or even add a sprinkle of flaky sea salt on top for an extra treat—the possibilities are endless!

Decadent Homemade Twix Bars for Sweet Indulgence
Ingredients
Equipment
Method
- Beat the butter and sugar in a mixing bowl for 2-3 minutes until light and fluffy. Gradually mix in the flour and a pinch of salt, forming a disc of dough. Wrap in plastic and chill for 30 minutes.
- Preheat your oven to 350°F (175°C). Roll out the chilled dough, transfer it to a baking dish, and poke holes. Bake for 25 minutes until golden brown.
- In a saucepan, combine sugar, corn syrup, butter, and cream. Heat over medium, stirring for 15-20 minutes until it thickens and reaches 240°F. Stir in vanilla extract and pinch of salt.
- Pour warm caramel over the cooled shortbread and smooth with a spatula. Chill for 1 hour or until set.
- Lift the bars out using parchment and cut into rectangles. Refrigerate for 10-15 minutes for easier slicing.
- Melt chocolate chips with coconut oil in a microwave-safe bowl. Dip each bar in chocolate, coat thoroughly, and refrigerate until chocolate sets (about 30 minutes).
Leave a Reply