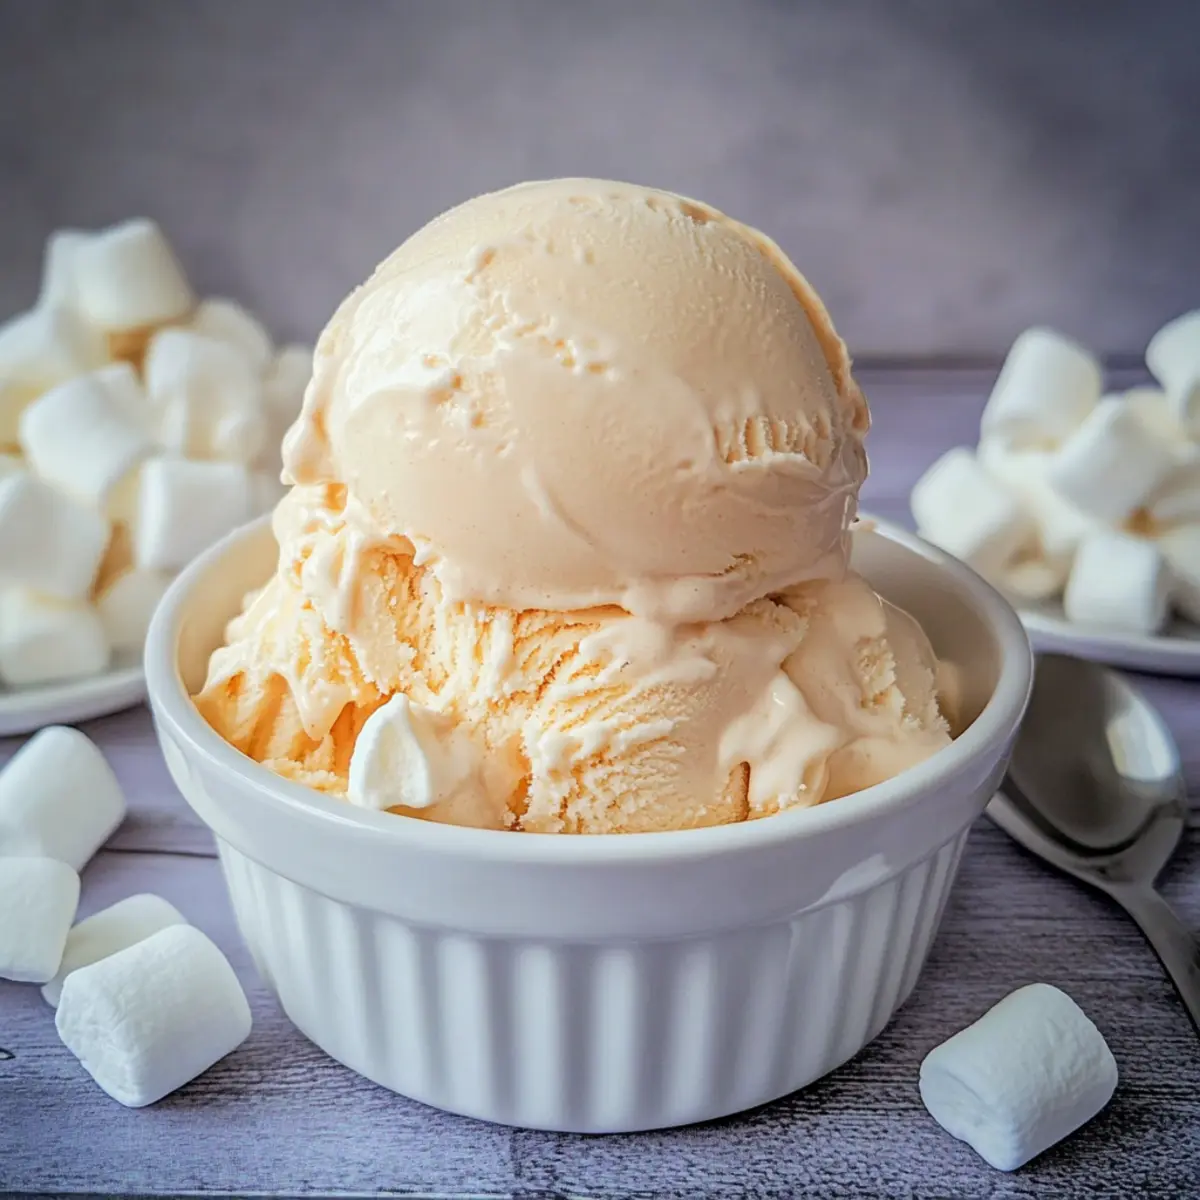
As the sun dips low and the air fills with hints of smoke and sweetness, a childhood memory bubbles to the surface: roasting marshmallows around a crackling campfire. That nostalgic flavor inspired my homemade toasted marshmallow ice cream, a creamy delight that’s easy to whip up and perfect for summer gatherings. This marshmallow ice cream not only brings joy with every scoop but also serves as a charming way to impress guests or treat yourself after a long day. Plus, it’s a fun project to involve the kids in, making it a great family activity. Why settle for store-bought when you can craft this dreamy scoop of bliss at home? Are you ready to dive into a delicious tasting journey that rekindles those campfire vibes?
Why Is Marshmallow Ice Cream So Irresistible?
Nostalgic flavors come to life with each creamy scoop, evoking wonderful memories of summer nights and campfires. Easy to make, this recipe requires no fancy gadgets, making it perfect for novice cooks and seasoned chefs alike. Kid-friendly and fun, it’s an engaging project that turns your kitchen into a playful space. Versatile by nature, you can customize it with your favorite mix-ins, like chocolate chips or crushed graham crackers, to create your own s’mores twist. Serve it up topped with chocolate syrup for a truly delightful dessert after BBQs or family dinners, much like my Southern Spaghetti Bake experience! Why not raise the bar and impress your guests with this homemade treat?
Marshmallow Ice Cream Ingredients
For the Ice Cream Base
- Milk – Provides a creamy texture; opt for whole milk for the best results.
- Tapioca Starch – Acts as a thickening agent to enhance creaminess; arrowroot powder can be an alternative.
- Thickened Cream – Adds richness; heavy cream also works beautifully here.
- White Sugar – Sweetens the mixture easily; stick with white sugar to avoid flavor alterations.
- Glucose Syrup – Ensures a smoother texture; light corn syrup can substitute if needed.
- Vanilla Essence – Intensifies flavor; choose natural for a more authentic taste.
For the Marshmallow Flavor
- Marshmallows – The star ingredient giving that signature toasted flavor; consider using colored marshmallows for a fun twist.
This homemade marshmallow ice cream will make your summer gatherings unforgettable!
Step‑by‑Step Instructions for Toasted Marshmallow Ice Cream
Step 1: Prepare Tapioca Mixture
In a small bowl, whisk together the tapioca starch with a couple of tablespoons of milk until smooth, creating a slurry. This will help thicken your marshmallow ice cream later. Set this mixture aside while you focus on the next steps.
Step 2: Heat Mixture
In a medium pot over medium-low heat, combine the remaining milk, thickened cream, white sugar, and glucose syrup. Stir continuously until the sugar completely dissolves, and the mixture is warm but not boiling, about 5 minutes. Once heated, slowly stir in the tapioca slurry and remove from heat to cool, preventing lumps.
Step 3: Toast Marshmallows
Preheat your grill or oven to medium-high. Spread the marshmallows evenly on a baking tray. Toast one side until golden brown, about 2-3 minutes, keeping a close watch to avoid burning. Once one side is toasted, carefully flip the marshmallows and toast the other side until equally golden, achieving that delicious campfire flavor.
Step 4: Blend Ingredients
After cooling for at least 15 minutes, combine the cooled ice cream mixture and the toasted marshmallows in a large mixing bowl. Using an immersion blender, blend until the mixture is smooth and the marshmallows are fully incorporated into the ice cream base. Strain this creamy mixture into a heat-proof container and chill in the refrigerator for at least 4 hours.
Step 5: Churn Ice Cream
Prepare your ice cream storage container by chilling it in the freezer for 30 minutes before use. If you have a self-churning machine, turn it on about 10 minutes in advance to get it cold. Blend the chilled mixture once more before pouring it into the machine, and churn until it reaches a soft serve consistency, which usually takes about 20-30 minutes.
Step 6: Freeze
Transfer the churned toasted marshmallow ice cream into your previously chilled storage container. Spread it evenly and cover tightly with a lid. Place the container in the freezer for about 4 hours or until firm. Your homemade marshmallow ice cream will be ready to scoop and enjoy, evoking those delightful campfire vibes with every bite!
Marshmallow Ice Cream Variations
Feel free to explore these delightful twists on your homemade marshmallow ice cream for a flavor adventure that might surprise your taste buds!
-
Dairy-Free: Substitute whole milk and cream with coconut milk and coconut cream for a rich, tropical flavor. The creamy texture remains inviting!
-
S’mores Inspired: Add crushed graham crackers and chocolate chips to create a s’mores experience in your ice cream. It’s a nostalgic nod to summer campfire nights!
-
Nutty Delight: Include crushed almonds or pecans for a delightful crunch and nutty flavor. Not only does it add texture, but it also elevates the flavor profile.
-
Chocolate Swirl: Fold in a ribbon of chocolate fudge or sauce for a chocolaty twist that beautifully complements the marshmallow notes. Chocolate and marshmallow? A match made in heaven!
-
Fruit Fusion: Toss in some fresh berries or slices of ripe bananas for a refreshing fruity touch. The sweetness of the fruit pairs wonderfully with the creaminess of the base.
-
Spicy Kick: Mix in a spoonful of cinnamon or a hint of cayenne pepper for a surprising heat that contrasts with the sweetness of the marshmallow. This twist takes your taste buds on a wild ride!
-
Mini Marshmallow Fun: Use mini marshmallows instead of larger ones to change the texture; they mix in delightfully for a pop of sweetness in each scoop.
-
Vanilla Bean Heaven: Swap the regular vanilla essence for fresh vanilla beans or a premium vanilla extract for a richer, more authentic flavor. This small change packs a punch in gourmet experience.
So go ahead—let your imagination run wild! Each variation not only celebrates the joy of homemade ice cream but invites you to recreate that campfire feeling right in your kitchen. If you’re also interested in other delightful desserts, consider trying out my creamy Chocolate Orange Creamsicle or the comforting flavors of Potatoes Rosemary Cream for even more delicious adventures.
Expert Tips for the Best Marshmallow Ice Cream
-
Perfect Toasting: Watch the marshmallows while toasting as they can burn easily; a golden brown on both sides ensures that delicious campfire flavor without bitterness.
-
Consistency Check: If the mixture gets too thick before churning, use an immersion blender to achieve a smoother texture, ensuring your marshmallow ice cream turns out creamy and delightful.
-
Sugar Substitutes: Stick with white sugar for easy dissolving; using alternatives can affect the flavor profile of your marshmallow ice cream, so choose wisely!
-
Flavor Variations: Want something different? Consider adding a splash of flavored extracts like almond or coconut in the mix for a unique twist everyone will love.
-
Texture Preference: If you prefer a milder marshmallow flavor in your ice cream, try reducing the amount of marshmallows by half, allowing other flavors to shine as well.
Make Ahead Options
No need to rush on the day you want to serve this scrumptious toasted marshmallow ice cream! You can prepare the ice cream base up to 24 hours in advance. Start by making the tapioca mixture and toasting the marshmallows, then combine and chill the ice cream mix in the refrigerator for at least 4 hours, or overnight for the best results. When you’re ready to enjoy it, simply churn the mixture and freeze it for about 4 hours until firm. For optimal flavor and texture, cover it tightly in an airtight container to prevent ice crystals. This way, your marshmallow ice cream will stay just as delightful, saving you precious time on busy summer nights!
How to Store and Freeze Marshmallow Ice Cream
Fridge: Store the marshmallow ice cream in an airtight container in the fridge for up to 3 days. Keep in mind that it may lose some of its creaminess while stored.
Freezer: For long-term storage, keep your marshmallow ice cream in an airtight freezer-safe container. It can last up to 4 weeks while maintaining optimal flavor and texture.
Reheating: If you find your marshmallow ice cream has hardened too much, let it sit at room temperature for about 10 minutes before scooping or soften it slightly in the microwave for 5-10 seconds.
Serving: For the best experience, always store the ice cream covered to prevent ice crystals from forming, ensuring a smooth and delightful scoop every time!
What to Serve with Toasted Marshmallow Ice Cream?
A delightful dessert deserves equally enchanting companions to create the perfect summer gathering.
-
Graham Cracker Crust Pie: The crunchiness of a graham cracker pie crust matches the creamy ice cream well, creating a nostalgic s’mores vibe.
-
Fresh Berries: Juicy strawberries or raspberries add a burst of freshness that beautifully contrasts the rich flavors of the ice cream.
-
Chocolate Sauce: A drizzle of warm chocolate sauce brings an indulgent, heavenly touch that enhances the sweet marshmallow goodness.
-
Roasted Almonds: Add a delightful crunch and earthy flavor; their nuttiness complements the sweet, toasted notes of the ice cream beautifully.
-
Mint Leaves: A sprig of fresh mint elevates presentation and offers a refreshing pop; the bright green sets off the creamy white of the ice cream perfectly.
-
Iced Coffee: Cool and refreshing, an iced coffee pairs wonderfully and can balance the sweetness of your marshmallow ice cream after a hearty meal.
-
S’mores Brownies: Rich, fudgy brownies layered with marshmallow fluff tie in perfectly, creating a decadent dessert experience that feels like a campfire classic.
-
Homemade Waffles: Fluffy waffles serve as a unique base for your ice cream, adding a delightful texture and making it feel like a breakfast treat.
-
Peanut Butter Sauce: Creamy and indulgent, this sauce adds a rich dimension, enhancing the overall flavor profile of your marshmallow ice cream.
Toasted Marshmallow Ice Cream Recipe FAQs
What type of milk should I use for the best texture in my marshmallow ice cream?
I recommend using whole milk (around 3.5% fat) for a creamy and smooth texture. This not only enhances the flavor but also creates a luscious mouthfeel that makes your toasted marshmallow ice cream irresistible!
How long can I store my homemade marshmallow ice cream?
To maintain the best flavor and texture, store your marshmallow ice cream in an airtight container in the freezer for up to 4 weeks. After that, while it’s still safe to eat, the quality may start to decline.
Can I freeze marshmallow ice cream, and if so, how?
Absolutely! To freeze, transfer your churned marshmallow ice cream into a freezer-safe, airtight container. Press a piece of parchment paper directly onto the surface of the ice cream before sealing it tightly to prevent ice crystals from forming. It will stay fresh for about 4 weeks but is best enjoyed within 2 weeks for optimal taste and texture.
What are some common issues when making marshmallow ice cream, and how can I troubleshoot them?
One common issue is that the mixture might get too thick before churning. If this happens, simply use an immersion blender to whip it back to a smooth consistency, making sure there are no lumps. Additionally, if the marshmallows burn too quickly while toasting, try keeping a close eye on them; they can turn from golden to burnt in seconds—so better safe than sorry!
Are there any dietary considerations I should keep in mind?
Yes! If you’re serving this ice cream to guests with food allergies or dietary restrictions, make sure to let them know that the recipe contains dairy and sugar. For those who are vegan, consider substituting the milk and cream with plant-based alternatives, and swap marshmallows for a vegan-friendly version. It’s all about customization and making sure everyone enjoys!
What type of marshmallows should I use for the best flavor?
I suggest sticking with regular marshmallows for that classic toasted flavor in your ice cream. However, if you want to make it visually fun, try using colored marshmallows! Just be aware that flavored or artisan marshmallows can impact the overall taste, so choose according to your flavor preference.
Marshmallow Ice Cream: Your New Favorite Summer Indulgence
Ingredients
Equipment
Method
- Prepare Tapioca Mixture: In a small bowl, whisk together the tapioca starch with a couple of tablespoons of milk until smooth, creating a slurry. Set aside.
- Heat Mixture: In a medium pot, combine the remaining milk, thickened cream, white sugar, and glucose syrup over medium-low heat. Stir continuously until dissolved, about 5 minutes. Slowly stir in the tapioca slurry and remove from heat.
- Toast Marshmallows: Preheat your grill or oven to medium-high. Spread marshmallows on a baking tray and toast until golden brown on one side, about 2-3 minutes. Flip and toast the other side.
- Blend Ingredients: After cooling for at least 15 minutes, combine the ice cream mixture and toasted marshmallows in a large bowl. Blend until smooth and strain into a heat-proof container. Chill in the fridge for at least 4 hours.
- Churn Ice Cream: Chill your ice cream storage container for 30 minutes. Blend the chilled mixture again and pour into the ice cream machine. Churn until it reaches a soft serve consistency, 20-30 minutes.
- Freeze: Transfer the churned ice cream into the container, cover tightly, and freeze for about 4 hours or until firm.
Leave a Reply