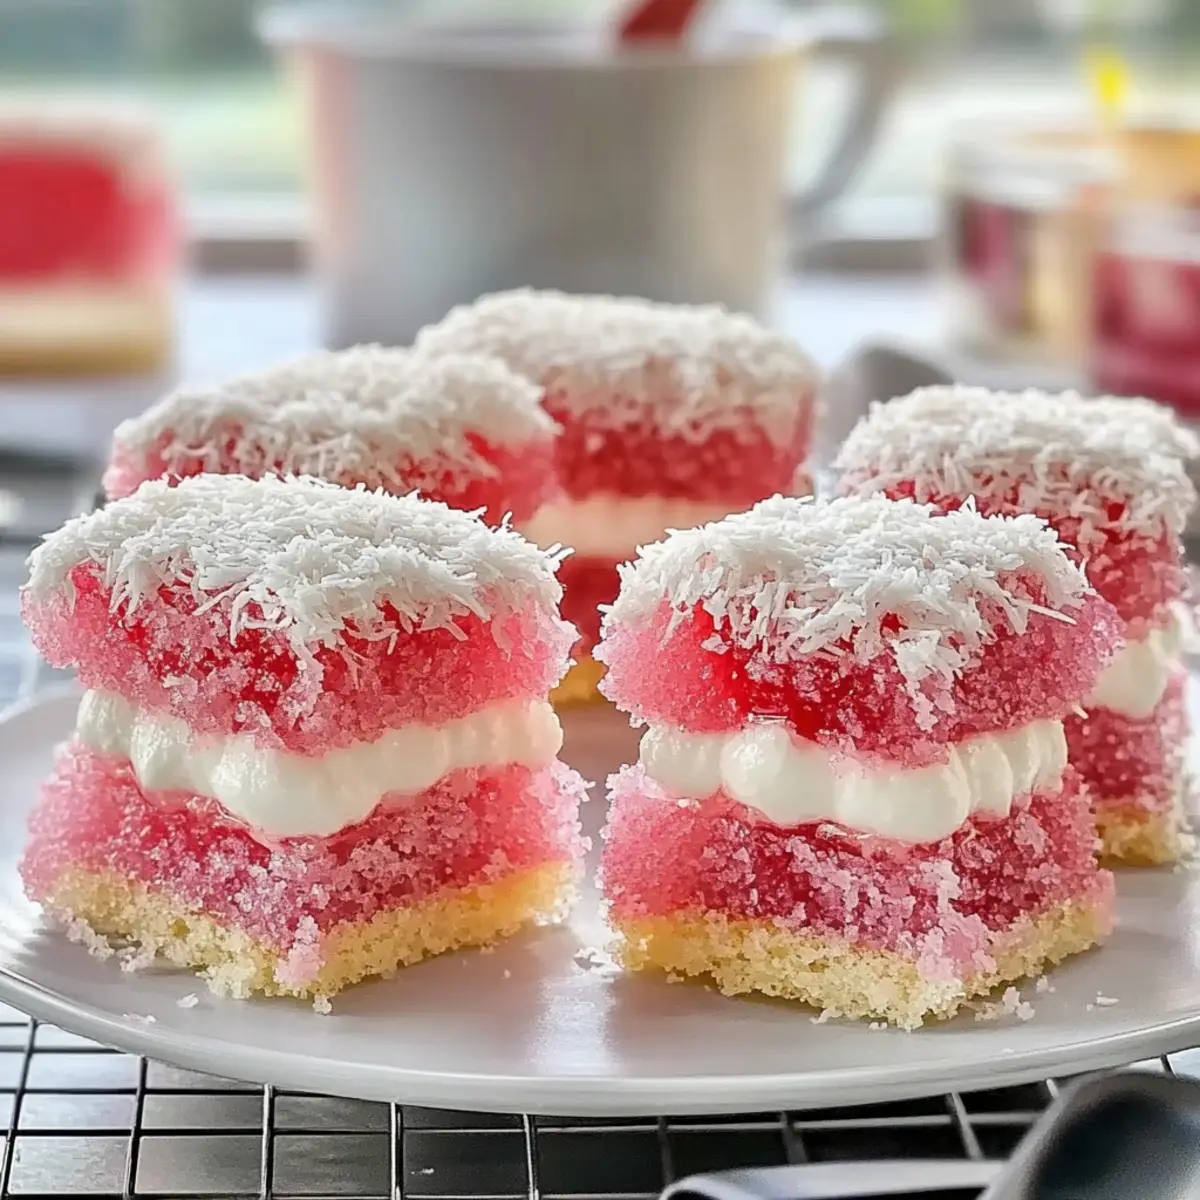
As I stood in my kitchen, the playful scent of vanilla tingled my senses, transporting me back to the joyful days of childhood laughter and special family gatherings. The delightful Mother’s Day Pink Jelly Cake has always captured my heart with its soft sponge cake dipped in raspberry jelly and rolled in coconut, making it a charming dessert that resonates with nostalgia. Not only is this recipe a breeze to whip up, but it’s also a crowd-pleaser that brings loved ones together for cherished celebrations. With endless variations—from sweet strawberry to tart cherry jelly—you can customize it just for your loved ones. If you’re ready to create a meaningful masterpiece that’ll leave everyone smiling, stay with me as we dive into this delicious journey! What flavor combination will you try first?
Why is Pink Jelly Cake a Must-Try?
Nostalgic Delight: This enchanting dessert evokes cherished memories, making it perfect for special occasions like Mother’s Day.
Endless Variations: With options for raspberry, strawberry, or cherry jelly, you can tailor this cake to suit any palette.
Easy and Accessible: Even novice bakers will find this recipe straightforward, allowing anyone to create a lovely treat without stress.
Visual Appeal: The vibrant pink hue and coconut coating make it an eye-catching centerpiece for any gathering.
Crowd-Pleasing Flavor: With its soft sponge and rich vanilla cream, this cake is sure to impress friends and family alike, making it an ideal choice for celebrations.
For more sweet inspiration, don’t miss the delightful Angel Cake Churro or the comforting Strawberry Custard Cake!
Mothers Day Pink Jelly Cake Ingredients
For the Cake
• Vanilla Cake Mix – This forms the delicious base and can be made from scratch or a boxed mix for convenience.
• Eggs – They provide moisture and richness; use room temperature eggs for better mixing.
• Milk – Enhances the cake’s tenderness and flavor; whole milk is preferred for creaminess.
• Margarine – For a lighter option, but feel free to substitute with butter for a richer taste.
For the Jelly
• Raspberry Jelly Crystals – This is the star ingredient that gives the cake its signature pink hue and fruity flavor; consider trying strawberry or cherry jelly for a variation.
For the Cream Filling
• Icing Sugar – Adds sweetness to the cream filling; sift to avoid lumps for a smooth texture.
• Vanilla Extract – A splash of vanilla enhances the creamy filling; worth the extra touch!
• Margarine – Provides creaminess; make sure it’s softened for easier blending.
For the Coating
• Shredded Coconut – Gives a delightful crunch and visual appeal; swap for crushed freeze-dried berries for a fruity twist.
• Desiccated Coconut – This fine coconut adds a nice texture on the outside; it’s essential for that classic feel.
Now gather these ingredients, and let’s craft a deliciously nostalgic Mother’s Day Pink Jelly Cake that will bring warmth and sweetness to your celebrations!
Step‑by‑Step Instructions for Mothers Day Pink Jelly Cake
Step 1: Prepare the Cake
Begin by preheating your oven to 180°C (or 160°C for fan-assisted). Grease and line a 20x30cm lamington pan with parchment paper. In a large mixing bowl, beat together the margarine, sugar, and vanilla extract until light and fluffy—this should take about 3-4 minutes. Gradually add in the eggs, mixing well after each addition, then fold in the milk and sifted flour until just combined. Pour the batter into the prepared pan and bake for 25 minutes or until a skewer inserted into the center comes out clean. Allow the cake to cool completely on a wire rack.
Step 2: Make the Jelly
While the cake is cooling, prepare the raspberry jelly. In a bowl, dissolve the jelly crystals in 250ml of boiling water, stirring until fully dissolved. Then add 250ml of cold water to the mixture to cool it down. Place the jelly in the refrigerator and chill for 30 to 45 minutes until it is slightly set but still pourable—a perfect consistency for dipping your cake.
Step 3: Cut and Coat the Cake
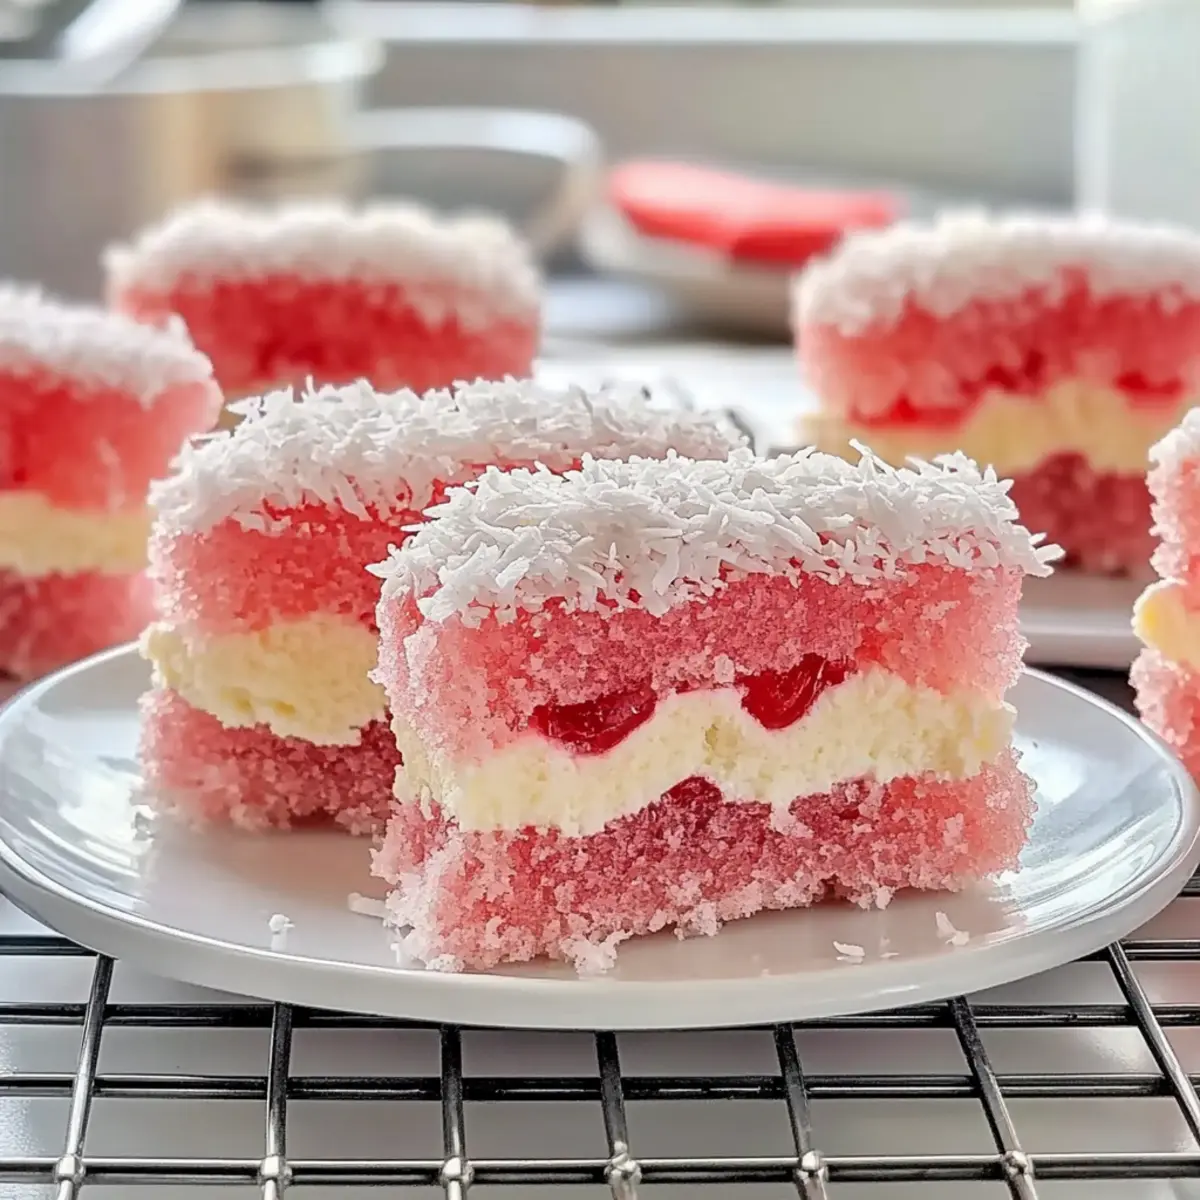
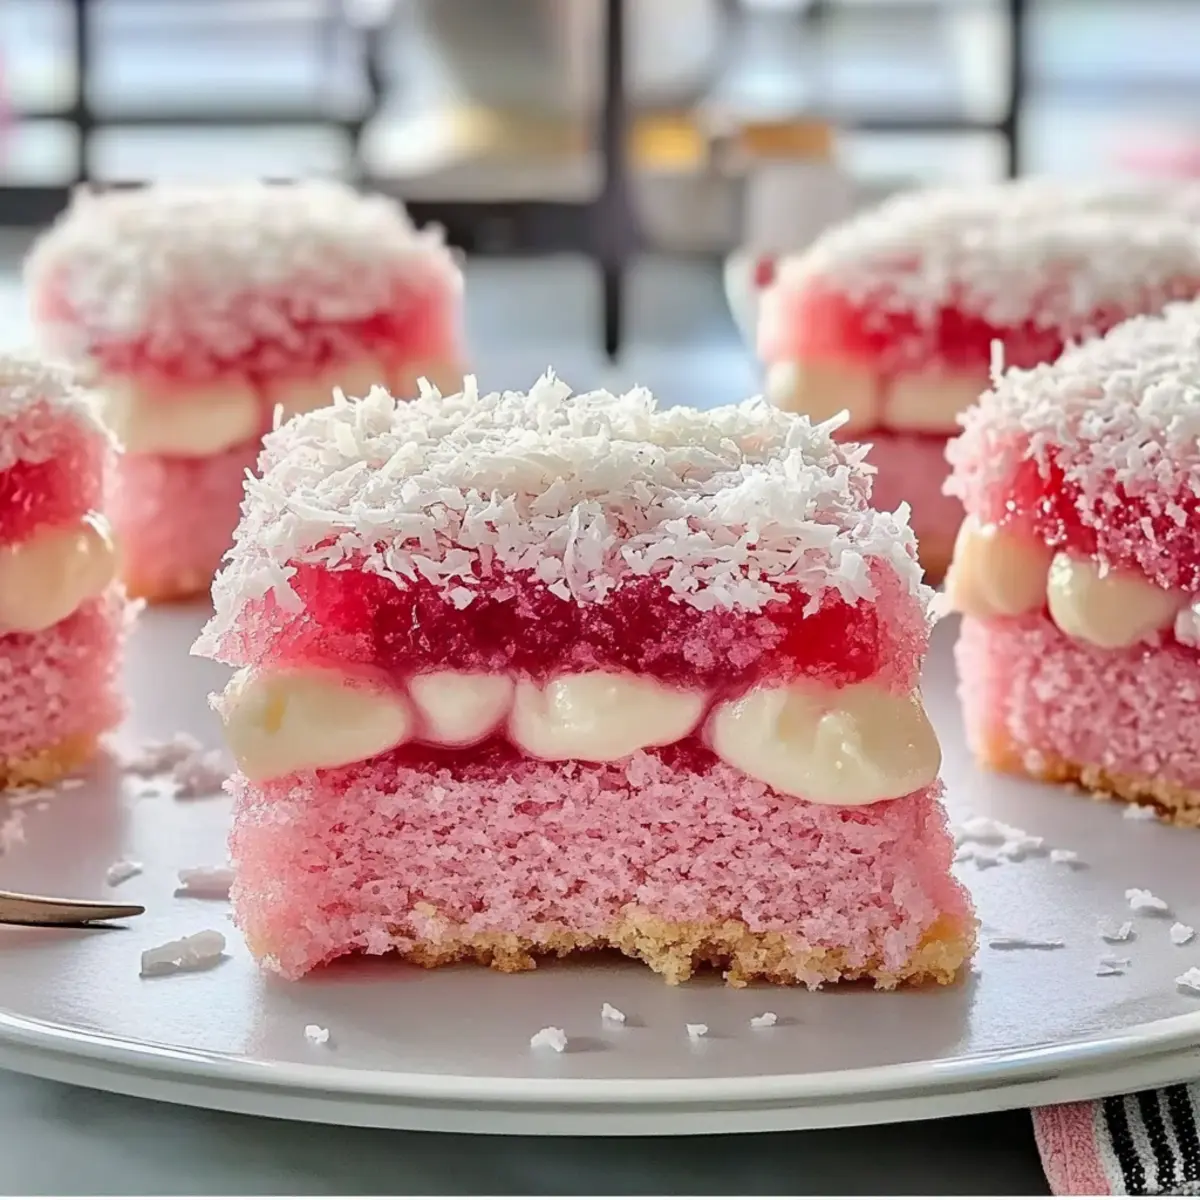
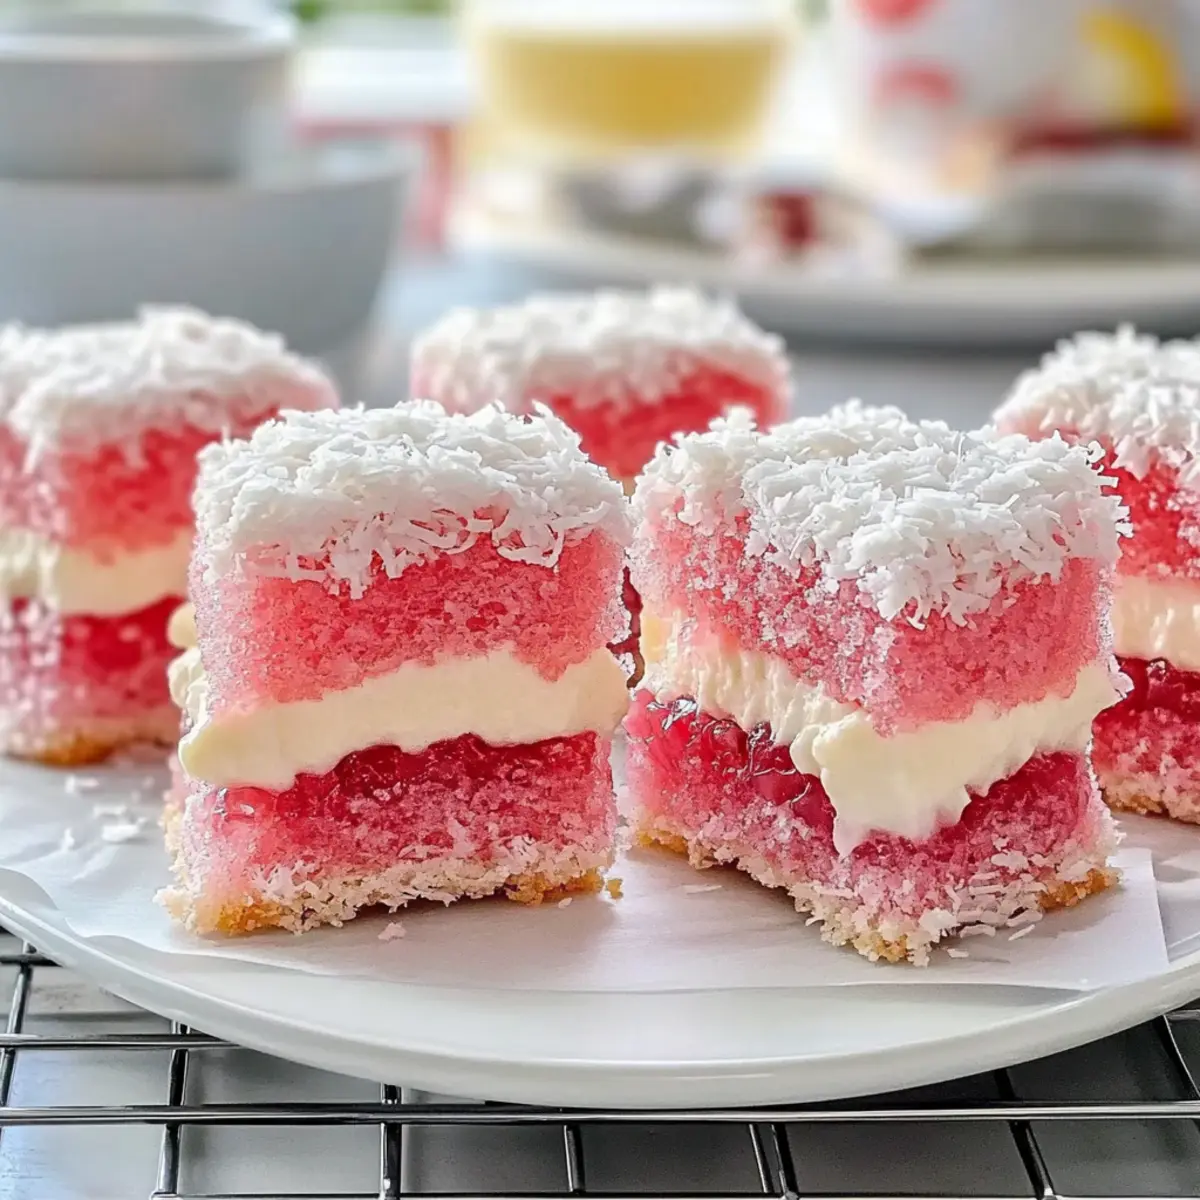
Once the cake has cooled completely, carefully cut it into 24 squares, each measuring about 5cm. Take each cake square and dip it into the raspberry jelly, allowing any excess jelly to drip off. Immediately roll the coated cake pieces in a mixture of shredded and desiccated coconut, ensuring they are thoroughly covered. Place the jelly-coated cakes on a wire rack to set for about 1 hour, allowing the jelly to firm up.
Step 4: Prepare the Cream Filling
To make the vanilla cream filling, start by beating the margarine and vanilla extract in a bowl until fluffy and smooth. Gradually add in the icing sugar and a splash of milk, mixing until you achieve a creamy consistency. This filling should be thick enough to pipe but smooth and delightful. For best results, chill the cream until you’re ready to assemble the cakes.
Step 5: Assemble the Cakes
Take each set of jelly-coated cake squares and carefully slice each one horizontally across the middle. Spread a layer of raspberry jam on one half of each square and pipe the vanilla cream filling on the other half. Carefully sandwich the two halves together, aligning them neatly. The result will be a delightful showcase of the Mothers Day Pink Jelly Cake, ready to share with family and friends!
Variations & Substitutions for Mothers Day Pink Jelly Cake
Feel free to enhance your pink jelly cake with these fun twists that are sure to spark your culinary creativity!
-
Dairy-Free: Substitute margarine with coconut oil and use a plant-based milk for a delightful dairy-free version. It adds a subtle flavor, perfect for those with dietary restrictions.
-
Flavor Boost: Experiment with seasonal fruit jellies like peach or mango for a refreshing change. Each flavor brings a unique vibe, allowing this cake to shine all year round.
-
Nutty Crunch: Replace shredded coconut with crushed almonds or walnuts for an added crunch. The earthy flavors perfectly balance the sweetness of the jelly cake.
-
Citrusy Surprise: Add lemon or orange zest to the cream filling for a bright, zesty twist. This elevates the overall flavor profile, making it even more invigorating!
-
Berry Burst: Top the finished cake with fresh berries for a colorful garnish. Not only does it enhance presentation, but it also adds a juicy burst of flavor and freshness.
-
Chocolate Drizzle: Drizzle melted dark chocolate over the cake for a rich contrast to the sweetness. This indulgent touch will leave everyone asking for more!
Ready to explore more delightful recipes? Check out my favorite Italian Grandmas Cake or indulge in a slice of Fluffy Japanese Cotton Cheesecake!
What to Serve with Pink Jelly Cake
This delightful dessert deserves companions that elevate your celebration and accentuate its nostalgic flavors.
-
Creamy Vanilla Ice Cream: A scoop adds rich creaminess, creating a delightful contrast to the lightness of the cake. The coolness complements each sugary bite wonderfully.
-
Fresh Berries: Raspberries or strawberries introduce a fresh, tart note that balances the sweetness of the cake, enhancing the overall taste experience. Plus, they add a pop of color to your presentation!
-
Coconut Whipped Cream: Light and airy, this adds extra coconut flavor while maintaining the soft texture that pairs beautifully with the jelly cake’s sponge. It’s a truly harmonious combination.
-
Sparkling Lemonade: The zesty effervescence of sparkling lemonade refreshes the palate, making it the perfect drink choice to serve alongside this nostalgic dessert, especially at gatherings.
-
Minted Fruit Salad: A mixture of seasonal fruits brightened with fresh mint brings freshness and a lovely contrasting element to the sweet, indulgent cake.
-
Chocolate Drizzle: A warm chocolate ganache drizzle can enhance the flavor profile, adding a rich twist that many will adore. It beautifully complements the other textures of the dessert.
-
Tea or Coffee: A warm cup of your favorite brew, whether it’s a classic black tea or rich coffee, rounds out the meal, providing warmth and inviting conversation over each delightful slice.
Let your imagination run wild, and enjoy creating the perfect spread to accompany your Mother’s Day Pink Jelly Cake!
Expert Tips for Mothers Day Pink Jelly Cake
-
Room Temperature Ingredients: Ensure your margarine and eggs are at room temperature for the best fluffiness in your cake.
-
Proper Jelly Consistency: Avoid letting the jelly set too firmly; it should be slightly thickened for even coating.
-
Sealing in Freshness: Store your assembled cakes in an airtight container in the refrigerator to keep them fresh and moist.
-
Experiment with Flavors: Feel free to test different jelly flavors, like strawberry or cherry, for a unique twist on the classic Mothers Day Pink Jelly Cake.
-
Avoid Overmixing: When combining the flour and milk, fold gently to prevent a dense cake; stop as soon as it’s just incorporated.
How to Store and Freeze Mothers Day Pink Jelly Cake
Fridge: Store assembled cakes in an airtight container for up to 3 days to maintain freshness and moisture.
Freezer: Unassembled cake squares can be frozen for up to 1 month. Just let them thaw completely before dipping in jelly to retain their texture.
Reheating: If you prefer your cake slightly warmed, simply microwave individual slices for 10-15 seconds. Enjoy your nostalgic Mother’s Day Pink Jelly Cake at your own pace!
Make Ahead Options
The Mother’s Day Pink Jelly Cake is a fantastic choice for meal prep, making it easy to enjoy this delightful treat even on busy days! You can prepare the vanilla sponge cake up to 24 hours in advance; simply store it tightly wrapped in plastic wrap at room temperature to keep it fresh. Additionally, the jelly can be made the day before and kept in the refrigerator for a quick dip when you’re ready to assemble. For the cream filling, it’s best to prepare it and refrigerate it for up to 3 days before serving—just ensure it remains tightly covered to preserve its creamy texture. When you’re ready to enjoy, simply dip the cake squares in the prepared jelly, coat in coconut, and assemble with the cream and jam. This way, you can savor the sweet nostalgia of your Mother’s Day Pink Jelly Cake with minimal last-minute effort!
Mothers Day Pink Jelly Cake Recipe FAQs
What type of jelly should I use for the best flavor?
Absolutely! For a classic taste, raspberry jelly is the way to go. However, feel free to experiment with strawberry or cherry jelly for a different flavor twist, allowing your imagination to reign supreme in this recipe!
How should I store the assembled cakes?
Store your assembled Mother’s Day Pink Jelly Cakes in an airtight container in the refrigerator for up to 3 days. This will keep them fresh and moist, ensuring that every bite is just as delightful as the first.
Can I freeze the pink jelly cake squares?
Definitely! Unassembled cake squares can be frozen for up to 1 month. Wrap each square tightly in plastic wrap and place them in a freezer-safe container. When you’re ready to enjoy, let the squares thaw completely before dipping them in jelly to maintain their fluffy texture.
What should I do if the jelly sets too firm?
No worries! If your jelly has set too firm, simply place it back in the microwave in short 10-second intervals, stirring in between until it reaches a slightly pourable consistency. Be cautious not to overheat—it should still have a bit of thickness for proper coating.
Are there any dietary concerns I should consider?
It’s a great question! Since this recipe contains dairy and eggs, be mindful of any allergies your guests may have. If you’re looking for a vegan option, consider swapping the margarine for a plant-based spread and using an egg replacer suitable for baking. Always provide alternative toppings, too, like crushed freeze-dried berries for an enticing finish.
What’s the best way to achieve a fluffy cake texture?
To achieve that airy, fluffy texture, be sure to use room temperature ingredients, especially your margarine and eggs. This helps them mix evenly and incorporate air during the beating process. Also, avoid overmixing the batter once you add flour—fold gently until just combined for optimal fluffiness!
Mothers Day Pink Jelly Cake: Sweet Nostalgia in Every Bite
Ingredients
Equipment
Method
- Preheat your oven to 180°C. Grease and line a lamington pan with parchment paper. Beat margarine, sugar, and vanilla until fluffy. Add eggs one at a time, mix well. Fold in the milk and sifted flour. Pour into the pan and bake for 25 minutes. Cool completely.
- Prepare Raspberry Jelly by dissolving jelly crystals in boiling water, then add cold water. Chill in refrigerator until slightly set, about 30-45 minutes.
- Cut the cooled cake into 24 squares. Dip each square in raspberry jelly and roll in shredded and desiccated coconut. Set on a wire rack for 1 hour.
- For the cream filling, beat margarine and vanilla until fluffy. Gradually mix in icing sugar and a splash of milk until creamy. Chill until ready to assemble.
- Slice each jelly-coated square horizontally, spread raspberry jam on one side, pipe cream filling on the other, and sandwich them together.
Leave a Reply