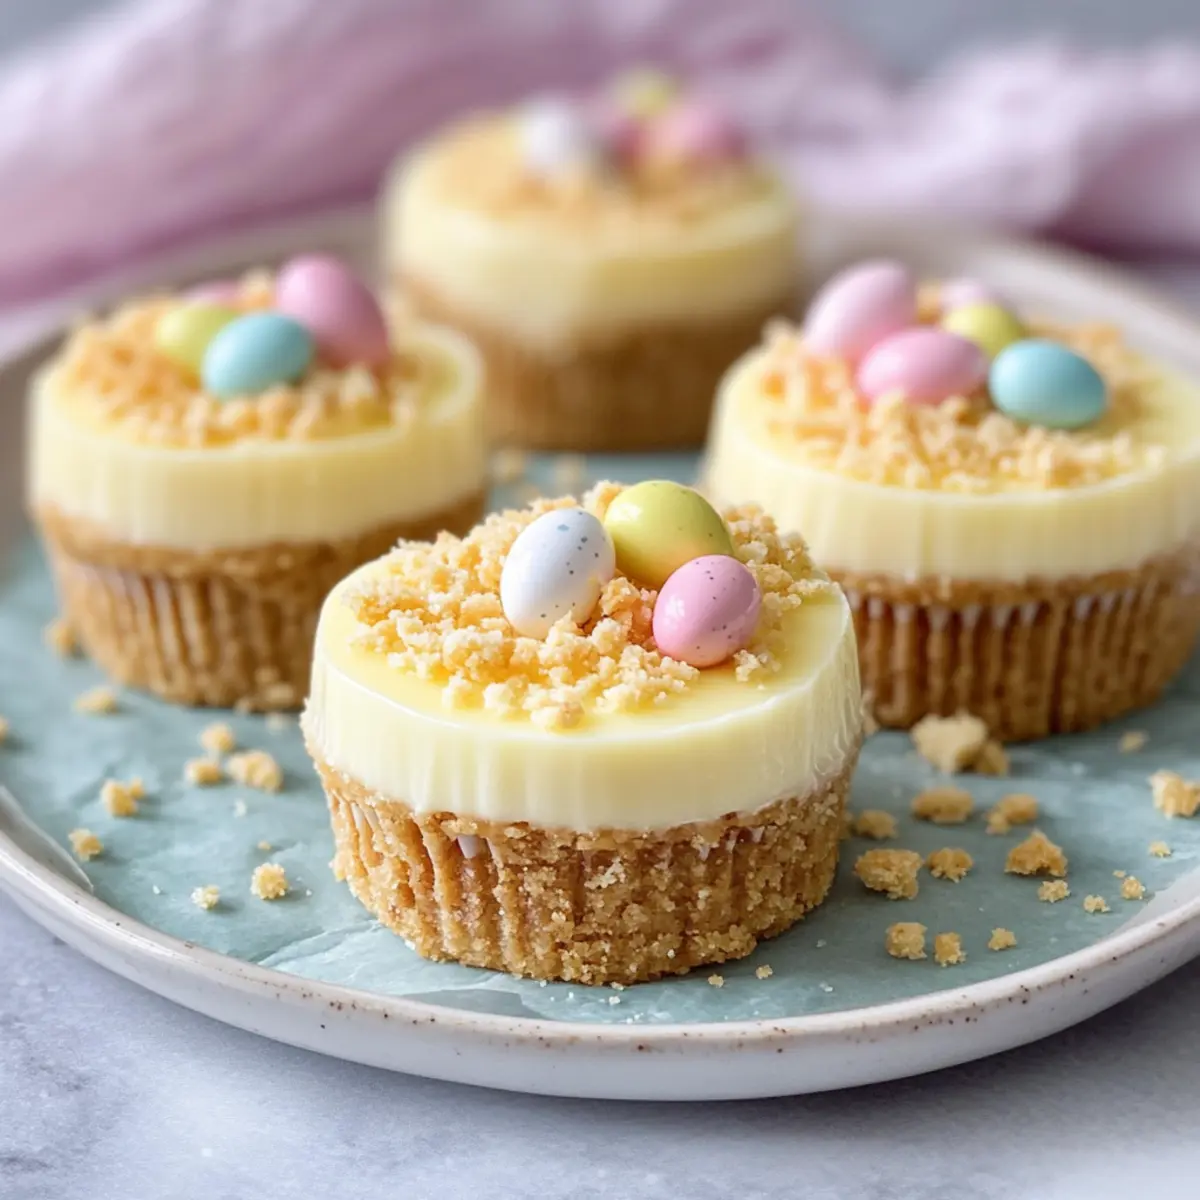
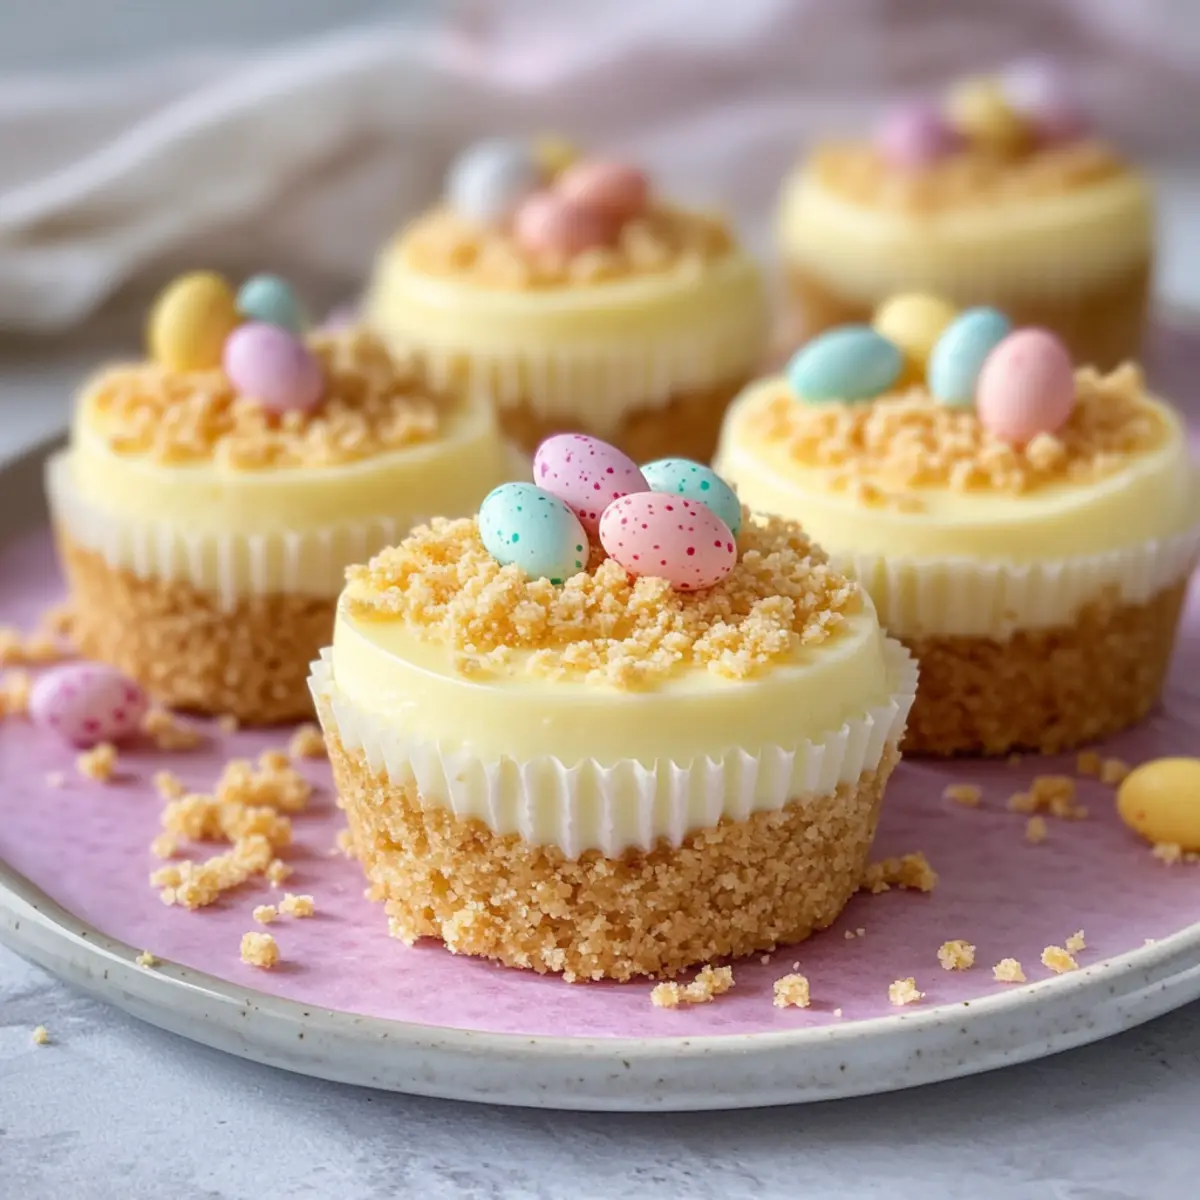
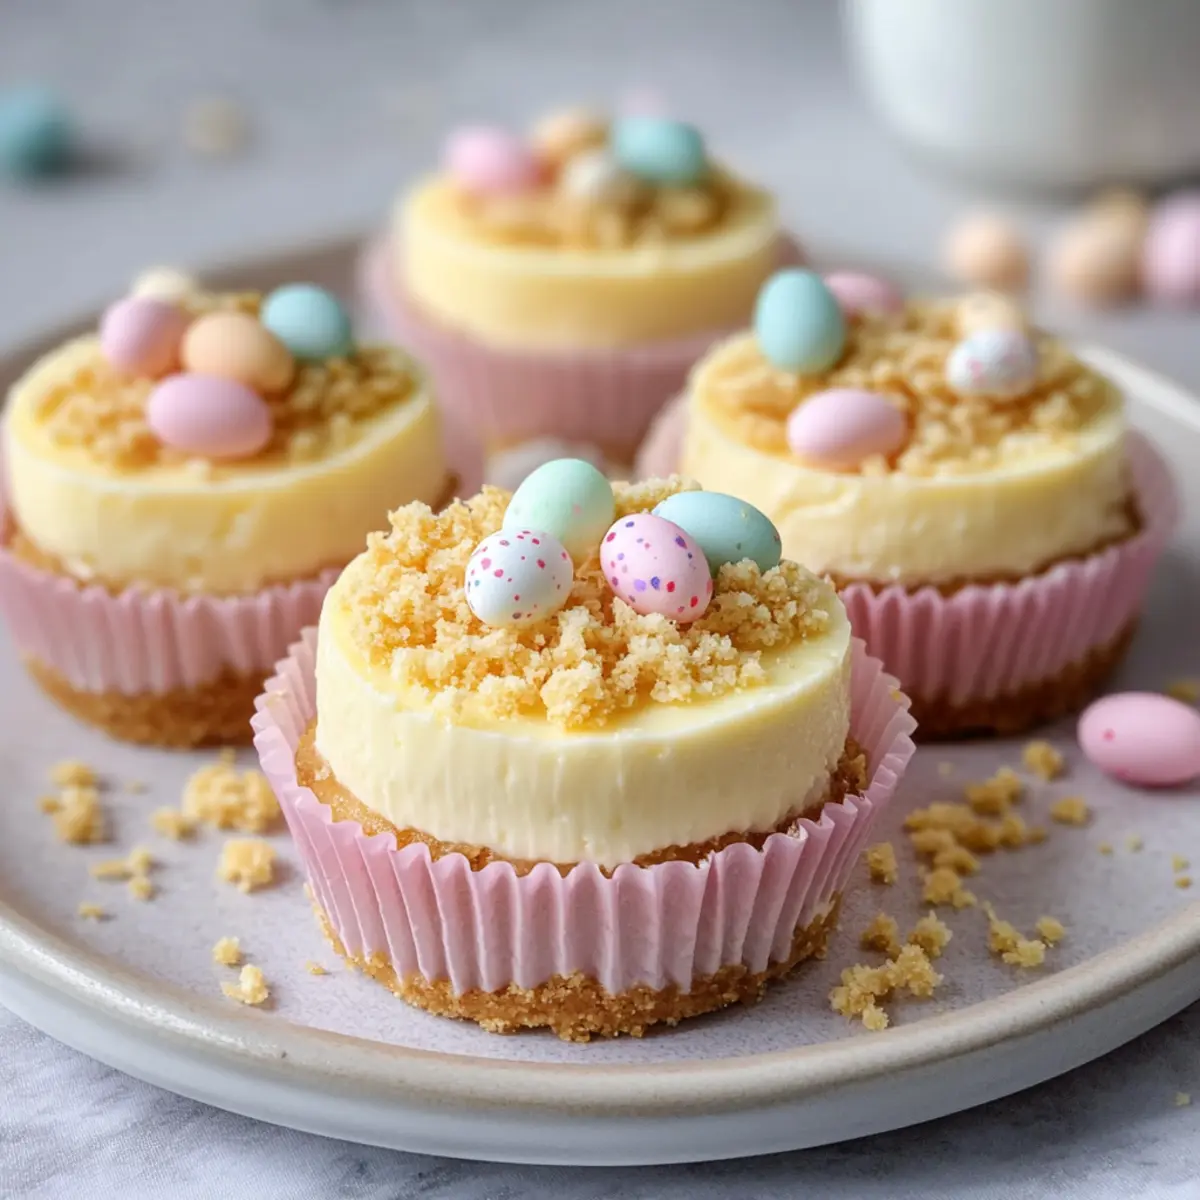
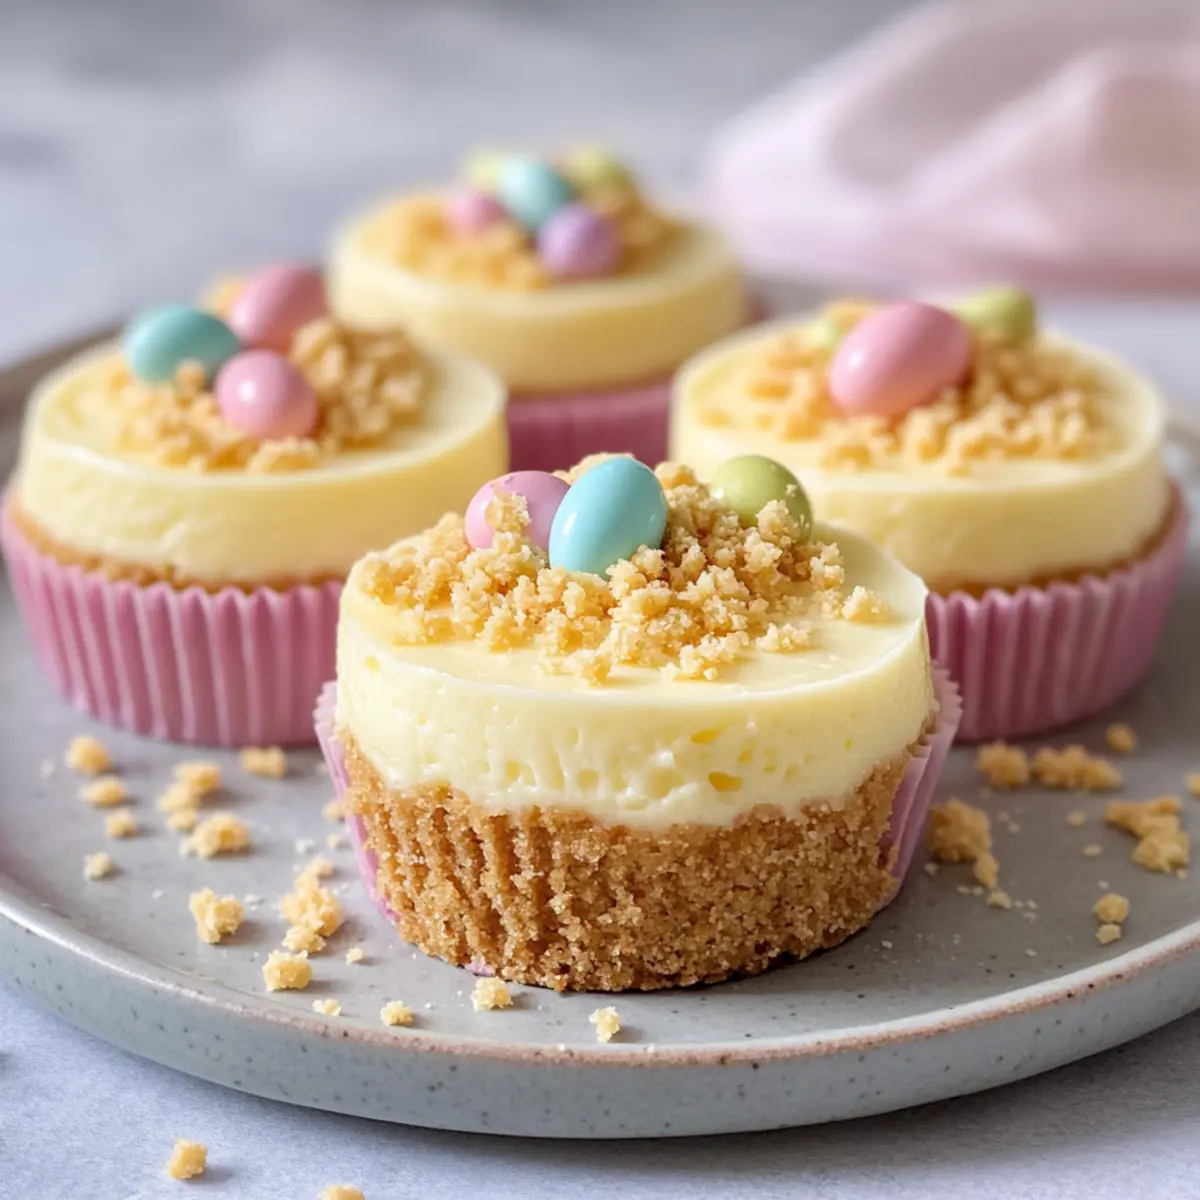
Easter is just around the corner, and I can almost taste the joy that comes with festive gatherings! One of my favorite ways to celebrate is with a delightful No Bake Mini Egg Cheesecake that’s as easy to make as it is to enjoy. Picture this: a rich, creamy filling nestled in a buttery graham cracker crust, topped with colorful mini eggs that add both crunch and a pop of cheer. This stunning dessert is not only beginner-friendly, but it’s also a stress-free way to wow your friends and family without spending hours in the kitchen. Plus, there’s no baking involved—just a little mixing, chilling, and you’re ready to impress! Want to learn how to make this charming treat? Let’s dive in!
Why is this dessert a must-try?
No-Bake Convenience: This No Bake Mini Egg Cheesecake is the epitome of effortless baking—just mix, chill, and serve!
Delightful Presentation: With vibrant mini eggs on top, it’s a feast for the eyes and will impress at any gathering.
Perfect Texture: Enjoy a silky filling combined with a crumbly graham cracker crust—an unbeatable match!
Versatile Flavor: Feel free to switch up the toppings or even try a chocolate version using crushed Oreos!
Ideal for Beginners: Even novice cooks can create this stunning dessert, making it perfect for family events or spring celebrations.
Transform your Easter festivities with this crowd-pleasing treat that even pairs beautifully with other favorites like Japanese Cotton Cheesecake or a delicious Southern Spaghetti Bake.
No Bake Mini Egg Cheesecake Ingredients
• Get ready for a delicious treat!
For the Crust
- Graham Crackers – Serves as the base for a buttery crust; can substitute with digestive biscuits or cookie crumbs.
- White Sugar – Adds sweetness to the crust; you may substitute with coconut sugar for a different flavor.
- Butter – Provides richness and helps bind the crust together; use unsalted butter for better control over saltiness.
For the Filling
- Cream Cheese – The main component of the cheesecake filling, delivering a rich, creamy texture; use full-fat for best results as low-fat can alter taste.
- Confectioners’ Sugar – Sweetens the cheesecake filling; granulated sugar can be used for a slightly different texture.
- Vanilla Essence – Enhances the overall flavor; vanilla extract is the best substitute.
- Heavy Cream – Adds fluffiness to the filling; substitute with coconut cream for a dairy-free option.
- Mini Eggs – Introduces crunch and color, making it festive; use any small candy like chocolate-covered almonds as an alternative.
This delectable No Bake Mini Egg Cheesecake is sure to be a showstopper at your Easter celebration!
Step‑by‑Step Instructions for No Bake Mini Egg Cheesecake
Step 1: Prepare the Crust
In a medium bowl, combine crushed graham cracker crumbs with white sugar. Melt unsalted butter and mix it in until the mixture resembles wet sand. Line a muffin pan with muffin liners and press about 1-2 tablespoons of the crumb mixture into each liner to form a compact crust. Refrigerate for 15 minutes until set and firm.
Step 2: Make the Filling
In a large bowl, use an electric mixer to beat softened cream cheese until smooth. Gradually add confectioners’ sugar and vanilla essence, mixing until well blended and creamy. In another bowl, whip heavy cream until it reaches stiff peaks, then carefully fold it into the cream cheese mixture until no streaks remain. This will create a light, fluffy filling for your No Bake Mini Egg Cheesecake.
Step 3: Add the Mini Eggs
Once your filling is smooth and fluffy, gently stir in roughly crushed mini eggs, being careful not to deflate the whipped cream. The mini eggs will add a wonderful crunch and colorful flair to your cheesecake filling. Make sure the mixture is well combined, showcasing the festive colors of the mini eggs throughout.
Step 4: Assemble the Cheesecakes
Take the chilled crusts out of the refrigerator and spoon the cheesecake filling into each liner, smoothing the tops with a spatula. Ensure an even layer in each crust, creating a polished look. For added decoration, sprinkle some additional crushed mini eggs on top before chilling to enhance the festive feel of your No Bake Mini Egg Cheesecake.
Step 5: Chill to Set
Place the assembled cheesecakes back into the refrigerator and chill for at least 2 hours, allowing them to firm up completely. During this time, the flavors will meld beautifully! After chilling, check for a firm texture, which indicates they are ready to be served. This step is crucial for achieving the perfect sliceable cheesecake.
Step 6: Serve & Enjoy
Once your cheesecakes are chilled and set, carefully remove them from the muffin pan. Peel away the liners and place the mini cheesecakes on a serving platter. Enjoy them chilled, and watch as your family and friends marvel at the delightful presentation of these No Bake Mini Egg Cheesecakes, perfect for any Easter celebration!
Expert Tips for No Bake Mini Egg Cheesecake
-
Softened Cream Cheese: Ensure your cream cheese is fully softened at room temperature to avoid lumps in the filling; this creates the smooth texture you desire.
-
Mess-Free Mini Eggs: Use a food processor to quickly crush your mini eggs. This saves time and minimizes kitchen mess, making your prep smoother.
-
Chill Properly: Allow enough chilling time for the cheesecake to set. If under-chilled, the filling may be too soft and difficult to slice.
-
Storage Tips: Store any leftovers in the fridge for up to 3 days or freeze them for later. Thaw overnight in the refrigerator before enjoying again.
-
Flavor Variation: Don’t be afraid to experiment! Try adding different seasonal candies to your No Bake Mini Egg Cheesecake for a delightful twist!
No Bake Mini Egg Cheesecake Variations
Feel free to make this delightful dessert your own with these fun twists and substitutions!
-
Dairy-Free: Substitute cream cheese and heavy cream with vegan alternatives for a dairy-free cheesecake everyone can enjoy. Coconut cream works wonders here!
-
Chocolate Lovers: Replace the mini eggs with crushed Oreo cookies for a chocolatey surprise that adds a fun flavor twist to your cheesecake.
-
Fruit Infusion: Stir in chopped strawberries or blueberries into your filling for a fresh, fruity burst that complements the creaminess beautifully.
-
Nutty Crunch: Add crushed nuts like pecans or almonds to the crust for an extra layer of texture and a delightful nutty flavor.
-
Minty Fresh: Incorporate a few drops of peppermint extract into the filling for a refreshing mint-chocolate version that’s perfect for Spring celebrations.
-
Extra Decadence: Drizzle melted chocolate over the top before chilling for an indulgent, rich finish that’s sure to impress!
-
Alternative Topping: Swap mini eggs for seasonal candies, like jelly beans or chocolate-covered almonds, to create a unique presentation and flavor.
-
Lemon Zing: Mix in some lemon zest or a splash of lemon juice to the filling for a refreshing and zesty twist that balances the richness.
These variations will keep your No Bake Mini Egg Cheesecake exciting and delicious for every Easter celebration! If you love dessert creativity, you might also enjoy making a Croissant Breakfast Bake or indulge in a slice of Mini Keto Crustless Pumpkin Pie next!
What to Serve with Easy No Bake Mini Egg Cheesecake
Elevate your dessert table with perfect pairings that complement the rich, creamy sweetness of this delightful treat.
- Fresh Berries: The tartness of strawberries or raspberries cuts through the cheesecake’s sweetness, adding a refreshing balance.
- Chocolate Drizzle: A decadent drizzle on top creates an indulgent touch, enhancing the flavors and visual appeal.
- Mint Sprigs: Add a pop of freshness and color to your plate, making the presentation even more festive and inviting.
- Coffee or Espresso: A warm cup of coffee pairs beautifully with the cool cheesecake, boasting a delightful contrast in temperature and flavor.
- Whipped Cream: A dollop of freshly whipped cream adds lightness, enhancing the dessert’s overall creaminess. It’s a classic touch!
- Lemon Curd: The citrus tang of lemon curd brings brightness, invigorating each bite and offering a zesty twist on traditional cheesecake.
- Vanilla Ice Cream: Serve alongside a scoop of velvety vanilla ice cream for a luscious combination that feels indulgently satisfying.
- Sparkling Lemonade: This refreshing drink adds a bubbly and bright flavor that complements the sweetness of the cheesecake wonderfully.
Make Ahead Options
These Easy No Bake Mini Egg Cheesecakes are a lifesaver for busy home cooks! You can prepare the graham cracker crust up to 24 hours in advance; simply mix the ingredients and refrigerate until set. Additionally, the cheesecake filling can be made up to 3 days ahead—just whip up the cream cheese mixture and refrigerate it until you’re ready to assemble. When it’s time to serve, spoon your filling into the pre-chilled crusts, top with mini eggs, and chill for at least 2 hours to firm them up beautifully. This way, you’ll have a stress-free dessert ready to wow your guests without spending all day in the kitchen!
How to Store and Freeze No Bake Mini Egg Cheesecake
Fridge: Keep your delicious No Bake Mini Egg Cheesecake covered in the refrigerator for up to 3 days. This will help maintain its creamy texture.
Freezer: If you want to save some for later, you can freeze individual cheesecakes wrapped tightly in plastic wrap. They will last up to 2 months, but for best quality, enjoy them sooner!
Thawing: To enjoy frozen cheesecakes, transfer them to the fridge and let them thaw overnight. This ensures they retain their delightful texture and flavor when served.
Reheating: Since this is a no-bake cheesecake, simply serve it chilled straight from the fridge, as reheating is not needed!
No Bake Mini Egg Cheesecake Recipe FAQs
How do I choose the right mini eggs?
Absolutely! When selecting mini eggs for your No Bake Mini Egg Cheesecake, look for ones that are vibrant and free from any dark spots. Fresh mini eggs should feel firm when squeezed, and the colors should be bright, indicating they are not stale. Make sure to pick up a few extra to have on hand for decoration!
What is the best way to store leftovers?
Very simply, store your No Bake Mini Egg Cheesecake in the refrigerator, covered tightly with plastic wrap or in an airtight container. It will stay fresh for up to 3 days. If you find that you have more than you can eat within that time, freezing is a great option!
Can I freeze No Bake Mini Egg Cheesecake?
Definitely! To freeze, wrap each individual cheesecake tightly in plastic wrap and place them in an airtight container. They can last for up to 2 months in the freezer. When you’re ready to enjoy them, transfer them to the fridge and allow them to thaw overnight for the best texture and flavor.
What should I do if my cheesecake filling is lumpy?
Don’t worry; it can happen! If your filling is lumpy, it’s usually due to the cream cheese not being softened properly. To fix this, ensure your cream cheese is left out at room temperature for about 30 minutes before you begin. If lumps persist, you can use a hand mixer to blend it smoothly. Just blend gently after adding the sugar and vanilla!
Is this dessert safe for pets or individuals with dairy allergies?
This No Bake Mini Egg Cheesecake contains cream cheese and heavy cream, which are not suitable for pets and can trigger dairy allergies in some individuals. For a pet-friendly or dairy-free alternative, consider using a cashew cream or coconut cream base, and ensure that no mini eggs are used in those versions! Always consult with your veterinarian if you’re unsure about specific ingredients for your furry friends.
No Bake Mini Egg Cheesecake: Effortless Easter Indulgence
Ingredients
Equipment
Method
- In a medium bowl, combine crushed graham cracker crumbs with white sugar. Melt unsalted butter and mix it in until the mixture resembles wet sand. Line a muffin pan with muffin liners and press about 1-2 tablespoons of the crumb mixture into each liner to form a compact crust. Refrigerate for 15 minutes until set and firm.
- In a large bowl, use an electric mixer to beat softened cream cheese until smooth. Gradually add confectioners’ sugar and vanilla essence, mixing until well blended and creamy.
- In another bowl, whip heavy cream until it reaches stiff peaks, then carefully fold it into the cream cheese mixture until no streaks remain.
- Gently stir in roughly crushed mini eggs, being careful not to deflate the whipped cream.
- Spoon the cheesecake filling into each liner, smoothing the tops with a spatula. For added decoration, sprinkle some additional crushed mini eggs on top before chilling.
- Place the assembled cheesecakes back into the refrigerator and chill for at least 2 hours.
- Once chilled, carefully remove them from the muffin pan and enjoy!
Leave a Reply