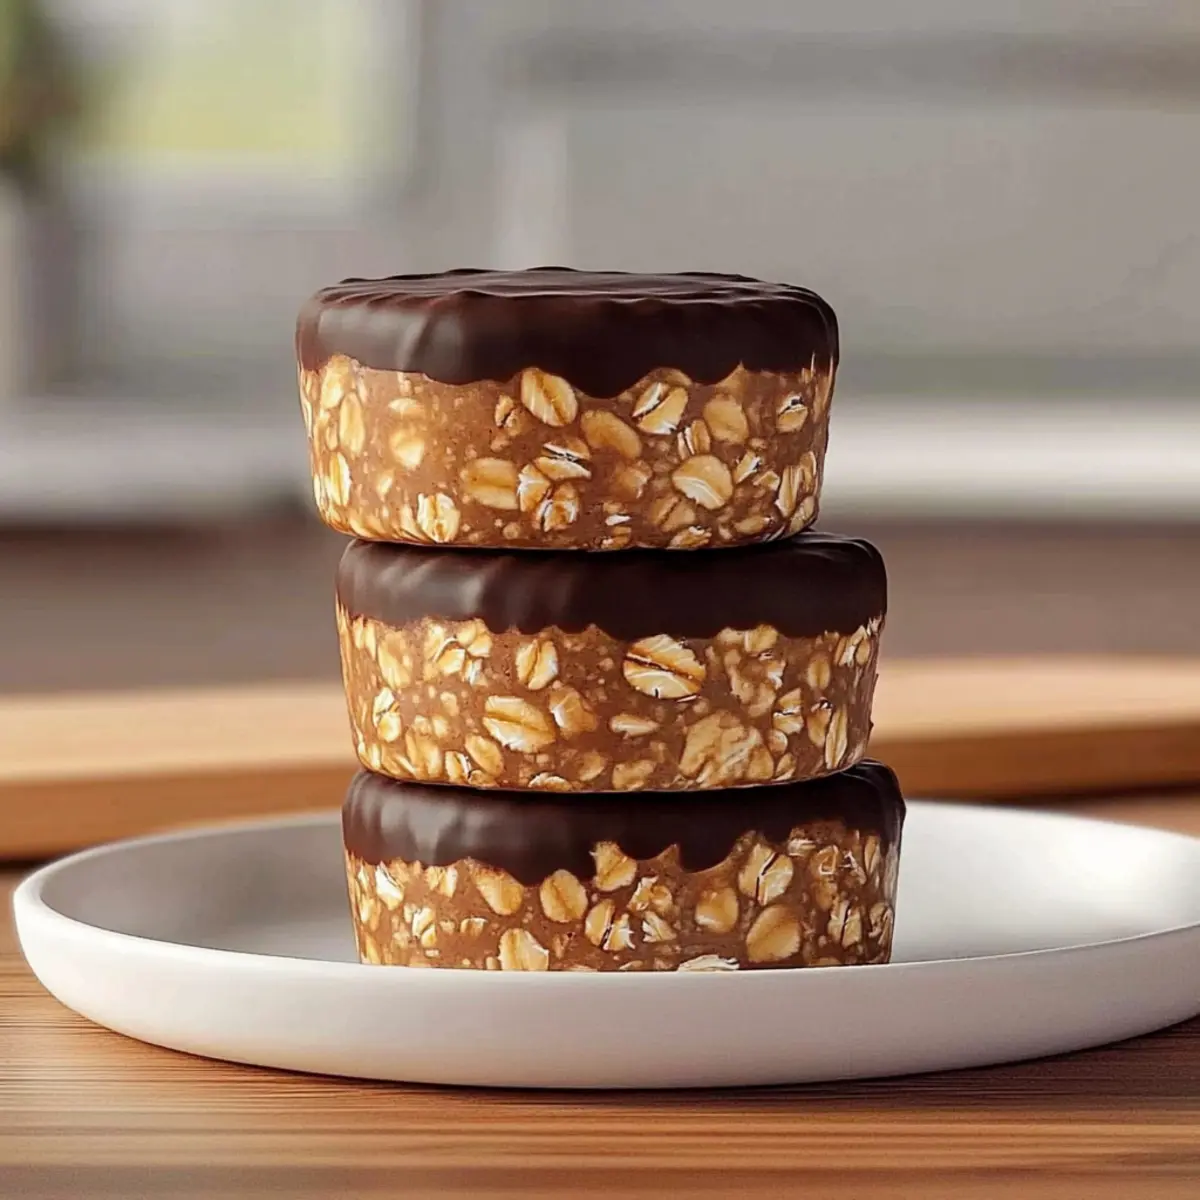
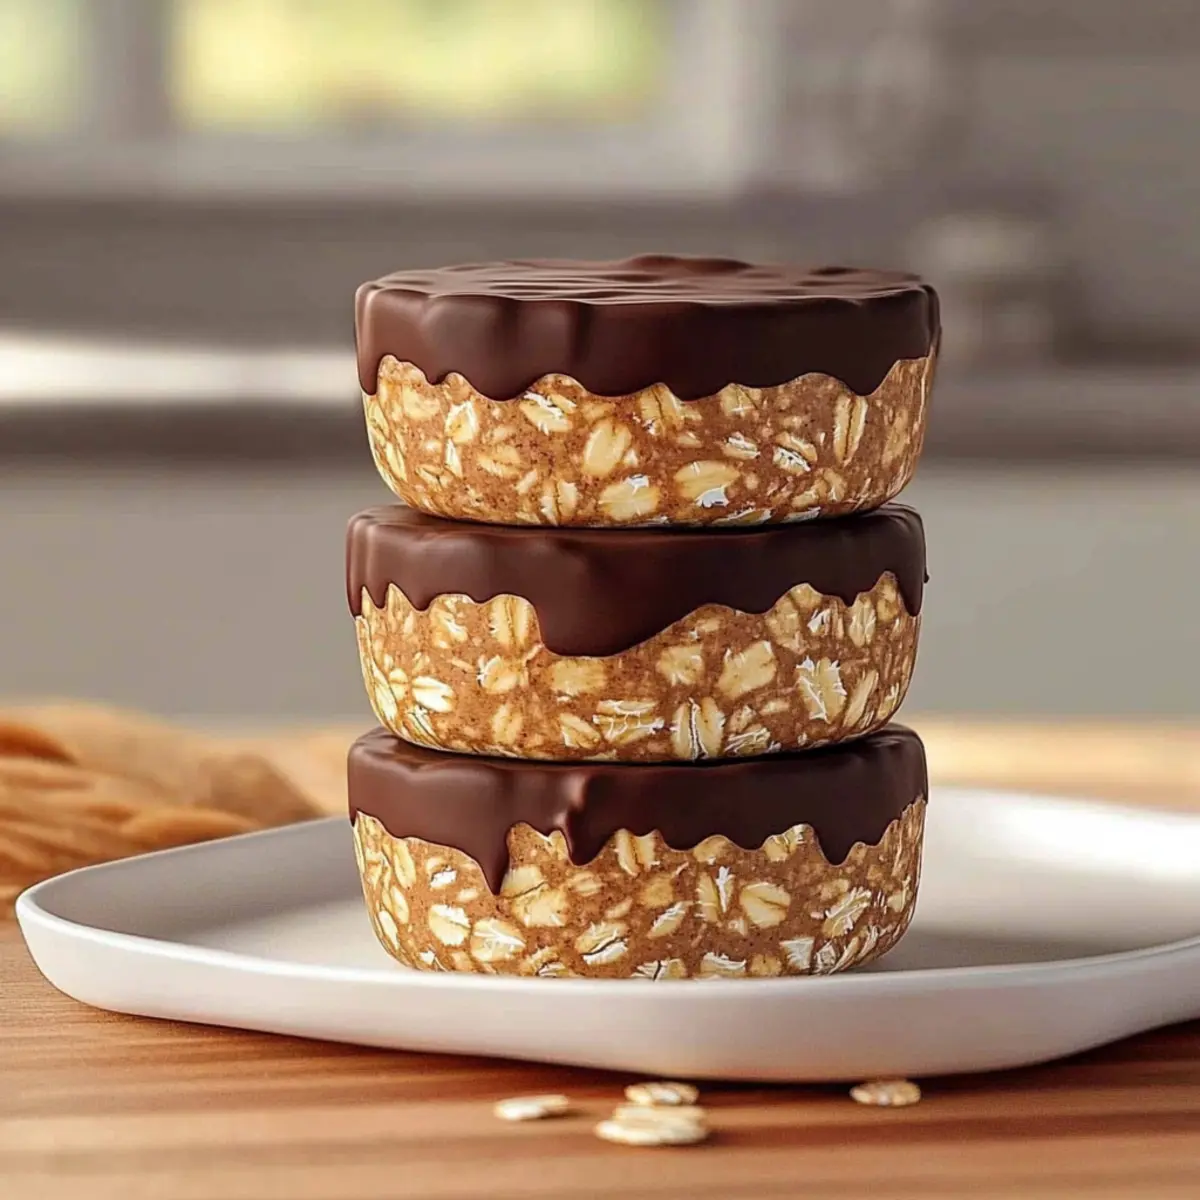
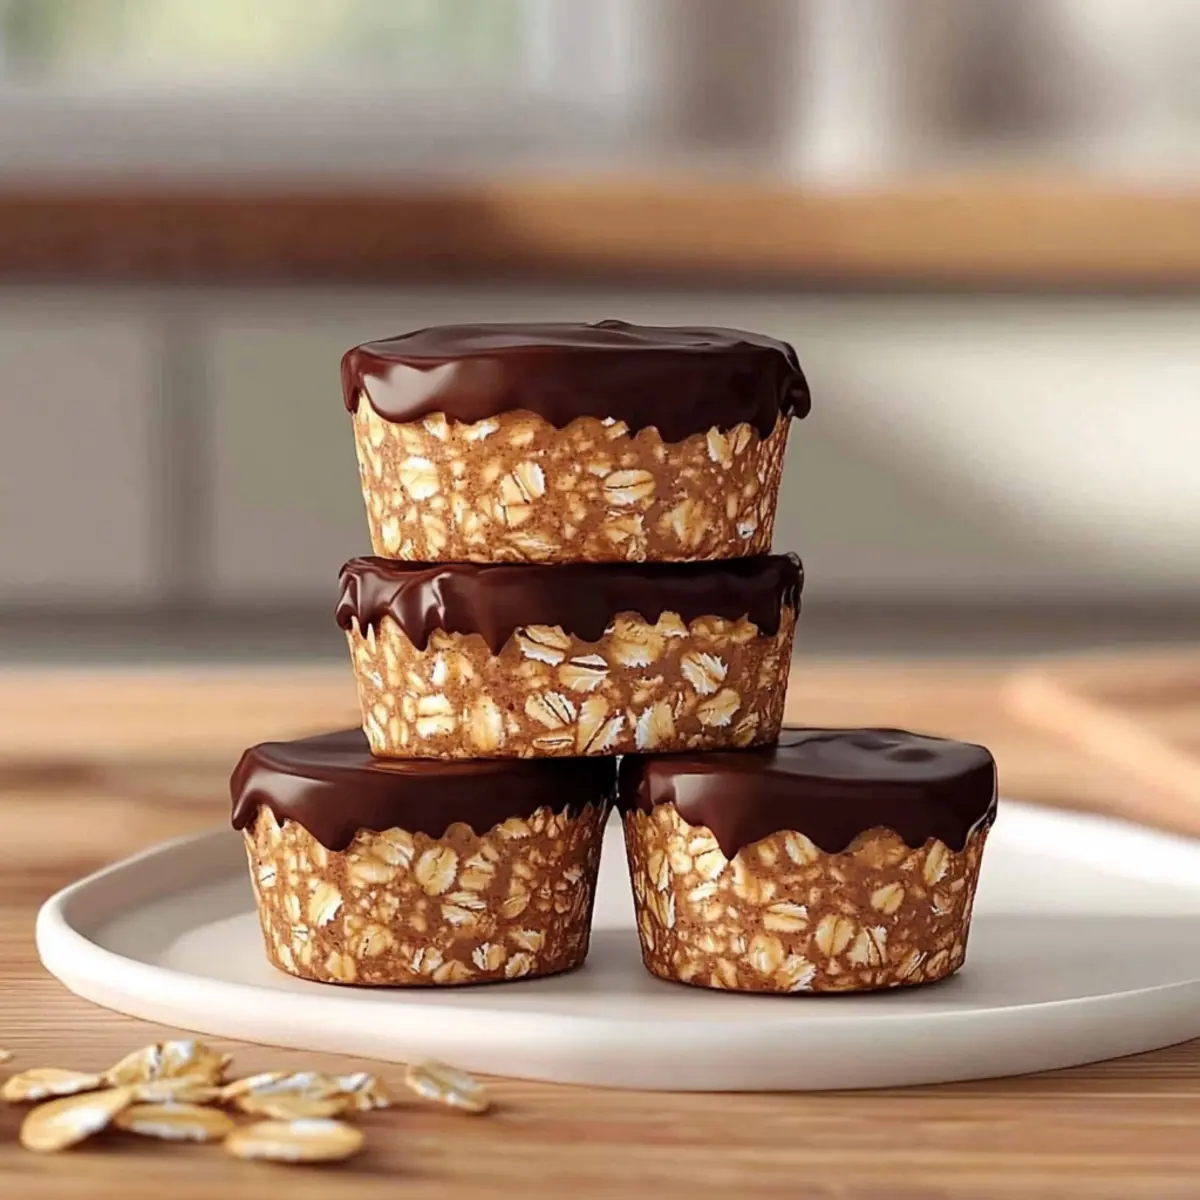
It’s that moment when the craving for something sweet hits, but you want to keep it on the healthier side. Enter my 4-Ingredient No-Bake Peanut Butter Oat Cups! These little gems blend the heartiness of oats with the nutty richness of creamy peanut butter, all topped with a luscious layer of melted vegan chocolate. They’re not just quick to whip up; in about 20 minutes, you’ll have a delightful snack that’s perfect for busy days or a post-workout boost. Plus, with only four simple ingredients, you’ll spend less time in the kitchen and more time indulging in deliciousness. Curious about how to make these easy treats? Let’s dive in!
Why Are These Oat Cups So Irresistible?
Simplicity at Its Finest: With just four ingredients, these No-Bake Peanut Butter Oat Cups come together effortlessly, making them an excellent choice for anyone pressed for time.
Nutritious and Delicious: Packed with healthy fats from peanut butter and fiber from oats, these cups double as satisfying snacks or post-workout fuel, keeping you energized throughout your day.
Versatility: You can customize the recipe by swapping out the peanut butter for almond or sunflower seed butter, ensuring everyone can enjoy these treats!
Just Chill and Enjoy: No baking is required, meaning you can simply mix the ingredients, chill, and indulge. This no-fuss approach is perfect for those who want to steer clear of complicated recipes.
Crowd-Pleaser: Kids and adults alike will love the rich flavors and chewy textures, making these oat cups a fantastic addition to any gathering or lunchbox. Grab a batch of these delicious creations, and you won’t regret it!
No-Bake Peanut Butter Oat Cups Ingredients
For the Base
• Unsalted creamy peanut butter – Provides richness and acts as a binding agent; try almond butter for a unique twist.
• Maple syrup – Adds natural sweetness and moisture, but can be swapped with honey for non-vegan options.
• Rolled oats – Offers structure and chewiness; use gluten-free oats for a gluten-free treat.
For the Topping
• Vegan chocolate chips – Gives a luxurious chocolate layer; feel free to use dark chocolate for a richer flavor.
• Unsalted creamy peanut butter (for topping) – Enhances creaminess; adjust the quantity for a lighter topping.
Step‑by‑Step Instructions for No-Bake Peanut Butter Oat Cups
Step 1: Prepare the Muffin Tin
Start by lining a muffin tin with 10 to 12 paper liners for easy removal, or lightly grease it with coconut oil to prevent sticking. This step is essential as it creates the perfect vessel for your No-Bake Peanut Butter Oat Cups, allowing them to maintain their shape as they chill.
Step 2: Mix the Peanut Butter and Maple Syrup
In a mixing bowl, combine 8 tablespoons of creamy peanut butter with 6 tablespoons of maple syrup. Stir the mixture vigorously with a spatula for about 1 to 2 minutes until it becomes smooth and glossy. This creamy blend is the foundation of your oat cups, adding both flavor and sweetness.
Step 3: Incorporate the Rolled Oats
Next, add 1 and 3/4 cups of rolled oats to the peanut butter mixture. Stir until the oats are fully coated, which should take just a minute or two. The oats will absorb the moisture and flavor, providing a hearty base for your No-Bake Peanut Butter Oat Cups that will hold together beautifully.
Step 4: Fill the Muffin Liners
Take about 2 tablespoons of the oat mixture and distribute it evenly into each muffin liner, pressing down firmly to pack it tightly. Ensure that the bases are well-formed and compact to maintain their structure once chilled. This step is crucial for achieving that perfect chewy texture.
Step 5: Chill the Oat Base
Place the muffin tin in the refrigerator and chill the oat bases for about 15 to 20 minutes. This will allow them to firm up, providing a sturdy bottom layer for your No-Bake Peanut Butter Oat Cups. Keep an eye on them—they should be firm to the touch when ready to layer with chocolate.
Step 6: Melt the Chocolate and Peanut Butter Topping
In a microwave-safe bowl, combine 1/2 cup of vegan chocolate chips and 5 tablespoons of creamy peanut butter. Heat the mixture in 20-second intervals, stirring in between, until it’s completely smooth—this should take about a minute. This luscious chocolate layer will perfectly combine with the nutty flavor.
Step 7: Top Each Oat Cup
Spoon 1 to 2 teaspoons of the melted chocolate and peanut butter mixture over each oat base, making sure to smooth the tops for an even finish. The chocolate topping not only adds flavor but also elevates your No-Bake Peanut Butter Oat Cups to a delightful treat.
Step 8: Freeze Until Firm
Transfer the muffin tin to the freezer and let the cups chill for 20 to 30 minutes. This will set the chocolate topping and solidify the cups, ensuring a deliciously satisfying bite. You’ll know they are ready when the chocolate is hard and the cups feel firm to the touch.
Step 9: Remove and Serve
Once set, gently remove the cups from the muffin tin and peel off the liners. Allow them to sit at room temperature for about 5 minutes before serving. This brief wait allows the No-Bake Peanut Butter Oat Cups to soften slightly, making them delectable and easy to enjoy!

What to Serve with 4-Ingredient No-Bake Peanut Butter Oat Cups
Ready to create a delightful spread to pair with your wholesome treats?
-
Fresh Fruit Salad: A colorful mix of seasonal fruits adds a refreshing, juicy contrast that balances the richness of the oat cups. Perfect for an uplifting bite!
-
Greek Yogurt Parfait: Layer creamy Greek yogurt with berries and a drizzle of honey for a protein-packed addition. The tanginess complements the sweet oat cups beautifully.
-
Nutty Granola: Serve up a crunchy nut and seed granola on the side for added texture. Sprinkle it over the oat cups for a delightful crunch with every bite!
-
Coconut Chia Pudding: This smooth and creamy pudding makes a wonderful contrast to the chewy oat cups. The natural sweetness and subtle coconut flavor elevate the overall experience.
-
Herbal Tea: A calming cup of peppermint or chamomile tea harmonizes perfectly with these treats, balancing sweetness with soothing warmth. It’s an ideal way to unwind.
-
Dark Chocolate Drizzle: Elevate your oat cups with a drizzle of dark chocolate. The richness enhances each bite, making them feel even more decadent.
-
Mango Smoothie: Blend ripe mango with almond milk for a creamy, fruity drink. The tropical notes and sweetness add a refreshing layer beside the delightful oat cups.
Storage Tips for No-Bake Peanut Butter Oat Cups
-
Fridge: Keep your No-Bake Peanut Butter Oat Cups in an airtight container in the fridge for up to 10 days. This way, they’ll stay fresh and ready for a quick snack anytime!
-
Freezer: For longer storage, freeze the oat cups for up to 3 months. Wrap them individually in plastic wrap before placing them in a freezer-safe container to prevent freezer burn.
-
Thawing: When you’re ready to enjoy the frozen cups, simply remove them from the freezer and let them thaw at room temperature for about 10 minutes, or pop them in the fridge overnight for a more gradual thaw.
-
Reheating: If desired, you can slightly warm them in the microwave for about 10-15 seconds to enhance the creamy texture of the peanut butter topping before serving!
Make Ahead Options
These No-Bake Peanut Butter Oat Cups are an excellent choice for busy home cooks looking to save time! You can prepare the oat mixture up to 24 hours in advance by storing it tightly packed in the muffin liners and refrigerating it. Simply follow the mixing and filling steps, then chill the bases overnight. When you’re ready to serve, melt the chocolate and peanut butter topping, pour it over each cup, and freeze for another 20-30 minutes until set. This method not only maintains the quality of your cups but also allows you to enjoy deliciously homemade treats with minimal effort on the day you need them!
Expert Tips for No-Bake Peanut Butter Oat Cups
-
Tightly Pack Mixture: Ensure you press the oat mixture firmly into the muffin liners; this step is crucial for achieving a sturdy texture in your No-Bake Peanut Butter Oat Cups.
-
Greasing Liners: Lightly grease the paper liners with coconut oil before adding the mixture for easier removal—nobody wants to struggle getting to the delicious part!
-
Chocolate Melting Technique: Melt the chocolate and peanut butter in short bursts; this prevents burning and guarantees a smooth, luscious topping for your cups.
-
Cool to Perfection: Allow the cups to chill thoroughly; patience is key! Make sure the topping is fully set to enjoy the best textural contrast with the chewy oat base.
-
Customization Ideas: Don’t hesitate to mix in extras like chia seeds or dried fruits; these will add delightful texture and flavor, making your No-Bake Peanut Butter Oat Cups even more special!
No-Bake Peanut Butter Oat Cups Variations
Feel free to explore these tasty twists on the classic recipe, making it uniquely yours.
-
Nut-Free: Use sunflower seed butter instead of peanut butter for a delightful twist that everyone can enjoy.
-
Less Sweet: Reduce maple syrup to 4 tablespoons for a more subtle sweetness that allows the peanut flavor to shine through.
-
Added Crunch: Mix in chopped nuts or seeds, such as almonds or pumpkin seeds, for a satisfying crunch that pairs beautifully with the creamy oats.
-
Boosted Fiber: Incorporate chia seeds or flaxseeds for added nutrients. They’ll introduce a delightful texture while enhancing the health benefits.
-
Rich Chocolate Flavor: Substitute with dark chocolate chips for a deeper, more intense chocolate layer that will satisfy any chocolate lover’s cravings.
-
Fruity Delight: Toss in some dried fruits like cranberries or raisins for a burst of natural sweetness and chewy texture.
-
Protein-Packed: Add a scoop of your favorite protein powder to the mixture for an extra nutritional boost, perfect for a post-workout snack.
-
Tropical Vibe: Mix in shredded coconut for a hint of the tropics, adding both flavor and a fun texture to your oat cups.
If you love these no-bake cups, you might also enjoy some delightful Peanut Butter Greek yogurt bites or the exquisite flavors from Roasted Butternut Squash. These variations are perfect companions that could elevate your snack game!
No-Bake Peanut Butter Oat Cups Recipe FAQs
What kind of oats should I use for the No-Bake Peanut Butter Oat Cups?
For the best texture and flavor, I recommend using rolled oats, as they provide a chewy consistency. If you need a gluten-free option, be sure to use certified gluten-free rolled oats to ensure there’s no cross-contamination.
How should I store the No-Bake Peanut Butter Oat Cups?
Store your oat cups in an airtight container in the fridge for up to 10 days. This keeps them fresh and ready for a delicious snack! If you want to keep them longer, you can freeze them for up to 3 months by wrapping each cup individually in plastic wrap before placing them in a freezer-safe container.
Can I freeze these oat cups? How?
Absolutely! To freeze your No-Bake Peanut Butter Oat Cups, wrap each one in plastic wrap after they have set. Place them in a freezer-safe container, and they’ll last up to 3 months. When you’re ready to enjoy them, simply remove one from the freezer and let it thaw at room temperature for about 10 minutes, or pop it in the fridge overnight for a gradual thaw.
What if my mixture is too crumbly?
If you find your oat mixture is too crumbly and doesn’t hold together, try adding a bit more peanut butter or maple syrup to increase the moisture content. Start with just a tablespoon at a time and mix thoroughly until you achieve a consistency that holds together well when pressed.
Can I give these oat cups to my kids? What about allergies?
Definitely! These oat cups are a great snack for kids, packed with healthy fats and fiber. If your children have nut allergies, substitute the peanut butter with sunflower seed butter to make a nut-free version. Always check the chocolate chips if allergies are a concern, as some may contain milk or traces of nuts.
How can I customize the No-Bake Peanut Butter Oat Cups?
There are so many ways to customize these cups! Consider mixing in chia seeds, dried fruit, or even a handful of dark chocolate chunks for extra flavor and nutrition. You can also reduce the sweetness by cutting back on maple syrup or using unsweetened chocolate chips for the topping. The more, the merrier!
Irresistible No-Bake Peanut Butter Oat Cups You’ll Love
Ingredients
Equipment
Method
- Line a muffin tin with 10 to 12 paper liners or lightly grease it with coconut oil.
- In a mixing bowl, combine the peanut butter and maple syrup, stirring vigorously until smooth.
- Add the rolled oats to the peanut butter mixture and stir until fully coated.
- Distribute about 2 tablespoons of the oat mixture into each muffin liner, pressing down firmly.
- Chill the muffin tin in the refrigerator for about 15 to 20 minutes until firm.
- In a microwave-safe bowl, combine vegan chocolate chips and peanut butter. Melt in short intervals, stirring until smooth.
- Spoon 1 to 2 teaspoons of the chocolate mixture over each oat base, smoothing the tops.
- Freeze the muffin tin for 20 to 30 minutes until the chocolate topping is set.
- Remove the cups from the muffin tin and peel off the liners before serving.
Leave a Reply