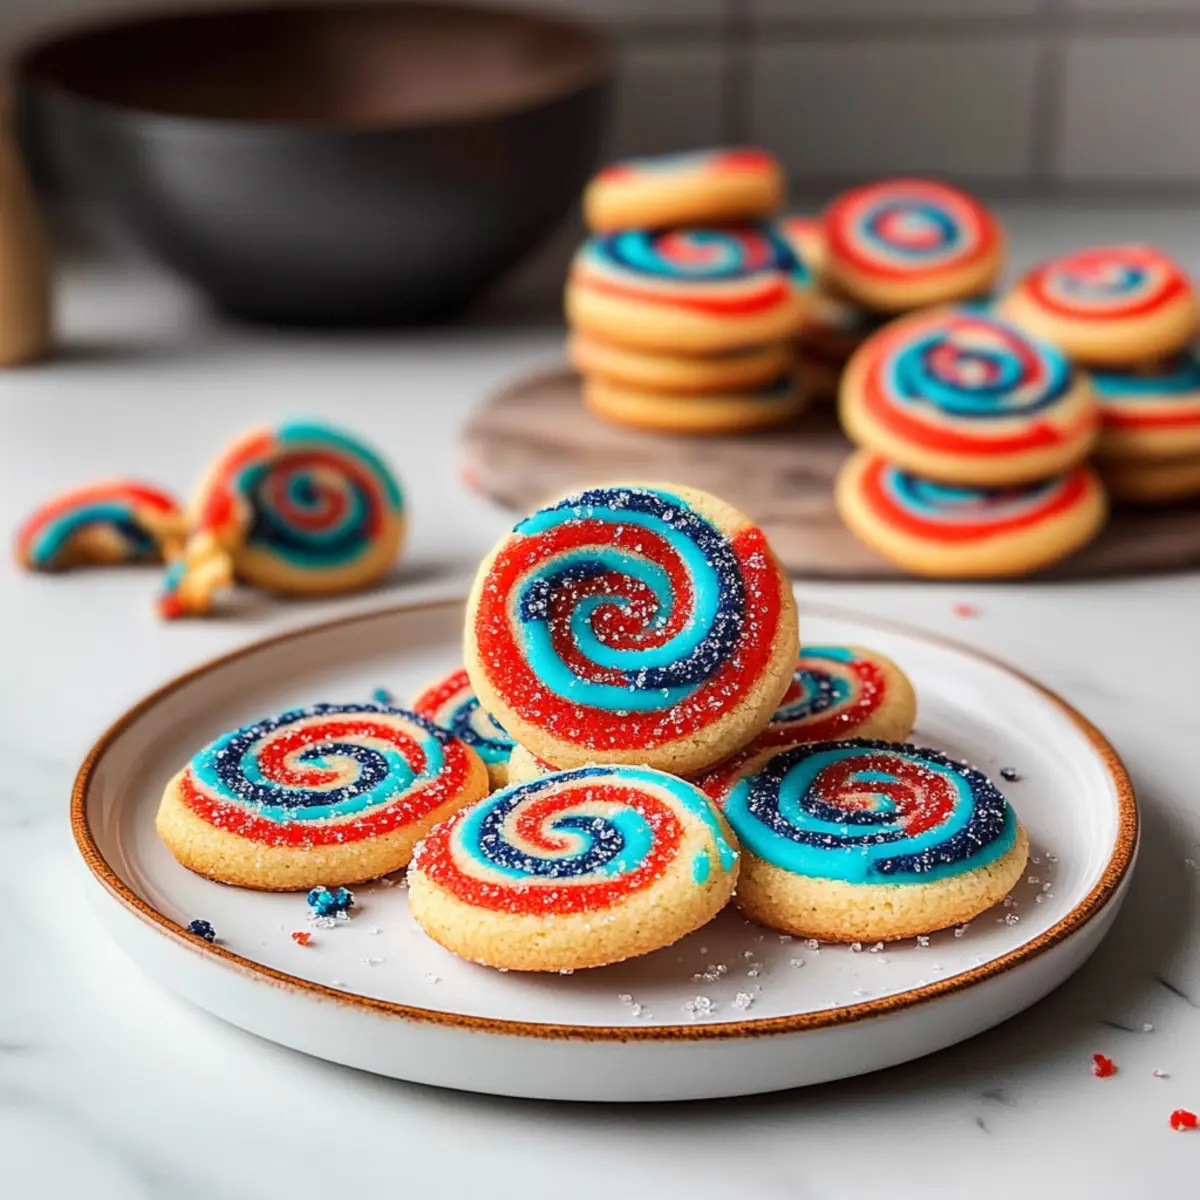
As I arranged the picnic table under the bright summer sun, a glorious thought struck me—nothing says celebration quite like homemade Red White and Blue Pinwheel Cookies. These eye-catching treats are not only festive but incredibly easy to whip up, making them perfect for both novice bakers and seasoned pros. With soft, buttery layers swirled in vibrant red and blue, these cookies offer a delightful bite that balances sweetness with a fun twist. Whether you’re hosting a lively 4th of July barbecue or simply looking to brighten up a gathering, these colorful delights are sure to impress. Ready to learn how to create these show-stopping cookies? Let’s get baking!
Why Are These Cookies a Must-Try?
Celebration-ready: These vibrant Red White and Blue Cookies are perfect for summer festivities, especially the 4th of July!
Easy to make: With beginner-friendly steps, even novice bakers can feel like pros in no time.
Fun twist: The colorful swirl design not only pleases the eye but also adds a sweet surprise with every bite.
Perfect pairing: They go beautifully with summer beverages, making them a hit at any gathering—think lemonade or iced tea.
Make-ahead friendly: Prepare the dough ahead of time and bake fresh cookies whenever the craving strikes! Enjoy the delightful aroma as they fill your home.
Red White and Blue Cookies Ingredients
Want to whip up your own batch of these delightful treats? Here’s what you’ll need!
For the Dough
- All-Purpose Flour – Structure. Substitute with gluten-free flour for a gluten-free version.
- Baking Powder – Leavening agent. Ensure it is fresh for proper rise.
- Salt – Enhances flavor. No substitute needed.
- Unsalted Butter – Richness and moisture. Can use margarine if dairy-free.
- Granulated Sugar – Sweetness and helps with texture. Brown sugar can add a deeper flavor.
- Large Eggs – Provide moisture and bind ingredients. No substitute for egg-free cookies is suggested.
- Vanilla Extract – Flavor enhancement. Almond extract can be used for a different flavor profile.
For the Colors
- Red Gel Food Coloring – Color. Gel type preferred for vibrant color without affecting texture.
- Blue Gel Food Coloring – Color. Same as above; liquid food coloring may alter dough texture.
For the Finish
- Coarse Sugar/Sprinkles – Optional. Adds texture and decoration.
With these simple ingredients, you can make your very own Red White and Blue Cookies that will dazzle at your next summer gathering!
Step‑by‑Step Instructions for Easy Red White and Blue Pinwheel Cookies
Step 1: Dough Preparation
In a mixing bowl, whisk together 2 cups of all-purpose flour, 1 teaspoon of baking powder, and ¼ teaspoon of salt until well combined. In a separate bowl, beat 1 cup of softened unsalted butter until creamy. Gradually add 1 cup of granulated sugar and continue mixing until the mixture is light and fluffy. Add in 2 large eggs and 2 teaspoons of vanilla extract, mixing until just combined.
Step 2: Add Dry Ingredients
Slowly add the dry mixture to the wet ingredients, mixing on low speed until just combined and a soft dough forms. Be sure not to over-mix; you want a smooth consistency without any lumps. Once combined, the dough should be slightly sticky but manageable. This forms the base of your delightful Red White and Blue Cookies.
Step 3: Color the Dough
Divide the prepared dough into three equal portions. Leave one portion plain for the white layer. Use red gel food coloring to tint one portion, adding gradually until you achieve your desired shade. In the third portion, mix in blue gel food coloring, following the same method. This will give each layer its festive color for your pinwheel cookies.
Step 4: Chill Dough
Shape each colored dough portion into flat rectangles, about half an inch thick. Wrap each rectangle tightly in plastic wrap and refrigerate for 30 minutes. Chilling the dough is crucial for maintaining its structure when rolling, especially the decorative layers in your Red White and Blue Cookies.
Step 5: Roll and Stack
Once chilled, carefully roll out each portion between sheets of parchment paper into rectangles about ¼ inch thick. Begin with the plain dough, followed by the red and then the blue layers on top. Press gently to adhere the layers together, ensuring they align properly for a beautiful swirl effect.
Step 6: Form the Log
Starting from the short end of the stacked dough, roll it tightly into a log, ensuring even pressure to maintain the layers. Wrap the log tightly in plastic wrap and refrigerate for at least 2 hours, or overnight if you prefer convenient baking later. This will help the layers hold their shape when slicing.
Step 7: Bake
Preheat your oven to 375°F (190°C). Remove the dough log from the refrigerator and slice it into ¼-inch rounds. Optionally, roll the edges in coarse sugar for added texture. Place the rounds on a baking sheet lined with parchment paper, leaving space between each cookie. Bake for 8-10 minutes, until the edges are set but the cookies remain soft.
Step 8: Cool and Serve
Let the cookies cool on the baking sheet for a few minutes before transferring them to a wire rack to cool completely. As they cool, the festive colors will shine, showcasing the lovely pinwheel design of your Red White and Blue Cookies, perfect for summer celebrations!

How to Store and Freeze Red White and Blue Cookies
Room Temperature: Store cookies in an airtight container at room temperature for up to 4 days to retain their softness and freshness.
Fridge: If you prefer a firmer texture, place the cookies in the refrigerator, where they can stay fresh for up to a week.
Freezer: Unbaked dough can be frozen for up to 2 months. Just slice and bake directly from the freezer for warm, freshly baked Red White and Blue Cookies anytime!
Reheating: For the best experience, warm refrigerated cookies in the microwave for a few seconds, just until they’re soft and cozy.
Red White and Blue Cookies Variations
Feel free to let your creativity shine as you customize these delightful cookies into your very own masterpieces!
-
Gluten-Free: Use a gluten-free baking blend instead of all-purpose flour for a delicious alternative that everyone can enjoy.
Creating a gluten-free version means reimagining holiday classics, ensuring those with dietary restrictions can join the celebration. -
Dairy-Free: Swap unsalted butter for dairy-free margarine or coconut oil to make these cookies dairy-free friendly.
This option doesn’t lose the rich, buttery flavor, allowing you to share them without worry. -
Add Flavor: Experiment with peppermint or orange extracts for a unique twist, enhancing your cookies with exciting new flavors.
These subtle changes can transport your taste buds to different festive celebrations, making each occasion memorable. -
Stuffed Surprise: Add a layer of chocolate chips or nuts between the dough layers for a fun hidden surprise in each bite.
The added texture gives an unexpected crunch, adding a delightful element that makes these cookies even more irresistible. -
Fruity Twist: Mix in some dried cranberries or blueberries directly into the dough for an added berry flavor alongside the classic colors.
Bright bursts of fruity goodness elevate these cookies, making each bite a refreshing treat on sunny days. -
Spicy Kick: Add a pinch of cinnamon or cayenne pepper for a surprising twist of warmth that complements the sweet elements.
A hint of spice can elevate the flavor profile, providing a bold contrast that’s sure to intrigue guests. -
Festive Sprinkles: Incorporate multicolored sprinkles directly into the dough for an added crunch and extra color that children will adore.
Besides fun, these sprinkles make the cookies even more visually appealing, great for capturing joyful moments. -
Layered Look: Experiment with alternating layers of different colors, or even stripes, for a visually stunning pinwheel design.
This creative approach not only enhances their festive spirit but also adds an artistic flair to your baking.
Try out these variations, and don’t forget to pair your cookies with refreshing drinks like lemonade or iced tea. While you’re at it, why not explore more festive treats like White Chocolate Orange or Almond Cherry Cookies? Let your baking adventures begin!
Make Ahead Options
These delightful Red White and Blue Pinwheel Cookies are perfect for meal prep! You can prepare the dough up to 24 hours in advance. Simply follow all steps through the chilling portion (Step 4), then wrap each colored layer in plastic and refrigerate. For even longer storage, you can freeze the rolled log for up to 2 months; just slice and bake directly from the freezer for fresh cookies anytime. To maintain the quality, ensure the dough is wrapped well to prevent freezer burn. When you’re ready to enjoy, slice your cookie log, bake at 375°F for about 8-10 minutes, and savor the joy of freshly baked treats with minimal effort!
What to Serve with Easy Red White and Blue Pinwheel Cookies
Indulge in a perfect summer gathering by creating a vibrant spread that pairs beautifully with these delightful cookies.
-
Lemonade Stand: The crisp, tangy taste of homemade lemonade refreshes and complements the sweet flavors of the pinwheel cookies. It’s a classic pairing that never disappoints.
-
Iced Tea Delight: A chilled glass of sweetened iced tea can balance the cookies’ richness, creating a combination that’s both invigorating and satisfying as you enjoy the summer sun.
-
Fresh Fruit Platter: Serve assorted fresh fruits like strawberries, blueberries, and watermelon for a burst of natural sweetness and color that mirrors the cookies’ festive theme.
-
Patriotic Fruit Salad: Whip up a fruity salad with red, white, and blue berries, drizzled with a touch of honey. This light, nutritious option pairs excellently with the rich flavors of the cookies.
-
Red White and Blue Cheesecake Dip: This creamy, indulgent dip aligns perfectly in color and flavor with your cookies. It adds a fun element for guests to enjoy with fresh fruit or cookie bites!
-
Vanilla Ice Cream: A scoop of vanilla ice cream adds a creamy texture that beautifully contrasts the soft cookie. Together, they make a delightful and nostalgic summer treat.
-
Sparkling Water Infusion: Infuse sparkling water with fresh mint and lime for a refreshing drink option that keeps the gathering festive and light.
The vibrant essence of your red, white, and blue cookies will shine even brighter when served alongside these delightful pairings!
Expert Tips for Red White and Blue Cookies
-
Chill the Dough: Ensure the dough is thoroughly chilled before slicing. This helps maintain the pinwheel shape and prevents spreading during baking.
-
Use Gel Food Coloring: Opt for gel food coloring instead of liquid. Gel colors provide vibrant hues without altering the dough’s consistency, keeping your cookies perfectly textured.
-
Don’t Over-Mix: When combining the dry ingredients with the wet, mix just until blended. Over-mixing can result in tough cookies, while a gentle touch preserves that soft, buttery bite.
-
Slice Evenly: For uniform cookies, use a sharp knife to slice the dough log into ¼-inch rounds. This ensures even baking and a lovely appearance.
-
Experiment with Layers: Don’t hesitate to try different color combinations or flavored extracts! This allows you to customize your Red White and Blue Cookies for various occasions or personal tastes.
Red White and Blue Pinwheel Cookies Recipe FAQs
How do I choose the right ripeness of ingredients?
Absolutely! For the best results, use unsalted butter that is softened at room temperature, as this will blend more easily with your sugars, creating that delightful texture. Eggs should also be at room temperature for better incorporation into the dough, enhancing the overall richness of your pinwheel cookies.
What’s the best way to store leftover cookies?
To keep your Red White and Blue Cookies fresh, store them in an airtight container at room temperature for up to 4 days. If you want them to last longer, placing them in the refrigerator can keep them good for up to a week without sacrificing too much of their delightful texture. Just make sure you layer parchment paper between them to prevent sticking!
Can I freeze the dough for later use?
Yes, you can! To freeze the unbaked dough, wrap the formed log tightly in plastic wrap and place it in a freezer-safe bag. It can be frozen for up to 2 months. When you’re ready to bake, simply remove it from the freezer, slice the dough into rounds, and bake straight from frozen—no need to thaw!
What should I do if my cookies spread during baking?
Very! If your cookies spread, it could mean the dough was too warm or not chilled sufficiently. Make sure to chill the dough for at least 2 hours before slicing, and consider refrigerating the sliced cookies for about 10 minutes before baking. Another tip is to ensure that you’re using chilled butter and keeping ingredients cool while you work.
Are there any dietary considerations for these cookies?
Yes! If you have dairy allergies, you can use margarine or vegan butter as a substitute for the unsalted butter. For gluten-free options, simply swap the all-purpose flour for a gluten-free alternative, making sure it’s a good blend for baking. Always double-check the food colorings to make sure they meet your dietary needs as well.
Can I customize the colors for different occasions?
Absolutely! The more the merrier! You can easily customize the colors for various festivities—think green and red for Christmas or pastels for Easter. Just follow the same process and have fun mixing different gel food colors to create your unique pinwheel masterpieces!
Delightful Red White and Blue Cookies for Your Summer Parties
Ingredients
Equipment
Method
- In a mixing bowl, whisk together all-purpose flour, baking powder, and salt until well combined.
- In a separate bowl, beat softened unsalted butter until creamy. Gradually add granulated sugar and continue mixing until light and fluffy.
- Add in eggs and vanilla extract, mixing until just combined.
- Slowly add the dry mixture to the wet ingredients, mixing on low speed until just combined and a soft dough forms.
- Divide the prepared dough into three equal portions. Leave one portion plain for the white layer.
- Use red gel food coloring to tint one portion, adding gradually until desired shade.
- In the third portion, mix in blue gel food coloring, following the same method.
- Shape each colored dough portion into flat rectangles, about half an inch thick. Wrap in plastic wrap and refrigerate for 30 minutes.
- Once chilled, roll out each portion between sheets of parchment paper into rectangles about ¼ inch thick.
- Begin with the plain dough, followed by the red and then the blue layers on top.
- Starting from the short end of the stacked dough, roll tightly into a log, maintaining even pressure.
- Wrap the log in plastic wrap and refrigerate for at least 2 hours, or overnight.
- Preheat your oven to 375°F (190°C). Slice the dough log into ¼-inch rounds.
- Place rounds on a baking sheet lined with parchment paper and bake for 8-10 minutes.
- Let cookies cool on the baking sheet for a few minutes before transferring to a wire rack.
Leave a Reply