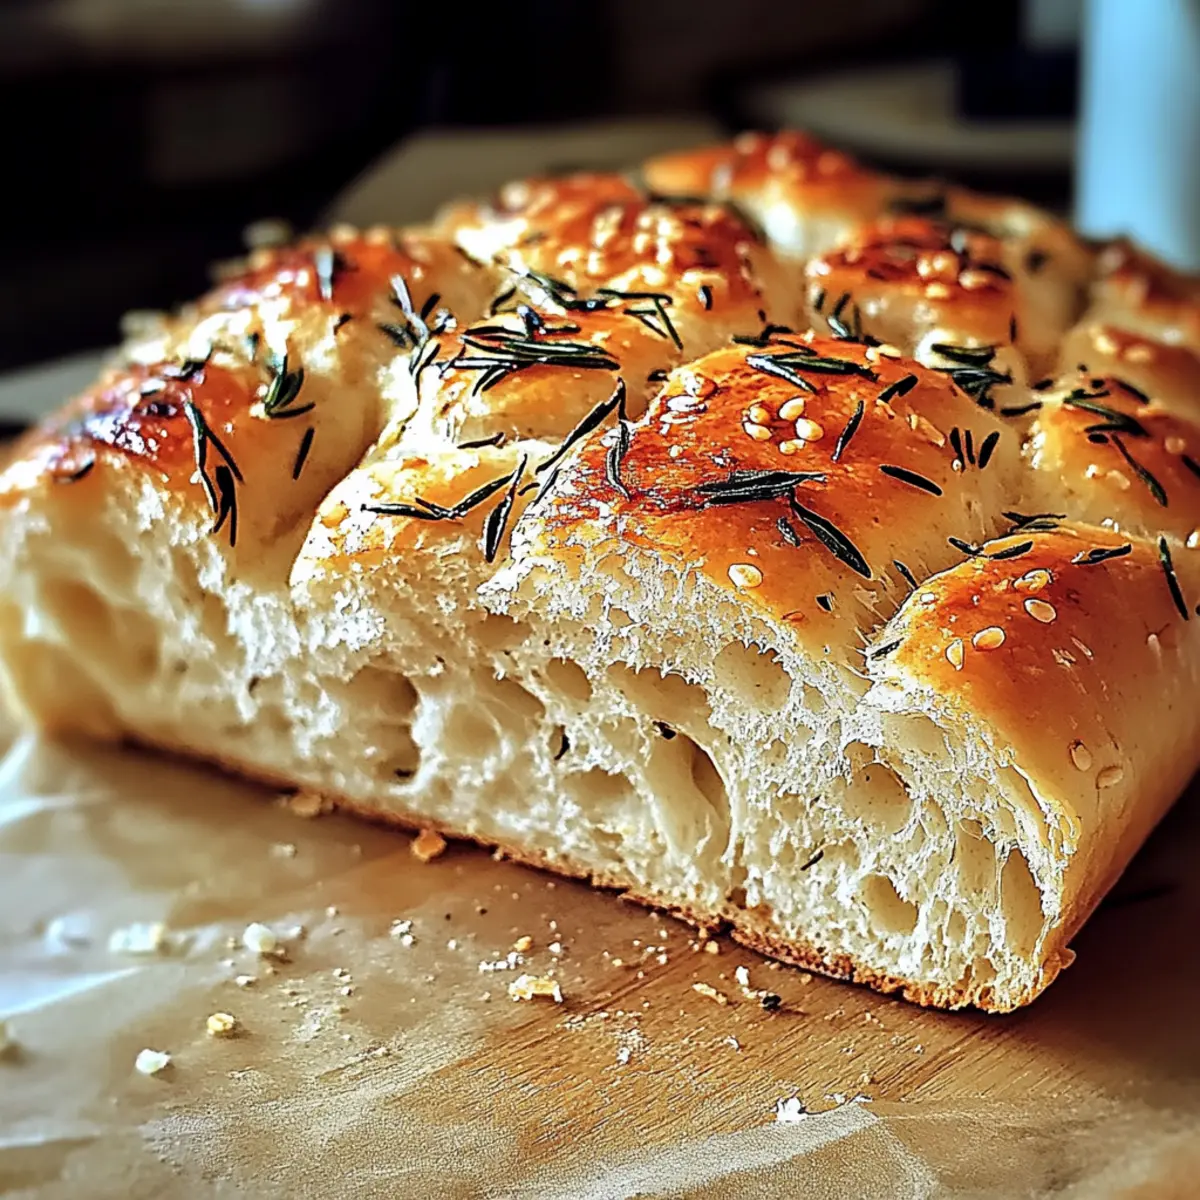
The aroma of freshly baked bread filled my kitchen, wrapping around me like a warm hug. Today, I’m thrilled to share my recipe for Easy Roasted Garlic Rosemary Artisan Bread—a homemade delight that transforms simple ingredients into a rustic masterpiece. This no-knead wonder offers the perfect balance of chewy texture and a golden-crisp crust, making it an exceptional addition to any meal. As a passionate home chef, I know the joy of crafting bread that not only impresses family and friends but also fills the home with inviting warmth. Plus, this versatile loaf is incredibly easy to prepare, allowing you to savor the simple pleasure of homemade bread without hours of labor. Ready to elevate your baking game and indulge in the delightful flavors of garlic and rosemary? Let’s dive into this delicious adventure together!
Why Is Artisan Bread So Irresistible?
Homemade Goodness: There’s nothing quite like the aroma of freshly baked bread wafting through your home, creating an inviting atmosphere for family and friends.
Effortless Preparation: With this no-knead recipe, you can whip up a delicious loaf without the fuss of traditional bread-making techniques.
Impressive Flavor: Roasted garlic and rosemary meld to create a flavor explosion that elevates any dish. Perfect for gourmet sandwiches or paired with soups!
Family-Friendly: This rustic loaf is a hit at any gathering, bringing everyone together over warm, crusty slices.
Versatile Uses: Use it for breakfast toast, sandwiches, or simply enjoy with a drizzle of olive oil. Try it alongside my Garlic Butter Beef Bites for a complete meal experience!
Roasted Garlic Rosemary Artisan Bread Ingredients
For the Bread
• All-purpose flour – Provides structure and chewiness; substitute with whole wheat flour for a denser bread.
• Water – Hydrates the dough and activates yeast; use warm water (about 70°F) to enhance fermentation.
• Salt – Enhances flavor and controls yeast activity; opt for sea salt for a subtler taste.
• Instant yeast – Leavens the bread without proofing; can substitute with active dry yeast but might need to adjust water temperature slightly.
• Roasted garlic – Adds a rich, mellow flavor; fresh garlic can replace it for a sharper taste, but be cautious of stronger potency.
• Rosemary – Infuses a fragrant herbal note; feel free to swap with other herbs like thyme or oregano depending on your preference.
This Roasted Garlic Rosemary Artisan Bread recipe will surely become a favorite in your home!
Step‑by‑Step Instructions for Roasted Garlic Rosemary Artisan Bread
Step 1: Mixing the Dough
In a large mixing bowl, combine all-purpose flour, warm water, salt, and instant yeast. Stir until a shaggy dough forms, ensuring all ingredients are well incorporated. Once mixed, gently fold in the roasted garlic and chopped rosemary, creating an aromatic blend. The dough will look rough but should come together into a cohesive mass.
Step 2: First Rise
Cover the bowl tightly with plastic wrap to trap warmth and moisture. Allow the dough to rise at room temperature for about 12 hours, or until it has doubled in size and is bubbly on the surface. During this time, the delightful scents of roasted garlic and rosemary will start to fill your kitchen, hinting at the deliciousness to come.
Step 3: Shaping the Dough
Once the dough has risen beautifully, sprinkle some flour on a clean work surface. Gently turn the dough out onto the floured surface and shape it into a rough ball. Avoid overworking it; you want to keep that airy structure. Let the formed dough rest for about 30 minutes. This allows the gluten to relax, making it easier to shape for the next rise.
Step 4: Second Rise
After resting, lightly flour a banneton or a bowl lined with a floured kitchen towel. Carefully transfer the dough into the banneton, seam side up. Cover it again and let it rise for another 1 to 2 hours, or until the dough has magically puffed up. Look for it to become noticeably larger, which indicates it’s ready for baking.
Step 5: Baking
Preheat your oven to 450°F and place a Dutch oven inside to heat up as well. Once preheated, carefully transfer the dough into the hot Dutch oven. Cover it with the lid and bake for 30 minutes. The steam will help create that perfect crust. After 30 minutes, remove the lid to reveal a beautifully golden loaf, and bake for an additional 15-20 minutes until deep brown and it sounds hollow when tapped.
Step 6: Cooling
Once baked, carefully transfer the artisan bread to a wire rack. Allow it to cool completely before slicing—this step is essential to avoid a gummy texture in the bread. As you await the cooling, enjoy the comforting aromas wafting through the air, signaling that your Roasted Garlic Rosemary Artisan Bread is ready to be enjoyed!
Roasted Garlic Rosemary Artisan Bread Variations
Feel free to play with this recipe and tailor it to your taste buds for a delightful twist!
-
Whole Wheat: Substitute all-purpose flour with whole wheat flour for a heartier and denser loaf. It adds a nutty flavor that pairs beautifully with the garlic and rosemary.
-
Herb Medley: Try using a mix of herbs like thyme, oregano, or basil to create a fragrant and flavorful loaf. Each herb brings its unique personality to this rustic delight.
-
Cheesy Surprise: Fold in shredded cheese, such as sharp cheddar or mozzarella, for a gooey center. The melted cheese complements the roasted garlic perfectly, making each bite savory and indulgent.
-
Olive Touch: Add chopped olives into the dough for a briny twist that adds depth to the flavor profile. The saltiness of the olives elevates the taste and enhances the artisanal vibe.
-
Spicy Kick: Incorporate red pepper flakes for an extra layer of flavor and a subtle heat. Spice lovers will appreciate how the heat contrasts with the coolness of the roasted garlic.
-
Sun-Dried Tomatoes: Mix in chopped sun-dried tomatoes for a Mediterranean flair that pairs deliciously with the garlic and rosemary. They provide a sweet, tangy component that brightens the bread.
-
Sweet Twist: Add a spoonful of honey or brown sugar for a hint of sweetness. This creates a beautiful balance with the savory flavors and gives a slightly caramelized crust.
-
Vegetable Infusion: Grate some zucchini or carrot into the dough for extra moisture and nutrition. The subtle sweetness of the veggies adds a whole new dimension to the bread and keeps it moist!
With these delicious variations, the possibilities are endless for your Roasted Garlic Rosemary Artisan Bread. Each twist transforms a simple loaf into something uniquely yours, perfect for any cozy gathering!
How to Store and Freeze Roasted Garlic Rosemary Artisan Bread
Room Temperature: Store the bread in a bread box or an airtight container at room temperature for up to 5 days to maintain its freshness and crusty exterior.
Freezer: For longer storage, wrap slices individually in plastic wrap and then place them in a freezer bag. Frozen roasted garlic rosemary artisan bread can last up to 3 months without losing flavor.
Reheating: To enjoy your bread warm, preheat the oven to 350°F and bake for 10-15 minutes. Alternatively, warm slices in a skillet on the stovetop for a crispy finish.
Thawing: When ready to use, remove slices from the freezer and allow them to thaw at room temperature, or place them directly in your preheated oven for a quick refresh!
What to Serve with Easy Roasted Garlic Rosemary Artisan Bread
There’s nothing quite like a freshly baked loaf to elevate your dining experience and turn a simple meal into something special.
- Hearty Soup: Pair with a rich minestrone or creamy tomato bisque; the rustic bread is perfect for dipping and soaking up flavors.
- Fresh Salad: A vibrant arugula salad with lemon vinaigrette complements the savory bread, balancing its rich undertones with freshness.
- Gourmet Sandwiches: Use it as a base for gourmet sandwiches; its chewy texture holds up against robust fillings like roasted veggies or artisanal meats.
- Olive Oil & Balsamic Vinegar: Serve with a small dish of high-quality olive oil and balsamic vinegar for dipping—simple yet luxurious.
- Cheese Platter: A selection of soft cheeses brings out the garlic notes beautifully—try goat cheese or fresh mozzarella for a delightful combination.
- Wine Pairing: Enjoy with a glass of robust red wine; the herbal notes in the bread match wonderfully with the wine’s complexity.
- Roasted Vegetables: Serve alongside roasted seasonal vegetables, enhancing the earthy flavor profile of the artisan bread.
- Chili or Stew: A warm bowl of chili practically begs for a good crusty bread to accompany it, pairing perfectly for a comforting meal.
- Dessert Option: End on a sweet note with a slice of cinnamon apple pie after your hearty meal—this combination will make a lovely finish!
Expert Tips for Roasted Garlic Rosemary Artisan Bread
Accurate Measurements: Ensure precise measurements of flour and water for the best results; a kitchen scale can help with accuracy.
Patience is Key: Do not rush the rising process; it develops the flavors and textures essential for a fantastic roasted garlic rosemary artisan bread.
Heat Matters: Always preheat your oven before baking; this creates the perfect crust. Skipping this step can lead to a doughy loaf.
Cooling Time: Allow the bread to cool completely on a wire rack before slicing; cutting too soon can result in a gummy texture.
Experiment with Herbs: Feel free to swap rosemary with other herbs like thyme or basil to mix up flavors; just keep the original proportions for a balanced taste.
Make Ahead Options
These Roasted Garlic Rosemary Artisan Bread preparations are a true time-saver for busy home cooks! You can mix the dough up to 24 hours in advance—after mixing, simply cover it tightly with plastic wrap and let it rise in the fridge. This slow fermentation not only develops flavor but also keeps the dough just as delicious! If you’re short on time, shape the dough and let it rise in the fridge for an additional 3 hours before baking. When you’re ready to bake, take the dough out, allow it to warm slightly at room temperature, and then proceed with the baking instructions as usual. With these make-ahead tips, you’ll have mouthwatering bread ready for your family with minimal effort!
Roasted Garlic Rosemary Artisan Bread Recipe FAQs
How do I select ripe ingredients for my artisan bread?
Absolutely! For the best flavor, use fresh, high-quality ingredients. Choose all-purpose flour that is unbleached and free from any additives. When selecting garlic, look for firm bulbs without dark spots; they should be tightly packed. Fresh rosemary should be vibrant and fragrant—avoid dried herbs as they lack the essential oils that bring your bread to life.
What is the best way to store roasted garlic rosemary artisan bread?
Store your freshly baked bread in an airtight container or alternatively, a bread box at room temperature for up to 5 days. If you notice the crust becoming soft, place it in a paper bag for a day or two to help maintain its crustiness longer.
Can I freeze my roasted garlic rosemary artisan bread?
Very! To freeze, allow the bread to cool completely. Then, wrap individual slices tightly in plastic wrap, followed by aluminum foil for added protection. Place the wrapped slices in a freezer bag and they can last up to 3 months. When you’re ready to enjoy, reheat in the oven at 350°F or toast them straight from frozen for a quick snack!
What should I do if my dough doesn’t rise properly?
If your dough is not rising, it could be due to the yeast being inactive. First, check the expiration date on your yeast. If using instant yeast, ensure you’re incorporating it well into the dry ingredients before adding the water. The water should be warm, around 70°F, to activate the yeast properly—if it’s too hot, it can kill the yeast. Patience is key; keep your dough in a warm area free from drafts for the best results.
Is this bread suitable for people with dietary restrictions?
Absolutely! This roasted garlic rosemary artisan bread is vegetarian, and if you substitute all-purpose flour with a gluten-free flour blend, you can make it gluten-free as well. For those with garlic sensitivities, you can omit the roasted garlic and still enjoy delicious rosemary bread. Just note that the flavor profile will change a bit, but it will still be delightful.
How can I ensure my bread has a crispy crust?
The secret lies in preheating your Dutch oven and using steam! Preheat the Dutch oven in your oven at 450°F for about 30 minutes before adding the dough, which helps create a steamy environment that promotes a crispy crust. Additionally, keep the lid on for the first 30 minutes of baking, then remove it to allow the crust to become golden brown and crispy during the final baking phase. Enjoy that satisfying crunch!

Roasted Garlic Rosemary Artisan Bread for Cozy Gatherings
Ingredients
Equipment
Method
- Combine all-purpose flour, warm water, salt, and instant yeast in a large mixing bowl. Stir until a shaggy dough forms. Gently fold in roasted garlic and chopped rosemary.
- Cover the bowl with plastic wrap to trap warmth and moisture. Let the dough rise at room temperature for about 12 hours, until doubled in size.
- Sprinkle flour on a clean surface. Turn the dough out and shape it into a rough ball. Let it rest for about 30 minutes.
- Lightly flour a banneton. Transfer the dough seam side up and let it rise for 1 to 2 hours until puffed up.
- Preheat your oven to 450°F and place a Dutch oven inside to heat. Transfer the dough into the hot Dutch oven, cover, and bake for 30 minutes.
- After 30 minutes, remove the lid and bake for an additional 15-20 minutes until deep brown. Transfer to a wire rack to cool completely before slicing.
Leave a Reply