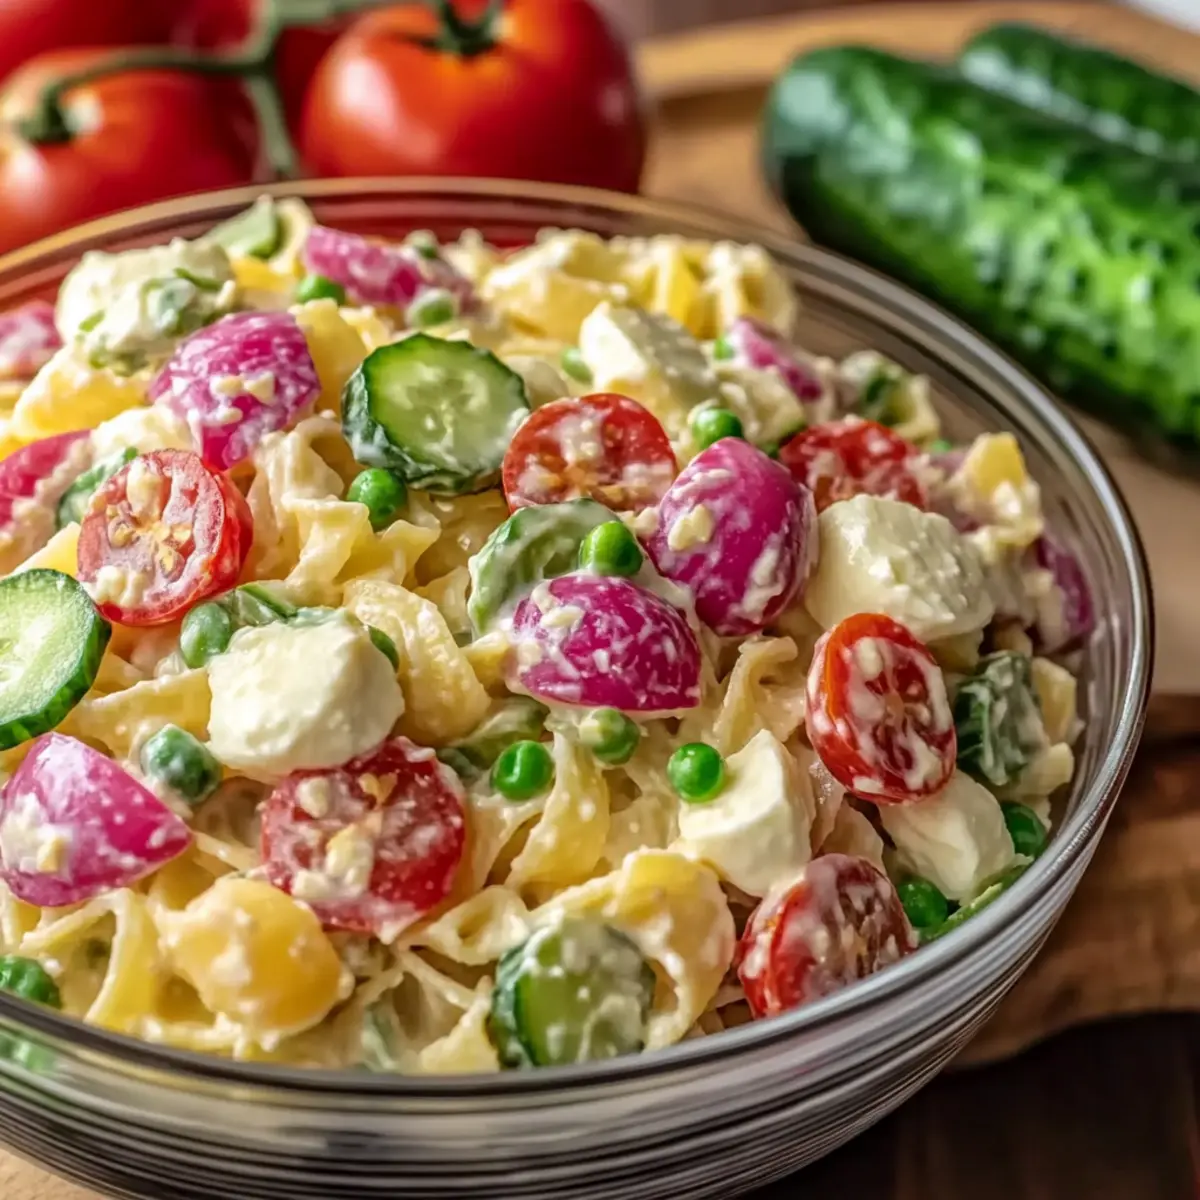
As I sat on my porch, the sun kissing my skin, I couldn’t help but notice the vibrant colors popping up in my garden—spring was finally here! Inspired by the fresh produce that season offers, I whipped up this Layered Spring Pasta Salad. It’s not just another dish; this healthy delight is a stunning centerpiece for picnics or potlucks, making it a must-try for any home chef. With its quick prep time and make-ahead convenience, you can easily enjoy the flavors of spring while keeping your busy schedule in mind. This pasta salad, with its layers of crisp vegetables, creamy mozzarella, and a light dressing, will surely impress everyone at your next gathering. Curious to learn how to create this colorful celebration on your table? Let’s dive in!
Why is This Spring Pasta Salad a Must-Try?
Vibrant Colors: This salad bursts with vibrant hues from fresh spring vegetables, making it as visually appealing as it is tasty.
Healthy Ingredients: Packed with nutrients and using Greek yogurt for the dressing, this dish is a guilt-free delight.
Make-Ahead Magic: Prepare it hours or even a day in advance—just chill it, and it’s ready to impress your guests.
Versatile Options: With easy substitutions like swapping mozzarella for feta or adding proteins like grilled chicken, it caters to various dietary needs.
Effortlessly Delicious: It combines refreshing flavors and textures, turning a simple salad into a crowd-pleaser, perfect for gatherings or light lunches.
Integrate this with other favorites, like a Thanksgiving Salad Cranberry or a Grinder Tortellini Salad, for an unforgettable meal spread!
Spring Pasta Salad Ingredients
• Here’s what you need to create your flavorful Layered Spring Pasta Salad!
For the Pasta
- Pasta (Rotini or Bowtie) – The structural base providing delightful twists and shapes that hold onto flavors.
For the Vegetables
- Cherry Tomatoes – Sweet bursts of flavor; feel free to swap with other seasonal veggies for variety.
- Cucumber – Adds a refreshing crunch; opt for firm cucumbers for the best texture.
- Bell Peppers (Orange) – Sweet and vibrant; you can use any available color for a fun presentation.
- Peas (Sweet) – Bright green and sweet; frozen peas work perfectly if fresh ones aren’t available.
For the Cheese
- Mozzarella Pearls – Creamy and rich, they create luscious layers; substitute feta if you’re looking for a tangy twist.
For the Dressing
- Greek Yogurt – A lighter base that adds creaminess; substitute with plant-based yogurt for vegan options.
- Mayonnaise – Richness to the dressing; light or vegan mayo can be used to meet dietary preferences.
- Red Wine Vinegar – Brings balancing acidity; white wine vinegar makes a fine substitute when needed.
- Dijon Mustard – Adds a touch of tanginess; feel free to swap for yellow mustard if that’s what you have.
- Sugar or Honey – To soften the dressing’s acidity; can be adjusted or skipped for a healthier option.
- Salt & Pepper – Essential seasonings to elevate all the flavors; use to taste.
Now you have all the components for your delicious Spring Pasta Salad! Enjoy the fresh taste of spring while impressing your family and friends.
Step‑by‑Step Instructions for Layered Spring Pasta Salad
Step 1: Cook the Pasta
In a large pot of salted boiling water, cook the rotini or bowtie pasta according to package instructions until al dente, approximately 8-10 minutes. Once done, drain the pasta and rinse it under cold water to stop the cooking process. Toss with a drizzle of olive oil to prevent sticking, and set it aside to cool entirely.
Step 2: Prepare the Dressing
In a medium bowl, whisk together the Greek yogurt, mayonnaise, red wine vinegar, Dijon mustard, and sugar or honey until smooth and creamy. Season the mixture with salt, pepper, and garlic powder to taste. This dressing will provide a rich and tangy flavor that perfectly enhances your Layered Spring Pasta Salad.
Step 3: Layer the Ingredients
Grab a clear bowl or serving dish to showcase the vibrant colors of your salad. Start layering with half of the cooled pasta, followed by a layer of cherry tomatoes, cucumber, bell peppers, peas, and a sprinkle of mozzarella pearls. Aim for an even distribution, ensuring that moisture levels are respected to maintain texture.
Step 4: Add the Dressing
Evenly pour the prepared dressing over the top layer of the salad, using a spatula to gently spread it across without stirring. This allows the dressing to coat the fresh ingredients while keeping the beautiful layers intact, making your Layered Spring Pasta Salad visually appealing.
Step 5: Chill the Salad
Cover the bowl tightly with plastic wrap or a lid, and refrigerate the salad for at least 2 hours, although overnight is preferred. Chilling the salad allows the flavors to meld beautifully, creating a refreshing and harmonious taste that captures the essence of spring.
Step 6: Garnish and Serve
Before serving, remove the salad from the fridge and optionally sprinkle with fresh herbs like basil or parsley for an aromatic touch. You can gently toss the ingredients to mix or serve it layered for a stunning presentation. Your Layered Spring Pasta Salad is now ready to delight your friends and family!
Spring Pasta Salad Variations & Substitutions
Feel free to make this delightful salad your own with these easy swaps and additions!
-
Protein Boost: Add grilled chicken, shrimp, or chickpeas for a heartier salad that packs a protein punch. Mix it up and enjoy how different proteins change the flavor profile!
-
Seasonal Swap: Use seasonal vegetables like zucchini, carrots, or arugula for a fresh twist that showcases what’s available at your local market. Each season brings its own flavor, allowing you to keep things exciting!
-
Cheese Change: Substitute mozzarella with feta for a tangy flavor or try goat cheese for a creamier texture. A simple change can elevate your salad’s taste and add a whole new dimension!
-
Dressing Alternatives: Consider switching out the dressing for a balsamic vinaigrette or a vibrant pesto to surprise your palate. Each dressing variation brings a unique character to the salad, making it feel like a brand new dish!
-
Add Heat: For spice lovers, sprinkle in some red pepper flakes or diced jalapeños to kick it up a notch. The heat adds a delightful contrast to the refreshing veggies.
-
Grains Galore: Swap the pasta for quinoa or farro to create a grain salad that’s gluten-free and oh-so-nutritious. This change adds great texture and makes it equally satisfying.
-
Crunch Factor: Top your salad with toasted pine nuts or slivered almonds for an irresistible crunch. The added texture makes every bite enjoyable, adding contrast to the creamy elements.
-
Herb Infusion: Incorporate fresh herbs like basil, cilantro, or dill throughout the layers for an aromatic explosion of flavor. Freshness in every bite will transport your taste buds straight to a sunlit garden!
For more inspirations, consider pairing this salad with a refreshing Beet Salad Spinach or a hearty Chicken Broccoli Pasta!
How to Store and Freeze Spring Pasta Salad
Fridge: Store in an airtight container for up to 4 days. The flavors continue to meld and deepen, making it even tastier the next day!
Freezer: Not recommended for freezing, as the creamy dressing and fresh vegetables may lose their texture when thawed.
Reheating: Serve chilled directly from the fridge. If it’s been in the fridge for a while, give it a gentle toss to redistribute the dressing and reestablish those beautiful layers.
Preparation Tip: To maintain freshness, keep the dressing separate until just before serving. This helps the Spring Pasta Salad stay vibrant and crunchy!
Make Ahead Options
These Layered Spring Pasta Salads are perfect for busy home cooks looking to save time! You can prepare the pasta and chop the vegetables up to 3 days in advance, storing them separately in the refrigerator to maintain their freshness and avoid sogginess. The dressing can also be made and refrigerated for up to 3 days before serving. When you’re ready to assemble, simply layer the prepped ingredients in a clear bowl, pour over the dressing, and refrigerate for at least 2 hours (preferably overnight) for flavors to meld. This way, your pasta salad will be just as delicious and vibrant, allowing you to enjoy a stress-free mealtime while delighting your family or guests!
Expert Tips for Spring Pasta Salad
-
Perfect Pasta: Cook the pasta al dente to ensure it holds its shape. Overcooked pasta can become mushy, deteriorating your beautiful layers in the Spring Pasta Salad.
-
Keep It Fresh: Use fresh, seasonal vegetables for the best flavor. Avoid limp veggies that can detract from the salad’s overall appeal.
-
Layer Wisely: Layer ingredients according to moisture content—vegetables like tomatoes can release water, so place them strategically to prevent sogginess.
-
Dressing Secrets: To keep your Spring Pasta Salad crisp, store the dressing separately until just before serving. This will maintain the freshness of the salad.
-
Make It Your Own: Don’t hesitate to experiment with different vegetables or dressings based on your preferences; think about adding seasonal favorites for a unique twist.
-
Chill for Flavor: Letting the salad sit in the fridge for several hours or overnight will enhance the flavors, making each bite even more delightful!
What to Serve with Layered Spring Pasta Salad?
Elevate your spring gatherings with delightful accompaniments that perfectly complement this vibrant, healthy dish.
-
Garlic Breadsticks: Crunchy and warm, these breadsticks provide a delightful contrast to the crispness of the salad. They’re perfect for soaking up any leftover dressing!
-
Grilled Chicken Skewers: Juicy and smoky, these skewers add a protein-rich option that pairs wonderfully with the fresh flavors of the salad.
-
Fruit Platter: A colorful assortment of seasonal fruits like strawberries, melon, and pineapple brings a sweet balance, enhancing the spring theme on your table.
-
Crispy Potato Chips: These add a satisfying crunch that contrasts with the creaminess of the salad, delivering a fun snacking option that everyone will love.
-
Lemonade or Iced Tea: A refreshing drink like lemonade or iced tea can complement the lightness of the salad while keeping your guests cool and refreshed.
-
Cheese and Charcuterie Board: A selection of cheeses, cured meats, and olives introduces savory elements, making it a perfect side for a well-rounded meal.
Each pairing not only enhances your Layered Spring Pasta Salad but also transforms your dining experience into a delightful spring celebration!
Layered Spring Pasta Salad Recipe FAQs
How do I choose the best ingredients for my Spring Pasta Salad?
Absolutely! For the freshest taste, select firm cucumbers, vibrant cherry tomatoes, and crisp bell peppers, avoiding any that show dark spots or wrinkles. Seasonal vegetables are key for flavor, so feel free to substitute with veggies like zucchini or radishes depending on availability.
How should I store my Layered Spring Pasta Salad?
Store your salad in an airtight container in the fridge for up to 4 days. It’s best to keep the dressing separate until just before serving to maintain the salad’s crunch and prevent sogginess. This way, you’ll enjoy fresh, flavorful bites every time!
Can I freeze leftover Spring Pasta Salad?
Unfortunately, freezing isn’t recommended because the creamy dressing and fresh vegetables may lose their texture when thawed. However, you can prepare the pasta and chop the veggies ahead of time, storing them separately for easy assembly later!
What if my pasta is soggy after cooking?
If your pasta becomes soggy, there’s no need to worry! To avoid this, ensure you cook it al dente and drain it well before rinsing with cold water. If it does sog up, consider repurposing it into a hot pasta dish or add in crunchy ingredients like nuts to create more texture in your dish.
Are there any dietary considerations I should keep in mind?
Very! This recipe can easily be adapted to fit various dietary needs. For a gluten-free option, simply substitute traditional pasta with gluten-free pasta. If you’re aiming for a vegan dish, use plant-based yogurt and mayo while omitting the mozzarella. Just be sure to check for any allergies with the chosen ingredients!
How can I enhance the flavors of my Spring Pasta Salad?
To elevate the flavor profile, consider adding fresh herbs like basil or dill! These can be mixed into the salad right before serving for a bright finish. You can also toast some pine nuts or sliced almonds for added crunch and richness. The more, the merrier!
Fresh Spring Pasta Salad - Vibrant, Healthy & Make-Ahead
Ingredients
Equipment
Method
- Cook the pasta in a large pot of salted boiling water until al dente, about 8-10 minutes. Drain and rinse under cold water. Toss with olive oil and set aside to cool.
- In a medium bowl, whisk together Greek yogurt, mayonnaise, red wine vinegar, Dijon mustard, and sugar or honey until smooth. Season with salt and pepper.
- In a clear bowl, layer half of the cooled pasta, then add cherry tomatoes, cucumber, bell peppers, peas, and mozzarella.
- Evenly pour the dressing over the top layer without stirring. This keeps the layers intact.
- Cover and refrigerate for at least 2 hours, preferably overnight.
- Before serving, optionally garnish with fresh herbs. Toss gently or serve layered.
Leave a Reply