As I stood at my kitchen counter, the heady aroma of spices mingling in the air, I recalled my recent culinary adventure: crafting these delightful Cheesy Antojitos. This quick and irresistible Mexican street food is more than just a snack; it’s a burst of joy wrapped snugly in a tortilla. Ready in under 30 minutes, these little bites are perfect for any gathering or a spontaneous family movie night. Plus, they’re effortlessly adaptable—whether you need a gluten-free version with corn tortillas or want to spice things up with jalapeños, the options are endless! Are you ready to bring a sprinkle of fiesta to your table with these crowd-pleasers? Let’s dive into the delicious world of Antojitos!

Why Are These Antojitos a Must-Try?
Quick and Hassle-Free: This recipe takes just 30 minutes from start to finish, letting you enjoy delicious homemade snacks without the wait.
Bursting with Flavor: The cheesy filling, combined with spices and green chilies, creates a mouthwatering experience that’s sure to impress your family and guests.
Customizable Goodness: Whether you’re craving a spicy kick or a milder option, feel free to swap in your favorite ingredients for a unique twist each time.
Perfect for Any Occasion: Serve these Antojitos as an appetizer during game night, as snacks for your next gathering, or just for a cozy evening treat.
Texture Lovers Rejoice: Enjoy the brilliant contrast of a crispy exterior and a gooey, flavorful interior that’ll have everyone asking for seconds!
With such versatility, why not check out how to make easy gluten-free adaptations to suit every dietary need?
Antojitos Ingredients
For the Filling
• Cream Cheese – adds creaminess and richness; ensure it is softened for easy mixing.
• Diced Green Chilies – provides a mild kick; canned chilies are convenient, but fresh jalapeños can add a nice twist.
• Cheddar Cheese – offers sharpness and meltability; substitute with Monterey Jack for a milder flavor.
• Red Onion – adds crunch and flavor; use finely diced for better distribution.
• Bell Pepper – enhances texture and sweetness; any color bell pepper works well or omit if desired.
• Sour Cream – contributes to the filling’s creaminess; limited to three tablespoons for the mixture.
• Paprika – adds a subtle smokiness and color to the filling.
• Garlic Powder – imparts depth of flavor; fresh garlic can be swapped in if preferred.
• Onion Powder – complements the flavor of the red onion; optional but recommended.
• Cayenne – provides a touch of heat; adjust to your spice preference.
For the Tortillas
• Flour Tortillas – the base for wrapping; 10” tortillas are ideal, but corn tortillas can be used for a gluten-free option.
Escape the mundane fast food routine with these scrumptious Antojitos!
Step‑by‑Step Instructions for Antojitos
Step 1: Preheat the Oven
Begin by preheating your oven to 350ºF (175ºC) and lining a baking sheet with parchment paper. This prepares the environment for your delicious Antojitos to bake evenly without sticking. Take a moment to enjoy the aroma of spices you’ll be using as you gather your ingredients.
Step 2: Prepare the Filling
In a large mixing bowl, combine softened cream cheese, diced green chilies, shredded cheddar cheese, finely diced red onion, chopped bell pepper, sour cream, and your chosen spices. Mix these ingredients thoroughly until the filling is smooth and well-combined—this should take about 3-5 minutes. Set aside and admire the colorful mixture that awaits your tortillas.
Step 3: Assemble the Antojitos
Lay out a flour tortilla on a clean surface, and spread a generous amount of your cheesy filling evenly across the tortilla. Be sure to leave a little space at the edges to prevent overflow when they’re rolled. Once filled, tightly roll the tortilla from one edge to seal in all the goodness, creating a snug cylinder.
Step 4: Cut the Rolled Tortillas
Using a sharp knife, cut each rolled tortilla at a 45-degree angle into five equal pieces. Discard the ends to ensure all pieces have a uniform filling. Arrange the sliced Antojitos cut-side up on your prepared baking sheet, ready to transform into a crispy snack.
Step 5: Bake the Antojitos
Place the baking sheet in the preheated oven and bake for about 8 minutes, allowing the outer tortillas to start crisping up. Keep an eye on them as they cook, keeping the kitchen filled with the enticing aroma of baking Antojitos.
Step 6: Broil for Extra Crispiness
After the initial bake, switch your oven to high broil and broil the Antojitos for an additional 5 minutes, or until they are golden brown and bubbly. Watch closely to prevent burning, as broiling can quickly change from perfectly baked to overly crispy!
Step 7: Cool and Serve
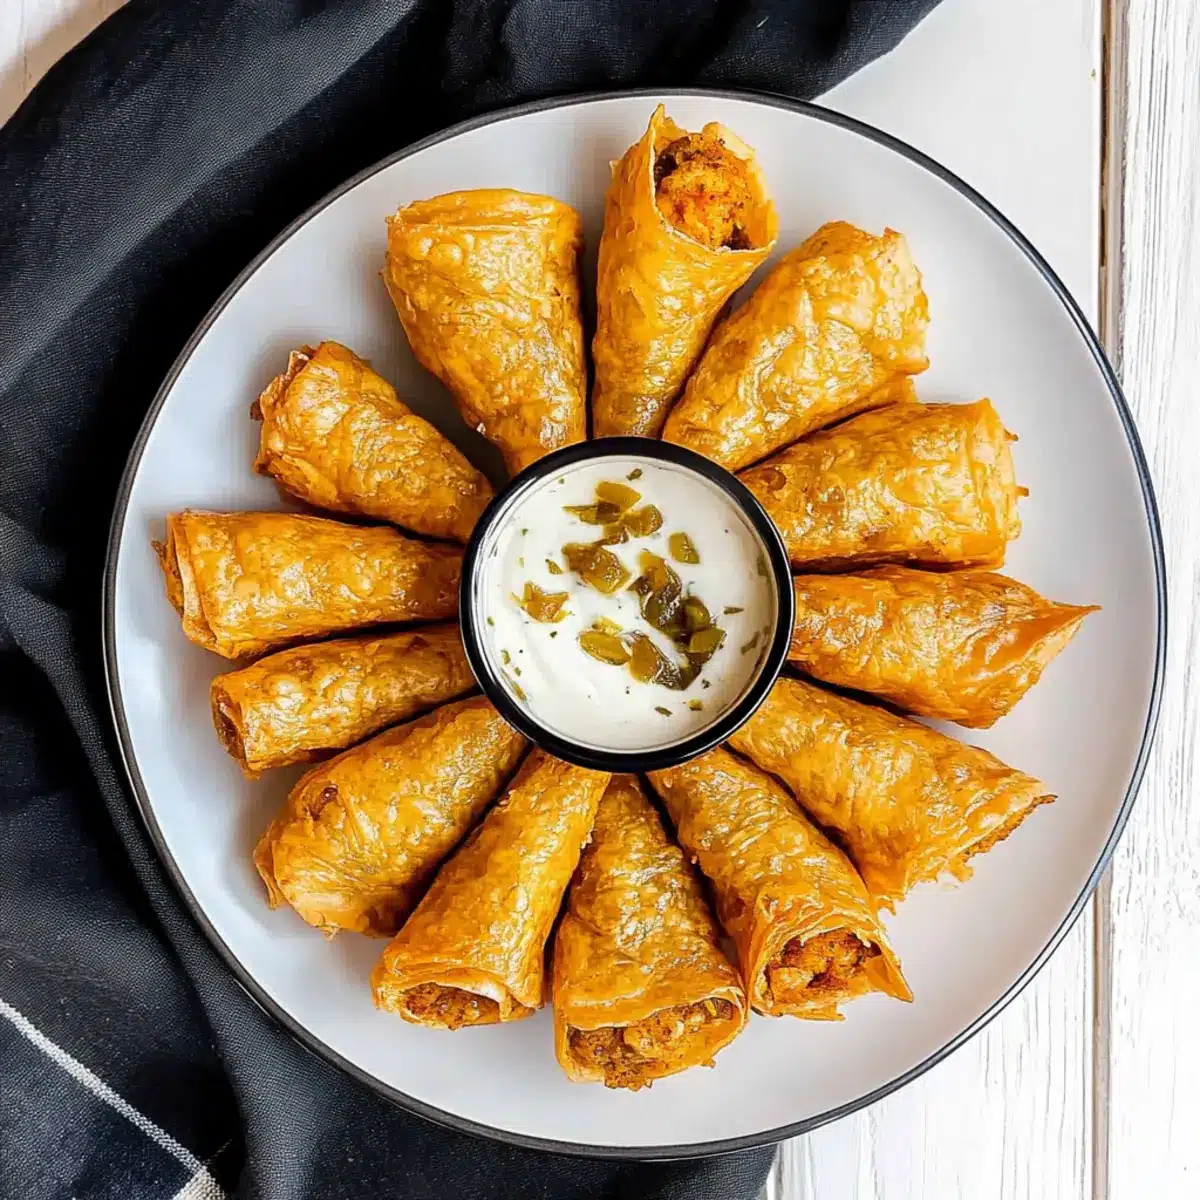
Once the Antojitos are beautifully golden and crisp, remove them from the oven and let them cool slightly on the baking sheet. This brief cooling period ensures easier handling. Serve your warm Antojitos with a side of basil pesto sour cream dipping sauce for an extra delightful touch!

What to Serve with Cheesy Antojitos?
These cheesy bites bring a fiesta to your table, and it’s time to complete the feast!
-
Fresh Guacamole: This creamy avocado dip offers a refreshing contrast, balancing the savory flavors of the Antojitos perfectly. Its cool texture compliments the crunch, creating a harmonious snacking experience.
-
Spicy Salsa: A zesty salsa brings a punchy flavor and vibrant color. The tanginess elevates the melting cheese, providing a bright explosion of taste that enhances every bite.
-
Crispy Tortilla Chips: These provide added crunch and are perfect for dipping! Pairing your Antojitos with tortilla chips lets you enjoy an irresistible mix of textures while savoring even more cheesy goodness.
-
Mexican Street Corn Salad: This colorful dish offers sweet, roasted corn mingled with creamy dressing, spices, and fresh herbs. It adds brightness to your meal while enhancing the Mexican flair of your Antojitos.
-
Pineapple Agua Fresca: A refreshing drink to wash it all down! The sweet and tart pineapple flavor is a fantastic match, cleansing your palate between bites and elevating the entire dining experience.
-
Churros for Dessert: Sweet, crispy churros dusted in cinnamon sugar make for a delightful ending! Their warm sweetness contrasts wonderfully with the savory Antojitos, making for a truly rewarding meal.
Antojitos Variations & Substitutions
Feel free to play around with these ideas to make the Antojitos uniquely yours!
-
Dairy-Free: Swap cream cheese for a cashew or tofu cream for a vegan option. This ensures you still get that creamy texture without dairy.
-
Add Protein: Introduce shredded cooked chicken or beans for added heartiness. This will turn your appetizer into a more filling meal option that’ll leave everyone satisfied.
-
Gluten-Free: Use corn tortillas instead of flour ones for a delicious, gluten-free version that maintains the delightful crunch.
-
Extra Heat: Spice things up by adding fresh jalapeños or a dash of chipotle powder for a smoky kick. You can adjust these to suit your heat preference, transforming a mild bite into a fiery treat!
-
Different Cheese: Experiment with a blend of cheeses like Pepper Jack or Gouda for a unique flavor experience. Each cheese brings its own character, making your antojitos exciting every time.
-
Herb Infusion: Include fresh herbs like cilantro or parsley for a fresher taste. This not only brightens the flavors but also adds a pop of color to your dish.
-
Sweet Twist: Add sweet corn or diced bell peppers for a touch of sweetness. This unexpected ingredient will surprise your guests and add another layer of flavor.
-
Fruity Dip: Serve your Antojitos with a fruit salsa instead of the traditional sauces. A mango or peach salsa can create a delightful contrast with the savory filling.
Ready to get those creative juices flowing? Don’t forget to check out my tips on easy gluten-free adaptations or ways to jazz up your recipe with bold flavors!
Make Ahead Options
These Antojitos are perfect for meal prep enthusiasts! You can prepare the filling up to 24 hours in advance and store it in an airtight container in the refrigerator. To do this, simply mix your softened cream cheese, green chilies, cheddar, onion, bell pepper, sour cream, and spices as directed, then refrigerate the mixture overnight to let the flavors meld beautifully. Additionally, you can assemble the rolled antojitos and keep them tightly wrapped in the fridge for up to 3 days before baking. When you’re ready to serve, just preheat your oven and bake them directly from the fridge, adjusting the baking time slightly if needed for perfect, golden results. Enjoy the ease and deliciousness of homemade Antojitos with minimal last-minute effort!
Expert Tips for Antojitos
-
Softened Cream Cheese: Make sure your cream cheese is at room temperature; this prevents lumps in your filling and ensures a smooth texture.
-
Watch the Broil: Broiling can quickly turn from golden to burnt. Keep a close eye on your Antojitos during this step for perfect crispiness.
-
Tight Rolls: Roll your tortillas tightly to keep the filling secure while baking. This prevents the cheesy goodness from spilling out during cooking.
-
Make Ahead: Prepare the filling a day in advance and let it sit in the fridge overnight. This allows the flavors to meld beautifully before you assemble.
-
Gluten-Free Swap: For a gluten-free option, use corn tortillas instead of flour. They’ll deliver the same delightful crunch with a slightly different flavor.
Storage Tips for Antojitos
-
Room Temperature: Antojitos are best enjoyed fresh, but if you need to store them at room temperature, keep them in a covered container for no more than 2 hours.
-
Fridge: Store leftover Antojitos in an airtight container in the fridge for up to 4 days. Make sure they’re properly wrapped to maintain their deliciousness and prevent drying out.
-
Freezer: For longer storage, freeze the assembled but unbaked Antojitos. Place them in a single layer in a freezer-safe container, separated by parchment paper, for up to 2 months.
-
Reheating: Reheat thawed Antojitos in the oven at 350°F (175°C) for 10-15 minutes until warmed through. This keeps them crispy, unlike microwaving, which may make them soggy.

Antojitos Recipe FAQs
How can I tell if my ingredients are ripe and fresh?
Absolutely! For this Antojitos recipe, look for cream cheese that’s soft and spreadable with no lumps. When selecting green chilies, fresh ones should be bright and unblemished, while canned options should have a pleasant aroma. Lastly, choose bell peppers with firm skin free of dark spots and a vibrant color—they should feel heavy for their size.
What are the best storage methods for leftover Antojitos?
Very good question! To keep your Antojitos fresh, store any leftovers in an airtight container in the refrigerator for up to 4 days. If you prefer, you can also keep them at room temperature for about 2 hours, but it’s best to refrigerate them sooner.
Can I freeze my assembled Antojitos?
Absolutely! To freeze your Antojitos, wrap the assembled but unbaked pieces tightly in plastic wrap and lay them in a freezer-safe container separated by parchment paper. They can be stored for up to 2 months. When you’re ready to enjoy, simply thaw them in the fridge overnight and bake as instructed!
What should I do if my Antojitos are burning on the edges while baking?
If you notice your Antojitos browning too quickly during the broiling stage, it may help to lower the oven rack or turn down the broil setting slightly. Also, keep a close watch to adjust the time accordingly—check every 1-2 minutes to ensure they don’t burn.
Are there any dietary considerations for this recipe?
Yes! This Antojitos recipe contains dairy due to cream cheese and cheddar cheese. If you’re looking for gluten-free options, simply substitute flour tortillas with corn tortillas. Always be cautious of any allergies to specific ingredients, such as dairy or any spices used.
Irresistible Antojitos: Cheesy Bites Ready in 30 Minutes!
Ingredients
Equipment
Method
- Preheat your oven to 350ºF (175ºC) and line a baking sheet with parchment paper.
- In a large mixing bowl, combine softened cream cheese, diced green chilies, cheddar cheese, red onion, bell pepper, sour cream, and spices. Mix until smooth.
- Lay out a flour tortilla on a clean surface, spread the cheesy filling across, and roll tightly.
- Cut the rolled tortillas at a 45-degree angle into five equal pieces and arrange cut-side up on the baking sheet.
- Bake for about 8 minutes until outer tortillas crisp up.
- Switch to high broil and broil for an additional 5 minutes until golden brown.
- Cool slightly before serving with a side of basil pesto sour cream dipping sauce.
Leave a Reply