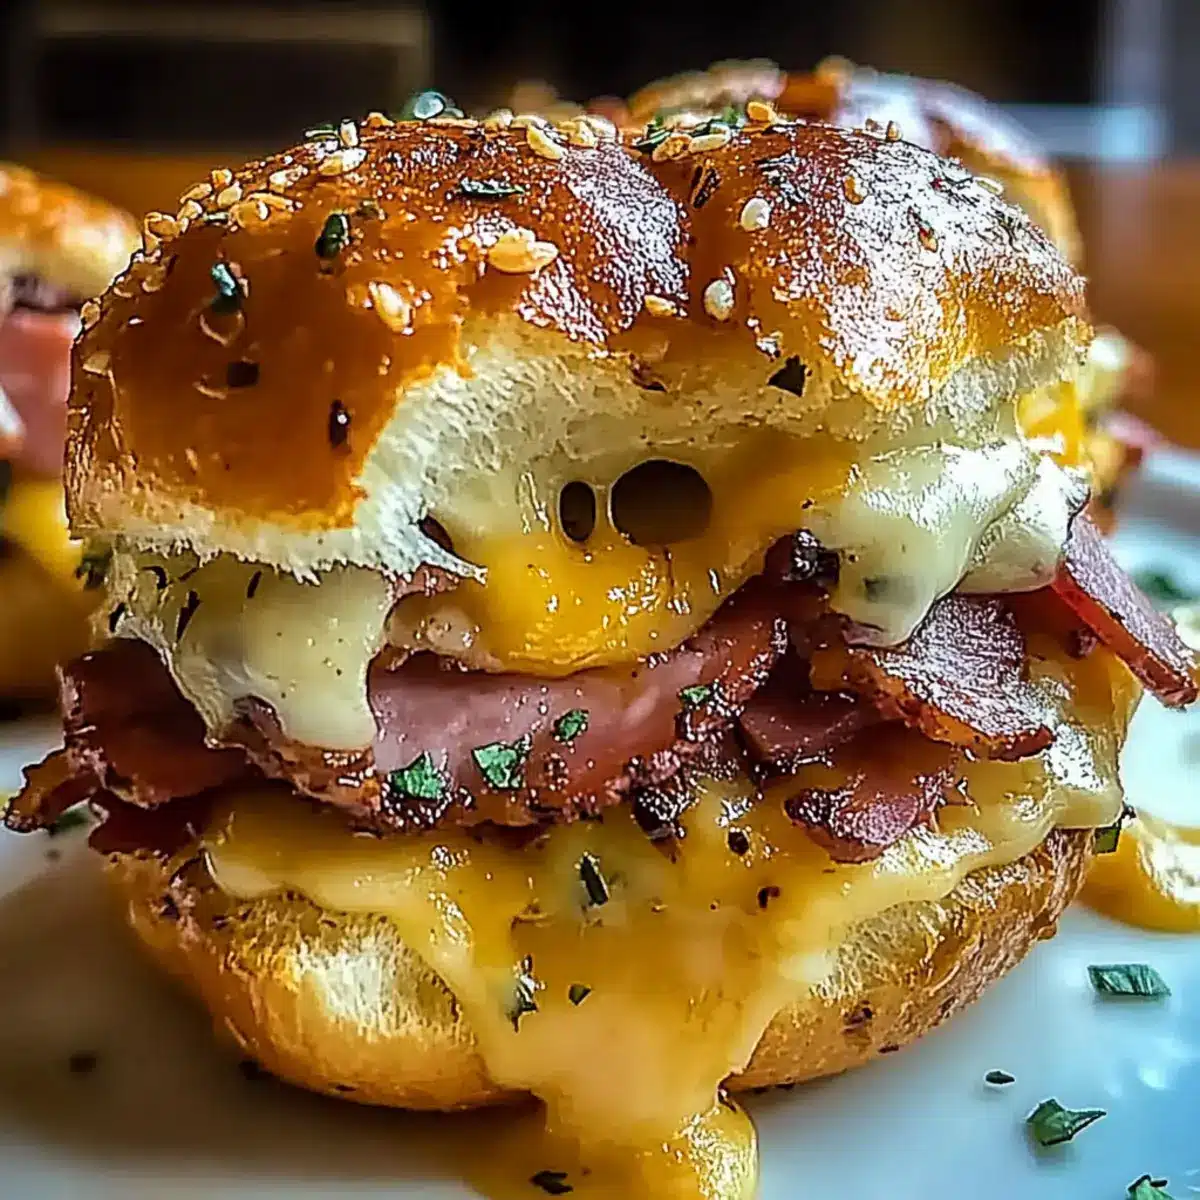
As I was flipping through an old cookbook recently, the enticing image of Cheesy Baked Italian Grinder Sliders caught my eye, sparking a delicious craving. These sliders, bursting with layers of savory meats and creamy provolone tucked inside soft Hawaiian rolls, are the ultimate comfort food that promise to light up any gathering—from game days to family dinners. One of the best parts? They come together effortlessly, allowing you to impress your guests without breaking a sweat. Plus, with easy gluten-free substitutions and the option to tailor the ingredients based on what you have in your pantry, you won’t have to worry about anyone missing out on this flavor-packed treat. Ready to elevate your next meal? Let’s dive into the cheesy goodness!

Why Are These Sliders So Irresistible?
Effortless Preparation: These Cheesy Baked Italian Grinder Sliders come together quickly, so you can whip up a crowd-pleaser without fuss.
Flavor Explosion: Packed with savory meats, zesty banana peppers, and melted provolone, each bite is a perfect medley of flavors.
Versatile Ingredients: Customize with gluten-free rolls or your favorite meats, making them suitable for everyone at your gathering.
Perfect for Game Day: Ideal as appetizers or a main dish, these sliders are sure to wow your friends at any celebration.
Storage-Friendly: Leftovers? No problem! They keep well, making these sliders just as delightful reheated as fresh out of the oven.
Want to explore more deliciousness? Check out Grinder Tortellini Salad or indulge in some Baked Caesar Chicken for your next feast!
Cheesy Baked Italian Grinder Sliders Ingredients
For the Sliders
• Hawaiian sweet rolls (12 count) – The base for these sliders provides a delightful sweetness and soft texture. Substitution: Use gluten-free rolls for those avoiding gluten.
• Mayonnaise (0.5 cup) – Adds creaminess and ensures moist sliders. Substitution: Greek yogurt works well for a lighter option.
• Red wine vinegar (1 tablespoon) – Balances flavors with its acidity. No direct substitute recommended.
For the Filling
• Italian seasoning (1 teaspoon) – Enhances flavor depth with savory herbs. Substitution: Combine dried oregano and basil for a similar effect.
• Deli ham (0.5 lb) – A savory addition that brings a delightful saltiness. Substitution: Smoked turkey or any favorite deli meat for a lighter option.
• Genoa salami (0.5 lb) – Adds robust flavor to the mix. Substitution: Pepperoni for a spicier twist or turkey salami for a healthier choice.
• Pepperoni (0.25 lb) – Infuses a spicy kick that complements the other ingredients. Substitution: Omit it or use spicy turkey pepperoni for a lower-fat version.
• Provolone cheese (10 slices) – Melts beautifully, creating that gooey, delicious texture everyone loves. Substitution: Try mozzarella or cheddar for a different flavor profile.
• Banana peppers (0.5 cup, drained) – Provides a tangy flavor contrast that brightens the sliders. Substitution: Use jalapeños for extra heat or roasted red peppers for sweetness.
For Topping
• Unsalted butter (0.5 cup, melted) – Gives richness and a shiny finish when brushed on top.
• Garlic powder (1 teaspoon) – Elevates the flavor of the sliders. Tip: Use fresh minced garlic for a more potent taste.
• Dried parsley (1 tablespoon) – Adds a touch of freshness as a garnish. Optional: Fresh parsley will lend vibrant color and more flavorful notes.
• Grated parmesan (1 tablespoon) – Incorporates umami richness when mixed with the butter.
Let your culinary adventure begin with these Cheesy Baked Italian Grinder Sliders—an irresistible delight that promises smiles at every gathering!
Step‑by‑Step Instructions for Cheesy Baked Italian Grinder Sliders
Step 1: Preheat the Oven
Begin by preheating your oven to 350°F (175°C). While the oven warms, prepare a 9×13 baking dish by greasing it lightly with cooking spray or butter. This will ensure that your Cheesy Baked Italian Grinder Sliders don’t stick, allowing for easy removal after baking.
Step 2: Slice the Rolls
Carefully cut the Hawaiian sweet rolls in half horizontally, keeping the tops and bottoms intact for the sliders. Use a serrated knife for a clean cut, and set the tops aside. Arrange the bottom halves in the greased baking dish, ready to be filled with flavor.
Step 3: Mix the Filling
In a mixing bowl, combine the mayonnaise, red wine vinegar, and Italian seasoning. Stir these ingredients together until well blended to create a creamy spread. Gently spread this mixture over the cut sides of the bottom rolls, allowing each slider to soak in that delicious flavor.
Step 4: Layer the Meats
Unwrap the deli ham, Genoa salami, and pepperoni, and layer them evenly over the mayonnaise mixture on the bottom rolls. Overlap the meats to maximize flavor and ensure a hearty filling. Make sure to cover the entire area so each bite of your Cheesy Baked Italian Grinder Sliders is packed with savory goodness.
Step 5: Top with Cheese and Peppers
Now it’s time to add the provolone cheese slices atop the layered meats. Evenly distribute them across the sliders for that gooey goodness. Next, scatter the drained banana peppers over the cheese, adding a zesty kick that enhances the overall flavor profile of your dish.
Step 6: Assemble the Sliders
Take the tops of the Hawaiian rolls that you set aside and place them gently back on each filled bottom half. This creates a compact slider that holds all the delicious ingredients together, making it easy to handle when baked.
Step 7: Prepare the Butter Mixture
In a small bowl, whisk together the melted unsalted butter, garlic powder, dried parsley, and grated parmesan. This aromatic mixture will not only impart flavor but also add a beautiful shine to the tops of your sliders. Brush it generously over the tops of the assembled sliders for that irresistible finish.
Step 8: Bake the Sliders
Cover the prepared baking dish with foil and place it in the preheated oven. Bake for about 15 minutes; this will warm everything through. After 15 minutes, remove the foil and bake for an additional 5-10 minutes until the tops are golden brown and slightly crispy, signaling that your Cheesy Baked Italian Grinder Sliders are ready to be enjoyed.

Cheesy Baked Italian Grinder Sliders Variations
Feel free to put your own spin on these sliders, letting your creativity shine through!
- Gluten-Free: Substitute Hawaiian rolls with gluten-free rolls to accommodate dietary needs without sacrificing flavor.
- Lightened Up: Swap mayonnaise for Greek yogurt to create a lighter and tangier base; plus, it adds extra protein!
- Extra Veggies: Add sautéed onions or bell peppers for an added layer of sweetness and crunch, elevating the overall flavor.
- Cheesy Twist: Experiment with cheese by using mozzarella or a sharp cheddar for a different flavor profile; both melt beautifully!
- Spicy Version: Replace banana peppers with jalapeños for a spicy kick that will excite your taste buds.
- Veggie Delight: Go meatless by using grilled vegetables like zucchini and bell peppers as your hearty filling.
- Herb Boost: Fresh herbs like basil or cilantro can be added to the butter mixture for a vibrant herbaceous bite.
- Flavorful Mix: Consider using different deli meats like smoked turkey or even a combination of meats to create a delightful variety.
And if you’re in the mood for something different, try pairing your sliders with a fresh side salad or some crispy potato chips for a well-rounded meal. Discover delicious combo ideas like Grinder Tortellini Salad to enhance your dining experience!
What to Serve with Cheesy Baked Italian Grinder Sliders
A comforting feast awaits you, ready to bring warmth and joy to your table.
-
Crispy Potato Chips: The crunch of the chips complements the soft, gooey sliders, providing a satisfying contrast in textures. Serve with a tangy dip for extra flavor!
-
Classic Caesar Salad: This fresh and zesty salad balances the savory richness of the sliders with crisp romaine and creamy dressing. It’s a refreshing side that rounds out the meal perfectly.
-
Garlic Breadsticks: Soft and buttery, these breadsticks bring an extra touch of indulgence while enhancing the warm, cheesy experience of the sliders. Perfect for dipping, too!
-
Pickles or Pickled Vegetables: Their tangy bite cuts through the richness of the sliders. The acidity offers a delightful contrast, making every bite even more enjoyable.
-
Antipasto Platter: Featuring a selection of olives, marinated vegetables, and cured meats, this colorful platter enhances your meal with a variety of textures and tastes, embodying an Italian feast vibe.
-
Wine Pairing: A glass of light red wine, like Chianti, complements the bold flavors while refreshing your palate, making your sliders even more enjoyable.
-
Brownies for Dessert: End your meal on a sweet note with rich, fudgy brownies. Their chocolatey goodness offers a wonderful contrast to the savory sliders, creating a well-rounded dining experience.
-
Roasted Vegetable Medley: A warm side of seasoned roasted vegetables adds both color and nutrients to your plate, balancing the richness of the Cheesy Baked Italian Grinder Sliders beautifully.
-
Beer Selection: Pair with a light lager or a fruity wheat beer. The crispness of the beer refreshes your palate, enhancing the flavors of the sliders.
Storage Tips for Cheesy Baked Italian Grinder Sliders
Fridge: Store leftovers in an airtight container in the refrigerator for up to 3 days. This keeps the sliders fresh and ready for a quick snack!
Freezer: If you want to enjoy them later, wrap the sliders tightly in foil or plastic wrap and freeze for up to 2 months. This helps preserve the cheesy goodness while preventing freezer burn.
Reheating: Thaw frozen sliders in the fridge overnight before reheating. Pop them in the oven at 350°F (175°C) for about 10-15 minutes, or until heated through, to keep that warm, gooey texture intact.
Room Temperature: Avoid leaving sliders out at room temperature for more than 2 hours to maintain food safety. Enjoy them warm and fresh for the best flavor experience!
Make Ahead Options
These Cheesy Baked Italian Grinder Sliders are perfect for meal prep enthusiasts! You can assemble the sliders up to 24 hours in advance by completing steps 1 through 6, then cover them tightly with plastic wrap and refrigerate. This allows the flavors to meld beautifully. If you’re preparing them even earlier, individual components like the filling can be mixed 3 days ahead and stored in the fridge. When you’re ready to bake, simply brush the butter mixture (made fresh) over the tops and follow step 8, ensuring a golden finish. This prepped approach saves time on busy weeknights while maintaining that delicious gooey texture your family loves!
Helpful Tricks for Cheesy Baked Italian Grinder Sliders
Let Flavors Meld: Allow the assembled sliders to sit for 15 minutes before baking. This helps the flavors to blend beautifully, enhancing the overall taste.
Tightly Assemble: Make sure the rolls fit snugly when stacked. This enables even cooking and prevents the sliders from becoming too dry or falling apart.
Watch the Baking Time: Keep an eye on your sliders during the final baking phase. The perfect golden finish comes quickly, and you don’t want them to over-bake.
Customize with Toppings: Feel free to switch up toppings like cheese or peppers based on personal preferences. Using gluten-free options makes these Cheesy Baked Italian Grinder Sliders adaptable for everyone.
Serve Warm: Enjoy the sliders hot out of the oven for the best experience. The melty cheese and warm filling will truly shine!
Cheesy Baked Italian Grinder Sliders Recipe FAQs
How do I choose the right ripeness for my ingredients?
Absolutely! When selecting your ingredients, particularly the banana peppers, look for bright-colored peppers without dark spots or blemishes. If using fresh garlic, choose firm cloves with no sprouting. As for the Hawaiian rolls, they should feel soft to the touch without any signs of hardening.
What’s the best way to store leftover sliders?
Very! I recommend storing any leftover Cheesy Baked Italian Grinder Sliders in an airtight container in the refrigerator. They’ll stay fresh for up to 3 days. Let them cool completely before sealing them up to maintain their texture.
Can I freeze these sliders for later?
Absolutely! To freeze your sliders, wrap them tightly in plastic wrap, then in aluminum foil to prevent freezer burn. They can be frozen for up to 2 months. When you’re ready to enjoy them, simply thaw overnight in the refrigerator and reheat at 350°F (175°C) for about 10-15 minutes until warm.
What if my sliders come out too dry or burnt?
Very common! If your sliders are dry, be sure you’re applying enough of that buttery mixture on top before baking—this keeps them moist and adds flavor. If they darken too quickly, tenting them with foil halfway through baking can help ensure even cooking without burning.
Are there any dietary considerations with this recipe?
Definitely! For gluten-sensitive individuals, using gluten-free Hawaiian rolls is a great alternative. Additionally, if you have allergies to specific meats or dairy, you can customize your fillings—opting for turkey or non-dairy cheese can create a more inclusive dish without compromising on taste.
Can I use different cheeses in the sliders?
Absolutely! While provolone is fantastic, feel free to experiment with mozzarella for a classic Italian flavor or cheddar for a sharper bite. Cheese is totally a personal choice, so go with what you love!

Cheesy Baked Italian Grinder Sliders That Wow Every Time
Ingredients
Equipment
Method
- Preheat your oven to 350°F (175°C) and prepare a 9x13 baking dish by greasing it lightly.
- Carefully cut the Hawaiian sweet rolls in half horizontally. Arrange the bottom halves in the greased baking dish.
- In a mixing bowl, combine mayonnaise, red wine vinegar, and Italian seasoning. Spread over the cut sides of the bottom rolls.
- Layer the deli ham, Genoa salami, and pepperoni over the mayonnaise mixture. Ensure even coverage.
- Add provolone cheese slices atop the meats, then scatter the drained banana peppers over the cheese.
- Place the tops of the rolls back on each filled bottom half to create compact sliders.
- Whisk together melted butter, garlic powder, dried parsley, and grated parmesan. Brush mixture over the tops of the assembled sliders.
- Cover with foil and bake for about 15 minutes. Remove foil and bake for an additional 5-10 minutes until golden brown.
Leave a Reply