The sound of sizzling corn on the cob brings me right back to sun-soaked summer evenings. Spending time outdoors, surrounded by friends and family, a perfectly grilled ear of corn is more than just a side dish; it’s an irresistible summer tradition. In this recipe, I’ll guide you through making grilled corn that’s not just simple to prepare but also incredibly satisfying—ideal for those warm nights when you want to keep your kitchen cool. With the sweet, smoky flavors of fresh corn coming together in just a matter of minutes, this dish will quickly become one of your go-to crowd-pleasers. Ready to fire up your grill and impress everyone with this summer staple? Let’s get started!
Why is Grilled Corn on the Cob a Must?
Satisfying, smoky flavor: Each bite of grilled corn delivers a delightful sweetness with a hint of char that screams summer.
Quick to prepare: With just a few minutes on the grill, you’ll have a delicious side ready to enjoy without heating up the kitchen.
Versatile side dish: Perfect alongside your favorite grilled meats or as a stand-alone snack, grilled corn fits seamlessly into any meal.
Easy to customize: Spice things up with flavored butters or seasonings, making every grilling experience unique! If you’re looking for more fresh summer ideas, don’t miss my Grinder Tortellini Salad, which pairs beautifully!
Family-friendly appeal: Kids and adults alike can’t resist the juicy, tender kernels of perfectly grilled corn, ensuring it’s a hit at every gathering.
Corn on the Cob Ingredients
For the Corn
• Fresh corn on the cob – Look for plump kernels and moist green husks to guarantee sweetness.
For Brushing
• Olive oil – Helps achieve a crispy, charred exterior; use a high-heat oil for the best results.
For Seasoning
• Salt and Pepper – Essential to elevate the corn’s natural flavor and add that delightful smoky taste.
• Butter (optional) – Adds richness and moisture; consider a blend of salted and garlic butter for extra flavor.
• Mexican street corn seasoning (optional) – A great way to infuse additional flavor for a unique twist on your corn on the cob.
Step‑by‑Step Instructions for Grilled Corn on the Cob
Step 1: Preheat the Grill
Start by preheating your grill to medium-high heat, around 400°F to 450°F. This ensures that when you place the corn on the grates, it’ll sear beautifully, creating those delightful charred marks. While the grill heats, you can prepare your corn, making the process smooth and efficient.
Step 2: Shuck the Corn
Next, take the fresh corn on the cob and shuck it, removing the outer husk and all silk strands. Use a vegetable brush to gently scrub off any remaining silk for a clean finish. Ensure the kernels look plump and hydrated; this is crucial for achieving that sweet, juicy flavor in your grilled corn.
Step 3: Grill the Corn
Once your grill is ready, place the shucked corn directly onto the hot grates. You should hear a satisfying sizzle as the corn makes contact, indicating it’s starting to cook. Close the lid and allow the corn to grill for about 3 minutes before turning for even cooking.
Step 4: Brush with Olive Oil
After a few minutes, use a silicone brush to generously coat the corn on all sides with olive oil. This not only enhances the corn’s flavor but also helps in forming a crispy, charred exterior. Continue to grill the corn for an additional 8 to 12 minutes, turning it every few minutes until all sides are beautifully charred.
Step 5: Check for Doneness
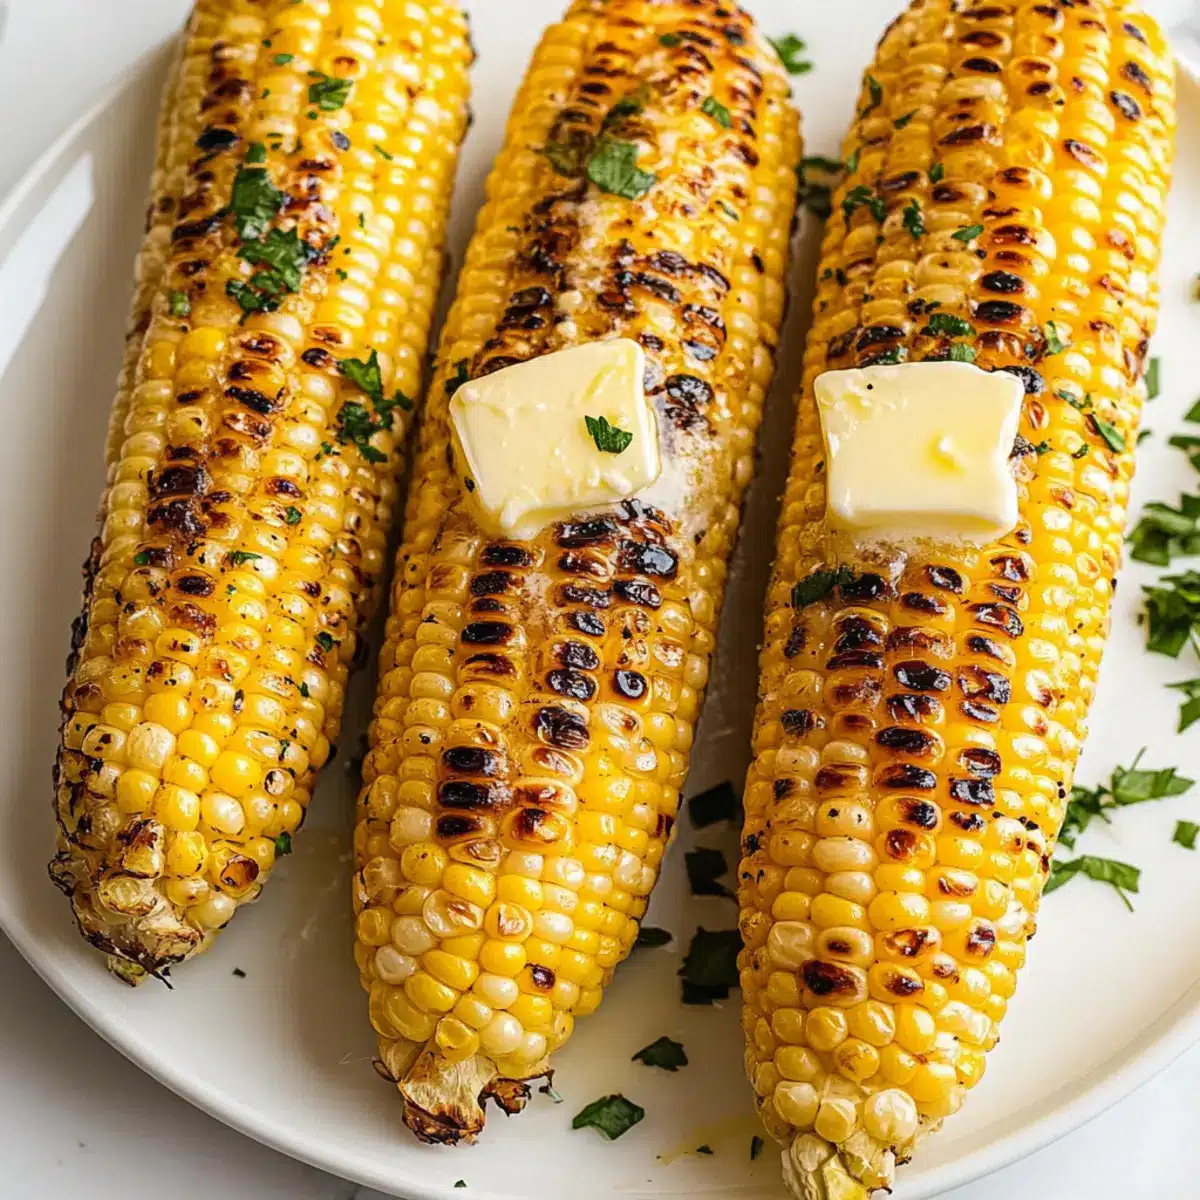
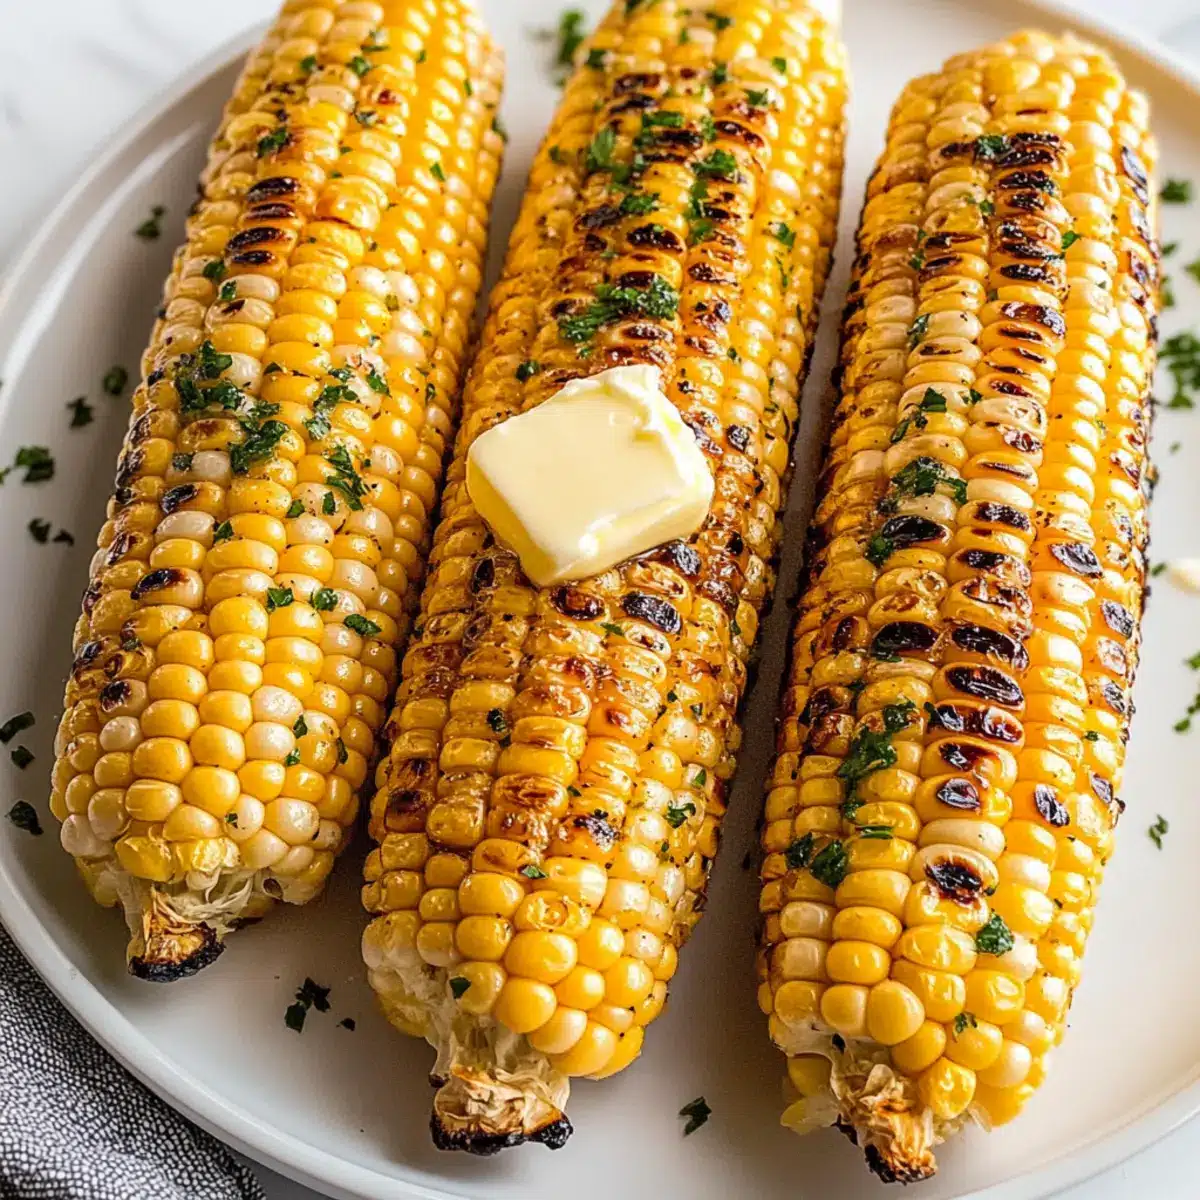
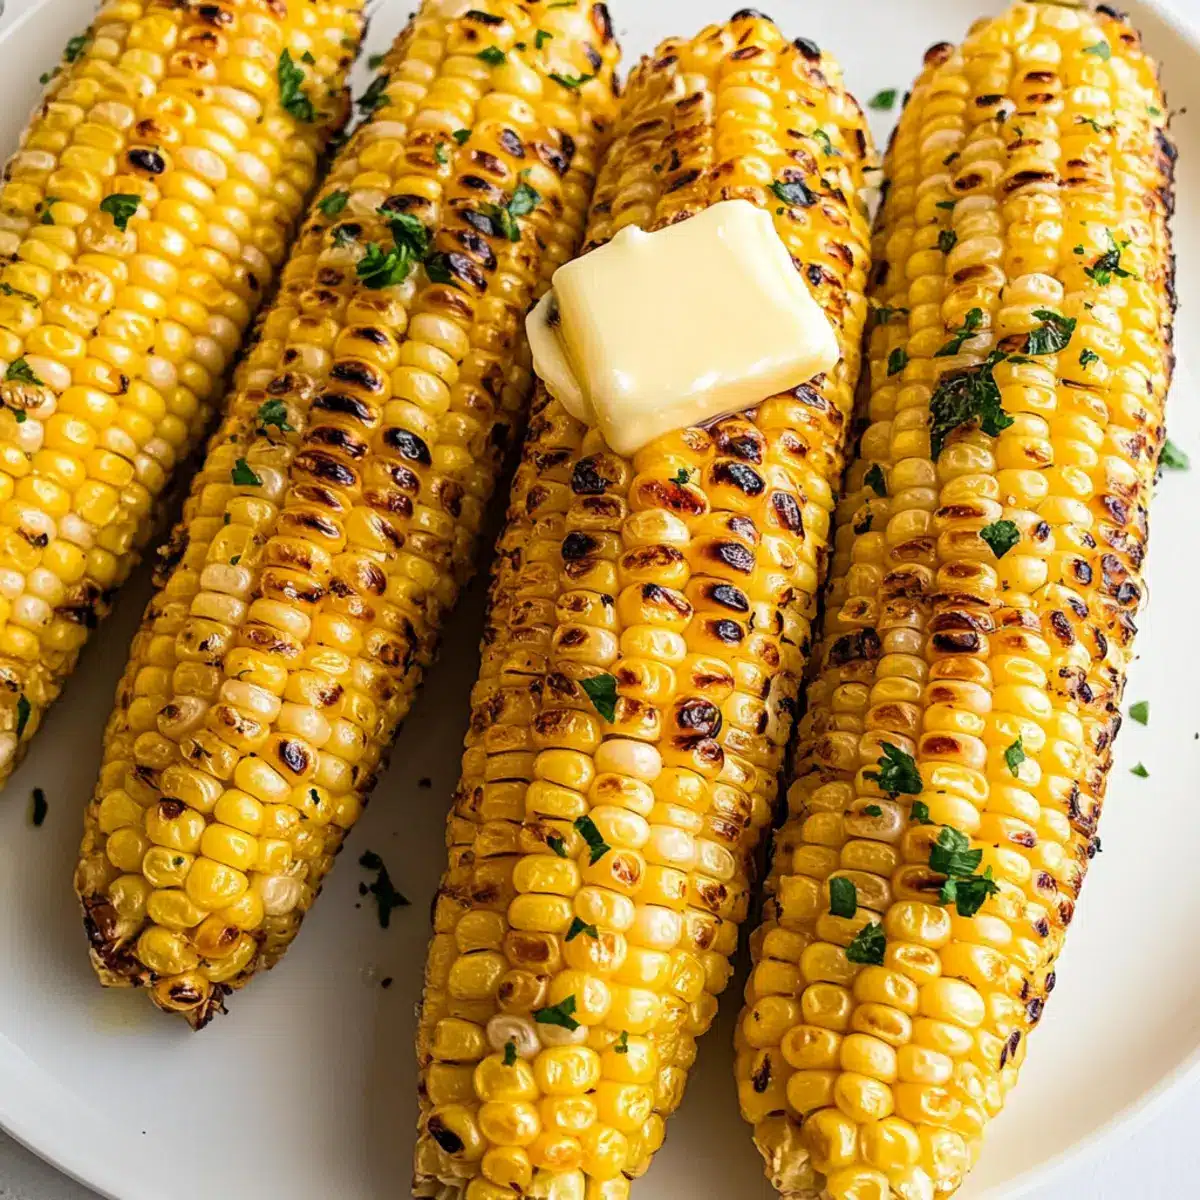
Keep a close eye on the corn as it continues to cook. You’ll know it’s ready when the kernels have a nice golden-brown char and are tender to the bite. This visual cue is key to ensuring your grilled corn on the cob is perfectly cooked and packed with flavor.
Step 6: Season and Serve
Once the corn is done, carefully transfer it to a serving platter. Sprinkle with salt and pepper to taste, enhancing the natural sweetness of the corn. For an extra touch, consider adding optional pats of butter on top to melt into the warm kernels and elevate your grilled corn experience.
Make Ahead Options
Grilled corn on the cob is a fantastic recipe for meal prep lovers! To save time during your busy summer evenings, you can shuck the corn and brush it with olive oil up to 24 hours in advance. Simply store the prepped corn in an airtight container in the refrigerator to maintain freshness. When you’re ready to serve, just place the corn directly on the preheated grill and cook for about 13-15 minutes, turning occasionally until charred. With these make ahead instructions, you can enjoy delicious grilled corn in no time, making your summer barbecues even more enjoyable and stress-free!
How to Store and Freeze Corn on the Cob
Fridge: Store leftover grilled corn in an airtight container in the refrigerator for up to 3 days to maintain freshness and flavor.
Freezer: To freeze grilled corn, wrap each ear in plastic wrap and then place in a freezer bag. This method keeps the corn tasty for up to 6 months.
Reheating: When ready to enjoy, reheat the corn on the grill for a few minutes, turning until warmed through, or microwave for about 1-2 minutes until hot.
Additional Uses: Leftover corn on the cob is fantastic in salads, soups, or even as a topping for tacos, giving a fresh flavor boost to your dishes!
What to Serve with Grilled Corn on the Cob
Fresh off the grill, the sweet and smoky corn creates a delightful experience that pairs beautifully with various summer dishes.
-
Creamy Coleslaw: This crunchy, tangy salad adds freshness and a creamy texture that perfectly balances the charred corn’s flavors.
-
Grilled Chicken Skewers: Tender, marinated chicken complements the sweet corn perfectly, making it a satisfying and delicious summer meal.
-
Garlic Butter Shrimp: Juicy shrimp sautéed in garlic butter bring a savory richness that enhances the smoky notes of the grilled corn, creating an irresistible combination.
-
Caprese Salad: The juicy tomatoes and creamy mozzarella paired with fresh basil provide a bright contrast, making every bite of corn even more enjoyable.
-
Watermelon Feta Salad: This refreshing, sweet and salty combination adds a delightful twist to your meal. The juicy watermelon and salty feta pair beautifully with the sweet corn.
-
Spicy Mexican Street Corn Dip: Bring the flavors of street corn to your table. This creamy dip will be a hit, especially when served alongside your grilled corn.
-
Pineapple Mint Mocktail: Cool down with this refreshing drink. The sweetness of pineapple and freshness of mint offer a delightful reprieve from the smoky flavors of your grilled corn.
-
Chocolate Chip Cookies: For a sweet ending, soft and chewy cookies are the perfect contrast to the crisp flavors of grilled corn, rounding out your summer feast wonderfully.
Expert Tips for Grilled Corn on the Cob
• Grill Temperature: Start with a properly heated grill to get that perfect char without burning. Medium-high heat is ideal for grilling corn on the cob.
• Turning Technique: Turn the corn every few minutes as it cooks. This ensures even cooking and prevents any side from getting too dark or burnt.
• Visual Cues: Look for light charring around the kernels to know when the corn is done. This visual indicator guarantees that you’ll enjoy juicy and flavorful corn.
• Leftover Storage: If you have any leftover corn, wrap it in plastic and refrigerate. It makes a great addition to salads or can be re-grilled for a quick snack!
• Butter Magic: Experiment with different flavored butters, like garlic herb or chili lime, to add an exciting twist to your grilled corn on the cob.
Corn on the Cob Variations & Substitutions
Feel free to get creative with your corn on the cob, enhancing flavors and textures that will make your dish truly unique!
- Dairy-Free Butter: Swap traditional butter for your favorite vegan butter to keep things plant-based. It’s rich and creamy, ensuring each bite remains indulgent.
- Herb-Infused Olive Oil: Infuse your olive oil with fresh herbs like rosemary or thyme for an aromatic twist. This adds a gourmet touch that’s perfect for special gatherings.
- Spicy Kick: Top your grilled corn with a sprinkle of chili powder or cayenne for a heat boost. This simple addition can elevate your corn from ordinary to extraordinary!
- Alternative Vegetables: Experiment with grilling other vegetables, such as zucchini or bell peppers, alongside the corn. They’ll absorb that beautiful smoky flavor and make for a colorful presentation.
- Cheesy Corn: For a cheesy flavor, sprinkle some grated Parmesan or crumbled feta cheese on top after grilling. This adds a savory layer that complements the sweetness of the corn beautifully.
- Tangy Twist: Brush the corn with a mixture of lime juice and chili powder before grilling to create a zesty flavor. This combination brings a refreshing tang akin to popular Mexican street corn!
- Sweet Glaze: Drizzle with honey or agave syrup right before serving for a sweet finish that contrasts beautifully with the charred kernels. You can also serve it alongside a light drizzle of balsamic glaze for an upscale flair.
- Mediterranean Style: Top with chopped tomatoes, olives, and a drizzle of olive oil for a Mediterranean-inspired dish. Throw in some fresh parsley for bright flavor and color.
Looking for more inspirations? Try adding this grilled corn to my Southern Spaghetti Bake for a feast that brings summer flavors to the dinner table!

Grilled Corn on the Cob Recipe FAQs
How do I select ripe corn on the cob?
Absolutely! Look for corn with plump, firm kernels that are tightly packed together. The husk should be bright green and fresh, not dry or brown. Also, gently peel back the husk at the top of the ear—if you see moist silk, you’re good to go!
How should I store leftover grilled corn on the cob?
Very simple! Wrap any leftover grilled corn in plastic wrap or place it in an airtight container. Store it in the refrigerator for up to 3 days. This way, it retains its flavor and juiciness for your next meal.
Can I freeze grilled corn on the cob?
Absolutely! To freeze, wrap each ear of corn in plastic wrap and then place them in a freezer bag, squeezing out as much air as possible. This method will keep your corn delicious for up to 6 months. When you’re ready to enjoy it again, simply reheat on the grill for a few minutes, or microwave for about 1-2 minutes until heated through.
What should I do if my corn burns on the grill?
No worries! If your corn starts to get dark spots or burns, it helps to turn it more frequently and adjust your grill’s heat. If it’s already overdone, you can slice off the charred sections, and the sweet kernels underneath will still be delicious. Remember to keep an eye on it to prevent further burning!
Is grilled corn safe for pets to eat?
It’s best to be cautious! While corn itself is not toxic to dogs, the husk and cob can pose a choking hazard. If you want to share, simply cut the kernels off and offer them a small portion. Always check with your vet if unsure about introducing new foods to your pet’s diet.
How can I add flavor to my grilled corn without extra toppings?
The more the merrier! Try seasoning the corn before grilling with spices like paprika, cumin, or even a sprinkle of chili powder. For a unique twist, marinate your corn in a mixture of olive oil, herbs, and garlic before grilling—this enhances the flavor right into the kernels!
Grilled Corn on the Cob: Your Summer BBQ Essential
Ingredients
Equipment
Method
- Preheat your grill to medium-high heat, around 400°F to 450°F.
- Shuck the corn, removing the outer husk and silk strands.
- Place the shucked corn directly onto the hot grates.
- Grill for about 3 minutes before turning for even cooking.
- Brush with olive oil using a silicone brush and grill for an additional 8 to 12 minutes, turning occasionally.
- Check for doneness; kernels should have a nice golden-brown char and be tender to the bite.
- Transfer to a serving platter and sprinkle with salt and pepper. Optionally, add pats of butter.
Leave a Reply