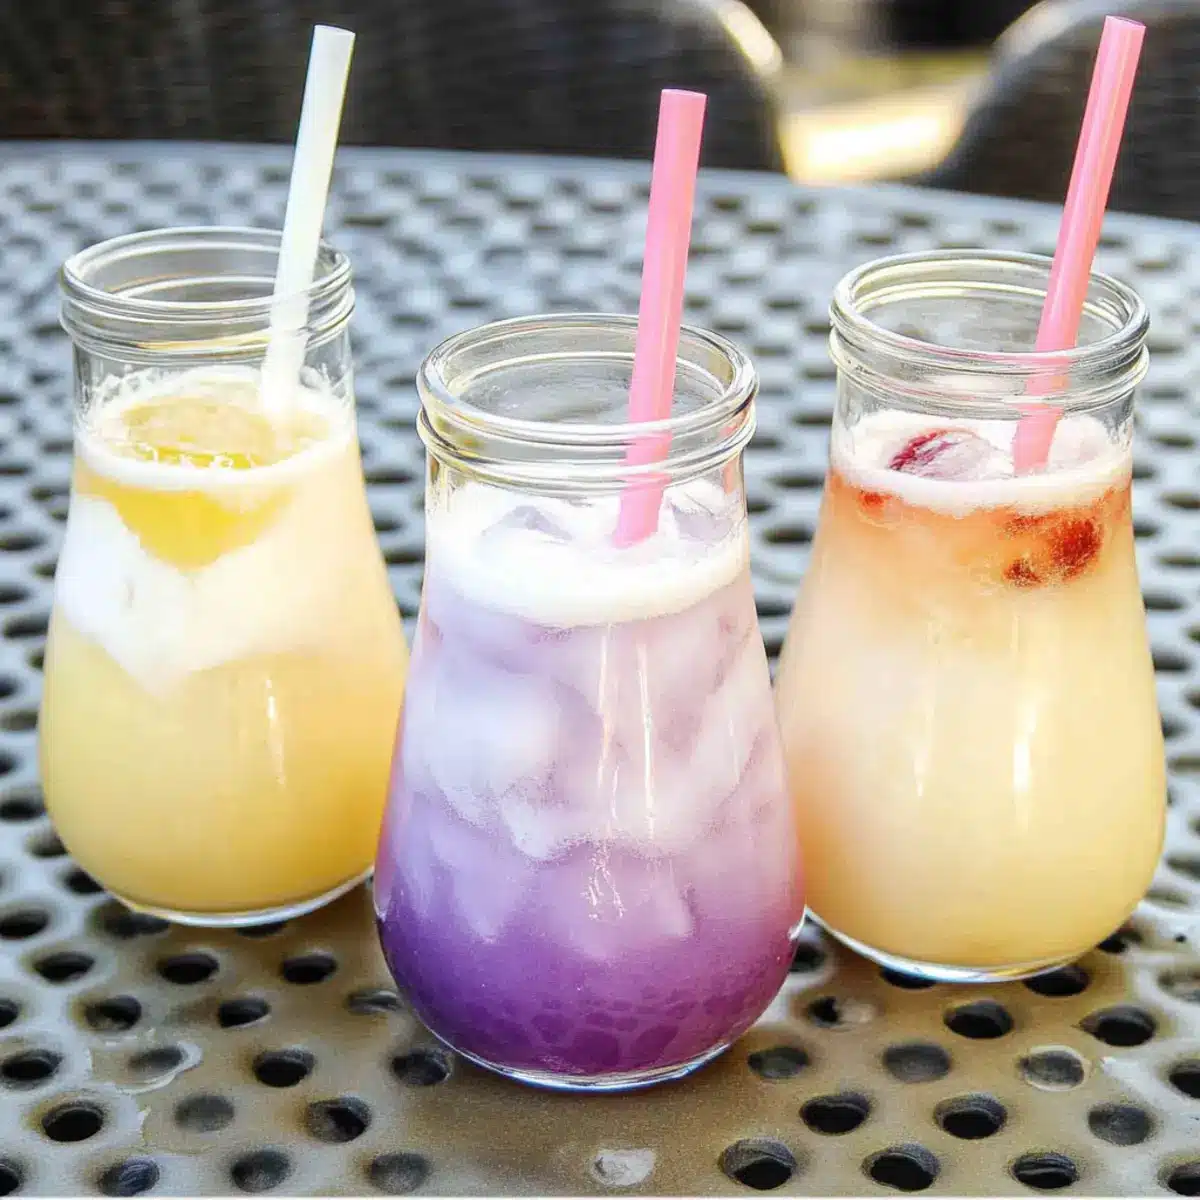
With the sweltering days of summer upon us, there’s nothing quite like a chilled drink to quench your thirst. Enter the Homemade Fruit Cream Soda, a refreshing delight that combines vibrant fruits with a creamy twist—all in just four ingredients! This easy-to-make concoction is not only a nostalgia-inducing treat reminiscent of classic soda shops but also a versatile canvas for your favorite seasonal fruits like strawberries, raspberries, or even peaches. Whether it’s a backyard barbecue, a picnic in the park, or simply a special weekday indulgence, this creamy soda is sure to impress friends and family alike. Plus, you can whip it up in a flash, making it a perfect last-minute drink option. Curious about how to create this fizzy summer sensation? Let’s dive into the recipe!
Why try Homemade Fruit Cream Soda?
Refreshing flavors burst from this delightful drink, transforming ordinary summer gatherings into extraordinary ones. Quick and easy to make, you’ll love that it only requires four simple ingredients! Versatility shines here; swap in your favorite fruits for a unique twist each time. Rich, creamy texture adds a luxurious touch, reminiscent of your childhood soda shop visits. Perfect for impressing guests at barbecues or enjoying on a quiet afternoon, this drink is sure to be a family favorite! For a delicious pairing, serve alongside a light snack like Cranberry Jalapeno Cream or even refreshing Fall Fruit Salad.
Homemade Fruit Cream Soda Ingredients
Get ready to create a fizzy delight!
For the Fruit Syrup
- Fruit (1 ½ cups, chopped) – Provides natural sweetness and flavor; try strawberries, raspberries, or peaches for variety.
- Granulated Sugar (¾ cup) – Enhances sweetness and balances the fruit’s acidity; honey or agave syrup are excellent alternatives.
- Warm Water (1 cup) – Helps dissolve the sugar and extract delicious flavors from the fruit; no substitute needed.
For the Soda
- Club Soda or Carbonated Water – Adds refreshing bubbles; tonic water can be a tasty twist if you’re feeling adventurous.
- Cream (Half and Half) – Creates a rich, creamy texture; substitute with coconut milk for a delightful non-dairy option.
Now you’re all set to whip up your own Homemade Fruit Cream Soda and enjoy its refreshing burst of flavors!
Step‑by‑Step Instructions for Homemade Fruit Cream Soda
Step 1: Make the Fruit Syrup
In a medium pot, combine 1 cup of warm water with ¾ cup of granulated sugar over high heat. Stir until the sugar fully dissolves—this should take about 2 minutes. Once dissolved, add 1 ½ cups of chopped fruit to the pot, bring the mixture to a boil for 1 minute, then reduce the heat and let it simmer for 20 minutes until the fruit releases its flavors.
Step 2: Strain the Syrup
After simmering, carefully strain the mixture through a fine-mesh sieve into a bowl to remove the solid fruit pieces. The syrup should be thick and aromatic at this point. Allow the strained syrup to cool completely at room temperature, which will take about 30 minutes. This cooling step is crucial for achieving the best flavor in your Homemade Fruit Cream Soda.
Step 3: Prepare the Glasses
While the syrup cools, gather your serving glasses and fill each with ice cubes to keep your drink refreshingly cold. The ice should fill the glass about halfway. Using chilled glasses enhances the overall enjoyment of the Homemade Fruit Cream Soda, making every sip feel like a summer treat.
Step 4: Combine the Ingredients
Once the syrup has cooled, take your strained fruit syrup and pour 4 tablespoons into each glass filled with ice. Next, slowly fill the glass with club soda, leaving some space at the top for the cream. The fizz should start bubbling up, creating a lively visual that invites you to stir it all together.
Step 5: Add Cream and Serve
To finish off your delightful creation, add a splash of cream into each glass—this will give your Homemade Fruit Cream Soda its signature rich, velvety texture. With a gentle stir, combine all the elements, allowing the vibrant fruit flavors and creamy goodness to meld together. Serve immediately and enjoy this refreshing summer beverage!

Make Ahead Options
These Homemade Fruit Cream Sodas are perfect for busy cooks looking to save time on hot summer days! You can prepare the fruit syrup up to 3 days in advance; just make sure to store it in an airtight jar in the refrigerator to keep it fresh and flavorful. The syrup can easily be made by combining warm water and sugar, then simmering the chopped fruit, as per the recipe instructions. When you’re ready to serve, simply fill glasses with ice, pour in 4 tablespoons of the cooled syrup, top with club soda, and a splash of cream. This way, you’ll have a refreshing, fizzy treat ready to go with minimal effort!
Expert Tips for Homemade Fruit Cream Soda
• Cool the Syrup First: Ensure the fruit syrup is completely cooled before mixing it with soda to enhance the flavors of your Homemade Fruit Cream Soda.
• Adjust Sweetness: Taste the syrup before serving; you can always add more sugar or swap in alternatives like honey for a different sweetness profile.
• Use Fresh Fruit: Opt for seasonal fruits for the best flavor. Fresh strawberries or peaches can elevate your creamy soda experience.
• Store Syrup Properly: Keep any extra fruit syrup in a sealed jar in the fridge for up to two weeks, making it easy to whip up quick drinks.
• Prevent Flat Soda: Mix your Homemade Fruit Cream Soda just before serving to maintain its fizzy texture; it doesn’t keep well after mixing.
Homemade Fruit Cream Soda Variations
Let your creativity shine by customizing your Homemade Fruit Cream Soda to match your flavor cravings!
-
Seasonal Swap: Try using peaches in summer or apples in the fall for a delightful seasonal twist. Each fruit brings its unique sweetness that will shine through in your drink!
-
Non-Dairy Delight: Replace half and half with coconut cream or almond milk for an equally luscious and creamy texture. This swap allows everyone to enjoy the soda while keeping it dairy-free!
-
Flavorful Infusion: Add a splash of flavored syrup, such as vanilla or mint, to elevate the taste experience. This little twist can turn your drink into an exciting culinary adventure!
-
Berry Trio: Blend three different berries, like strawberries, blueberries, and raspberries, for a vibrant and colorful drink. The combination not only packs a punch of flavor but also a feast for the eyes!
-
Zesty Citrus: Incorporate lemon or lime juice to add a refreshing citrus kick. The bright acidity complements the sweetness, creating a well-rounded drink!
-
Sparkling Twist: Use tonic water instead of club soda for an intriguing flavor profile. This subtle change adds a delightful bitterness that balances the sweetness of the fruit.
-
Extra Fizz: Add a splash of ginger ale for a spicier, more effervescent beverage. The zing from the ginger elevates the drink and makes it stand out in any gathering.
-
Herbal Addition: Infuse your syrup with fresh mint or basil while it simmers. This aromatic enhancement will breathe a fresh perspective into your Homemade Fruit Cream Soda, making it memorable and unique!
For more delightful companion recipes, consider pairing this refreshing drink with a light snack like a delightful Cranberry Jalapeno Cream or a fresh Fall Fruit Salad. Enjoy these tasty variations and discover your favorite way to enjoy this bubbly treat!
How to Store and Freeze Homemade Fruit Cream Soda
• Room Temperature: Enjoy your Homemade Fruit Cream Soda immediately after mixing for the best flavor and fizz. It’s not recommended to leave it out as it loses carbonation quickly.
• Fridge: Store any extra fruit syrup in a sealed jar in the refrigerator for up to two weeks, allowing you to prepare a quick drink anytime. Just remember to mix fresh with soda when serving.
• Freezer: While freezing the prepared cream soda isn’t ideal, you can freeze the fruit syrup in ice cube trays to use later for a refreshing treat!
• Reheating: There’s no reheating for this drink as it’s best enjoyed chilled and fizzy. Just mix it fresh each time for that delightful, bubbly experience!
What to Serve with Homemade Fruit Cream Soda?
Prepare your taste buds for a delightful summer feast that pairs perfectly with this refreshing drink!
-
Light Fruit Salad: A colorful mix of your favorite seasonal fruits complements the soda’s sweetness while adding a refreshing crunch. The fresh flavors enhance the fruity notes in your cream soda.
-
Savory Bruschetta: Crisp toast topped with tomatoes, basil, and a drizzle of balsamic glaze balances the creaminess of your drink, creating a perfect summer appetizer. Guests will love the contrast between savory and sweet.
-
Grilled Chicken Skewers: Juicy, marinated chicken grilled to perfection adds a savory element that offsets the sweetness of the cream soda. It’s a crowd-pleaser that pairs beautifully at barbecues.
-
Mini Caprese Skewers: These bite-sized delights combine mozzarella, tomatoes, and basil for a fresh, savory treat. The herbaceous notes play nicely with the fruity flavors of the drink.
-
Coconut Macaroons: These sweet, chewy bites offer a delightful texture that pairs wonderfully with the creamy soda. They bring a touch of tropical flavor that enhances the summer vibe.
-
Herbal Iced Tea: A chilled, lightly sweetened herbal tea with mint or chamomile cools down the palate and creates a refreshing duet with the fruity soda.
-
Dark Chocolate Dipped Strawberries: A touch of indulgence, these bites bring a sweet richness that harmonizes elegantly with the vibrant flavors of your cream soda. Perfect as a dessert pairing!
-
Sparkling Water: A refreshing non-alcoholic option, flavored sparkling water can cleanse the palate while keeping the fizzy theme in tune with the homemade fruit cream soda.
Homemade Fruit Cream Soda Recipe FAQs
What fruit works best for the Homemade Fruit Cream Soda?
Absolutely, you can use any fresh fruit that you enjoy! Strawberries, raspberries, and peaches are fantastic options. Just make sure the fruit is ripe and flavorful for the best results—I often recommend using seasonal fruits for maximum flavor.
How should I store leftover fruit syrup?
Store any extra fruit syrup in a sealed jar in the refrigerator for up to two weeks. This way, you can whip up your Homemade Fruit Cream Soda anytime! Just remember to mix it fresh with club soda and cream when serving to maintain that delightful fizz.
Can I freeze the Homemade Fruit Cream Soda?
While it’s not ideal to freeze the complete drink due to carbonation loss, you can certainly freeze the prepared fruit syrup! Pour the cooled syrup into ice cube trays and freeze. Once frozen, pop the cubes into drinks for instant flavor and a refreshing twist anytime!
How can I adjust the sweetness of my drink?
Taste the fruit syrup before serving—it should be a balance of fruity and sweet. You can always add more sugar if needed or try alternatives like honey or agave syrup for a different flavor profile. Adjust according to your preference!
Is this recipe suitable for people with dietary restrictions?
Yes! For a non-dairy version, substitute half and half with coconut milk or almond milk. Always ensure to check for any allergies—if you’re serving guests, it’s a great idea to ask about their dietary restrictions beforehand. The more the merrier when it comes to enjoying this creamy soda!
Homemade Fruit Cream Soda: Your Refreshing 4-Ingredient Treat
Ingredients
Equipment
Method
- In a medium pot, combine 1 cup of warm water with ¾ cup of granulated sugar over high heat. Stir until the sugar fully dissolves, about 2 minutes. Add 1 ½ cups of chopped fruit, bring to a boil for 1 minute, then simmer for 20 minutes.
- Carefully strain the mixture through a fine-mesh sieve into a bowl to remove solid fruit pieces. Allow the syrup to cool completely at room temperature, about 30 minutes.
- Fill serving glasses with ice cubes, about halfway, to keep drinks cold. Using chilled glasses enhances the enjoyment.
- Once cooled, pour 4 tablespoons of the strained fruit syrup into each glass filled with ice. Slowly fill the glasses with club soda, leaving space for cream.
- Add a splash of cream into each glass and stir gently to combine. Serve immediately and enjoy!
Leave a Reply