As I stirred the mixture on the stove, the warm aroma of vanilla began to take over my kitchen, feeling like a cozy hug from the past. This Homemade Vanilla Pudding is more than just a dessert; it’s a tasty shortcut back to simpler times, reminding us of those joyful moments spent savoring sweet treats. Whipping up this creamy delight from scratch takes just 10 minutes, and its luscious texture makes it a crowd-pleaser for family and friends. Not only is it gluten-free, but it also invites endless creativity with various flavor twists; just imagine coconut or lemon! Dive in with me, and let’s explore how easy it is to create this comforting classic that’s sure to make your taste buds dance. What unique twist will you add to yours?
Why Is Homemade Vanilla Pudding Better?
Simplicity Meets Flavor: This Homemade Vanilla Pudding is made in just 10 minutes with simple ingredients that you probably already have in your pantry. No complicated processes here!
Endless Customization: Feel free to switch up the flavor with different extracts like coconut or lemon for a fun twist. Your taste buds will never tire!
Crowd Favorite: With its rich creaminess, this pudding is guaranteed to impress guests, making it a perfect dessert for any occasion, from family dinners to casual get-togethers.
Guilt-Free Indulgence: Gluten-free and lighter than many store-bought options, you can enjoy a generous serving without the guilt. Try pairing it with fresh berries or a dollop of whipped cream for an elevated treat.
Get ready to indulge in this decadent dessert that truly stands out; it’s the ultimate homemade comfort food you’ve been craving! For more delightful desserts, explore our Tiramisu Chia Pudding or try the Condensed Milk Pudding for something different.
Homemade Vanilla Pudding Ingredients
For the Pudding
- Whole Milk – Adds creaminess and structure; substitute with almond or coconut milk for a dairy-free version.
- Large Egg Yolks – Provide richness and help to thicken the pudding; essential for the creamy texture.
- Cornstarch – Acts as a thickening agent; flour or arrowroot can be alternatives, but may change the texture.
- Granulated Sugar – Essential for sweetness; brown sugar can enhance the flavor with a deeper undertone.
- Salt – Balances flavors and enhances sweetness; try using sea salt for a gourmet touch.
- Butter – Adds richness; optional for a lighter pudding if desired.
- Vanilla Extract – Provides aromatic flavor; swap for almond or lemon extract for fun variations.
Optional Toppings
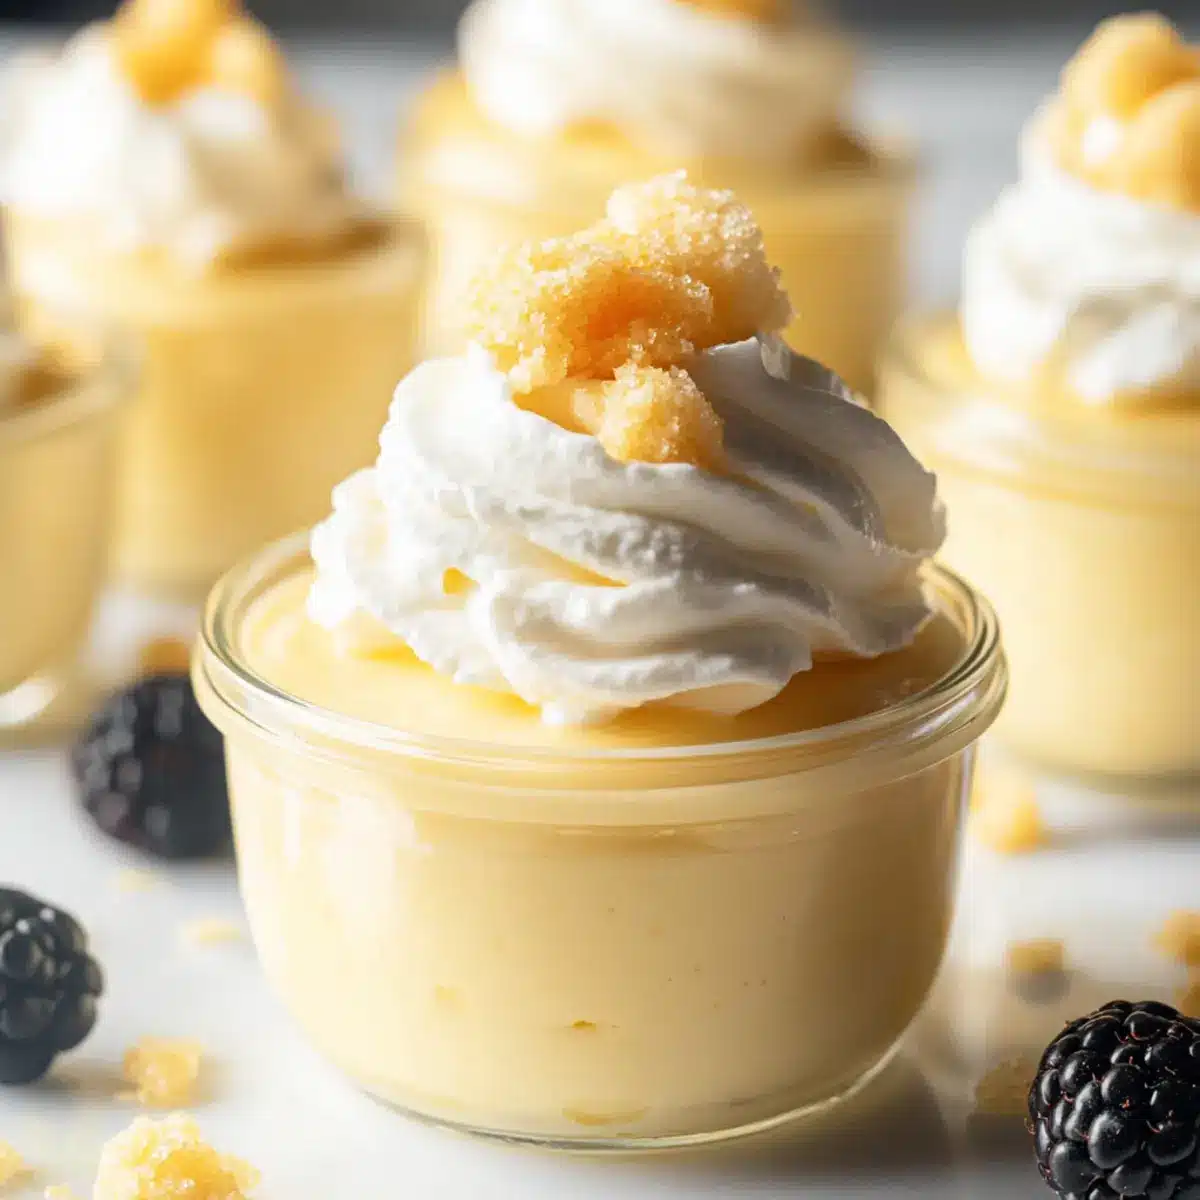
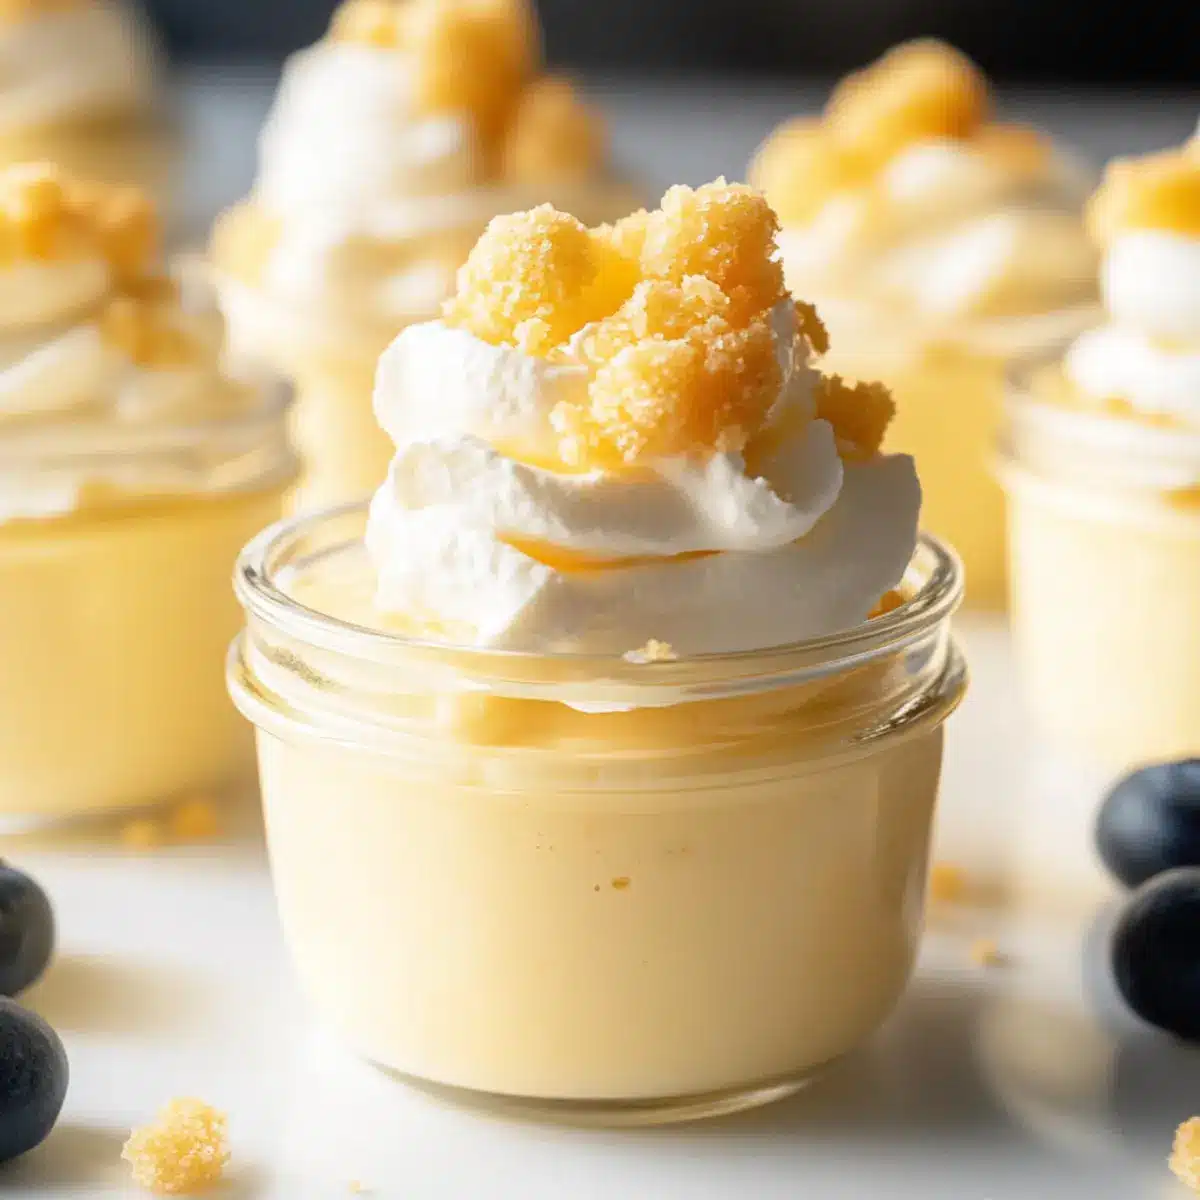
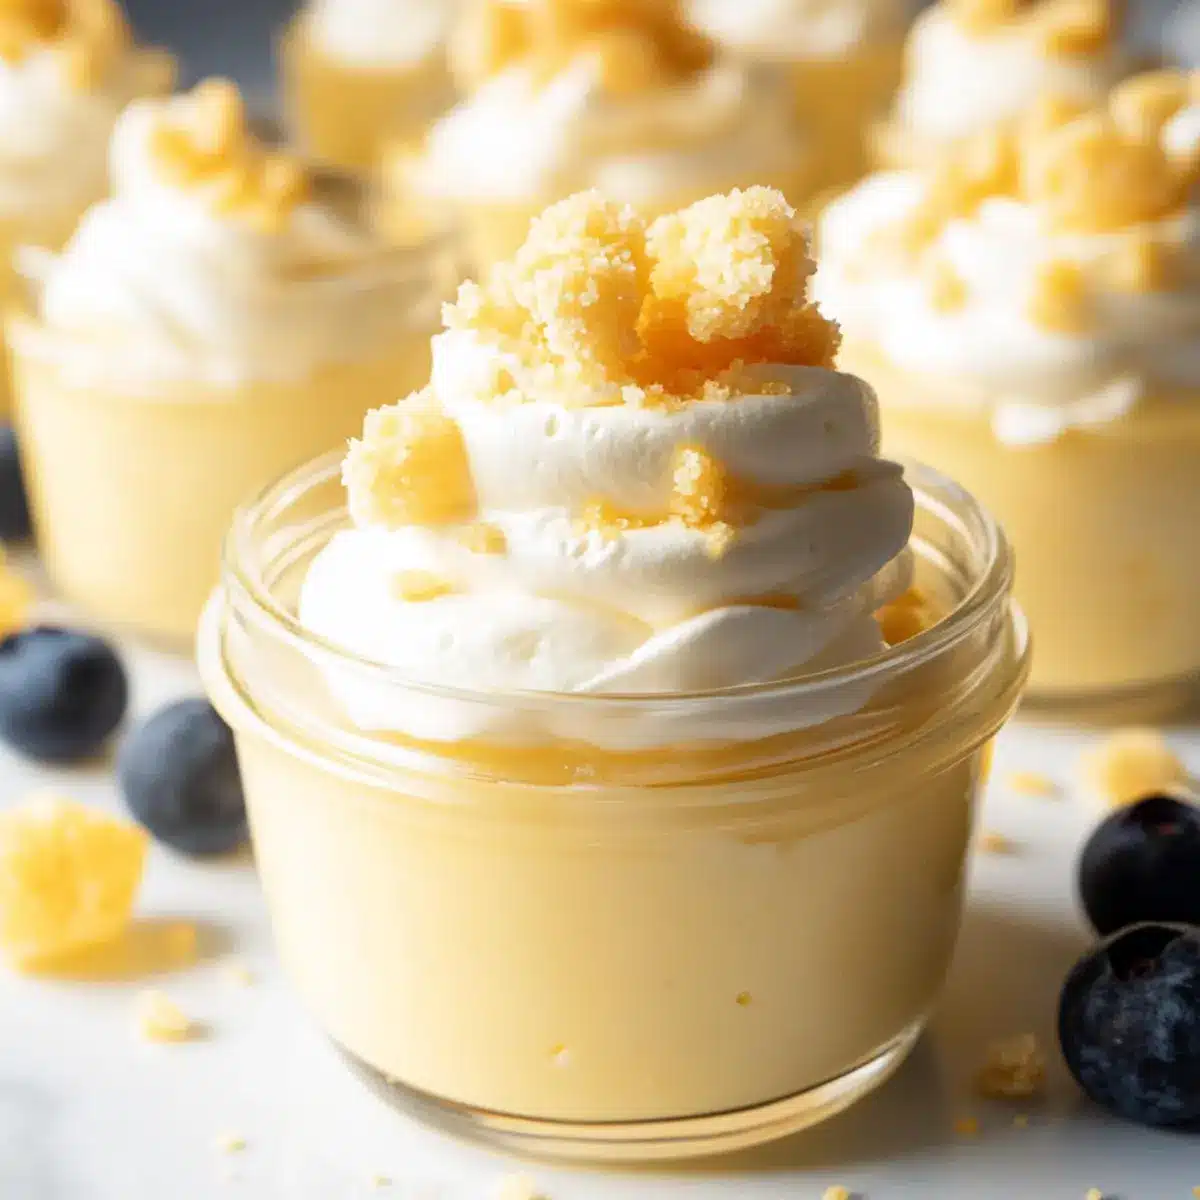
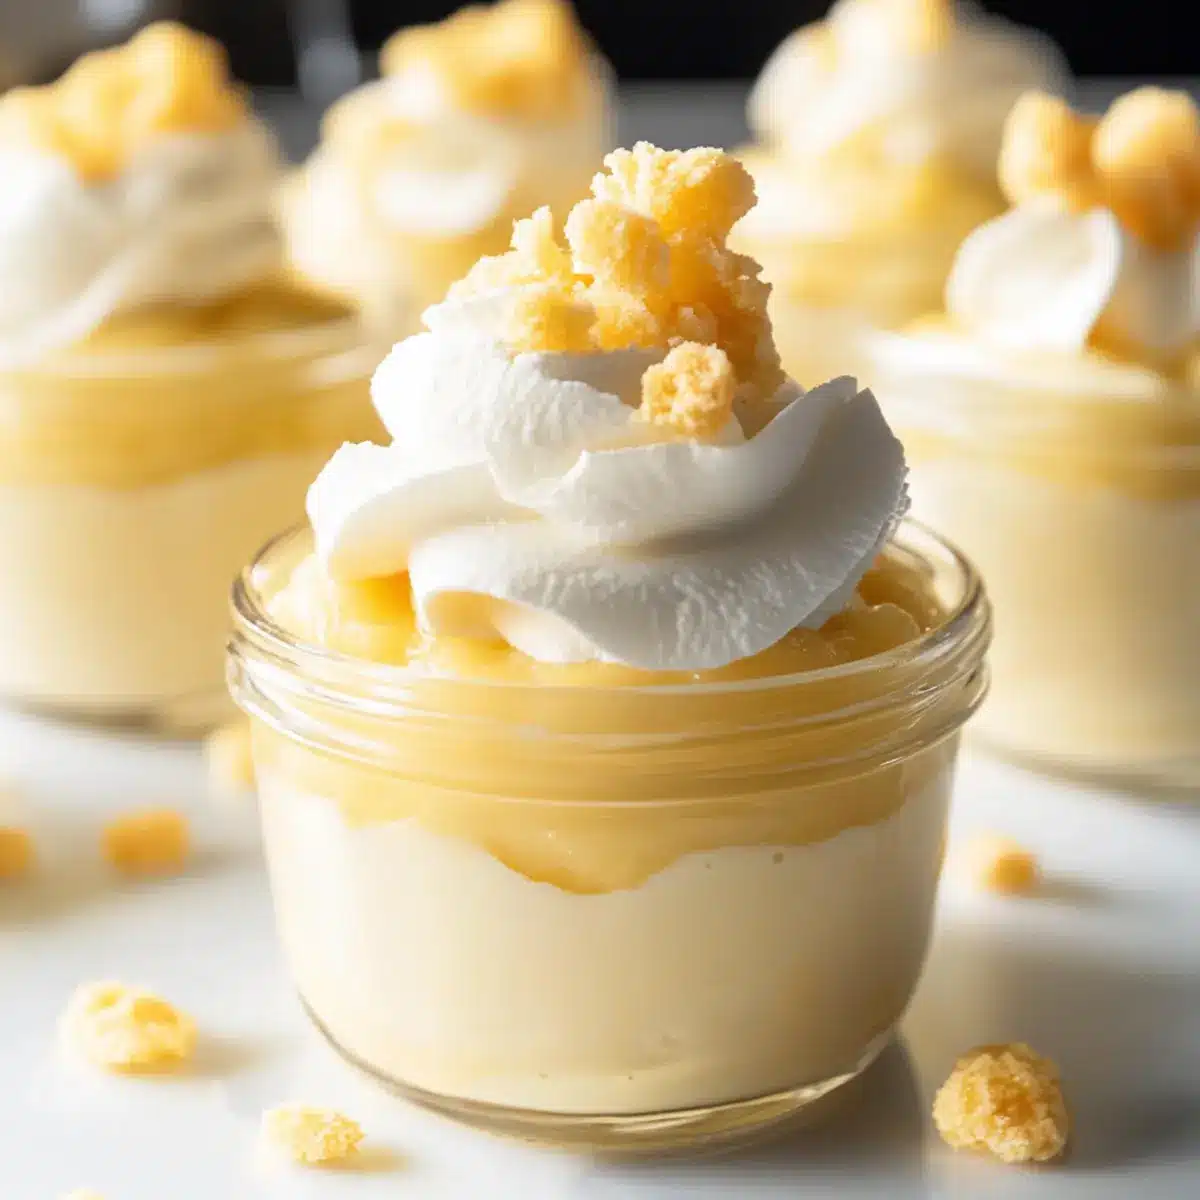
- Whipped Cream – A classic garnish that elevates the dessert’s creaminess.
- Vanilla Wafers – Perfect for adding texture and a nostalgic crunch.
- Fresh Berries – Strawberries or blueberries can enhance flavor and bring a fresh element to the dish.
This Homemade Vanilla Pudding is everything you need for a comforting, delightful treat!
Step‑by‑Step Instructions for Homemade Vanilla Pudding
Step 1: Whisk the Base
In a medium saucepan over medium heat, combine whole milk, large egg yolks, cornstarch, granulated sugar, and salt. Whisk the mixture together until smooth and incorporated, making sure there are no lumps remaining. This step is crucial as it sets the foundation for your creamy Homemade Vanilla Pudding.
Step 2: Heat the Mixture
Continue to cook the mixture, stirring constantly, until it comes to a gentle simmer, about 3-5 minutes. Keep an eye on it and ensure that you’re stirring well to prevent any clumping or sticking to the bottom. You’ll know it’s ready when it begins to thicken and bubbles start to appear on the surface.
Step 3: Thicken the Pudding
Once the mixture reaches a simmer, maintain gentle stirring for an additional 1-2 minutes. This will ensure that the pudding fully thickens and achieves a rich, velvety consistency. It should coat the back of a spoon when it’s the perfect thickness, signaling that your Homemade Vanilla Pudding is almost done.
Step 4: Add Flavor and Richness
Remove the saucepan from the heat and immediately stir in the butter and vanilla extract until they are fully melted and incorporated into the pudding. The butter adds a delicious richness while the vanilla delivers that classic flavor, enhancing your dessert’s overall taste profile.
Step 5: Cool the Pudding
Transfer the freshly made pudding into a storage container. Carefully press plastic wrap directly against the surface to prevent a skin from forming. Allow it to cool at room temperature for about 10-15 minutes before placing it in the refrigerator. This chilling process will help the flavors intensify and the texture to set nicely.
Step 6: Chill Until Set
Refrigerate the pudding for at least 2 hours to allow it to firm up. The pudding should be thick and creamy, perfect for serving as a comforting dessert. This waiting time also lets the flavors meld beautifully, ensuring each spoonful is as delightful as the last.
Step 7: Serve and Enjoy
Once chilled and set, your Homemade Vanilla Pudding is ready to be served. Spoon it into individual cups or bowls, and feel free to garnish it with whipped cream, vanilla wafers, or fresh berries. These optional toppings add an extra touch to this classic dessert, making it even more delicious!
Expert Tips for Homemade Vanilla Pudding
Continuous Whisking: Always whisk the egg mixture continuously while heating. This prevents scrambling and ensures a smooth, creamy texture in your homemade vanilla pudding.
Taste Test Variations: Don’t hesitate to explore flavor variations! Coconut or lemon extracts can add exciting twists; start with a teaspoon and adjust to your liking.
Store Properly: To keep your pudding fresh, store it in an airtight container. It will maintain its creamy texture for up to 5 days in the refrigerator.
Prevent Skin Formation: Press plastic wrap directly onto the surface of the pudding as it cools to avoid skin formation, guaranteeing a silky-smooth finish.
Thickening Tips: If your pudding isn’t thickening as desired, simply cook it a minute or two longer while stirring constantly to achieve that luscious consistency.
Homemade Vanilla Pudding Variations
Feel free to personalize your pudding adventure with these delightful variations that will brighten your dessert table!
- Dairy-Free: Substitute whole milk with almond or coconut milk for a creamy, dairy-free delight—perfect for those with lactose intolerance!
- Flavored Extracts: Try using almond or lemon extract instead of vanilla for a zesty change. These flavors will brighten up every bite!
- Chocolate Twist: Stir in cocoa powder or melted chocolate for a rich chocolate pudding. It’s a simple way to satisfy a chocolate craving!
- Coconut Cream: Incorporate coconut cream for a tropical flavor that pairs beautifully with chocolate or fresh fruit. Feel the beach vibes with each spoonful!
- Brown Sugar: Replace granulated sugar with brown sugar to deepen the flavor profile, adding caramel notes that enhance the pudding’s warmth.
- Minty Fresh: Add a few drops of peppermint extract for a fresh, minty twist that tastes delightful—especially with whipped cream on top!
- Nutty Flavors: Mix in almond or hazelnut meal for a crunchy texture that complements the smoothness of the pudding. It’s like a dessert surprise!
Explore these variations and don’t hesitate to get creative! For more tempting dessert ideas, check out the comforting flavors of Tiramisu Chia Pudding or the rich, creamy goodness of Condensed Milk Pudding.
Make Ahead Options
Whipping up your Homemade Vanilla Pudding ahead of time is a fantastic way to save precious moments during busy weeknights. You can prepare and cook the pudding up to 24 hours in advance; simply follow the recipe up to Step 5, then store it in an airtight container with plastic wrap pressed against the surface to prevent a skin from forming. This approach ensures it’s just as creamy and delicious when it’s time to serve. When you’re ready to enjoy your dessert, chill the pudding in the refrigerator for about 2 hours for the best texture. Feel free to garnish with whipped cream, vanilla wafers, or fresh berries just before serving for a delightful finish!
How to Store and Freeze Homemade Vanilla Pudding
Fridge: Store your homemade vanilla pudding in an airtight container in the refrigerator for up to 5 days. This helps maintain its creamy texture and freshness.
Freezer: While freezing is not recommended for homemade vanilla pudding due to potential texture changes, you can freeze if needed for up to 2 months. Thaw in the fridge and whisk before serving to regain consistency.
Reheating: If serving chilled, simply give the pudding a gentle stir. If you want it slightly warm, microwave in short intervals (15 seconds), stirring in between, to avoid overheating.
Skin Prevention: To keep your pudding silky smooth, press plastic wrap directly against the surface before refrigerating. This prevents a skin from forming, ensuring every bite is as delightful as the last.
What to Serve with Homemade Vanilla Pudding
Create a delightful meal experience by complementing this velvety dessert with the perfect accompaniments.
-
Fresh Berries: Adding strawberries or blueberries not only enhances the flavor but also introduces a fresh, tart balance to the creamy sweetness of the pudding.
-
Whipped Cream: A dollop of fluffy whipped cream provides an inviting contrast in texture and elevates the dessert’s indulgence. It’s a classic pairing that never disappoints.
-
Chocolate Shavings: Delicate chocolate shavings lend a touch of decadence and a deliciously bitter note that balances the pudding’s sweetness beautifully.
-
Vanilla Wafers: The nostalgic crunch of vanilla wafers adds a delightful texture, making each spoonful an adventure between creamy and crunchy.
-
Coconut Flakes: For an exotic twist, sprinkle toasted coconut flakes over the pudding. It offers a chewiness that pairs wonderfully with the smooth pudding, creating harmony in every bite.
-
Honey-Drizzled Peaches: Serve fresh peaches drizzled with a bit of honey alongside the pudding. Their juicy sweetness beautifully complements the rich texture of the pudding.
-
Iced Tea or Coffee: A refreshing glass of iced tea or a warm cup of coffee makes the ideal beverage pairing, contrasting smoothly with this rich homemade vanilla pudding, and providing a cozy touch to your dessert experience.
Indulge in these pairings, and watch your simple dessert transform into a delightful feast!
Homemade Vanilla Pudding Recipe FAQs
How do I choose the right milk for my pudding?
Absolutely! For creamy and rich texture, whole milk is the ideal choice. However, if you’re looking for a dairy-free alternative, almond or coconut milk works well too. Just keep in mind that it may slightly alter the pudding’s taste and consistency.
How should I store my homemade vanilla pudding?
To keep your pudding fresh and creamy, store it in an airtight container in the refrigerator for up to 5 days. This helps maintain its delightful texture. If you’re short on containers, a simple tip is to press plastic wrap directly against the surface of the pudding before sealing it.
Can I freeze homemade vanilla pudding?
While freezing is not typically recommended due to potential texture changes, if you must, you can freeze it for up to 2 months. To do this, let the pudding cool completely, then transfer it to a freezer-safe container. When ready to enjoy, thaw it in the fridge overnight and give it a good whisk before serving to restore its creamy consistency.
Why is my pudding not thickening properly?
Don’t worry! If your pudding isn’t thickening as desired, it may need a little more cooking time. Continue stirring gently over low heat for another minute or two until it thickens to your liking. Remember, the right consistency is when the pudding coats the back of a spoon.
Can I add flavor variations to my pudding?
Very! The beauty of this recipe lies in its versatility. Feel free to experiment with different extracts, such as coconut, lemon, or even mint. Start with a teaspoon, taste, and adjust as necessary to create your favorite flavor twist.
Is this pudding suitable for people with dietary restrictions?
Indeed, this homemade vanilla pudding is gluten-free! If you have allergies, opt for allergen-free ingredients and substitutes. Always check labels to ensure your chosen milk, butter, and extracts are safe for your dietary needs. Enjoy the indulgence of this comforting treat without worry!
Creamy Homemade Vanilla Pudding That's Better Than Store-Bought
Ingredients
Equipment
Method
- In a medium saucepan over medium heat, combine whole milk, large egg yolks, cornstarch, granulated sugar, and salt. Whisk until smooth.
- Continue to cook, stirring constantly, until it comes to a gentle simmer, about 3-5 minutes.
- Maintain gentle stirring for an additional 1-2 minutes until the pudding thickens.
- Remove from heat and stir in butter and vanilla extract until fully incorporated.
- Transfer to a storage container, press plastic wrap against the surface, and cool for about 10-15 minutes.
- Refrigerate for at least 2 hours to allow it to firm up.
- Once chilled, serve in cups or bowls and garnish with optional toppings.
Leave a Reply